Can Images Be Rotated in Premiere Rush? Absolutely! Your Guide to Perfect Visual Orientation

In the dynamic world of digital content creation, where visual appeal reigns supreme, the ability to manipulate and refine your media is paramount. Whether you’re a burgeoning vlogger, a social media influencer, or simply someone looking to polish personal videos, knowing how to handle your visual assets effectively is a crucial skill. A common question that arises for users of Adobe Premiere Rush, Adobe’s streamlined video editing tool, is: “Can images be rotated in Premiere Rush?” The answer is a resounding yes! Not only can you rotate images, but you can also rotate video clips, adjust their orientation, and fine-tune their placement to achieve the perfect visual narrative.
Adobe Premiere Rush is designed for creators who need quick, efficient editing capabilities across desktop and mobile devices. It bridges the gap between simple mobile editors and the complex professional environment of Adobe Premiere Pro, offering a user-friendly interface that doesn’t compromise on essential features. This guide will delve into the specifics of rotating images and videos within Premiere Rush, explore related editing techniques, and highlight how resources like Tophinhanhdep.com can further elevate your visual design journey.
Understanding Adobe Premiere Rush: A Lightweight Powerhouse for Visual Storytelling
Adobe Premiere Rush serves as an ideal entry point for individuals seeking potent video editing software without the steep learning curve often associated with professional suites. It excels in enabling rapid content creation, allowing users to move swiftly from capturing footage to editing and sharing across various platforms. Its automatic cloud syncing ensures that projects started on a mobile device can be seamlessly continued on a desktop, and vice versa. This cross-device compatibility is a game-changer for creators on the go.
While Premiere Rush might not boast the exhaustive feature set of its elder sibling, Premiere Pro, it provides all the core functionalities necessary for producing compelling short-form videos. This includes trimming clips, adding transitions, incorporating titles and graphics, adjusting audio, and crucially, managing the orientation of your visual elements. The simplicity of its interface belies a powerful engine, making it a favorite for those prioritizing speed and accessibility in their workflow. The focus here is not just on basic edits, but on empowering users to tell their stories effectively, ensuring that every visual detail, including the orientation of an image or video, contributes to the overall message.
The Core Functionality: How to Rotate Images and Videos in Premiere Rush
Correcting the orientation of your footage, whether it’s an image or a video clip, is one of the most fundamental yet frequently needed adjustments in video editing. Perhaps you filmed a vertical video that needs to be horizontal, or an image was imported sideways. Premiere Rush makes this process straightforward.
Here’s a step-by-step guide to rotating your images and videos in Adobe Premiere Rush:
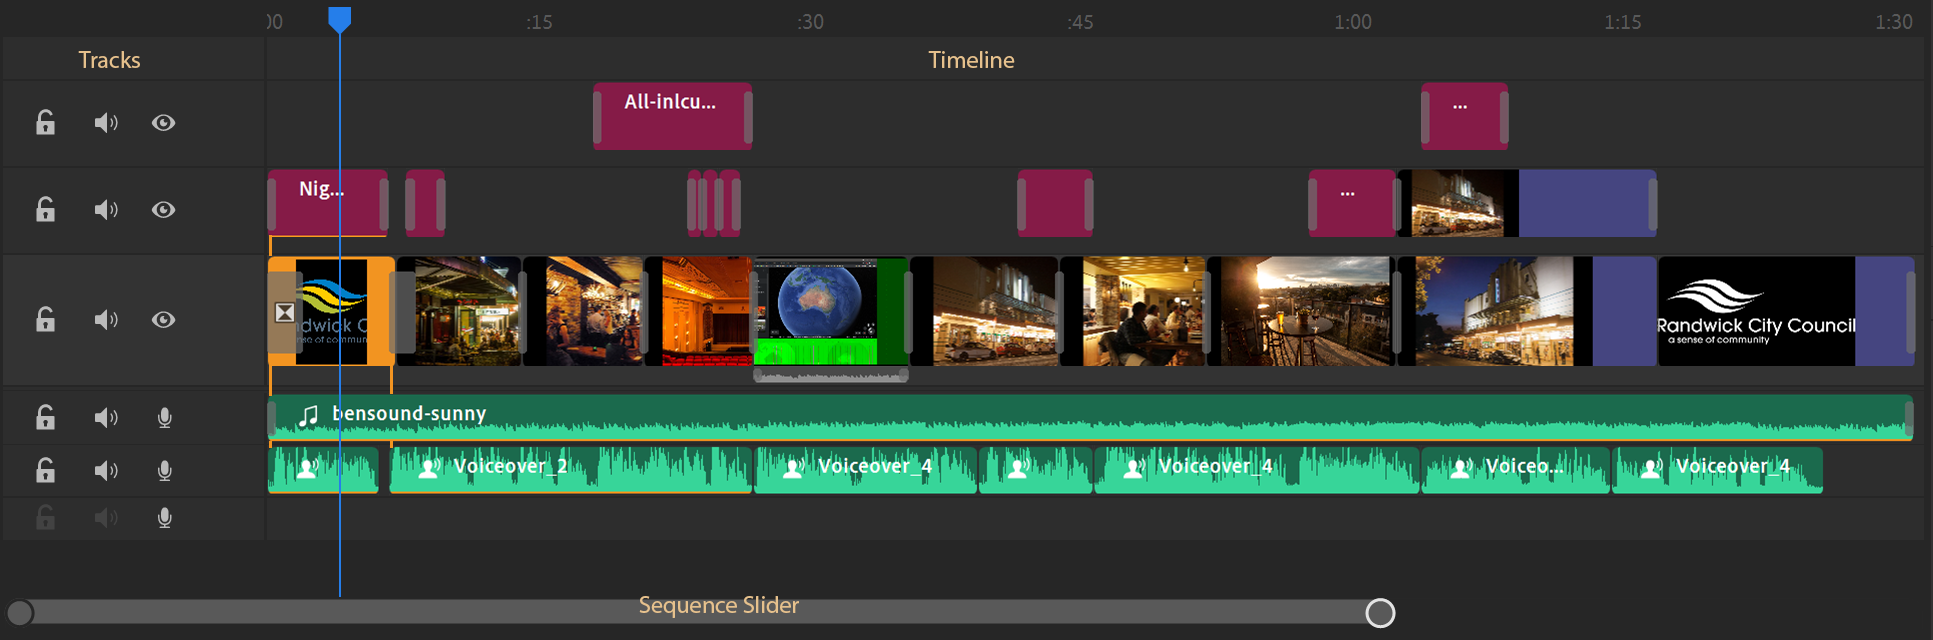
- Open Your Project: Start by launching Adobe Premiere Rush and opening the project you wish to edit. If you’re starting a new project, import your images and video clips into the timeline. Premiere Rush supports various formats, automatically converting many to MP4 for optimal performance.
- Select Your Clip: On the timeline at the bottom of your screen, click on the specific image or video clip you want to rotate. Once selected, it will typically be highlighted.
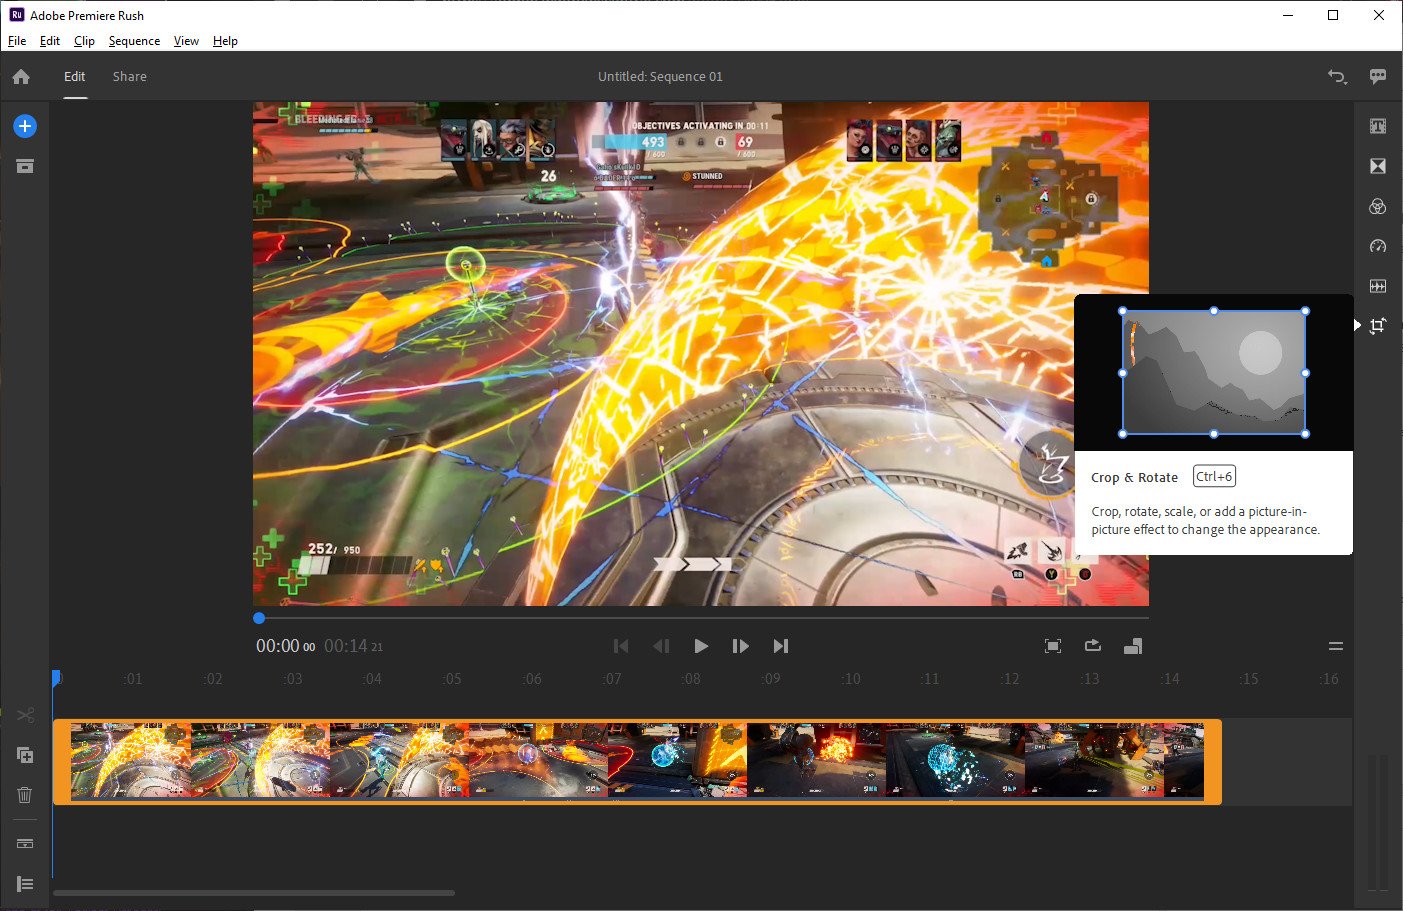
- Access the Transform Panel: Look for the editing tools located on the right side of the preview window (on desktop) or at the bottom of the screen (on mobile devices like iPhone or Android). Scroll through these tools until you find the “Transform” panel and click on it. This panel is where you control various visual properties of your selected clip, including its position, scale, and rotation.
- Adjust Rotation: Within the Transform panel, you will find the “Rotation” option. This will usually appear as a slider or a numerical input field.
- Using the Slider: Click and drag the slider to the left or right. As you move the slider, your image or video in the preview window will rotate clockwise or counter-clockwise in real-time. This allows for precise, gradual adjustments.
- Manual Input: Alternatively, you can click on the number field next to “Rotation” and manually type in the exact degree of rotation you desire (e.g., 90°, 180°, 270°). This is particularly useful for achieving perfectly aligned horizontal or vertical orientations.
- Refine and Preview: As you rotate, continuously monitor the preview window to ensure the orientation is exactly as you intend. Premiere Rush’s instant preview capability means you don’t have to render to see the changes.
The ease with which you can perform this action makes Premiere Rush an excellent tool for quick fixes and creative adjustments. This fundamental capability ensures your visual content is always presented in the correct and most aesthetically pleasing orientation, a vital aspect for any type of media, from casual social posts to more structured visual narratives.
Adjusting Aspect Ratios for Diverse Platforms
Beyond simple rotation, optimizing your content for various platforms often involves modifying the aspect ratio. An image or video suitable for a widescreen YouTube upload might need to be square for Instagram or vertical for TikTok. Premiere Rush understands this need and provides simple tools to adapt your footage without losing important visual information.
To change the aspect ratio in Premiere Rush:
- Select Your Project: Once your project is open, and you’ve made your initial edits, you might decide to adjust the overall canvas size.
- Access Aspect Ratio Settings: On desktop, this is typically found via an icon representing overlapping rectangles in the bottom toolbar or within the project settings. On mobile, scroll through the tools at the bottom until you locate the icon that allows for aspect ratio changes.
- Choose Orientation: You’ll be presented with options such as Landscape (16:9 or 4:3), Portrait (9:16 or 3:4), or Square (1:1). Select the orientation that best suits your target platform.
- Reposition and Scale: After changing the aspect ratio, your footage might not perfectly fill the new frame or might have black bars (letterboxing or pillarboxing). You can click on the video in the preview monitor and drag it to reposition it within the frame. You can also use the scaling option within the Transform panel to zoom in or out, ensuring that your key visual elements are perfectly framed without any undesirable cropping.
This functionality, combined with rotation, provides complete control over how your visual content appears, allowing for seamless adaptation across different digital landscapes. The careful combination of rotation and aspect ratio adjustment is crucial for maintaining consistent visual quality and impact, whether you’re dealing with high-resolution photography, digital art, or even stock photos sourced from sites like Tophinhanhdep.com.
Beyond Basic Adjustments: Enhancing Your Visuals with Premiere Rush
While rotation and aspect ratio adjustments are foundational, Premiere Rush offers a suite of other tools that contribute significantly to polishing your visual content. These go hand-in-hand with basic orientation fixes, allowing for comprehensive visual design.
Flipping Versus Rotating: A Key Distinction
It’s important to understand the difference between flipping and rotating a visual asset, as these terms are often used interchangeably but refer to distinct effects.
- Rotation: Involves turning an image or video around a central point. This is used to correct a crooked horizon, change a portrait video to landscape, or simply reorient the subject by a specific number of degrees. You’re changing the angle of the content relative to its original orientation.
- Flipping: Involves creating a mirror image of the content. This can be a horizontal flip (reversing left and right) or a vertical flip (reversing upside down). Flipping does not change the angle of the content but rather its spatial arrangement. For instance, if a person is looking left, a horizontal flip will make them look right.
Premiere Rush provides both capabilities. While rotation is handled in the Transform panel as described, flipping options are also readily available, often found near the rotation controls or within a dedicated “Crop and Rotate” section. To flip:
- Select the Clip: Choose the image or video on your timeline.
- Access Crop and Rotate/Transform Panel: Navigate to the panel containing transformation options.
- Apply Flip: Look for “Flip Horizontally” or “Flip Vertically” buttons. Clicking these will instantly mirror your content.
A crucial “pro tip” when flipping content, especially videos containing text or numbers, is to be mindful that these elements will also be reversed. Always preview carefully to ensure the desired effect is achieved without unintended consequences. For specialized cases, tools for blurring or masking text might be necessary, reflecting advanced photo manipulation techniques.
Cropping and Refining Your Visuals
After rotating and flipping, cropping is often the next step in perfecting your composition. Cropping allows you to remove unwanted portions of your frame, focus on the most important elements, or eliminate those awkward black bars that sometimes appear after rotating.
In Premiere Rush, the “Crop and Rotate” section (or dedicated crop tool) provides sliders for manually managing the position of an asset within the preview screen. You can adjust the width, height, and position using these sliders. A “maintain properties” checkbox often allows you to scale proportionally, preventing distortion. Advanced cropping features like “Feather” can even soften the borders of your selected assets, adding a professional touch reminiscent of high-resolution photography edits. This capability is particularly useful when composing aesthetic backgrounds or creating thematic collections where precise framing is crucial.
Cropping can also be creatively used for visual design. For example, you can crop two images to 50% width each and place them side-by-side on separate video tracks, creating a split-screen effect. Experimenting with these sliders and options can lead to unique digital art and creative ideas, transforming a simple image into a dynamic visual element.
Maximizing Your Creative Workflow with Tophinhanhdep.com’s Resources
Effective video editing and visual content creation extend beyond just knowing how to use software features. It involves a deeper understanding of visual design principles, access to high-quality assets, and the right tools for various image manipulation tasks. This is where a comprehensive resource like Tophinhanhdep.com becomes invaluable.
Tophinhanhdep.com is designed as a hub for visual creators, offering a vast array of resources categorized into key areas that complement your work in Premiere Rush and other editing platforms:
- Images: Dive into extensive collections of Wallpapers, Backgrounds, Aesthetic imagery, Nature shots, Abstract art, Sad/Emotional visuals, and Beautiful Photography. These high-resolution images can serve as excellent raw material for your Premiere Rush projects, whether as overlays, background elements, or mood board inspiration.
- Photography: Explore concepts like High Resolution imagery, Stock Photos, Digital Photography techniques, and various Editing Styles. Understanding these aspects can help you choose and prepare your visuals for editing, ensuring you start with the best possible foundation before even importing into Rush.
- Image Tools: Access practical utilities such as Converters, Compressors, Optimizers, AI Upscalers, and Image-to-Text tools. Before an image even touches Premiere Rush, you might need to convert its format, compress it for faster loading, or upscale it to maintain quality after complex manipulations. Tophinhanhdep.com provides these essential image tools to streamline your workflow.
- Visual Design: Learn about Graphic Design principles, explore Digital Art trends, master Photo Manipulation techniques, and spark Creative Ideas. The concepts found here can inform your editing choices in Rush, helping you go beyond basic rotations to create truly impactful visual content.
- Image Inspiration & Collections: Discover Photo Ideas, curate Mood Boards, browse Thematic Collections, and keep up with Trending Styles. This section is perfect for generating fresh concepts and ensuring your content remains relevant and engaging.
Leveraging Image Tools and Visual Design Principles
When working with Premiere Rush, the synergy between editing software and external resources is crucial. For example, if you import an image into Rush that seems low-resolution after scaling, an AI Upscaler from Tophinhanhdep.com can significantly improve its quality before you even begin editing in Rush. Similarly, if your project demands a very specific file size for quick online uploads, an Image Compressor can pre-optimize your assets.
Understanding visual design principles from Tophinhanhdep.com can guide your use of Premiere Rush’s rotation and cropping tools. Instead of randomly adjusting, you can make informed decisions about composition, leading lines, and negative space, ensuring that every adjustment serves a creative purpose. Whether you’re aiming for a tranquil nature aesthetic or a vibrant abstract piece, Tophinhanhdep.com’s resources empower you to execute your vision with precision and style.
Finalizing and Sharing Your Masterpiece
Once your images and videos are perfectly rotated, cropped, enhanced, and aligned with your creative vision, the final step is to export and share your project. Premiere Rush makes this process as streamlined as its editing capabilities.
- Enter Share Mode: Click the “Share” button, usually located at the top of the application.
- Define Output Settings: You can select from various presets tailored for popular platforms like YouTube, Instagram, and Facebook, which automatically adjust parameters like resolution and frame rate. Alternatively, you can customize settings for resolution, frame rate, and audio quality to produce an MP4 file. While Premiere Rush emphasizes simplicity by generally outputting MP4, this format is widely accepted and versatile for most online platforms.
- Export: With your settings finalized, click the “Export” button. Premiere Rush is known for its quick performance, living up to its “Rush” moniker, which means your final video will be ready for sharing in no time.
For creators aiming for multi-format video creation, tools like Premiere Rush, complemented by the vast resources on Tophinhanhdep.com, provide the foundation for adaptable and professional-looking content. From simple orientation corrections to intricate visual narratives, the ability to rotate images and videos is just one facet of a powerful creative toolkit. Whether you’re correcting a slightly off-center shot, reframing content for different social media dimensions, or creatively flipping elements for artistic effect, Premiere Rush, backed by the extensive image and design resources available at Tophinhanhdep.com, ensures your visual stories are always presented in their best light.
So, the next time you wonder “can images be rotated in Premiere Rush?”, rest assured that the tool is more than capable. With a blend of intuitive software and comprehensive external resources, your journey into professional-grade visual storytelling is well within reach.