Mastering Image Transfer to Wood: Your Comprehensive Guide with Tophinhanhdep.com

The desire to infuse personal touches into home decor and create unique, heartfelt gifts has always driven creative minds. In an age dominated by digital imagery, the tactile charm of a photograph transferred onto natural wood offers a rustic elegance that modern prints often cannot replicate. This captivating craft allows you to transform cherished memories, inspiring visuals, or intricate designs into durable, artistic pieces that tell a story. Whether you’re aiming for a farmhouse aesthetic, a vintage vibe, or simply a personalized keepsake, learning how to transfer a printed image to wood using readily available glues like Mod Podge or PVA is a rewarding DIY endeavor.
At Tophinhanhdep.com, we understand the power of a compelling image, not just as a digital display, but as a tangible element that enhances your living space or becomes a treasured gift. Our extensive resources on images, photography, and visual design serve as the perfect starting point for your creative projects. This guide will walk you through various glue-based photo transfer methods, leveraging the visual prowess found on Tophinhanhdep.com to ensure your projects are not only successful but also visually stunning.
![]()
The Allure of Image Transfer to Wood
Imagine a favorite landscape, a beloved family portrait, or an inspiring quote beautifully embedded into a piece of wood, revealing its natural grain and texture through the image. This technique creates an appealing, slightly distressed look that adds character and warmth, making each piece truly unique. It’s a budget-friendly way to personalize gifts for any occasion – be it a Christmas ornament, a Father’s Day plaque, or a commemorative wood slice. The process is surprisingly straightforward, requiring minimal supplies, and offers a gratifying sense of accomplishment.
The beauty of this craft lies in its versatility. From small wood slices for ornaments to larger planks for decorative wall art, the possibilities are endless. The rustic appeal makes it a perfect fit for various interior design styles, from modern farmhouse to bohemian, bringing an organic and authentic touch to any room. Furthermore, it allows for creative expression, inviting crafters to experiment with different wood types, image styles, and finishing touches.
Essential Preparations: Sourcing and Adapting Your Imagery with Tophinhanhdep.com
The foundation of a successful image transfer lies in selecting and preparing the right image. This crucial initial phase can significantly impact the final quality and aesthetic of your wood art. Tophinhanhdep.com, with its vast collection of Images (Wallpapers, Backgrounds, Aesthetic, Nature, Abstract, Sad/Emotional, Beautiful Photography) and resources on Photography (High Resolution, Stock Photos, Digital Photography, Editing Styles), is an invaluable partner in this step.
Selecting the Perfect Image
When choosing an image for transfer, consider the effect you want to achieve. The transparency of the transfer process means the wood grain will often show through the lighter areas of your image, adding to its unique charm. Therefore, images with good contrast and clear details tend to work best.
- Personal Photos: Family photos, pet portraits, or memorable travel snapshots make for deeply sentimental gifts and decor. Think about high-resolution digital photography captured on special occasions.
- Aesthetic & Thematic Images: Browse Tophinhanhdep.com’s curated collections for aesthetic wallpapers, beautiful photography, or thematic collections that align with your decor. Whether it’s a serene nature scene, an intricate abstract pattern, or a vintage-inspired illustration, Tophinhanhdep.com offers a wealth of inspiration.
- Graphic Designs & Text: Quotes, monograms, or intricate graphic designs can also be transferred. For these, ensure the text is bold and clear for legibility. Tophinhanhdep.com’s Visual Design and Graphic Design sections can provide creative ideas and ready-to-use digital art.
For optimal results, always start with high-resolution images. Lower resolution images may appear pixelated or blurry after transfer, diminishing the clarity and impact of your final piece. Tophinhanhdep.com’s emphasis on high-resolution stock photos means you have access to quality visuals suitable for reproduction.
Image Preparation: Mirroring and Optimizing
Once you’ve chosen your image, a few critical preparation steps are necessary before printing.
![]()
- Mirroring the Image: This is perhaps the most crucial step for many transfers. When an image is transferred face-down onto wood, it reverses. If your image contains text or specific directional elements (like a landmark or a person facing a certain way), you must mirror it before printing. Tophinhanhdep.com’s resources on Photo Manipulation and Digital Photography editing styles can guide you through this. Tools like Canva or PicMonkey (as mentioned in the source content) are user-friendly options for flipping images. Simply upload your photo, find the “flip” or “mirror” option, and save the reversed version.
- Resizing and Cropping: Ensure your image is scaled to fit your wood surface perfectly. If you’re working with wood slices, you might want to create circular images. Tophinhanhdep.com’s Image Tools can assist with cropping and resizing, ensuring your visual design fits your chosen medium.
- Printer Type & Paper: The type of printer and paper you use is paramount, as different transfer methods require specific combinations.
- Laser Printer: Most Mod Podge and similar glue-based transfers work best with images printed from a laser printer. Laser toner, being a dry powder, adheres better to the transfer medium than inkjet ink, which is liquid and tends to smear or dissolve.
- Inkjet Printer: While many methods advise against inkjet, some specific techniques (like the PVA glue with transparency film, or wax paper method discussed later) are compatible with inkjet printers.
- Paper Type: For Mod Podge transfers that involve rubbing off the paper, regular, thin printer paper (around 22lb) is ideal. Avoid photo paper or card stock, as their thickness and coating make the paper removal process significantly harder, if not impossible. The goal is to leave only the ink behind.
By carefully considering these preparatory steps, informed by the expertise and tools available on Tophinhanhdep.com, you set the stage for a successful and visually pleasing image transfer project.
Method 1: The Mod Podge Photo Transfer Technique
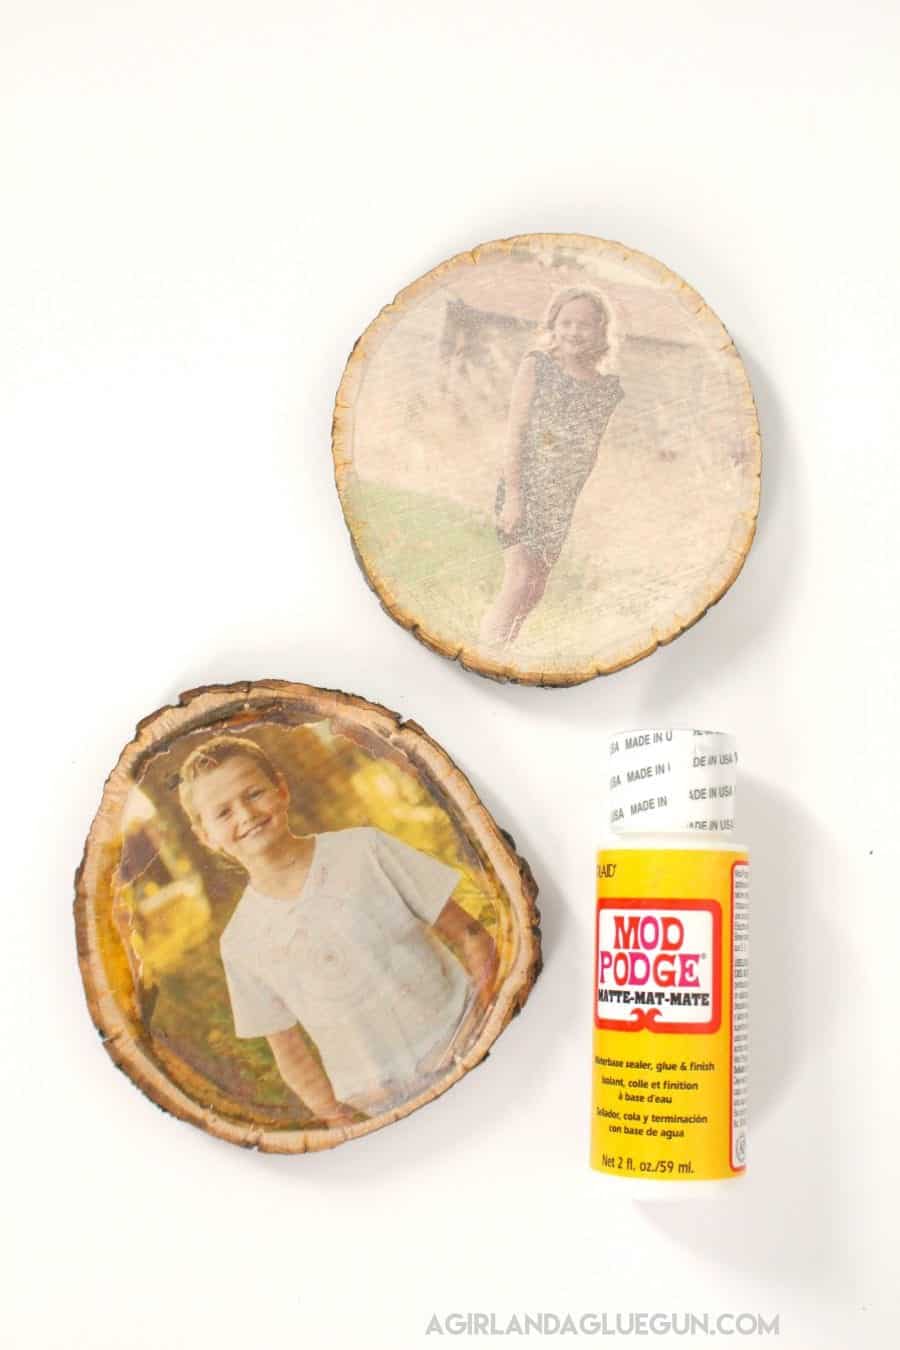
The Mod Podge method is arguably the most popular and widely recognized technique for transferring images to wood. It’s celebrated for creating a beautiful, slightly aged effect where the wood grain subtly shows through the transferred image, giving it a truly organic feel.
Step-by-Step Mod Podge Application
This method relies on the unique properties of Mod Podge, a versatile crafting glue that dries clear and acts as both an adhesive and a sealer.
- Gather Your Supplies:
- Mod Podge (Original/Matte): Crucially, use the original Mod Podge, preferably in a matte finish for a rustic look. Avoid Mod Podge Photo Transfer Medium, as it’s formulated for fabric and different surfaces, not wood.
- Laser-Printed Image: Your image, mirrored if necessary, printed on thin, regular printer paper from a laser printer. (Remember, Tophinhanhdep.com is your source for high-quality images!)
- Unfinished Wood Surface: Choose a smooth, clean wood piece. Wood slices, plaques, or blocks work well.
- Tools: Scissors (to cut your image), a foam brush or small craft brush (for applying Mod Podge), a burnishing tool (like a credit card or old gift card) to smooth out bubbles, and a damp washcloth or paper towel for removing paper backing. A hairdryer is optional but can speed up drying time.
- Prepare Your Image and Wood:
- Cut Your Image: Carefully cut your printed image to the exact size and shape of your wood surface.
- Clean Wood: Ensure your wood surface is clean, dry, and smooth. Light sanding might be beneficial for very rough surfaces.
- Adhere Photo to Wood:
- Apply Mod Podge to Wood: Using your foam brush, apply a medium, even layer of Mod Podge directly onto the wood surface. Ensure complete coverage without being excessively thick (which can cause oozing) or too thin (which might lead to poor adhesion).
- Place Image Face Down: Carefully position your printed image, face down, onto the wet Mod Podge. Align it precisely, as adjustments after placement are difficult.
- Smooth Out Bubbles: Immediately and gently, use your fingers or a burnishing tool (like a credit card) to press out any air bubbles or wrinkles, working from the center outwards. Air bubbles will result in missing parts of your image.
- Allow to Dry Completely:
- This is the most critical and often the longest step. The Mod Podge needs to dry completely to ensure the ink transfers properly. Recommendations range from 24 to 72 hours. Patience is key for the best results.
- Quick Tip (Hair Dryer): If you’re in a hurry, a hairdryer on medium heat for 2-3 minutes can help speed up the initial adhesion. However, still allow ample air-drying time afterward for full curing.
- Rub Away Paper Backing:
- Once the Mod Podge is fully dry and cool to the touch, it’s time for the reveal.
- Wet the Paper: Dampen a washcloth or paper towel (it should be wet, but not dripping). Gently lay it over the paper backing of your image for a few minutes to re-wet the paper.
- Gently Rub: Begin rubbing away the paper backing with your damp cloth or even your fingertips. Work slowly and gently, using a circular motion. The paper fibers will start to peel and rub off, leaving the transferred ink adhered to the wood.
- Repeat as Needed: You’ll likely need to make several passes, letting the surface dry slightly between each pass to identify any remaining white paper fibers. Continue until all paper residue is gone, being careful not to rub too hard, which could remove parts of your image.
- Seal for Protection:
- For added durability and protection against dust or moisture, apply a thin, even layer of Mod Podge over the entire transferred image. This acts as a sealant, enhancing the image’s vibrancy and ensuring its longevity. It will appear white initially but will dry clear.
Troubleshooting and Best Practices
- Incomplete Transfer: If parts of your image don’t transfer, it’s often due to insufficient Mod Podge application in that area or air bubbles during placement. Ensure even coverage and thorough smoothing.
- Paper Residue: If stubborn paper fibers remain, re-wet and rub gently. A very fine-grit sandpaper (600+ grit) can sometimes be used very lightly once dry, but this risks damaging the image.
- Printer Type is Key: Reinforce that laser printer toner works by adhering heat-fused powder, which gets trapped by the Mod Podge, while inkjet ink is water-soluble and can simply wash away. Tophinhanhdep.com emphasizes digital photography and high-resolution images, but the print method is equally vital.
Method 2: The Budget-Friendly PVA Glue Transfer (Inkjet Compatible)
For those looking for a cost-effective alternative to Mod Podge or a method compatible with inkjet printers, the PVA glue transfer offers a unique approach. This technique, highlighted on websites like Touchthewood.co.uk, involves printing on a dried layer of PVA glue on a transparency film, then transferring that “inked glue” layer to the wood.
Preparing Your Inkjet Print with PVA
This method stands out because it allows the use of common inkjet printers, making it more accessible for many home crafters.
- Gather Specialized Supplies:
- Contractors PVA Glue: A standard, inexpensive PVA glue (often called white school glue or carpenter’s glue) works effectively.
- Ordinary Photocopy Transparency Film: This is a key component, providing a temporary non-porous surface for printing.
- Inkjet Printed Image: Your chosen image, mirrored if it contains text or directional elements. Tophinhanhdep.com’s Visual Design tools can help in mirroring.
- Unfinished Wood Surface: As with Mod Podge, a clean, smooth wood surface is best.
- Tools: A brush for glue application, sticky tape (masking tape is recommended), and sandpaper (for finishing).
- Prepare the Printing Sheet (Transparency Film):
- Apply PVA to Film: Lay a transparency film flat. Spill a small amount of PVA glue onto it and spread it evenly with a brush to create a thin, smooth layer covering the desired print area.
- Allow to Dry Completely: This PVA layer must dry completely, turning transparent. This usually takes a few hours. The source mentions lightly sanding the film surface for a distressed finish; this is optional and a matter of personal preference.
- Print Your Design on the Dried PVA:
- Mirror Image: Double-check that your image is mirrored using Tophinhanhdep.com’s image editing advice or your preferred software.
- Print on Glue Layer: Carefully feed the transparency film (with the dried PVA layer facing up) into your inkjet printer. Print your design directly onto the PVA glue layer. The ink will sit on this non-porous surface.
- Allow Ink to Dry: Give the printed film about an hour or so for the inkjet ink to dry completely on the PVA layer. This prevents smudging during transfer.
Executing the PVA Transfer
The actual transfer process involves carefully adhering the inked PVA layer from the transparency film onto your wood.
- Prepare the Wood Plank:
- Align Image: Place the printed transparency film (inked side down) on your wood surface to align it perfectly.
- Secure with Tape: Once aligned, secure one side of the transparency film to the wood with masking tape. This creates a hinge, allowing you to flip the film over and then accurately place it back down.
- Apply PVA Glue to Wood:
- Flip the taped film back, exposing the wood surface where the image will go. Apply an even layer of PVA glue to this area on the wood.
- Attach the Image:
- Carefully flip the transparency film back down, starting from the taped hinge. Slowly lay the film onto the wet PVA glue on the wood, rubbing across the page during the process to remove all air bubbles. Work smoothly to avoid smudging the wet ink.
- Remove Tape: Once the film is fully adhered and smoothed, gently remove the masking tape.
- Wait for Drying:
- This is another critical drying phase. The glue between the film and the wood needs to dry completely. The milky opaque appearance of the wet PVA glue will turn transparent again once dry. This can take several hours to a couple of days, depending on humidity and wood porosity. Be patient!
- Remove the Transparency Film:
- Once fully dry, wedge the transparency film from one corner and slowly pull it away. If there’s resistance, it’s not dry enough; wait longer. If done correctly, the entire layer of PVA glue with the ink will peel off the film and remain on the wood.
- Finishing Touches:
- Sanding: Use fine-grit sandpaper to remove any excess dried glue from the edges of your wood. You can also lightly sand the entire surface for an evenly smooth finish or a more distressed look.
- Protection: Protect your finished work with a clear wax or polyurethane varnish. Avoid water-based acrylic varnishes, as they might reactivate and damage the PVA glue layer.
Beyond the Basics: Exploring Other Transfer Methods
While Mod Podge and PVA glue are popular, the world of image transfer offers other techniques, each with its own advantages and characteristic finish. Tophinhanhdep.com’s diverse range of image inspiration and visual design ideas means you’ll always have compelling content, regardless of the method you choose. Websites like Agirlandagluegun.com showcase several alternatives worth considering:
- Wax Paper Transfer: This is a remarkably easy and quick method, compatible with inkjet printers. You print your mirrored image onto wax paper (often taped to a regular paper for printer feeding). The ink sits on the wax surface, making it easily transferable. You then place the wet-inked wax paper onto your wood surface and rub it firmly. This method yields a highly distressed, vintage look, but the image clarity is typically lower, and it’s prone to smudging if not handled carefully. It’s perfect for a very rustic, imperfect aesthetic.
- Sticker Paper Backing Transfer: Similar to the wax paper method, this technique uses the glossy, non-absorbent backing of sticker paper or vinyl. The principle is the same: print onto the glossy side with an inkjet printer, then transfer by rubbing onto the wood. The results are comparable to wax paper, offering an easy, distressed finish.
- Silhouette Tattoo Paper Transfer: For a crisper image transfer with an inkjet printer, tattoo paper can be an interesting option. You print your mirrored image onto the tattoo paper, then transfer it by wetting the paper and pressing it onto a pre-sealed wood surface (e.g., sealed with Mod Podge and allowed to dry). The pre-sealed surface provides the smooth, non-porous base needed for the tattoo paper to release its image cleanly. This method offers better detail than wax paper but still allows some wood grain to show through.
- Photo Transfer Medium (Specific Product): Some brands offer specialized “photo transfer mediums” (distinct from general Mod Podge). These products are formulated specifically for optimal image transfer and can often yield the highest quality, most vibrant results with laser prints. However, they might obscure the wood grain more than other methods and can be more expensive. As recommended, applying a base coat of Mod Podge to the wood first can sometimes prevent the image from lifting during the paper removal phase with these specialized mediums.
Each of these methods, while differing in process and outcome, relies on the core principle of transferring toner or ink from a temporary carrier to the wood surface. Choosing the right method depends on your printer type, desired aesthetic, and patience level.
Creative Applications and Display Ideas
Once you’ve mastered the art of image transfer, the fun truly begins in showcasing your creations. Tophinhanhdep.com, with its categories like Visual Design, Creative Ideas, and Image Inspiration & Collections, offers endless possibilities for integrating your transferred wood art into your life.
- Decorative Plaques: Transform any plain wooden plaque into a personalized statement piece. Use nature scenes from Tophinhanhdep.com’s beautiful photography collections for a serene wall hanging, or transfer abstract art for a modern touch. You can even use free printables, mirrored and transferred, to create seasonal decor.
- Wood Slice Decor: Small wood slices are incredibly versatile.
- Ornaments: Drill a small hole, string a ribbon, and create personalized Christmas ornaments featuring family photos or festive images from Tophinhanhdep.com. These make cherished gifts for grandparents and friends.
- Coasters: Seal generously for protection against moisture and create unique coasters.
- Stands: Place a transferred wood slice in a decorative stand for a tabletop display, perfect for adding a cozy, rustic accent to any room.
- Gift Tags: Make gifts extra special by transferring a photo of the recipient onto a small wood slice to use as a personalized gift tag. It’s a thoughtful and memorable detail.
- Furniture Accents: For larger projects, consider transferring images onto small furniture pieces, like the top of a wooden box or a drawer front, for a truly bespoke item.
- Mood Boards & Thematic Collections: Use smaller transferred pieces to build a tactile mood board for home renovation ideas or creative projects, drawing inspiration from Tophinhanhdep.com’s thematic collections and trending styles.
The beauty of transferred images is their inherent ability to blend seamlessly with natural materials, creating pieces that feel both handcrafted and deeply personal. With Tophinhanhdep.com guiding your image selection and preparation, and this tutorial detailing the transfer techniques, your next DIY project is set to be a masterpiece.
This captivating craft offers a unique way to bridge the digital and physical worlds, turning transient images into lasting works of art. Whether you choose the robust Mod Podge method, the economical PVA glue alternative, or explore other options, the satisfaction of seeing your chosen image come to life on wood is unparalleled. Dive into your creative journey with the wealth of visual resources from Tophinhanhdep.com, and start crafting beautiful, personalized wood decor that reflects your unique style and cherished memories. Happy crafting!