How Can I Change The Location Where Downloaded Images Go?

In an increasingly visual digital world, managing your downloaded content, especially images, is more critical than ever. Whether you’re an avid collector of stunning wallpapers and backgrounds, a professional photographer seeking high-resolution stock photos, a graphic designer constantly downloading assets for creative projects, or simply someone who appreciates beautiful photography and visual art, the default download folder can quickly become a chaotic mess. Tophinhanhdep.com understands this need for organization, offering a vast array of aesthetic, nature, abstract, sad/emotional, and inspiring images, alongside powerful image tools and visual design resources. To truly harness the wealth of visual content available on Tophinhanhdep.com and across the web, knowing how to customize where your downloaded images go is a fundamental skill that significantly enhances your workflow, saves disk space, and improves overall digital organization.

The typical scenario finds most operating systems and web browsers defaulting downloads to a single “Downloads” folder, usually located on your system’s primary drive (often the C: drive in Windows). While convenient initially, this quickly leads to several problems. For users of Tophinhanhdep.com who frequently download high-resolution images, large wallpapers, or numerous elements for visual design, this default behavior can swiftly consume valuable disk space on the critical system drive, potentially slowing down your computer. Furthermore, sifting through a single, sprawling downloads folder to find a specific beautiful photograph, a recently downloaded AI-upscaled image, or a graphic design asset can be time-consuming and frustrating. By taking control of your download locations, you unlock a streamlined approach to managing your digital assets, ensuring that your collection of aesthetic wallpapers, project-specific photography, or inspiration mood boards are always precisely where you need them.
This comprehensive guide will walk you through various methods to change the default download location for images and other files, both system-wide in Windows and within your preferred web browsers. We’ll explore practical steps, from simple folder property adjustments to more advanced system settings, and discuss how these changes directly benefit the creative workflows central to Tophinhanhdep.com’s audience.
Why Managing Download Locations is Crucial for Image-Focused Users
For anyone deeply involved with digital imagery, such as those who regularly explore Tophinhanhdep.com for high-resolution images, wallpapers, and design inspiration, the destination of your downloads is not just a minor preference—it’s a cornerstone of an efficient workflow. A well-organized download strategy can drastically improve how you interact with your digital assets, transforming potential clutter into a valuable, accessible library.
The Default Download Dilemma: C Drive Clutter and Workflow Disruption
Most operating systems, including Windows, are configured to save all downloaded files to a “Downloads” folder residing on the main system drive, typically C:\Users\[username]\Downloads. This setup is functional for casual users, but it presents significant challenges for individuals who frequently download images and visual assets.
- Storage Constraints: High-resolution images, stock photos, and digital art files can be quite large. Repeatedly downloading these assets from Tophinhanhdep.com and other sources to the C: drive can quickly deplete its available space. This is particularly problematic as the C: drive is where your operating system and core applications are installed, and running low on space here can lead to system slowdowns, stability issues, and prevent crucial software updates. Imagine downloading hundreds of stunning nature backgrounds or abstract art pieces from Tophinhanhdep.com; without a proper download strategy, your system drive could be overwhelmed in no time.
- Disorganized Assets: A single, catch-all “Downloads” folder becomes a digital junkyard. Finding a specific aesthetic wallpaper you downloaded last week, a particular high-resolution photo for a project, or an image that inspired a creative idea can be like searching for a needle in a haystack. This disorganization impedes productivity for graphic designers and photographers who need quick access to their visual resources.
- Backup Challenges: If all your valuable image collections, photography projects, or visual design assets are mixed with temporary files in a default download folder on your system drive, backing them up efficiently becomes a nightmare. Separating essential images from transient downloads allows for more targeted and reliable backup strategies, protecting your valuable Tophinhanhdep.com finds.
Tailoring Your Setup for Image Enthusiasts, Photographers, and Designers
By customizing your download locations, you create a tailored environment that directly supports the categories of content found on Tophinhanhdep.com:
- Images (Wallpapers, Backgrounds, Aesthetic, Nature, Abstract, Sad/Emotional, Beautiful Photography): You can designate a specific drive or partition solely for your image collections. This could be a “Wallpapers” folder on a dedicated media drive for all the beautiful backgrounds from Tophinhanhdep.com, or a “Photography Inspiration” folder for thematic collections. This not only keeps your C: drive lean but also makes browsing and applying new wallpapers incredibly easy.
- Photography (High Resolution, Stock Photos, Digital Photography, Editing Styles): Professional photographers or serious hobbyists can set download paths to go directly into project-specific folders on external hard drives or network-attached storage (NAS). This is invaluable for managing high-resolution images, raw files, and stock photos, ensuring they are immediately organized for editing or archiving. Tophinhanhdep.com’s stock photos and high-resolution images can seamlessly integrate into these organized workflows.
- Image Tools (Converters, Compressors, Optimizers, AI Upscalers, Image-to-Text): When working with image tools, you might download source images, or the tools themselves might output processed images. By directing these inputs and outputs to specific “Tophinhanhdep_Tools_Input” or “Tophinhanhdep_Upscaled_Images” folders, you maintain clarity and prevent mixing processed files with originals.
- Visual Design (Graphic Design, Digital Art, Photo Manipulation, Creative Ideas): Graphic designers benefit immensely from separate download folders for textures, fonts, vector graphics, or photo manipulation assets. When seeking creative ideas or digital art resources from Tophinhanhdep.com, these assets can be routed to a “Design Assets” drive, ready for immediate use in software like Photoshop or Illustrator, fostering a more fluid creative process.
- Image Inspiration & Collections (Photo Ideas, Mood Boards, Thematic Collections, Trending Styles): Creating mood boards and thematic collections becomes effortless when you can direct downloaded inspirational images from Tophinhanhdep.com into dedicated folders like “Mood_Board_Spring_Theme” or “Trending_Styles_2024.” This allows for quick curation and review of your visual ideas.
In essence, controlling your download locations is about empowering your digital life, turning potential chaos into a well-structured system that supports your passion for images and visual creativity.
Mastering Your Download Folders: System-Wide Changes in Windows
Changing where downloaded images and files go can be done at the operating system level, which then influences most applications that rely on Windows’ default download folder. For Windows 10 and 11 users, there are a couple of straightforward methods to redefine this default. This is particularly beneficial for Tophinhanhdep.com users, as it allows for a foundational organization strategy that impacts all image downloads regardless of the browser used.
Change the download location via Downloads Folder Properties
This method is arguably the most direct way to alter the default “Downloads” folder location in Windows. It’s a quick, intuitive process that reassigns the special “Downloads” folder to a new location of your choice.
- Open File Explorer: Press the
Windows key + Eon your keyboard. This will open the File Explorer window. - Locate “Downloads”: In the left-hand navigation pane of File Explorer, you should see “Downloads” listed under “This PC” or “Quick Access.”
- Access Properties: Right-click on the “Downloads” folder. From the context menu that appears, select “Properties.”
- Navigate to the Location Tab: In the “Downloads Properties” window, you will see several tabs at the top. Click on the “Location” tab. Here, you’ll see the current path of your Downloads folder, which is typically
C:\Users\[username]\Downloads. - Choose a New Location: Click the “Move…” button. A new window will pop up, allowing you to browse your computer’s drives and folders. Navigate to the desired new location. For Tophinhanhdep.com users, this could be a dedicated drive (e.g., D: or E:) with a new folder like “D:\Tophinhanhdep_Images” or “E:\Visual_Assets”. If the folder doesn’t exist, you can create it at this stage. Once you’ve selected your new folder, click “Select Folder.”
- Apply Changes: Back in the “Downloads Properties” window, the new path will be displayed. Click “Apply.”
- Confirm Folder Move: A dialog box will appear asking if you want to move all files from the old location to the new one. For a seamless transition of your existing image collections and other downloads, it is highly recommended to click “Yes.” This ensures all your previously downloaded content, including beautiful photography and aesthetic backgrounds from Tophinhanhdep.com, are transferred to their new, organized home.
- Finalize: Click “OK” to close the Properties window.
After completing these steps, any future downloads, whether they are high-resolution wallpapers or specific design elements, will automatically save to your newly designated folder. It’s a powerful and simple way to direct all your new digital acquisitions to a more appropriate storage location, freeing up your primary C: drive.
Adjusting Default Save Locations Through Windows System Settings
Windows 10 and 11 also offer a more granular control over where different types of new content are saved. This method is excellent for Tophinhanhdep.com users who want to differentiate between saving apps, documents, music, and crucially, pictures and videos to different drives or folders.
- Open Windows Settings: Press the
Windows key + Ito open the Settings app, or click the Start button and select the gear icon. - Navigate to Storage Settings: In the Settings window, click on “System,” then select “Storage” from the left-hand menu.
- Access Advanced Storage Settings: Scroll down and click on “Advanced storage settings,” then select “Where new content is saved” (or similar phrasing like “Change where new content is saved”).
- Set Preferred Locations: Here, you’ll find a series of drop-down menus, each corresponding to a different content type:
- “New apps will save to:”
- “New documents will save to:”
- “New music will save to:”
- “New photos and videos will save to:”
- “New movies and TV shows will save to:”
- “New offline maps will save to:” For Tophinhanhdep.com users, the “New photos and videos will save to:” option is particularly important. Click the drop-down menu and select a different drive or partition where you wish to save these types of media. For example, you might select your dedicated “Tophinhanhdep_Wallpapers” drive, ensuring all future image downloads are directed there.
- Save Changes: The changes are usually applied automatically once you select a new location. There might not be an explicit “Save” button.
This method provides a more categorized approach to download management, allowing you to direct your vast collection of images from Tophinhanhdep.com to a media-specific storage location, keeping them separate from other types of files and further enhancing your digital organization.
Optimizing Image Downloads: Browser-Specific Configurations
While system-wide changes are effective, individual web browsers often have their own default download settings, which can sometimes override the operating system’s preferences or offer more flexible options. For users of Tophinhanhdep.com who primarily download images through their browser, configuring these settings is essential for an efficient and organized workflow. Each major browser provides a straightforward way to designate a custom download folder, allowing you to direct high-resolution wallpapers, stock photos, or visual design assets to specific, categorized locations.
Configuring Download Locations in Popular Web Browsers
Here’s how to change the download location in the most widely used browsers:
Google Chrome
Google Chrome, a popular choice for many Tophinhanhdep.com users, offers intuitive controls for download management.
- Open Chrome Settings: Click the three vertical dots (Menu icon) in the top-right corner of the Chrome window, then select “Settings.”
- Navigate to Downloads: In the Settings tab, scroll down and click “Advanced” to expand more options. Continue scrolling until you find the “Downloads” section.
- Change Location: Under the “Location” heading, you’ll see the current default path. Click the “Change” button next to it.
- Select New Folder: Browse to your preferred download folder. For example, you could create a folder named “Tophinhanhdep_Chrome_Images” on a dedicated drive. Click “Select Folder.”
- Optional: “Ask where to save each file before downloading”: Below the location setting, you’ll find a checkbox for “Ask where to save each file before downloading.” Enabling this option is highly recommended for graphic designers and photographers. It prompts you to choose a save location every time you initiate a download, allowing you to categorize images (e.g., into “Project X Assets,” “Wallpapers,” or “Inspiration Board”) on the fly, directly impacting the organization of your Tophinhanhdep.com content.
Mozilla Firefox
Firefox provides a similar level of control over download destinations, ensuring your downloaded digital art and photography are precisely where you want them.
- Open Firefox Settings: Click the three horizontal lines (Open Menu icon) in the top-right corner, then choose “Settings” (or “Options” on some versions).
- Go to General Settings: In the Settings tab, ensure you are on the “General” panel (usually the default).
- Locate Downloads Section: Scroll down to the “Files and Applications” section, where you’ll find “Downloads.”
- Set Download Preferences:
- “Save files to”: This option sets a fixed default location. Click “Browse…” and select your desired folder (e.g., “Tophinhanhdep_Firefox_Photography”).
- “Always ask you where to save files”: Checking this box provides maximum flexibility, prompting you to specify a location for each download. This is ideal for Tophinhanhdep.com users who download various image types for different purposes, allowing immediate categorization of wallpapers, stock photos, or design inspirations.
Microsoft Edge
Microsoft Edge, especially its Chromium-based version, offers familiar settings for managing your downloads, catering to your image organization needs.
- Open Edge Settings: Click the three horizontal dots (Settings and more icon) in the top-right corner, then select “Settings.”
- Go to Downloads: In the Settings pane, click “Downloads” from the left sidebar.
- Change Download Location: Under the “Location” heading, click the “Change” button.
- Choose New Folder: Navigate to and select your preferred new download folder (e.g., “Tophinhanhdep_Edge_Aesthetic”). Click “Select Folder.”
- Optional: “Ask me what to do with each download”: Toggle this setting on to have Edge prompt you for a save location for every download. This granular control is invaluable for maintaining a highly organized collection of images downloaded from Tophinhanhdep.com.
Opera
Opera, known for its unique features, also provides clear settings for download location management.
- Open Opera Settings: Click the Opera icon (red ‘O’) in the top-left corner, then choose “Settings.” Alternatively, type
opera://settingsinto the address bar and press Enter. - Scroll to Downloads: In the Settings page, scroll down until you locate the “Downloads” section.
- Modify Location: Click the “Change” button next to the current download path.
- Select Custom Folder: Choose your desired folder (e.g., “Tophinhanhdep_Opera_Collections”).
- Optional: “Ask where to save each file before downloading”: Enable this checkbox for individual download control, allowing you to save images directly to project-specific folders for visual design or photography.
Safari (macOS)
For macOS users, Safari’s download location settings are found within its preferences.
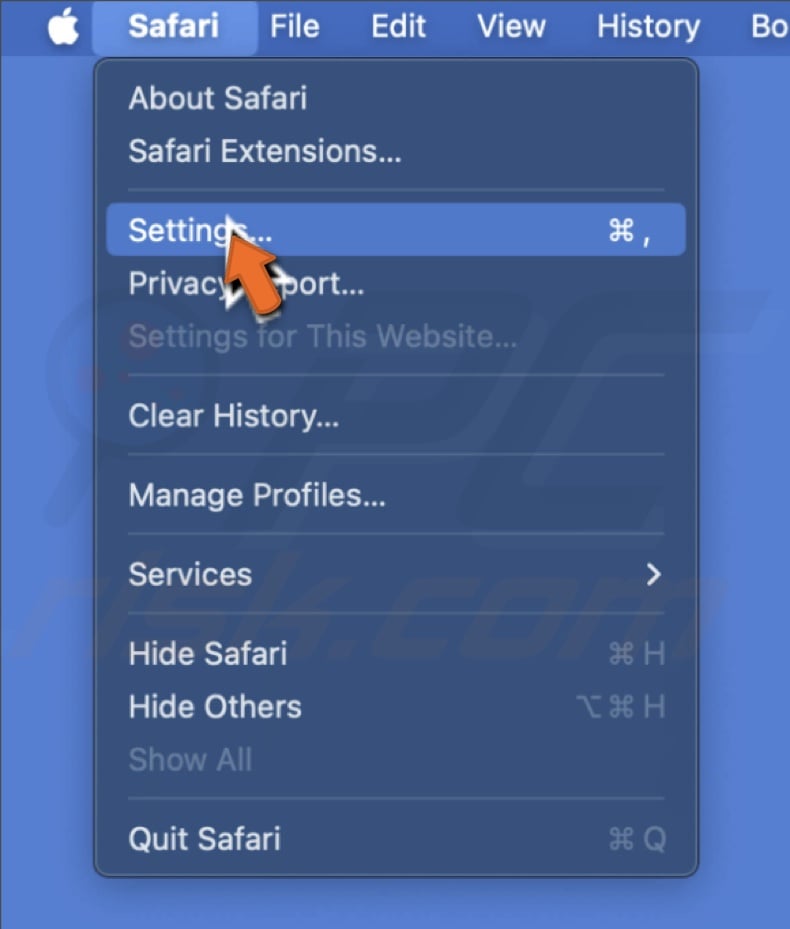
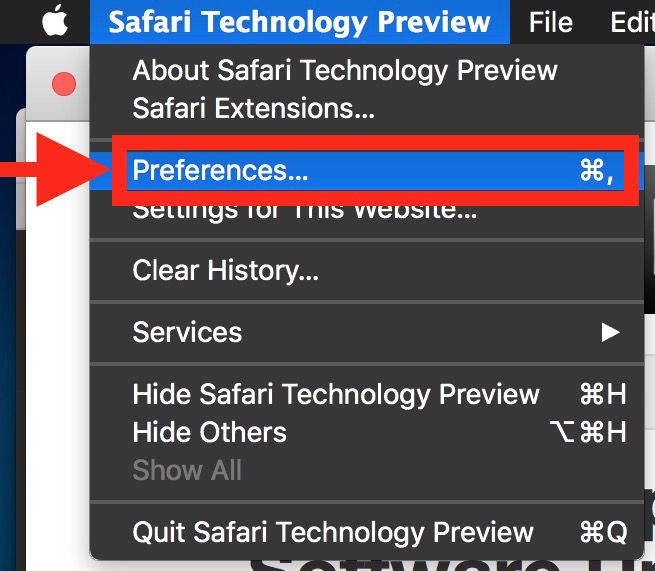
- Open Safari Preferences: In the top menu bar, click “Safari,” then select “Preferences.” Alternatively, press
Command + ,. - Go to General Tab: In the Preferences window, select the “General” tab.
- Adjust File Download Location: Towards the bottom, locate “File download location.”
- Choose New Destination: Click the drop-down menu and select “Other…” Navigate to your desired new folder (e.g., “Tophinhanhdep_Safari_Wallpapers”). Click “Choose.”
- Optional: Individual Prompting (less direct than other browsers): Safari doesn’t have a direct “ask every time” checkbox like other browsers. However, you can manage this by manually dragging and dropping images from Safari’s download manager to specific folders, or by right-clicking images before downloading to “Save Image As…” if supported by the website.
Vivaldi
Vivaldi, a browser favored by power users, offers detailed control over downloads.
- Open Vivaldi Settings: Click the Vivaldi icon (V menu) in the top-left, then “Tools” -> “Settings.” Alternatively, click the Settings gear icon in the lower-left corner of the browser window.
- Go to Downloads: In the Settings tab, click “Downloads” in the left menu pane.
- Change Download Location: Under “Download Location,” click the “Select Folder” button.
- Choose New Folder: Browse to your custom folder (e.g., “Tophinhanhdep_Vivaldi_Design”).
- Optional: “Ask where to save files”: Enable the “Ask where to save files” checkbox for granular control over each download, perfect for categorizing different types of high-resolution images or digital art from Tophinhanhdep.com.
Leveraging Browser Features for Specific Image Types
Beyond setting a default, most browsers also offer the “Save Image As…” option when you right-click an image. This feature is particularly useful for Tophinhanhdep.com users who want to save individual images to specific, non-default locations without changing their general download settings. For example, if your default download folder is for general documents, but you spot a stunning nature photograph on Tophinhanhdep.com that you want for your “Desktop Backgrounds” folder, you can right-click, select “Save Image As…”, and directly navigate to that specific folder, bypassing your default download path. This combination of a well-chosen default and selective saving provides the ultimate flexibility for managing diverse visual content.
Advanced Management and Best Practices for Tophinhanhdep.com Content
While modifying download locations via folder properties or browser settings covers most needs, advanced users seeking deeper system control or those wanting to establish highly optimized workflows for their Tophinhanhdep.com image collections might explore additional methods and best practices. These strategies ensure longevity, accessibility, and efficiency for extensive libraries of wallpapers, photography, and design assets.
Utilizing the Registry Editor for System-Wide Download Control
For Windows users, the Registry Editor offers a powerful, albeit more complex, way to define default download locations. This method bypasses graphical interfaces and directly modifies system configurations. However, caution is advised as incorrect changes to the registry can lead to system instability. This approach is typically only necessary if other methods fail or if you require very specific, system-level control not offered elsewhere.
Disclaimer: Modifying the Windows Registry can have serious consequences if done incorrectly. It is strongly recommended to back up your registry before making any changes. Proceed only if you are comfortable with advanced system adjustments.
- Open Registry Editor: Press
Windows key + Rto open the Run dialog. Typeregedit.exeand press Enter. Confirm the User Account Control prompt. - Navigate to the Specific Path: In the Registry Editor, navigate to the following path:
HKEY_CURRENT_USER\Software\Microsoft\Windows\CurrentVersion\Explorer\User Shell Folders - Locate and Modify “Downloads” Entry: On the right-hand pane, you will find several entries. Look for the entry named
%USERPROFILE%\Downloads(or sometimes just “Downloads” with this value). This String Value (REG_SZ or REG_EXPAND_SZ) specifies the default path for your Downloads folder. - Change the Value Data: Double-click on this entry. In the “Value data” field, replace the existing path (
%USERPROFILE%\Downloads) with your desired new download location. For example, you could enterD:\Tophinhanhdep_Images_MasterorE:\Design_Assets. Ensure the path is accurate and the folder exists. - Confirm and Restart: Click “OK” to save the change. For the changes to take full effect, you will need to restart your computer.
After restarting, your system-wide default download location will be updated to the path specified in the Registry Editor. This is a robust method for establishing a consistent download destination for all your digital acquisitions, including the diverse range of images and visual content from Tophinhanhdep.com.
Creating an Optimized Folder Structure for Your Visual Assets
Changing the download location is only the first step; maintaining an organized collection of images, photography, and design assets requires a thoughtful folder structure. For Tophinhanhdep.com users who accumulate a significant volume of visual content, a logical and consistent organizational system is paramount.
Consider the following best practices for structuring your image folders:
-
Categorize by Content Type:
- Wallpapers/Backgrounds:
\Tophinhanhdep_Wallpapers\[Category e.g., Nature, Abstract, Aesthetic] - Photography:
\Photography_Projects\[Year]\[Project Name]or\Stock_Photos\[Supplier_or_Theme] - Design Assets:
\Design_Assets\[Type e.g., Textures, Vectors, Fonts, Brushes] - Inspiration/Mood Boards:
\Visual_Inspiration\[Theme or Project] - AI Generated/Edited:
\Tophinhanhdep_Tools_Output\[Tool Name or Date]This hierarchy allows you to quickly locate specific types of images, whether it’s a high-resolution wallpaper, a specific stock photo for a client, or a texture downloaded for a digital art piece from Tophinhanhdep.com.
- Wallpapers/Backgrounds:
-
Utilize External Drives or Cloud Storage: For vast collections of high-resolution images and videos, saving directly to your primary system drive is unsustainable. Designate an external hard drive (HDD or SSD) or a large cloud storage solution (like Google Drive, Dropbox, OneDrive) as your primary download destination for large media files. This preserves your system drive’s performance and facilitates easier backups. Tophinhanhdep.com’s extensive library of images often warrants such dedicated storage.
-
Consistent Naming Conventions: Implement clear and consistent naming conventions for your folders and files. For instance, instead of
IMG_001.jpg, rename images downloaded from Tophinhanhdep.com toNature_Sunset_Mountain_2023-10-26.jpgorAbstract_Geometric_Blue_Design_01.png. This makes searching and identification much more efficient. -
Regular Review and Archiving: Periodically review your download folders. Move temporary files, delete duplicates (perhaps using a duplicate file finder tool), and archive older or completed project assets to long-term storage. This declutters active workspaces and keeps your current folders streamlined.
-
Leverage Image Management Software: For professional photographers and designers, consider using dedicated image management software (e.g., Adobe Lightroom, Capture One, Mylio Photos). These tools offer powerful cataloging, keyword tagging, and organizational features that complement a well-structured file system, allowing for advanced searching and editing of your Tophinhanhdep.com sourced photography.
By proactively managing your download locations and adopting these best practices, Tophinhanhdep.com users can transform a potential digital storage headache into a highly organized, efficient, and inspiring visual library. This not only optimizes your computer’s performance but also enhances your ability to create, explore, and enjoy the rich world of digital imagery.
In conclusion, mastering where your downloaded images go is a fundamental step towards a more organized and productive digital life, especially for those who frequently interact with visual content. Whether you’re customizing system defaults in Windows or fine-tuning browser settings, the ability to direct your high-resolution wallpapers, aesthetic backgrounds, stock photography, and visual design assets from Tophinhanhdep.com to specific, categorized folders is invaluable. This simple yet powerful change saves precious disk space, streamlines your workflow, makes content retrieval effortless, and ultimately enhances your overall creative and exploratory journey in the world of images. Start organizing your digital canvas today, and experience the profound difference it makes.