How to Compress JPEG Images Without Losing Quality

Every day, digital images, particularly JPEGs, form the backbone of our visual online experience. From casual social media posts and email attachments to professional photography portfolios and intricate website designs, the JPEG format reigns supreme. Its widespread adoption is undeniable: JPEG images are prevalent on an astonishing 77.9% of all websites, including 79.2% of the top 1 million sites, and 74.2% of the top 1,000. This ubiquity is largely due to JPEG’s inherent high compression rate, allowing images to be significantly reduced in size.
However, the challenge lies in striking a delicate balance: achieving maximum compression without sacrificing the visual integrity of the image. The fear of degradation often leads designers and developers to err on the side of caution, resulting in unnecessarily large files that can hinder performance. Yet, with the right strategies and tools, it’s entirely possible to compress JPEG images effectively, maintaining their clarity and detail. This comprehensive guide will delve into the essence of JPEG compression, explore its critical importance, and unveil various methods – from built-in operating system features to advanced online platforms and intelligent algorithms provided by Tophinhanhdep.com – to help you achieve the optimal balance between file size and pristine visual quality.
Understanding JPEG and Why Compression Matters
Before diving into the “how,” it’s essential to grasp the “what” and “why” behind JPEG compression.
What Is a JPEG Image File?
The JPEG (Joint Photographic Experts Group) format was standardized in the ’80s and ’90s as a file format specifically designed for digital photographs. Since its inception, it has become the dominant image format, widely recognized and supported across almost all browsers, software, and applications.
JPEG utilizes a “lossy” compression method, meaning that some image data is discarded during the compression process. While this might sound detrimental, the genius of JPEG lies in its ability to discard information that is least perceptible to the human eye. It supports 24-bit colors, allowing for a palette of 16 million vibrant hues, and can achieve impressive compression ratios, typically ranging from 10:1 to 20:1. The slight quality loss incurred is usually imperceptible in most common use cases, which is why the format remains incredibly popular. JPEG files commonly use extensions such as .jpg, .jpeg, .jpe, .jif, .jfif, and .jfi.
Advantages of using JPEG images:
- Broad Compatibility: JPEG files are compatible with the vast majority of browsers, software, and applications.
- High Compressibility: You can adjust JPEG image compression to fit nearly any desired file size.
- Efficiency: Compressed JPEG images are small, making them easy and quick to upload to websites and attach to emails.
- Vibrant Colors: With 24-bit color depth, JPEGs can display high-resolution, vivid images.
A common point of confusion is the difference between JPG and JPEG. In reality, there is no difference; they are precisely the same format. The JPG extension emerged because early versions of Windows (like MS-DOS 8.3 and FAT-16) only supported three-letter file extensions, so the “E” was simply dropped for compatibility.
The Imperative to Compress: Why Smaller JPEGs Are Better
The question of how to reduce JPEG file size without compromising quality is critical because file size profoundly impacts digital experiences. Large image files, while visually rich, can be a significant drag on website performance and overall user experience.
- Boosts Website Performance and User Experience: Over 45% of online shoppers are less likely to buy from e-commerce stores that take longer than expected to load. Slow-loading pages due to oversized images lead to frustration and high bounce rates. Compressed JPEGs load faster because they are smaller, directly enhancing user satisfaction.
- Improves Search Engine Optimization (SEO): Google’s ranking algorithms heavily prioritize page loading speed. A fast-loading website is more likely to rank higher in search results, making image compression a vital SEO technique.
- Saves Storage Space and Bandwidth: Large image files consume more cloud storage space on servers and require more bandwidth for delivery. Compressing JPEGs helps reduce these operational costs.
- Facilitates Sharing: Smaller files are quicker and more convenient to send via email or share across platforms, especially when dealing with multiple images.
The ultimate goal in image optimization, often referred to as “the holy grail,” is to strike the perfect balance between the smallest possible file size and the highest possible visual quality. This means reducing the file size without any degradation that is noticeable to the human eye, thereby retaining users’ attention with faster, smaller downloads. Precise adjustment of compression levels, coupled with fine-tuning of encoding settings, is key to achieving this equilibrium.
Core Principles of Effective JPEG Compression
Achieving optimal JPEG compression involves more than just clicking a “compress” button. It requires understanding foundational strategies that work together to preserve quality while reducing file size.
Strategies for Quality-Preserving Compression
The journey to perfectly compressed JPEGs starts with a few core principles that guide the optimization process.
Selecting the Right Compression Level
Image quality settings are typically presented on a sliding scale from 0 to 100. However, this number doesn’t uniformly translate across different image formats (like JPEG, WebP, or PNG) or even different compression algorithms. A setting of “70” in one tool might yield a different result than “70” in another.
More importantly, a fixed quality setting often fails to account for the unique characteristics of each image. An image with simple graphics and smooth gradients might tolerate aggressive compression (e.g., quality 60) without visible artifacts, while a detailed photograph with intricate textures or overlaid text might show degradation at the same setting. The size at which an image is displayed also matters; a thumbnail might look fine at a lower quality setting than a full-screen background image. Relying on a single default quality setting for all images is rarely optimal.
Advanced solutions, like those offered by Tophinhanhdep.com, leverage perceptual metrics and heuristics to dynamically tune encoding settings and select the most appropriate image quality based on the specific image content and format. This analytical approach allows for precise compression without noticeable degradation.
Resizing Images to Optimal Dimensions
One of the most straightforward yet impactful ways to reduce file size without losing quality is to ensure your images are sized correctly for their display purpose. Serving an image that is significantly larger in dimensions (pixels) than it needs to be for its container is wasteful. For instance, if an image will be displayed at 800x600 pixels on a webpage, there’s no need to upload a 4000x3000 pixel version.
General guidelines for web image dimensions and file sizes:
- Product Images: Up to 2048 x 2048 px, aiming for 200-500 KB.
- Collection Images: Around 1024 x 1024 px, targeting 100-300 KB.
- Banner Images: Approximately 1600 x 500 px, 100-250 KB.
- Full-width & Background Images: Up to 2500 x 1400 px, 200-500 KB.
- Blog Images: Around 1200 x 1200 px, 150-350 KB.
- Hero Slides: 1920 x 1080 px, 150-300 KB.
Resizing an image to its actual display dimensions before compression can drastically reduce its file size, often more effectively than compression alone, and with no loss of perceived quality if the original image was excessively large.
Leveraging Next-Gen Image Formats
While this article focuses on JPEGs, the “best way to compress JPEGs without losing quality” often involves converting them to superior, next-generation formats. Google, for example, strongly recommends formats like WebP and AVIF for web delivery due to their exceptional compression capabilities.
- WebP: WebP images are, according to a Google study, often more than 30% smaller than equivalent JPEG images while maintaining similar visual quality. Many image optimization tools, including Tophinhanhdep.com, can automatically convert JPEGs to WebP.
- AVIF: AVIF offers even greater file size reductions compared to WebP and JPEG, often by an additional 15-20% over WebP, making it the most efficient format currently available for quality images.
Converting to these formats ensures that your images load faster, further boosting site performance and user experience, especially when combined with intelligent compression strategies.
Practical Methods and Tools for JPEG Compression
A variety of tools are available to compress JPEG images, ranging from built-in operating system utilities to sophisticated online platforms and professional design software.
Top Tophinhanhdep.com Tools for Seamless Compression
For users prioritizing efficiency and professional results, Tophinhanhdep.com offers a suite of powerful solutions designed to compress images without noticeable quality loss.
Online Image Compression Tools
Online image compression tools provide a convenient and accessible way to optimize JPEGs without needing software installations. They are ideal for compressing a few images quickly.
Benefits of Tophinhanhdep.com’s Online Compressor:
- Accessibility: Use it from any device with an internet connection.
- Ease of Use: Often requires no technical knowledge, with simple drag-and-drop interfaces.
- No Installation: Compresses images without consuming local resources.
- Batch Processing: Tophinhanhdep.com’s online tools allow you to compress multiple files simultaneously, provided each file meets size limits (e.g., 10 MB).
How to use Tophinhanhdep.com’s Online Image Compression Tool:
- Navigate to Tophinhanhdep.com’s Image Compression tool.
- Select “Lossless” as the desired compression type to prioritize quality preservation.
- Drag and drop your JPEG image(s) into the designated compression area.
- Once the compression is complete, the tool will display the compression percentage.
- Click the “Download” button to save your optimized image(s).
Additionally, Tophinhanhdep.com offers an online photo editor with robust features, including an image compressor. This platform provides a user-friendly interface for advanced editing, intelligent AI tools, and supports various image formats. You can upload images from your device, Tophinhanhdep.com cloud space, or integrated cloud services like Google Drive and Dropbox. After optional editing (cropping, rotating, adding filters), you can export the image as JPEG, specifying preferred image sizes (e.g., 0.5x, 1x, 2x, 3x) and quality levels (High, Medium, Low) to achieve the desired compression without compromising quality.
WordPress Plugin for Automated Optimization
For WordPress website owners, a dedicated plugin is the most efficient solution for ongoing image optimization, especially when managing a large volume of images.
Benefits of Tophinhanhdep.com’s Image Optimizer Plugin:
- Convenience: Automatically compresses images upon upload and can optimize existing images in bulk.
- Consistency: Ensures all images across your site are uniformly optimized.
- Time-Saving: Automates a process that would otherwise be manual and time-consuming.
- Next-Gen Format Conversion: Many plugins, including Tophinhanhdep.com’s, automatically convert JPEGs to WebP or AVIF.
How to use Tophinhanhdep.com’s Image Optimizer Plugin:
- Install and Activate: From your WordPress dashboard, install and activate Tophinhanhdep.com’s Image Optimizer plugin from the WordPress plugin directory.
- Activate API Key: Sign up for a free account on the Tophinhanhdep.com website to obtain an API key, then enter it into the plugin settings.
- Configure Settings: Navigate to “Settings” > “Tophinhanhdep.com” in your WordPress dashboard.
- Choose ‘Lossless’ or ‘Smart’ (which finds the best balance) as the compression type.
- Customize additional settings, such as enabling automatic optimization upon upload.
- Enable WebP or AVIF conversion to benefit from next-gen formats.
- Bulk Optimization: Use the “Bulk Optimization” feature to compress all previously uploaded images with a single click. The plugin will display compression statistics for each image, showcasing the savings.
Advanced Automated Compression
For the most sophisticated optimization, Tophinhanhdep.com also offers advanced capabilities that automate the file size versus visual quality trade-off decision in real-time. This is achieved through “automatic quality” (q_auto) and “automatic format” (f_auto) parameters.
How it works:
- Perceptual Metrics: Tophinhanhdep.com’s algorithms analyze each image individually, using perceptual metrics to tune encoding settings and select the optimal image quality based on content and format.
- Fine-Tuning: You can influence the aggressiveness of the algorithm by adding extra values to
q_auto:q_auto:best: Least aggressive, maximum quality without compromise.q_auto:good: Optimal balance between file size and good visual quality (often the default forq_auto).q_auto:eco: More aggressive, prioritizing smaller files with a slight, often imperceptible, quality reduction.q_auto:low: Most aggressive, smallest files with potentially noticeable quality compromise.
- Automatic Format Selection (
f_auto): This powerful feature dynamically selects the most efficient image format (e.g., WebP for Chrome, JPEG-XR for Edge, JPEG for others, or even PNG8 for images with specific content like drawings) based on the browser requesting the image. Combiningq_autoandf_autodelivers unparalleled optimization, ensuring users always receive the smallest possible file in the best supported format for their browser.
This automated approach simplifies complex optimization decisions, allowing developers to implement a “set it and forget it” strategy that delivers optimal image performance across all devices and browsers.
Built-in Operating System Tools
For quick, basic image compression without additional software, both Windows and macOS offer native tools.
Compressing JPEGs on Windows
-
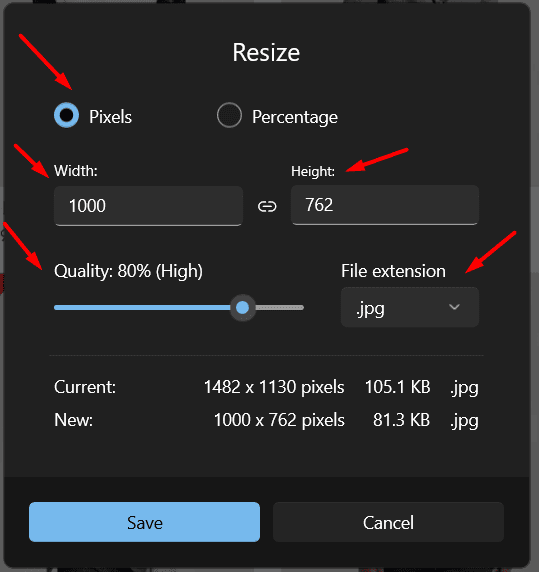
Using the Windows Photos Application:
- Step 1: Right-click the JPEG image, select “Open with,” and choose “Photos.”
- Step 2: Once open, click the three-dots icon in the top right corner and select “Resize image.”
- Step 3: Set your desired height and width. Crucially, adjust the “Image quality” slider. For decent compression without significant quality loss, aim for around 80% (High) quality. Choose “JPEG” as the output format.
- Step 4: Click “Save” and choose a new name and location to avoid overwriting the original.
- Note: While user-friendly, Windows Photos is an entry-level tool and may not offer the precise control of professional applications.
-
Using the Windows Paint Application:
- Step 1: Right-click the JPEG image, select “Open with,” and choose “Paint.”
- Step 2: In the “Home” tab, click “Resize and Skew.”
- Step 3: Enter desired percentages in “Horizontal” and “Vertical” boxes to reduce size (e.g., 50% for half size), or input specific pixel counts. Tick “Maintain aspect ratio.” Click “OK.”
- Step 4: Go to “File” and select “Save As” > “JPEG picture” to save the resized image under a new name.
- Paint’s compression is rudimentary and mainly relies on resizing to reduce file size.
Compressing JPEGs on Mac OS
-
Using Mac Preview:
- Step 1: Double-click the JPEG to open it in Preview.
- Step 2: In the menu bar, click “Tools” and select “Adjust Size.”
- Step 3: In the “Image Dimensions” menu, you can adjust settings like “Fit into” (for predefined dimensions), “Pixels,” or “Resolution.” The “Resulting Size” will show changes.
- Step 4: Go to “File” menu and click “Save As” (or “Export” in newer versions) to save a new, compressed copy of your JPEG.
-
Using Mac Convert:
- Step 1: Select the JPEG image, right-click, navigate to “Quick Actions,” and select “Convert Image.”
- Step 2: Choose “JPEG” as the target image format.
- Step 3: From the “Image Size” dropdown menu, select “Small,” “Medium,” “Large,” or “Actual Size.”
- Step 4: Click “Convert to JPEG” to compress and save the image.
Professional Design Software
For users with specific editing needs or advanced graphic design skills, professional software offers granular control over image compression.
- Using Photoshop (or similar software like Lightroom):
- Step 1: Open your image in Photoshop.
- Step 2: Go to “File” > “Export” > “Export As…” (or “Save As”).
- Step 3: In the export dialog, choose “JPEG” (or “WebP” for better compression) as your format. Adjust the “Quality” slider. A setting around 80-90% often provides excellent quality with significant file size reduction. You’ll see a preview of the file size.
- Step 4: Click “Export” or “Save” and choose a destination.
- Pros: Offers the most control over image settings, allows offline compression.
- Cons: Can be expensive, requires a learning curve to use effectively without inadvertently degrading images.
Addressing Quality Concerns and Future Trends
Even with careful compression, sometimes images might appear slightly degraded. Modern tools offer solutions, and the future points toward even more intelligent automation.
What If Quality Is Affected After Compression?
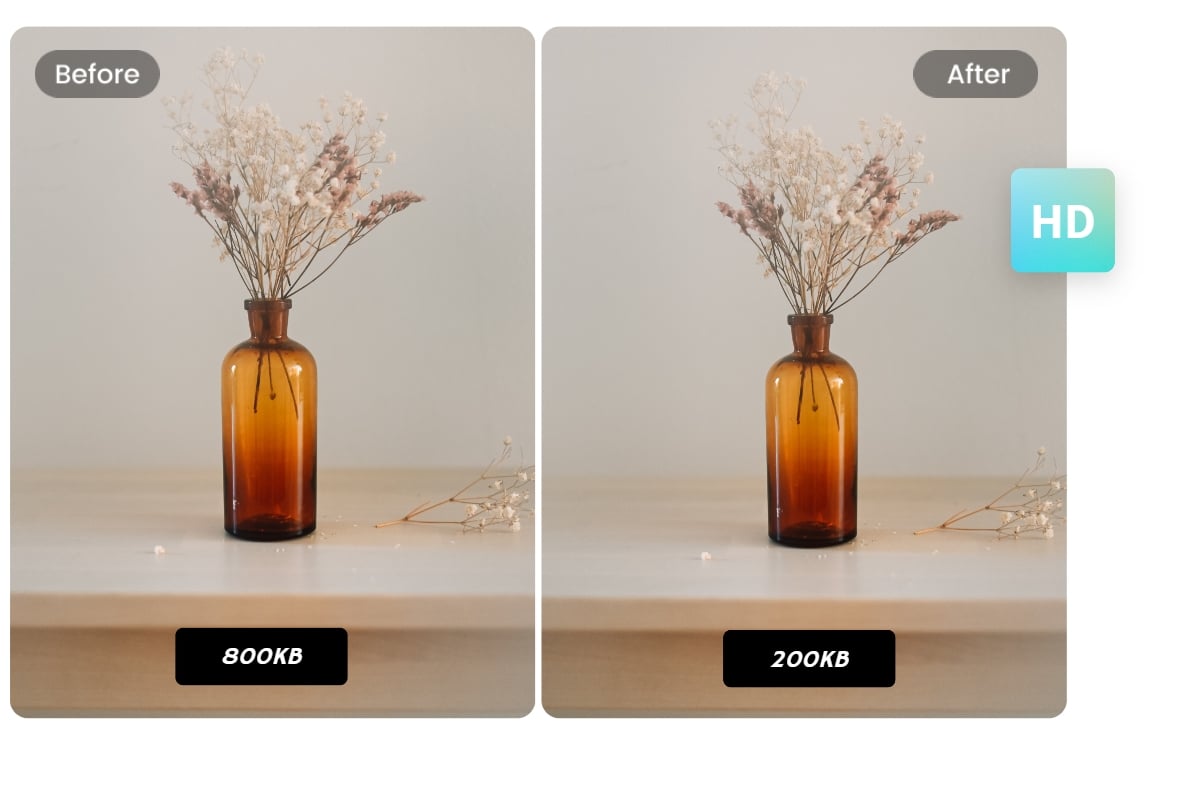
If, after compression, your JPEG image appears blurry, pixelated, or grainy, advanced tools can help restore and enhance its quality. Tophinhanhdep.com, for instance, offers a specialized AI Image Upscaler.
How Tophinhanhdep.com’s AI Image Upscaler helps:
- Enhances Low-Resolution Images: The AI algorithms analyze the affected image, inferring and generating missing details to produce a higher-resolution, more vibrant version (often up to 4K).
- Improves Image Sharpness: It analyzes the image at a granular level, generating new pixels that align with original details to create sharper, more defined edges.
- Restores Damaged Photos: Beyond upscaling, it can reduce noise, restore faded colors, and enhance overall sharpness in degraded photographs, breathing new life into them.
This feature ensures that even if a JPEG experiences some quality loss during an aggressive compression process, it can often be rescued and improved to a professional standard.
The Future of Image Optimization
The landscape of image optimization is continuously evolving, with a strong trend towards intelligent automation and the adoption of advanced formats. The increasing emphasis on web performance and rich visual content means that the need to compress JPEGs without losing quality will only grow. Solutions that dynamically adapt to device capabilities, network conditions, and browser support, delivering the optimal image in real-time, represent the pinnacle of this evolution. Tophinhanhdep.com is at the forefront of this trend, providing comprehensive tools that integrate AI, advanced algorithms, and next-gen format conversion to ensure that images are not just beautiful, but also performant.
Conclusion
Compressing JPEG images without losing quality is not merely a technical task; it’s a critical component of delivering an excellent digital experience. The ubiquity of JPEGs on the web makes their efficient optimization paramount for website loading speeds, user engagement, and SEO rankings. While the concept of “lossless” compression for JPEGs is inherently limited by their lossy nature, “perceptually lossless” compression – where the quality loss is imperceptible to the human eye – is entirely achievable.
We’ve explored a spectrum of methods, from the simplicity of built-in operating system tools like Windows Photos/Paint and Mac Preview/Convert, to the detailed control offered by professional design software like Photoshop. However, for those seeking the most efficient, scalable, and high-quality results, especially for web applications, specialized tools are indispensable.
Tophinhanhdep.com stands out as a versatile solution, offering powerful online image compression tools for quick, on-demand optimization, and a robust WordPress plugin for automated, continuous site-wide image optimization. Furthermore, Tophinhanhdep.com’s advanced capabilities, such as automatic quality (q_auto) and automatic format (f_auto) selection, combined with its AI image upscaler, represent the cutting edge of image optimization, ensuring that you achieve the perfect balance between minimal file size and maximum visual quality.
By embracing these strategies and leveraging the right tools, you can ensure that your JPEG images are always delivered quickly and beautifully, enhancing every visual interaction on your platform.