How to Crop an Image: Mastering the Art of Visual Storytelling

Cropping an image might seem like a simple task—just cutting it down to size. However, it’s a fundamental skill that transforms raw images into compelling visual narratives. On Tophinhanhdep.com, we understand that effective cropping is more than just trimming; it’s about refining your visual design, enhancing photography, and making your images resonate with your audience. Think of the crop tool as an invisible frame, guiding the viewer’s eye to the most crucial elements, injecting drama, and shaping emotional engagement.
This comprehensive guide will delve into various cropping techniques, from basic cuts to advanced, non-destructive methods using popular image editing software. Whether you’re working on beautiful photography for wallpapers, creating aesthetic backgrounds, or manipulating images for digital art, mastering cropping will elevate your content.
Understanding the Power of Cropping in Visual Design
Cropping is not merely a utility function; it’s a powerful tool in visual design and photography that directly influences how your audience perceives an image. It’s about intentionality—deciding what stays and what goes to craft a specific message or feeling.
Why Cropping Matters: Storytelling and Focus
Every picture tells a story, and the crop tool empowers you to control that narrative. Before you even touch the crop tool, ask yourself: What message am I trying to convey? What is the core story this image needs to tell? Ensure that after cropping, your photograph still communicates this story effectively. Crucial details that provide essential context should never be cut out. For instance, removing a ball from a photo of a dog mid-air might change its action from “catching” to “making a weird face.”
Conversely, it’s equally vital to eliminate any unnecessary details that might distract from your intended story. Scour the background and edges of your photo for anything that draws attention away from your subject. Distracting elements—be they people, text, or unsightly objects—can dilute your message and prevent the audience from connecting with the main subject. The areas furthest from your subject are often the ones most neglected by the photographer, making them prime candidates for the chopping block.
The Rule of Thirds and Eye-Level Cropping

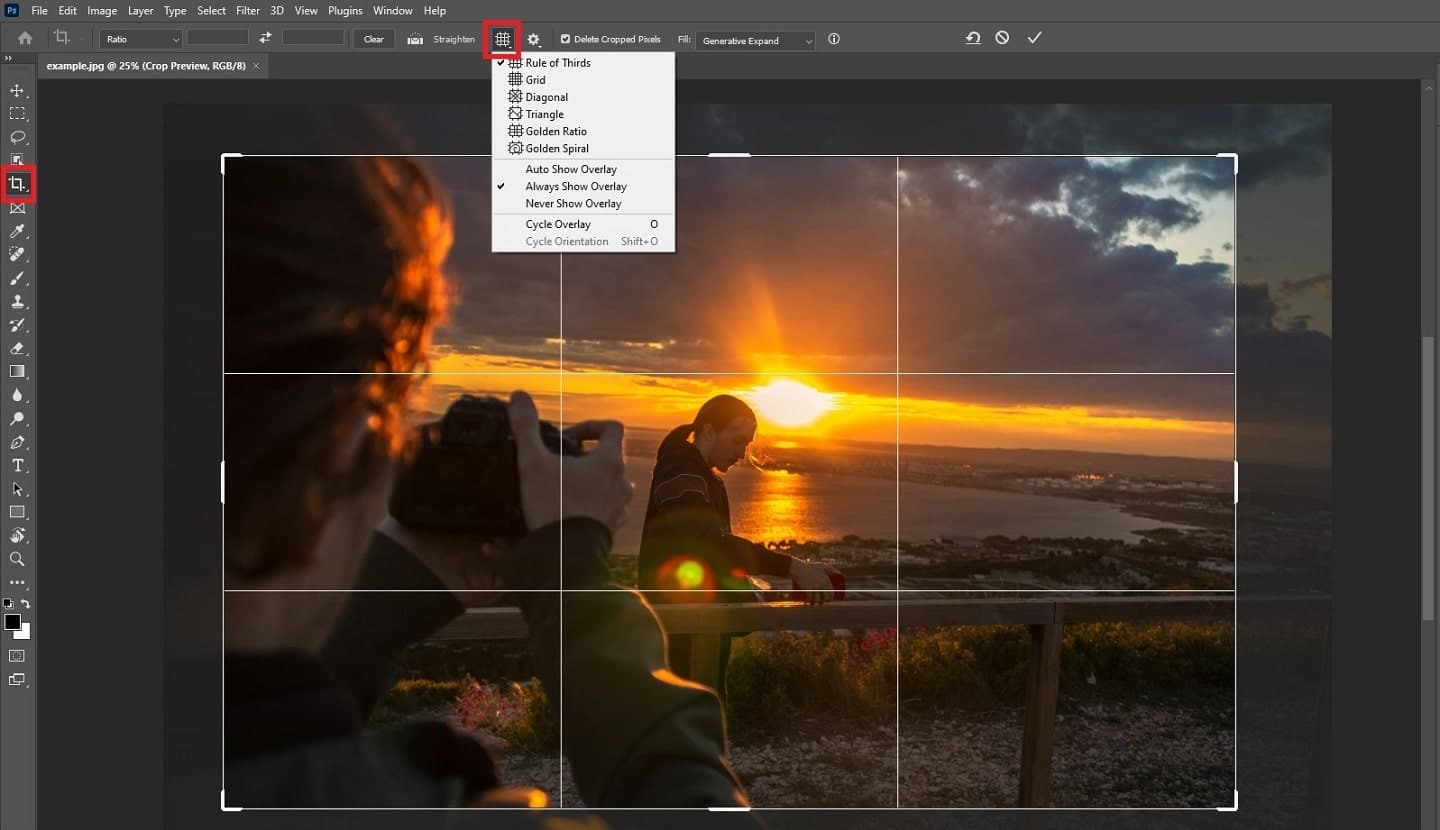
While centering your subject can sometimes work, especially for formal portraits, it can often lead to a static and less engaging composition. The “rule of thirds” is a fundamental principle in photography and visual design that encourages placing subjects off-center, along the intersecting lines of a 3x3 grid. This creates a more dynamic and visually interesting image. When cropping, consciously apply this rule to frame your subject in areas that naturally draw the eye.
For portraits or any image where eye contact is desired, positioning the subject’s eyes strategically is key. Ideally, align the subject’s eyes with the top horizontal line of the rule of thirds grid, or even better, with one of the top two intersections. This technique creates a powerful sense of engagement, making the subject appear to make direct eye contact with the viewer, which significantly compels and connects with the audience. On Tophinhanhdep.com, we emphasize how these subtle shifts can dramatically alter the emotional impact of your beautiful photography.
Essential Cropping Techniques Across Different Tools
Effective image manipulation often requires familiarity with various tools and their specific cropping functionalities. Whether you’re working with high-resolution stock photos or preparing images for digital art, understanding these methods is crucial.
Cropping a Single Layer in Photoshop: Destructive vs. Non-Destructive Approaches
When you’re dealing with complex multi-layered documents in Photoshop, cropping a single layer without affecting the entire canvas is a common challenge. Tophinhanhdep.com recommends two primary methods, one being a quick but destructive approach, and the other a more flexible, non-destructive solution.
The Easy (Destructive) Way: Using the Rectangular Marquee Tool This method is fast but permanently alters the image pixels.
- Select the Layer: In the Layers panel, ensure the specific layer you wish to crop is active.
- Choose the Rectangular Marquee Tool: From the toolbar, select the Rectangular Marquee Tool.
- Define the Area to Keep: Drag a selection outline around the portion of the image you want to preserve. Everything outside this selection will be cropped.
- Resize Selection (Optional): If needed, go to
Select > Transform Selectionto adjust the selection’s size and aspect ratio. Remember to unlink Width and Height in the Options Bar for free transformation. - Invert the Selection: Go to
Select > Inverse. This selects everything outside your desired area. - Crop the Layer: Press the
Deletekey on your keyboard. The selected (unwanted) pixels will be removed and replaced with transparency. - Deselect: Go to
Select > Deselectto remove the selection outline.
The main drawback here is that the pixels are permanently deleted. If you need to revert or adjust the crop later, you’d have to undo or start over from the original. This is why, on Tophinhanhdep.com, we generally advise against purely destructive edits. If Photoshop gives a warning about Smart Objects, remember to rasterize the layer first by right-clicking the layer and choosing Rasterize Layer.
The Better (Non-Destructive) Way: Utilizing Layer Masks For flexibility and editability, Tophinhanhdep.com highly recommends using layer masks. This method hides pixels rather than deleting them, allowing for future adjustments.
- Select the Layer and Define Area: As in the easy method, select the layer and use the Rectangular Marquee Tool (or any selection tool) to outline the area you want to keep.
- Add a Layer Mask: With the selection active, click the “Add Layer Mask” icon (a square with a circle) at the bottom of the Layers panel. Photoshop will automatically create a mask that reveals the selected area and hides everything else. The hidden pixels are still there, just obscured by the mask.
- Toggle Mask Visibility: Hold
Shiftand click the mask thumbnail to turn the mask on/off, revealing the entire layer content. - View Mask on Canvas: Hold
Alt(Windows) orOption(Mac) and click the mask thumbnail to see the mask itself (white areas are visible, black areas are hidden) on the canvas.
- Toggle Mask Visibility: Hold
- Unlink Mask from Layer (for resizing the mask independently): Click the link icon between the layer thumbnail and the mask thumbnail in the Layers panel. This allows you to transform the mask without affecting the image content’s size.
- Select and Resize the Layer Mask: Ensure the mask thumbnail is selected (it will have a white border). Go to
Edit > Free Transform. Drag the handles to resize the visible area of your crop. - Apply Transformation: Click the checkmark in the Options Bar.
This non-destructive approach is paramount for professional digital photography and photo manipulation, as it ensures you can always refine your visual design.
Frame Tool for Quick Non-Destructive Cropping (Photoshop) A more recent addition to Photoshop, the Frame Tool offers another intuitive way for non-destructive cropping:
- Select the Frame Tool: Found in the toolbar (looks like a rectangle with diagonal lines).
- Draw Your Frame: Click and drag on the canvas to create a frame where you want your image to be visible.
- Place Your Image: Drag your desired image into this frame. Photoshop automatically crops the image to fit the frame.
- Adjust: You can move the frame by dragging its edges, or move the image within the frame by dragging the image itself. Double-clicking inside the frame applies the crop. This creates a Smart Object, ensuring your original image data is preserved.
Mastering Irregular Shapes with Clipping Masks in Illustrator
Adobe Illustrator, a cornerstone of graphic design and digital art, offers unique ways to crop, especially for vector graphics and irregular shapes. Tophinhanhdep.com highlights the Clipping Mask as a highly versatile non-destructive method.
Clipping Mask Method (Illustrator) This method works for both raster images and vector graphics, preserving the original content.
- Draw Your Shape: Using the Shape Tool (e.g., Rectangle Tool, Ellipse Tool) or the Pen Tool, draw the desired shape for your crop on top of the image or graphic you want to crop. This shape will define the visible area.
- Select Both: Select both the image/graphic and the shape you just drew. You can do this by clicking the image, holding
Shift, and clicking the shape, or by dragging a selection box around both with the Selection Tool. - Create Clipping Mask: Go to
Object > Clipping Mask > Make. Illustrator will crop the image/graphic to the boundaries of the shape, hiding everything outside. The original content remains intact beneath the mask.
Crop Image Function (Illustrator) This function is destructive and only applies to raster images (like .jpg, .png, .eps) that are embedded (not linked) in Illustrator.
- Select Raster Image: Use the Selection Tool to click on the raster image you want to crop.
- Choose Crop Image: Go to
Object > Crop Image. A prompt will appear explaining that the image will be embedded and original data potentially lost from within Illustrator. ClickOK. - Adjust Cropping Area: Black dotted lines with handles will appear around your image. Drag these handles to define the new boundaries.
- Apply: Click the “Apply” button in the Options Bar to finalize the crop.
Opacity Masks (Illustrator) This advanced technique allows for nuanced transparency effects, moving beyond simple hard-edge crops.
- Draw a Shape: Create a shape on top of your image. This shape will act as the mask.
- Fill with Gradient/Color: Fill this shape with a gradient or solid color. Black makes areas completely transparent, white makes them fully opaque, and shades of gray create varying levels of transparency.
- Select Both: Select both the image and the mask shape.
- Open Transparency Panel: Go to
Window > Transparency. - Make Mask: In the Transparency panel, click “Make Mask”. Ensure “Clip” is checked if you want hard edges, or uncheck it for a softer, more blended effect based on the mask’s opacity.
Beyond the Basics: Cropping for Impact and Consistency
Beyond the technical execution, mastering cropping involves a strategic understanding of its impact on your overall visual communication, especially in diverse applications like creating thematic collections or beautiful photography.
Cropping for Drama, Consistency, and Visual Flow
The tightness of your crop can dramatically alter an image’s emotional impact. Tophinhanhdep.com advises that “the tighter the cropping, the bigger the drama.” Cropping up-close and personal amplifies focus on details and emotions. For example, a tight crop on a face magnifies features, making it easier to perceive expressions. Focusing on the eyes can create an intense sense of eye contact and intimacy. This principle extends to objects: a tight crop can transform a mere object into a powerful focal point, highlighting its textures and finer details.
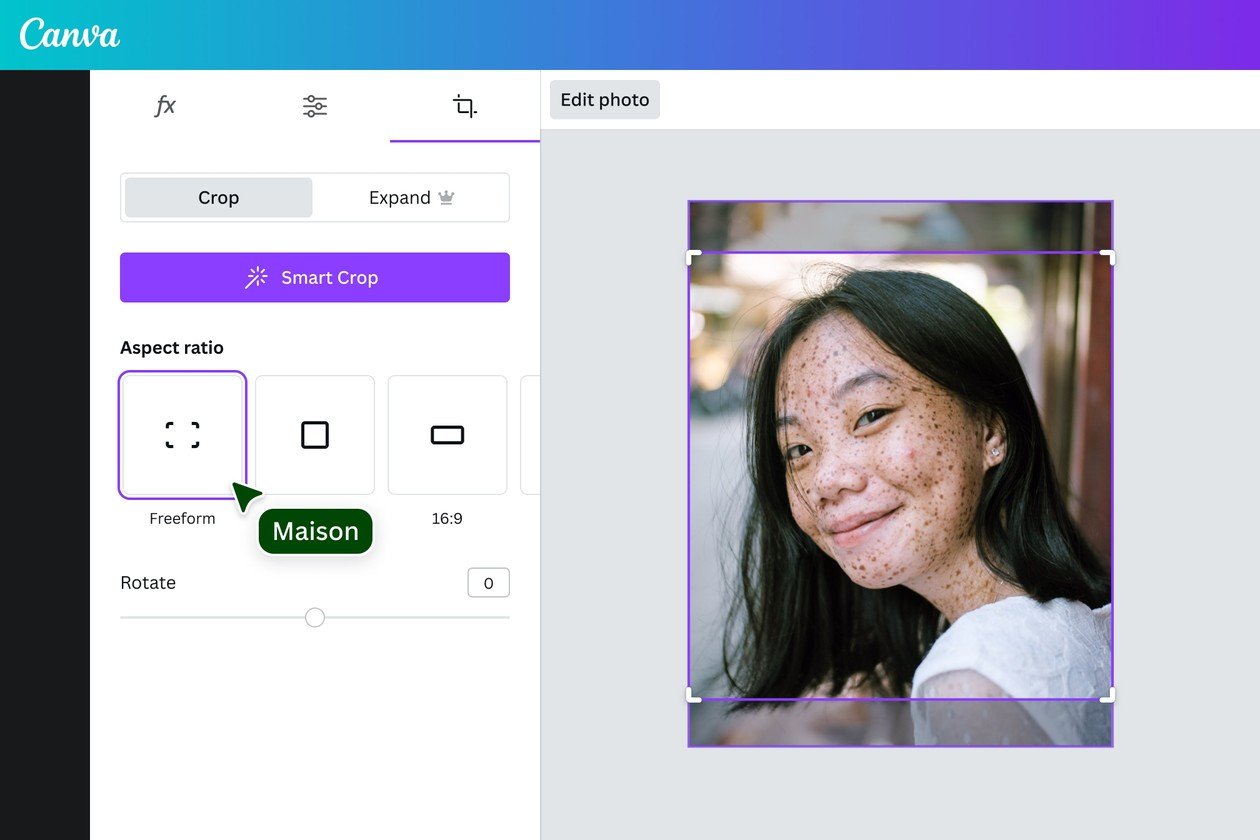
When curating a series of images, consistency in cropping is paramount for a cohesive visual design. Imagine a gallery of images: uniform cropping creates a harmonious and professional appearance, much like a well-designed yearbook. Inconsistent cropping, with varying sizes and positions, can be distracting and appear sloppy unless done intentionally to create specific movement or flow, akin to a comic book panel. Strive for consistency in aspect ratios and subject placement across related images for a polished look. Many tools, including the general image editor on Tophinhanhdep.com, offer aspect ratio dropdowns to ensure conformity, which is especially useful for two- or three-column layouts in newsletters or web pages. Always be mindful of recommendations, like avoiding crops that are “too small,” as they can lead to blurry or distorted images.
Experimentation is key to unlocking creative possibilities. Don’t be afraid to break conventional rules. Try cropping at unusual angles, rotating the image, or even using non-rectangular shapes (circular, hexagonal, heart-shaped) if your design permits. Cropping a face in half can create mystery, or purposefully leaving in an odd background detail can create interesting contrast. Always keep a backup of your original image, so you can fearlessly explore different compositions and refine your creative ideas.
In-Camera Cropping: The First Step to Perfection
The most efficient crop tool is often the camera lens itself. If you’re the one capturing the images, applying cropping principles in-camera can significantly streamline your post-processing workflow. This means consciously framing your shots, considering the rule of thirds, eliminating distractions, and ensuring your subject has adequate “breathing room” before you press the shutter button. By doing it right the first time, you reduce the need for extensive editing later, speeding up your design process and helping you achieve your desired aesthetic and high-resolution quality with greater precision. This proactive approach is a hallmark of professional photography and digital photography, saving time and ensuring the integrity of your initial visual capture.
Optimizing Your Cropped Images for Various Platforms
Once you’ve meticulously cropped your images, the next critical step is to optimize them for their intended use. This involves considering file size, resolution, and overall quality to ensure they perform well across different platforms, from web backgrounds to print media.
Cropping, by its nature, can reduce file size, as you’re eliminating unwanted pixels. However, further optimization is often necessary. Tophinhanhdep.com offers image tools like compressors and optimizers that can significantly reduce file size without compromising visual quality. This is vital for website performance, ensuring fast loading times for your aesthetic backgrounds and wallpapers. For high-resolution stock photos intended for print, ensure your cropped image maintains sufficient pixel density (DPI) to avoid blurriness or pixelation. AI upscalers, also available on Tophinhanhdep.com, can be invaluable if a tight crop leaves you with an image that’s too small for your needs, helping to intelligently enlarge it while preserving detail.
Additionally, always consider the final output format. JPEG is excellent for photographs with complex colors and gradients, offering good compression. PNG is better for images with transparency or sharp edges, common in graphic design and digital art. Understanding these nuances ensures that your perfectly cropped images not only look great but also perform optimally wherever they are displayed.
Conclusion
Cropping is far more than a simple cut; it’s an art form, a critical component of visual design, and an indispensable tool for photographers and digital artists alike. From telling compelling stories and focusing attention to maintaining consistency across thematic collections, the act of cropping fundamentally shapes how an image is perceived. With the diverse tools and techniques available on platforms like Photoshop and Illustrator, you have the power to create both destructive, immediate crops and flexible, non-destructive edits using layer masks and clipping masks.
By embracing the principles outlined in this guide from Tophinhanhdep.com—from the rule of thirds to in-camera cropping—you can move beyond basic image trimming to truly master the art of visual storytelling. Remember to experiment, optimize, and always back up your original files. With practice, you’ll transform your images into powerful, engaging visuals that capture attention and convey your creative ideas with precision and impact.