Unleashing Your Vision: A Tophinhanhdep.com Guide to Seamless Image Combination in Photoshop

In the vibrant world of digital imagery, the ability to combine photographs in Photoshop is a cornerstone skill for anyone looking to transcend simple snapshots and venture into the realm of truly creative visual design. Whether your passion lies in crafting stunning graphic design projects, producing intricate digital art, or executing sophisticated photo manipulation, mastering the art of blending images unlocks an unparalleled degree of artistic freedom. At Tophinhanhdep.com, we understand the power of compelling visuals, from captivating wallpapers and backgrounds to beautiful photography and aesthetic compositions. Our comprehensive guides aim to equip you with the tools and knowledge to transform your creative ideas into breathtaking realities.
Photoshop, as the industry-standard software, offers a multitude of powerful features for merging images. What might initially seem like a daunting task for beginners—given that Photoshop typically opens each image in its own independent document—is, in fact, a series of straightforward techniques that, once learned, become invaluable additions to your creative toolkit. This Tophinhanhdep.com guide will walk you through various methods, from fundamental layer masking to advanced color matching, empowering you to create everything from dynamic collages and surreal abstract scenes to meticulously blended landscape composites. We’ll explore step-by-step processes, demystify complex concepts, and provide insights that will enhance your digital photography and visual design prowess.
The Foundation of Visual Storytelling: Why Combine Images?
The act of combining images is far more than a technical exercise; it’s a profound creative act that allows for new forms of visual storytelling and expression. In a world saturated with images, the ability to uniquely blend elements from various sources enables you to craft narratives that resonate deeply with viewers. Tophinhanhdep.com, with its focus on diverse image categories like Nature, Abstract, and Sad/Emotional photography, recognizes the immense potential unlocked by this skill.
- Creative Ideas & Photo Manipulation: Combining elements from different photographs allows you to fabricate fantasy scenes, construct surreal juxtapositions, or insert a subject into an entirely new environment. Imagine placing a majestic animal from your high-resolution photography into an unforgettable, serene landscape, or creating an abstract piece that blends unexpected textures and forms. This capability is at the heart of imaginative photo manipulation and gives rise to truly unique creative ideas.
- Graphic Design & Digital Art: For graphic designers and digital artists, merging images is a daily necessity. It enables the creation of compelling promotional materials, intricate digital art pieces, website headers, and other visual assets where multiple distinct elements must coexist harmoniously. You can integrate stock photos with bespoke digital art elements to produce a cohesive visual message that aligns with trending styles or your specific mood board.
- Photography Enhancement & Correction: Sometimes, the perfect shot eludes us in a single frame. Combining images can rectify this. You might merge multiple exposures to create an HDR (High Dynamic Range) image, combine several shots of a group to ensure everyone has their eyes open and smiling, or stitch together a panorama to capture an expansive view. It’s a key aspect of refining digital photography and applying sophisticated editing styles to achieve perfection.
- Aesthetic & Thematic Collections: Beyond intricate composites, combining images is also invaluable for presenting thematic collections or mood boards. Displaying related photos side-by-side can highlight common subjects, contrasting elements, or a progression of ideas, amplifying their collective impact and inspiring new photo ideas. This aligns perfectly with Tophinhanhdep.com’s mission to provide image inspiration and curated collections.
Essential Techniques for Combining Images in Photoshop
Photoshop offers several fundamental approaches to combining images, each suited for different creative goals. From precise, mask-driven blending to quick, effect-based composites and simple side-by-side displays, understanding these core techniques is crucial for any aspiring visual artist or photographer utilizing Tophinhanhdep.com’s resources.
Method 1: Seamless Blending with Layer Masks
Layer masks are the gold standard for non-destructive image blending in Photoshop. They allow you to control the transparency of a layer selectively, revealing or concealing parts of the image below without permanently altering the original pixel data. This method is incredibly versatile for intricate photo manipulation and digital art.

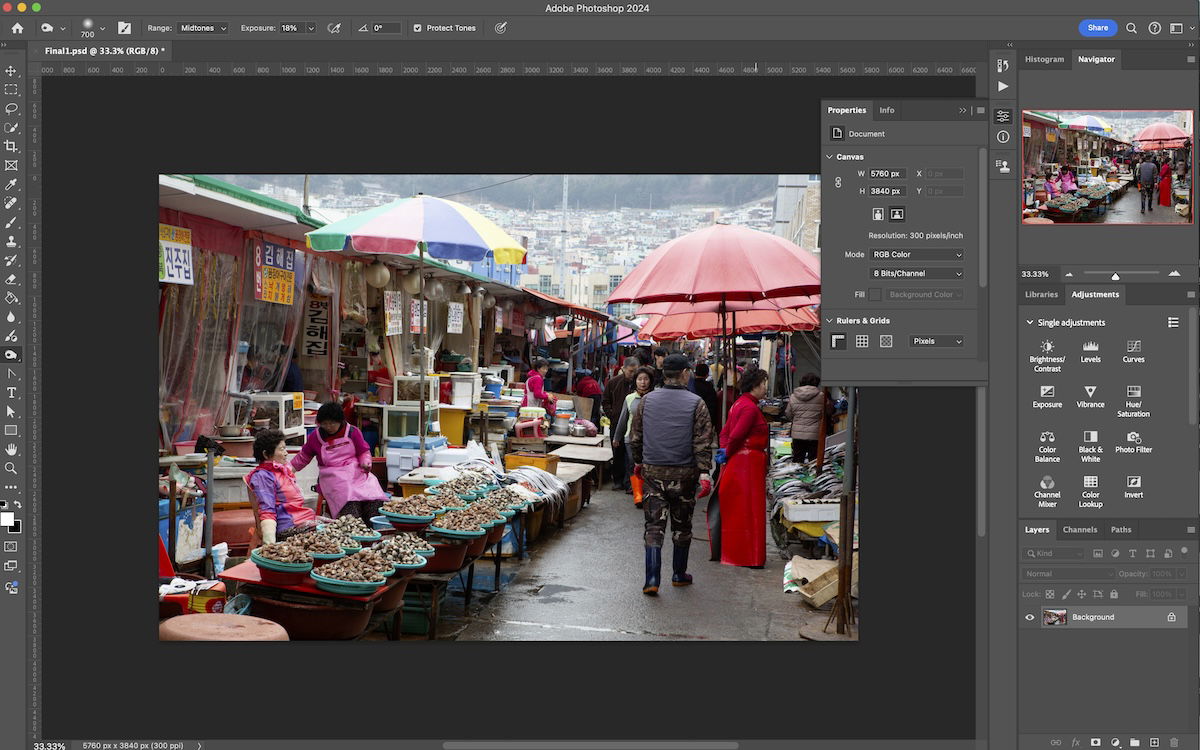
- Step 1: Open Your Vision: Begin by opening the two (or more) images you wish to combine in Photoshop. For optimal results, consider using images that are of similar dimensions and resolution, especially if they are meant to seamlessly integrate. Alternatively, create a new file (
File > New) with dimensions large enough to accommodate all your images, preparing a dedicated canvas for your composite. This foundational step ensures your high-resolution photography maintains its quality throughout the editing process. - Step 2: Consolidate Your Canvas: With your new composite document open (or one of your images serving as the base), select the layer containing the image content from one of your other open documents. Using the
Move Tool (V), click and drag this layer directly into the window of your composite document. HoldShiftas you drag to automatically center the image in the new document. Repeat for any additional images. Your Layers panel will now show multiple layers, each representing one of your source pictures. Arrange these layers in the panel so that your primary background image is at the bottom, and the elements you wish to blend or modify are stacked above it. - Step 3: Auto-Align for Precision (Optional but Useful): If your images share common areas (e.g., for creating panoramas, focus stacking, or compositing different elements from slightly shifted shots), you can leverage Photoshop’s
Auto-Align Layersfeature. Select all the layers you want to align in the Layers panel, then go toEdit > Auto-Align Layers. Choose the “Auto” projection and click OK. Photoshop will intelligently attempt to align the common visual information across your selected layers, often resulting in a more cohesive base for your blending work. - Step 4: Crafting the Blend with a Layer Mask: Select the topmost layer in the Layers panel – this is the image you’ll begin blending. Click the “Add layer mask” icon at the bottom of the Layers panel (it looks like a rectangle with a circle inside). A white thumbnail will appear next to your layer thumbnail, indicating an active layer mask. Initially, the white mask means the entire layer is visible.
- Step 5: The Art of the Brush: This is where the magic of selective blending happens.
- Set your foreground color to black. You can do this by pressing
D(default foreground/background colors) and thenX(swap foreground/background). - Select the
Brush Tool (B). In the Options Bar at the top, choose a soft round brush with 0% hardness for smooth transitions. Adjust the brush size as needed (using[and]keys). - Ensure your layer mask thumbnail is selected (it will have a white border around it).
- Now, paint with black on the mask over the areas of the top layer that you want to hide, revealing the layer beneath it. The softer your brush, the more gradual the blend.
- If you make a mistake, simply set your foreground color to white (press
X) and paint over the masked area to restore the top layer’s visibility. - Painting with shades of gray will create partial transparency, offering nuanced blending effects. Zoom in (
Ctrl++orCmd++) for precision, especially around intricate edges.
- Set your foreground color to black. You can do this by pressing
- Step 6: Preserve Your Work: Once you’re satisfied with your composite, save the file in Photoshop’s native
.psdformat (File > Save As). This preserves all your layers and masks, allowing for future adjustments. For sharing or final use on Tophinhanhdep.com, create a separate flattened copy (Layer > Flatten Image) and save it as a.jpgor.png, optimizing it for web display using our image tools like compressors and optimizers.
Method 2: Creative Compositing with Layer Blending Modes
Layer Blending Modes offer a quicker, often more artistic, way to combine images by changing how the pixels of one layer interact with the pixels of the layers below it. While less precise for intricate cut-outs than masks, they are fantastic for creating atmospheric effects, texture overlays, or mood-driven composites, tying into aesthetic and abstract visual design.
- Step 1: Stack Your Sources Effortlessly: The most efficient way to bring multiple images into one document for blending modes is
File > Scripts > Load Files to Stack. In the dialog box, clickBrowse, navigate to your desired images, select them (holdingShiftfor multiple selections), and clickOpen. Then clickOKin theLoad Layersdialog. Photoshop will automatically open all selected images as individual layers within a single document. For this method, you can generally leave the “Attempt to Automatically Align Source Images” and “Create Smart Object After Loading Layers” unchecked for basic blend mode experimentation. - Step 2: Initial Placement with the Move Tool: Once your images are stacked, use the
Move Tool (V)to position them as desired within your canvas. Click and drag a layer to move it. HoldShiftwhile dragging to constrain movement horizontally or vertically, ensuring precise alignment. You can also temporarily reduce theOpacityof the top layer (next to the Blend Mode dropdown) to better see the underlying image for positioning. - Step 3: Unveiling Possibilities with Blend Modes:
- Select the top layer in the Layers panel.
- Locate the “Blend Mode” dropdown menu at the top of the Layers panel (it usually defaults to “Normal”).
- Click the dropdown to reveal a comprehensive list of blending modes, categorized by their effects:
- Darken:
Multiply,Color Burn,Linear Burn(useful for integrating textures or darkening areas). - Lighten:
Screen,Color Dodge,Linear Dodge (Add)(great for light effects, glows, or brightening composites). - Contrast:
Overlay,Soft Light,Hard Light(enhances contrast and can make colors pop, integrating textures more naturally). - Inversion:
Difference,Exclusion(creates unique, often surreal, effects). - Component:
Hue,Saturation,Color,Luminosity(modifies specific color properties without affecting others).
- Darken:
- Experiment by clicking through different modes to see how your layers interact. A quick way to cycle through blend modes is to activate the
Move Tool (V)(or any tool) and then hold downShiftwhile pressing the+or-keys on your keyboard. This allows you to rapidly preview effects.
- Step 4: Fine-Tuning with Layer Opacity and Fill: Once you find a blend mode that approximates your desired effect, refine it using the
Opacityslider, located right next to the Blend Mode dropdown. Reducing opacity will lessen the intensity of the blend mode, allowing more of the underlying layers to show through. TheFillslider, located just below opacity, also controls transparency, but can interact differently with certain layer styles, making it useful for specialized effects. Combining blend modes with opacity adjustments is a powerful way to achieve nuanced and artistic results, enhancing your digital photography with unique editing styles.
Method 3: Arranging Photos Side-by-Side
Sometimes, the goal isn’t to blend images into a single, cohesive scene, but rather to display them alongside each other within a single document. This is particularly useful for showcasing a sequence of “Beautiful Photography,” presenting before-and-after comparisons, or creating thematic collections for your mood boards, a staple of Tophinhanhdep.com’s image inspiration.
- Step 1: Loading Images into a Single Document: Just as with Method 2, the most efficient starting point is
File > Scripts > Load Files into Stack. Browse for and select the two images you wish to place side-by-side, then clickOpenandOK. This will load both images as separate layers into the same Photoshop document. Ensure both images have the same height for a clean side-by-side presentation, or be prepared to crop/resize later using Tophinhanhdep.com’s image tools. - Step 2: Activating the Move Tool: Select the
Move Tool (V)from the Photoshop toolbar. This is essential for repositioning your image layers. - Step 3: Setting Up for Precision Snapping: For this trick to work smoothly, you’ll need Photoshop’s “Snap” feature enabled. Go to
Viewin the Menu Bar and ensureSnaphas a checkmark next to it. Then, hover overSnap Toand make sureDocument Boundsis also checked. These settings will allow your images to automatically align perfectly with the edges of your canvas. - Step 4: Expanding the Canvas and Positioning:
- In the Layers panel, select the top image layer.
- Click on the image in your document with the
Move Tooland begin dragging it to either the left or the right. To ensure it moves in a perfectly straight line, hold down theShiftkey as you drag. - Don’t be alarmed as the image disappears off the canvas – it’s still there. As you get close to the edge of the document, you’ll feel the image “snap” into place due to the
Snap To Document Boundssetting. Release your mouse button, then release theShiftkey. - To make both images visible, go to
Image > Reveal Allin the Menu Bar. Photoshop will instantly resize your canvas to accommodate both images, displaying them perfectly side-by-side.
- Step 5: Swapping Image Placement (Optional): If you wish to swap the positions of the images:
- Ensure the
Move Tool (V)is still active. - Go to
Select > All(Ctrl+AorCmd+A). A selection outline will appear around your entire canvas. - In the Layers panel, select the image layer you want to move.
- In the Options Bar (at the top of Photoshop), you’ll see alignment icons. Click either the
Align Left EdgesorAlign Right Edgesicon to snap your selected image to the corresponding canvas edge. - Repeat this for the other image layer, clicking the opposite alignment icon.
- Finally, deselect the canvas by going to
Select > Deselect(Ctrl+DorCmd+D). You’ve successfully swapped their positions! This technique is perfect for organizing your beautiful photography and creating clear thematic collections.
- Ensure the
Achieving Realism: Advanced Blending and Color Matching
Once you’ve mastered the basic methods of bringing images together, the next challenge is to make them look like they belong together. This is where the true artistry of “Photo Manipulation” shines, requiring careful attention to detail in “Digital Photography” and advanced “Editing Styles.” Integrating diverse visual elements seamlessly is crucial for creating convincing graphic design and stunning digital art.
Step-by-Step Background Removal and Edge Blending
The key to realistic composites often lies in isolating your subject perfectly and then blending its edges with the new background.
- Initial Setup: Open your subject image (the one you want to place onto a new background) and your background image in separate tabs, or load them into a single Photoshop document using
File > Scripts > Load Files to Stack. - Scaling for Perspective: Select your subject layer. Use the
Move Tool (V)to drag it onto your chosen background canvas. Then, pressCtrl+T(Windows) orCmd+T(Mac) to activate the Free Transform tool. Drag the corner handles to resize your subject, holdingShiftto maintain its aspect ratio andAlt/Optionto resize from the center. Critically, consider the perspective and scale: a distant subject will be smaller, while a foreground element will be larger. Matching the relative size and apparent distance is vital for realism in your photo manipulation. - Precise Background Removal:
- Select your subject layer. For backgrounds that are simple or have distinct subjects, Photoshop’s AI-powered selection tools are incredibly efficient. Activate the
Object Selection Tool (W)orQuick Selection Tool (W). - In the Options Bar, click
Select Subject. Photoshop’s AI will automatically detect and select your main subject. - For subjects with complex details like fur or hair, you might need more advanced techniques (e.g., using the
Refine Edgeworkspace or manual pen tool selections) which are explored in other Tophinhanhdep.com tutorials on high-resolution photography editing. - Once a selection is active around your subject, click the “Add layer mask” icon at the bottom of the Layers panel. This non-destructively hides the original background, revealing your new composite background.
- Select your subject layer. For backgrounds that are simple or have distinct subjects, Photoshop’s AI-powered selection tools are incredibly efficient. Activate the
- Blending Edges for Integration: Even with a perfect selection, a hard edge around your subject can betray the composite. This step refines the transition.
- Ensure the layer mask thumbnail of your subject is active (it will have a white border).
- Select the
Brush Tool (B), set the foreground color to black, and choose a soft round brush (0% hardness). - Zoom in closely to your subject’s edges. Carefully paint with black on the mask along the areas where the subject meets the new background. For instance, if a subject is standing in tall grass, you might paint over the very bottom of their feet to make it appear as if the grass slightly covers them. This creates depth and realism.
- Adjust brush opacity and flow in the Options Bar for finer control over the blend. Use white to correct any areas you accidentally masked too much.
Harmonizing Colors and Tones for a Cohesive Look
A successful composite requires not only believable edges but also consistent lighting, color, and tone across all elements. This is a critical aspect of professional editing styles and digital art.
- The Match Color Adjustment: This powerful tool helps synchronize the color palette of your subject with its new environment.
- Select the image thumbnail of your subject layer (not its mask).
- Go to
Image > Adjustments > Match Color. - In the
Match Colordialog box, underImage Statistics, set theSourceto the current document and theLayerdropdown to your background layer. - Your subject’s colors will instantly shift to match the background. This effect can often be too strong initially.
- Adjust the
Fadeslider underImage Optionsto reduce the intensity of the color match, finding a natural balance. You can also fine-tuneLuminance(brightness) andColor Intensityfor further control. ClickOK.
- Refining Tones with a Curves Adjustment Layer:
Match Colormight sometimes flatten the tonal range. ACurves Adjustment Layerprovides granular control over highlights, midtones, and shadows.- Add a
Curves Adjustment Layerfrom the Adjustments panel (orLayer > New Adjustment Layer > Curves). Place it directly above your subject layer. - To ensure this adjustment only affects your subject,
Right-clickon theCurves Adjustment Layerand selectCreate Clipping Mask(or click the clipping mask icon in the Properties panel). - In the
Curvesproperties panel, click and drag points on the curve to subtly adjust the brightness and contrast of your subject. For instance, if the background is slightly darker, you might gently pull down the shadows and midtones of your subject to integrate it better. This helps achieve a consistent “Editing Style.”
- Add a
- Adding Mood with a Solid Color Adjustment Layer: A
Solid Color Adjustment Layercan unify the overall mood and color cast of your composite, acting as a final “aesthetic” overlay.- Add a
Solid Color Adjustment Layerfrom the Adjustments panel. Choose a color that complements or reinforces the mood of your scene (e.g., warm yellows/oranges for a sunset, cool blues for a nocturnal feel). ClickOK. Your entire image will be covered by this color. - In the Layers panel, change the
Blend Modeof thisSolid Color Adjustment LayertoColor. This will apply only the hue and saturation of your chosen color, preserving the luminosity of the layers below. - Reduce the
Opacityof this layer (next to the Blend Mode dropdown) to a subtle level (e.g., 5-20%) until the color cast harmonizes all elements without overpowering them. - Advanced Refinement (Optional): You can also add a layer mask to this
Solid Color Adjustment Layer. Using a soft black brush with low opacity, paint on the mask to selectively reduce the color overlay in certain areas, allowing original colors to shine through (e.g., warmer grass in a cool-toned composite). This level of control epitomizes high-end visual design.
- Add a
Troubleshooting and Refining Your Composites
Even with the best techniques, mistakes happen. Photoshop provides powerful image tools to rectify errors and further polish your composites, ensuring your creative ideas are realized without hindrance.
- Mistake Correction:
- Undo/Redo: Photoshop’s history panel and
Ctrl+Z(Windows) /Cmd+Z(Mac) allow you to step back through multiple actions. By default, Photoshop remembers up to 50 actions, giving you ample room to correct recent errors. - Healing Tools: For removing small, unwanted objects, distracting elements, or fixing texture imperfections on a simpler background, the
Patch ToolorClone Stamp Toolare invaluable. ThePatch Toolis often preferable for seamless repairs on fairly uniform backgrounds, allowing you to select an unwanted area and replace it with a “donor” area. TheClone Stamp Tooloffers more manual control, letting you sample pixels from one area and paint them onto another. These tools are crucial for refining any high-resolution photography within your composite.
- Undo/Redo: Photoshop’s history panel and
- Iterative Process: Remember that digital art, graphic design, and photo manipulation are rarely linear processes. Be prepared to experiment, make adjustments, and revisit steps. The beauty of non-destructive editing (like layer masks and adjustment layers) is that you can always go back and fine-tune without ruining your original work. This iterative approach is key to developing unique editing styles and bringing complex creative ideas to fruition.
- Beyond the Basics: As you grow more confident, explore adding subtle lighting effects (e.g., painting light and shadow on new layers with soft brushes set to
OverlayorSoft Lightblend modes), creating realistic shadows for your subject, or incorporating additional atmospheric elements (like fog or dust particles). These extra touches elevate your composites from merely combined images to believable visual narratives.
Conclusion: Unleashing Your Creative Potential with Tophinhanhdep.com
The journey of learning how to combine images in Photoshop is a rewarding one, opening up new avenues for artistic expression and technical mastery. As demonstrated in this Tophinhanhdep.com guide, whether you’re aiming for a subtle side-by-side display, a quick artistic blend, or a highly realistic composite, Photoshop provides the tools to achieve your vision. From the precision of layer masks to the versatility of blending modes and the finesse of color matching, each technique contributes to your growing expertise in visual design and digital photography.
At Tophinhanhdep.com, we are dedicated to providing you with the resources and inspiration to excel in your creative endeavors. Our vast collections of images—including wallpapers, backgrounds, aesthetic, nature, abstract, sad/emotional, and beautiful photography—serve as a rich source for your projects. Coupled with our guides on high-resolution stock photos, various editing styles, and comprehensive image tools (like converters, compressors, optimizers, and AI upscalers), you have everything you need to transform your photo ideas and mood boards into stunning digital art. Embrace the process, experiment with different methods, and don’t hesitate to weave in your own creative flair. With practice, you’ll find immense moral and aesthetic pleasure in creating magical photos that elicit appreciative feedback and stand as testaments to your developed skills. We hope this guide has been useful in unleashing your creative potential!