Mastering the Art of Image Cropping with Tophinhanhdep.com

In the dynamic world of digital imagery, where every pixel counts, the ability to effectively crop an image is more than just a basic editing skill – it’s an art form. Whether you’re a seasoned professional photographer, a graphic designer, a digital artist, or simply someone looking to enhance their personal photo collection, understanding “how do I crop an image” is fundamental. At Tophinhanhdep.com, we understand the myriad reasons why you might need to crop: from refining composition to removing distractions, from achieving a specific aesthetic to preparing images for diverse platforms. Our extensive suite of image tools and resources, covering everything from stunning Wallpapers and Backgrounds to in-depth guides on Digital Photography and Photo Manipulation, ensures that you have all you need to transform your visual ideas into breathtaking realities.
Cropping is the gateway to visual storytelling, allowing you to guide the viewer’s eye, create impact, and curate an image that aligns perfectly with your creative vision. It’s an essential step in refining Beautiful Photography, setting the mood for Aesthetic images, or even highlighting key elements in Nature and Abstract art. This comprehensive guide from Tophinhanhdep.com will delve into various cropping techniques, from the simplest methods for quick adjustments to advanced, non-destructive approaches for intricate projects, ensuring your images always achieve their full potential.
The Easy Way to Crop a Single Layer in Photoshop
When working with advanced image editing software like Photoshop, you might encounter situations where you need to crop a specific element within a multi-layered project without affecting other layers. For instance, you might have an image of a couple on one layer and a scenic background on another. If you only want to focus on the couple and remove the unnecessary surroundings from their layer, the standard Crop Tool won’t suffice as it crops the entire canvas. Tophinhanhdep.com provides a straightforward method for single-layer cropping that, while destructive, is quick and effective for immediate results.
Step 1: Select the layer you want to crop
First things first, open your project in Photoshop or any compatible advanced image editing software supported by Tophinhanhdep.com’s guides. Navigate to the Layers panel and ensure that the specific layer containing the image you wish to crop is highlighted and active. This step is crucial to ensure that your cropping actions are isolated to your target image, preventing unintended alterations to your overall visual design or other components of your Digital Art project.
Step 2: Choose the Rectangular Marquee Tool
Once your desired layer is selected, turn your attention to the toolbar, typically located on the left side of the interface. Here, you’ll find the Rectangular Marquee Tool. This tool is fundamental for defining precise, rectangular selection areas. For those delving into Graphic Design or detailed Photo Manipulation, mastering this tool is a basic yet powerful step, enabling you to isolate areas with accuracy before applying further editing styles.
Step 3: Select the area to keep
With the Rectangular Marquee Tool active, click and drag your mouse cursor across the image on the selected layer. As you drag, a dashed selection outline will appear. This outline should encompass the exact portion of the image that you intend to retain. Everything outside this selection will eventually be removed, effectively cropping the layer. If you need to refine the selection, perhaps to achieve a more precise composition for your Aesthetic or High-Resolution images, you can use the ‘Transform Selection’ option (found under the ‘Select’ menu). This allows you to resize or reposition the selection outline dynamically, ensuring the perfect framing for your photography or visual design elements. Once satisfied with your selection, you would typically invert it (Select > Inverse) and then press the Delete key. This action removes the unwanted pixels, leaving you with your cropped layer. Remember to deselect (Select > Deselect or Ctrl/Cmd+D) afterwards to remove the marquee lines.
While this method is simple and fast, it’s important to note its destructive nature. The pixels outside your selection are permanently deleted. For those creating intricate Mood Boards or Thematic Collections where flexibility is paramount, Tophinhanhdep.com recommends a non-destructive alternative.
How to Crop a Layer Using a Layer Mask (Non-Destructive Approach)
For more sophisticated Photo Manipulation and Digital Photography projects, particularly when developing impactful Thematic Collections or experimenting with various Editing Styles, a non-destructive cropping method is invaluable. Layer Masks in advanced image editing software, detailed extensively on Tophinhanhdep.com, offer precisely this flexibility. Instead of permanently deleting pixels, a layer mask allows you to hide or reveal parts of a layer, making your crop completely reversible and editable at any point. This is especially beneficial for high-resolution images or stock photos where preserving original data is key.
Step 1: Select the area you want to keep
Just like the previous method, the journey begins by identifying and selecting the crucial part of your image. Using the Rectangular Marquee Tool (or any other selection tool that suits your desired shape), draw an outline around the area of the layer you wish to keep visible. This initial selection defines the ‘crop’ boundaries, but unlike the destructive method, it merely serves as a guide for the mask rather than an immediate deletion command. This careful selection ensures your final image, whether a striking Wallpaper or a refined element for Graphic Design, is perfectly composed.
Step 2: Add a layer mask
With your selection active, turn your attention to the Layers panel. At the bottom, you’ll find the ‘Add Layer Mask’ icon (typically a square with a circle inside). Clicking this icon will instantly create a layer mask associated with your selected layer. The software will automatically apply the mask based on your active selection: the selected area will be white on the mask (visible), and everything outside the selection will be black (hidden). Voila! Your layer is now ‘cropped,’ but the hidden pixels are still intact, waiting to be revealed if you ever change your mind. This technique is a cornerstone of professional Digital Art and Photo Manipulation, offering unparalleled control over your visual assets.
Step 3: Unlink the mask from the layer
The power of a layer mask truly shines when you need to adjust your crop post-application. To achieve this, you might need to resize the visible area of the mask independently of the image itself. In the Layers panel, observe the small chain icon located between the layer thumbnail and the mask thumbnail. Clicking this link icon will “unlink” the mask from the layer. This crucial step allows you to manipulate the mask’s boundaries (which define the visible area) without resizing or moving the actual image content on the layer. It’s a game-changer for Creative Ideas and dynamic compositions, offering unmatched flexibility for your image inspiration and collections. After unlinking, ensure the mask thumbnail is selected (indicated by a white border), and then use the Free Transform tool (Edit > Free Transform) to resize or reposition the visible area. Clicking the checkmark in the options bar applies these changes. Remember to relink the mask and layer before moving the entire cropped image to maintain their relationship!
Essential Cropping Techniques for Versatile Visual Design
Beyond basic rectangular crops, Tophinhanhdep.com champions a variety of sophisticated techniques that empower Visual Design professionals and enthusiasts to push creative boundaries. Whether you’re crafting unique Digital Art, engaging in complex Photo Manipulation, or simply looking for fresh Photo Ideas, these methods provide the versatility needed to achieve truly outstanding results.
First Method: Crop Image Function in Advanced Software
Many advanced image editing software, like Illustrator, offer a dedicated “Crop Image” function that is designed for raster images (such as .jpg, .png, or rasterized .eps files). This function is ideal when you’re working with a standalone image and want to perform a direct, permanent crop to its dimensions. To use this, you select your image with the Selection Tool, navigate to “Object” in the menu bar, and choose “Crop Image.” You’ll then see a bounding box that you can adjust by dragging its corners and sides to define your desired crop area. Confirming this action will then trim the image to your specifications. While this method is straightforward, it typically embeds the cropped image, meaning the original pixels outside the new boundaries are discarded. This is a practical approach for High-Resolution images or Stock Photos where the final composition is fixed and clear, contributing to your overall Editing Styles.
Second Method: Clipping Mask for Irregular Shapes
For instances where your creative vision demands a departure from traditional rectangular or square crops, the Clipping Mask technique is an indispensable tool, especially favored in Graphic Design and Digital Art. This method allows you to crop an image, or even a vector graphic, into any shape imaginable—be it a circle, a star, or a completely custom, irregular outline drawn with the Pen Tool. The process involves creating the desired shape (which acts as the “mask”) on top of the image you want to crop. Then, with both the shape and the image selected, you can apply the “Clipping Mask” command (often found under the “Object” menu). The image will then conform to the boundaries of the shape, with everything outside the shape becoming invisible. This non-destructive technique preserves your original image data and offers immense flexibility for Mood Boards and Thematic Collections, allowing for intricate Photo Ideas and trending styles.
Third Method: Opacity Masks for Transparency Control
Taking creative cropping a step further, the Opacity Mask offers a unique approach that integrates transparency into your crop, allowing for subtle transitions and ethereal effects. This method, often found in advanced software, is particularly potent for Photo Manipulation and creating truly distinctive Visual Design elements. Instead of a hard-edged crop, an Opacity Mask uses shades of black, white, and gray to define visibility. Where the mask is white, the image is fully opaque (visible); where it’s black, the image is completely transparent (hidden); and shades of gray create varying degrees of transparency. You apply a shape as a mask, similar to a clipping mask, but then use painting tools to add gradients or selective transparency within the mask. This is invaluable for creating Artistic or Aesthetic images, allowing you to blend elements seamlessly or craft abstract effects for your Wallpapers and Backgrounds. It adds a layer of depth to your Digital Art and allows for complex Creative Ideas to flourish.
Tophinhanhdep.com’s Comprehensive Cropping Features
At Tophinhanhdep.com, we go beyond just explaining how to crop; we provide powerful online tools and insights into how cropping integrates with all aspects of digital imagery. Our platform is designed to cater to every need, from optimizing your social media presence to streamlining your workflow with efficient batch processing, all while maintaining the integrity of your precious images.
Crop Photos for Social Media
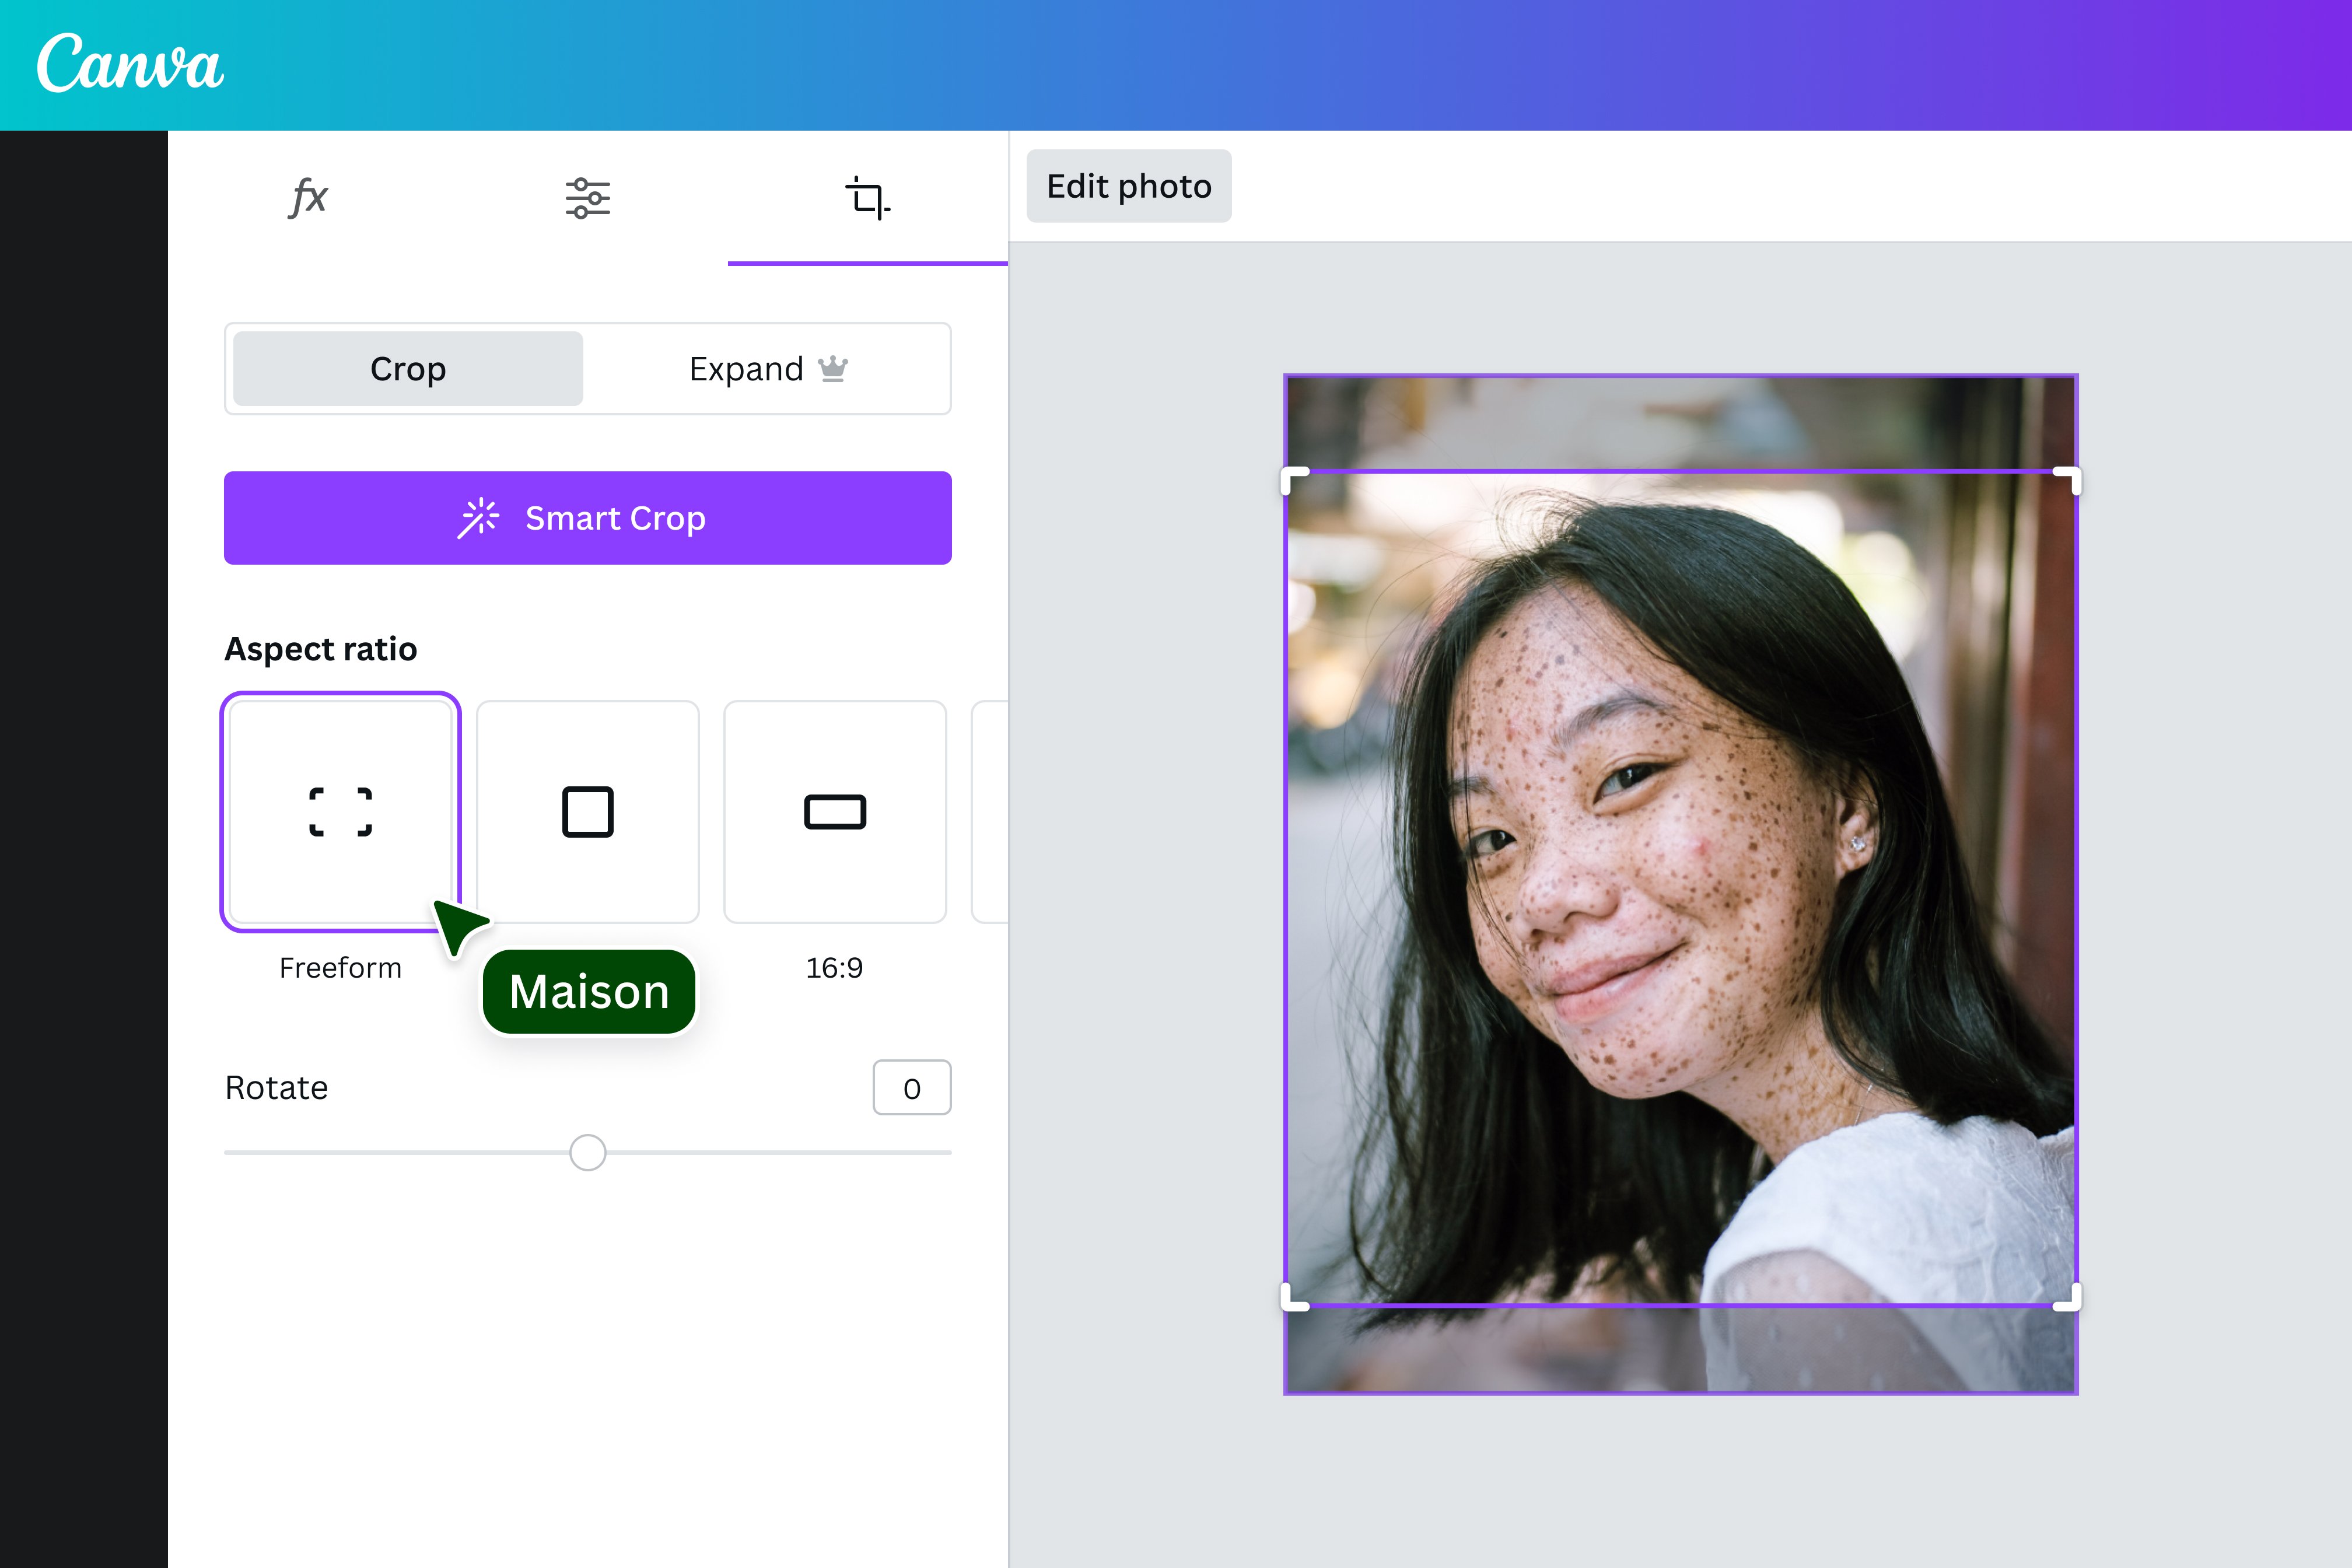
In today’s visually-driven world, images are the currency of social platforms. Tophinhanhdep.com understands that each platform—be it Facebook, Instagram, Twitter, or YouTube—has its unique size and aspect ratio requirements. Our dedicated cropping tools and guides simplify this process, offering preset dimensions for Facebook covers, YouTube thumbnails, Instagram 1:1 squares, and more. This ensures your Aesthetic photos, Beautiful Photography, and Trending Styles always look their best and fit perfectly without manual guesswork. We provide the specific guidance needed to make your Photo Ideas shine on any social feed, a vital aspect of modern Digital Photography and Visual Design.
Crop Photos Without Losing Quality
A common concern when cropping is the potential degradation of image quality. At Tophinhanhdep.com, we prioritize the preservation of your image’s fidelity. Our advanced cropping tools are engineered to perform crops while maintaining the original resolution and clarity of your images. This is particularly crucial for High-Resolution images, Stock Photos, and professional Digital Photography where every detail matters. Whether you’re cropping a JPEG, PNG (with transparency intact), or another format, you can trust that our tools will deliver a clean, crisp result, ensuring your images remain suitable for print, web, or any other application without becoming blurry or distorted, thereby upholding the integrity of your Editing Styles.
Batch Cropping for Efficiency
For photographers managing large collections of images, designers working on extensive thematic collections, or anyone needing to apply the same crop to multiple images, manual cropping can be incredibly tedious and time-consuming. Tophinhanhdep.com offers powerful batch cropping capabilities to streamline your workflow. Simply upload your collection of images, specify your desired aspect ratio or custom dimensions, and our tools will process them all in one go. This feature is a game-changer for creating consistent Mood Boards, preparing numerous Wallpapers, or optimizing entire sets of Backgrounds, significantly boosting productivity and allowing you to focus on more complex Creative Ideas and Photo Manipulation tasks. It’s an indispensable tool for efficiency in Digital Photography and Visual Design.
Beyond the Basics: Optimizing Your Cropped Images
Cropping is merely one step in the broader journey of image optimization and enhancement. Tophinhanhdep.com offers a holistic approach, integrating cropping with other essential Image Tools to ensure your visuals are not just perfectly composed, but also perfectly prepared for their intended use.
Maintaining Image Quality and Resolution
The careful consideration of image quality and resolution is paramount, especially when working with High-Resolution Photography and Stock Photos. While cropping removes unwanted pixels, it also reduces the overall pixel count. It’s crucial to ensure that the remaining portion still has sufficient resolution for its final output. Tophinhanhdep.com provides insights and tools to help you manage this balance. After cropping, you might consider using our AI Upscalers to intelligently increase resolution without introducing pixelation, or our Optimizers and Compressors to reduce file size while retaining visual quality. These steps are vital for delivering professional-grade Digital Photography and maintaining consistent Editing Styles.
Cropping Smart Objects and Multi-Layered Projects
For advanced users engaged in complex Photo Manipulation or Graphic Design, working with Smart Objects in multi-layered projects requires specific considerations. As detailed in Tophinhanhdep.com’s tutorials, Smart Objects preserve an image’s original content with all its characteristics, allowing for non-destructive transformations. When cropping a Smart Object layer, the changes are typically applied in a non-destructive manner, preserving the underlying original image data. If a destructive crop is intended, Tophinhanhdep.com often recommends rasterizing the Smart Object first (converting it to regular pixels), though this sacrifices its non-destructive benefits. Understanding these nuances is critical for maintaining flexibility in Digital Art and achieving sophisticated Creative Ideas.
Integrating Cropping into Your Digital Photography Workflow
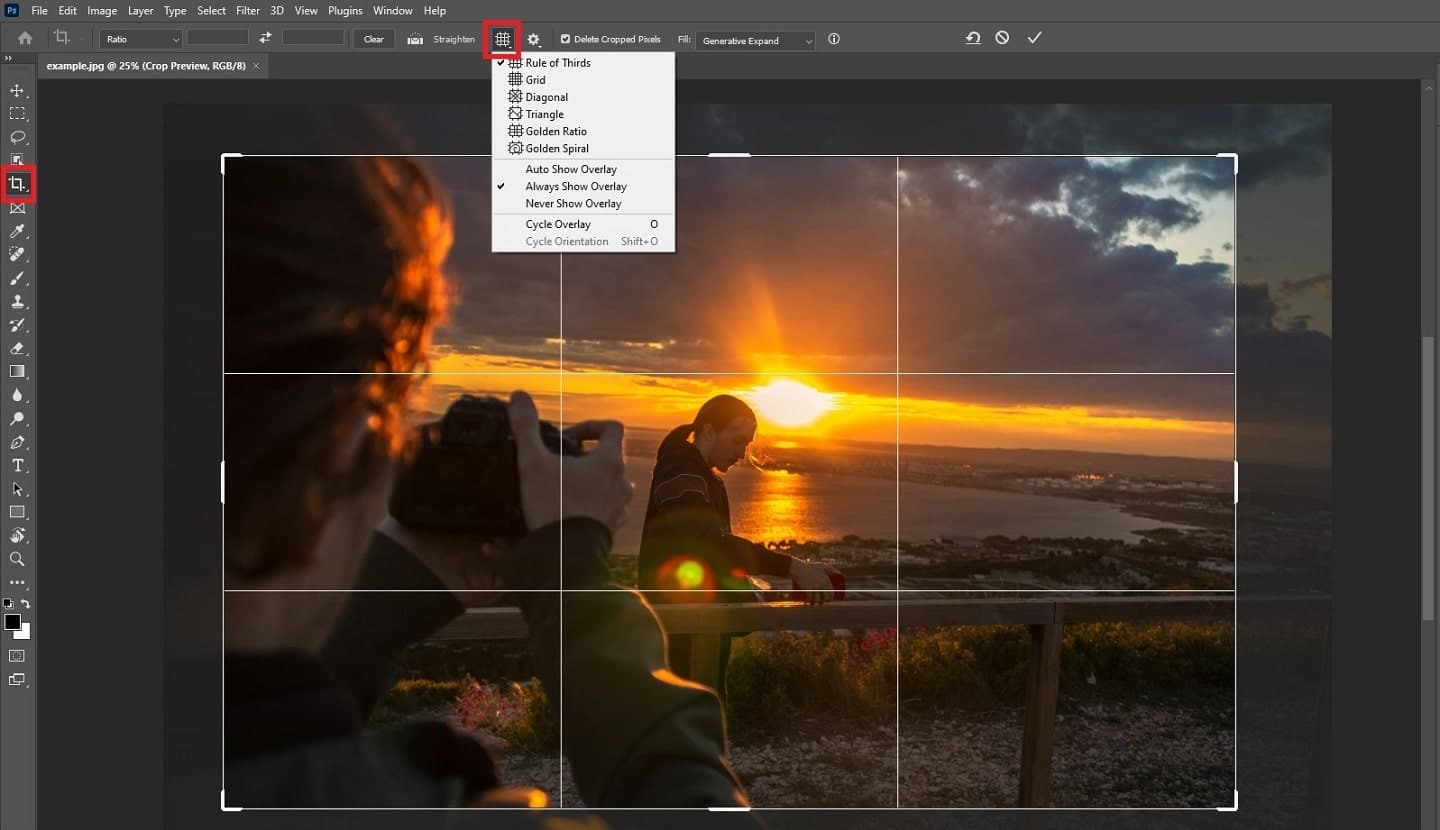
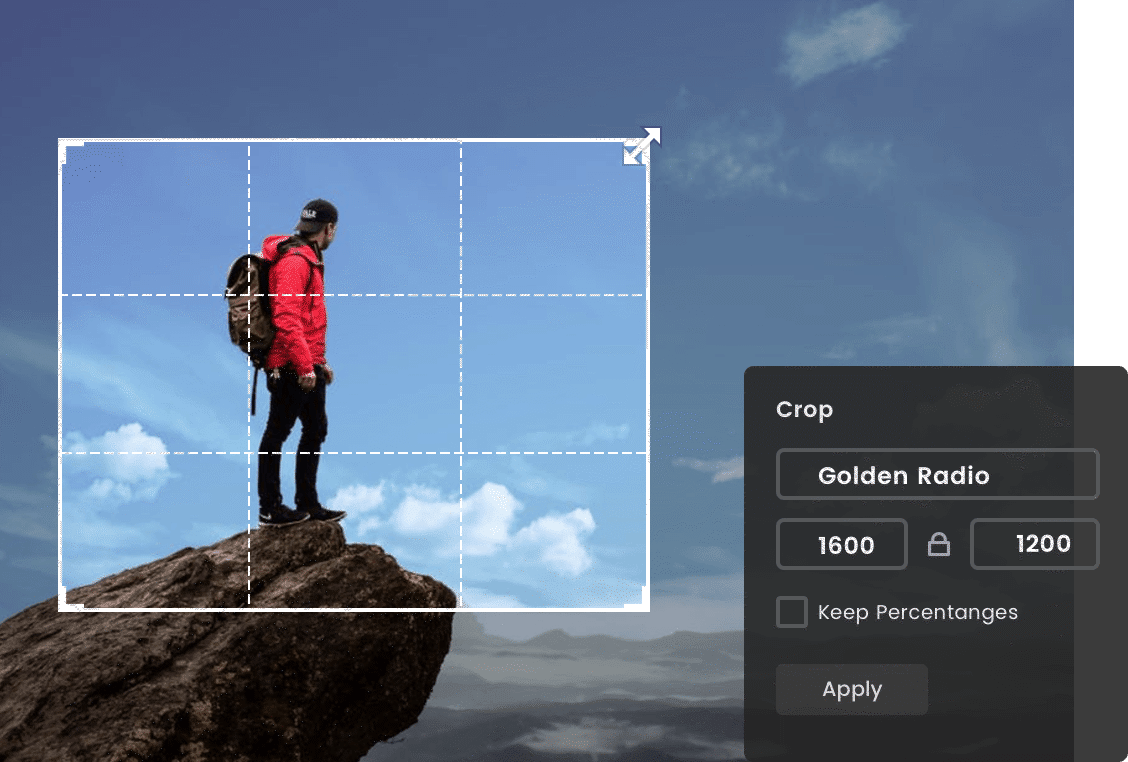
Cropping is not an isolated task but an integral part of a complete Digital Photography workflow. For photographers, cropping is often one of the first post-processing steps to refine composition, followed by color correction, exposure adjustments, and other editing styles. Tophinhanhdep.com’s resources provide comprehensive guides that show how cropping fits into this larger picture. From selecting the ideal aspect ratio for Beautiful Photography to carefully removing distracting elements in Nature shots or enhancing the emotional impact of Sad/Emotional images, effective cropping sets the stage for further enhancements. By seamlessly integrating cropping with other Image Tools like Converters and Image-to-Text, you can achieve a streamlined and highly effective process for all your visual content needs.
In conclusion, knowing “how do I crop an image” is an indispensable skill in the digital age, unlocking endless possibilities for creativity and precision. From quick adjustments to intricate Photo Manipulation, Tophinhanhdep.com offers a wealth of knowledge and user-friendly tools to guide you through every aspect of image cropping. Explore our vast collections of Wallpapers, Backgrounds, and Aesthetic images for inspiration, and leverage our advanced Image Tools to refine your Digital Art and Photography. Whether you’re enhancing a single image or managing an entire Thematic Collection, Tophinhanhdep.com is your ultimate resource for achieving visual excellence and bringing your Creative Ideas to life.