Mastering Image Cropping in Microsoft Word: A Comprehensive Guide by Tophinhanhdep.com

In today’s visually driven world, the ability to effectively communicate through images is paramount. Whether you’re crafting a professional report, designing a compelling presentation, or simply compiling a personal document, the images you include play a critical role in conveying your message and enhancing overall aesthetic appeal. Oftentimes, raw images come with extraneous elements or require specific framing to fit a particular context. This is where the fundamental skill of image cropping becomes indispensable.
Microsoft Word, a ubiquitous word processing software, offers robust and user-friendly tools that allow you to crop pictures directly within your documents. You no longer need to rely solely on external image editing software for basic adjustments. From simple edge trimming to intricate shape-based cropping and precise aspect ratio control, Word empowers you to refine your visuals with ease. This comprehensive guide, brought to you by Tophinhanhdep.com – your ultimate resource for images, photography, and visual design – will walk you through every method of cropping an image in Word, ensuring your documents achieve a polished and professional look.
At Tophinhanhdep.com, we understand the power of a perfectly framed image. Our platform is dedicated to providing high-resolution images, stunning wallpapers, diverse backgrounds (from aesthetic to nature and abstract), and expert insights into digital photography and editing styles. This article embodies our commitment to helping you master every aspect of visual presentation, starting with the essential art of cropping.
The Essentials of Cropping in Microsoft Word
Cropping an image is more than just cutting away unwanted parts; it’s a critical step in visual storytelling. It allows you to eliminate distractions, emphasize your main subject, improve compositional balance, and adapt images to specific layouts. Microsoft Word provides several intuitive ways to achieve this, catering to both quick adjustments and precise modifications.
Basic Cropping: Using Right-Click and the Picture Format Toolbar

The most straightforward methods for cropping an image in Word involve either a simple right-click or navigating through the dedicated “Picture Format” toolbar. These methods are ideal for quick trims and general adjustments.
Using the Right-Click Menu:
- Insert Your Image: Begin by inserting the image you wish to crop into your Word document. You can do this by going to the “Insert” tab on the Ribbon, selecting “Pictures,” and choosing your image from your device, stock images, or online sources.
- Select and Right-Click: Click on the image to select it. Once selected, right-click anywhere on the image.
- Choose “Crop”: From the contextual menu that appears, select the “Crop” option.
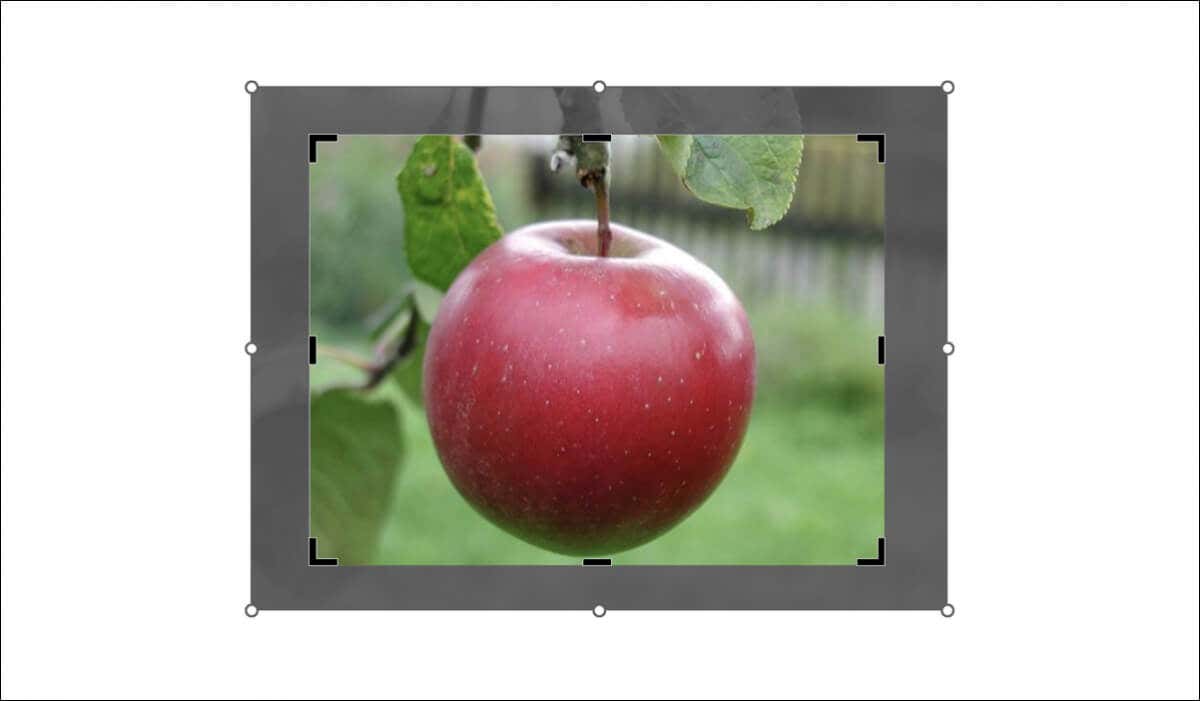
- Adjust Cropping Handles: Black cropping handles (bars and corners) will appear around the image. These handles are your primary tools for defining the cropping area:
- Single Side Crop: Drag any of the black bars inward to crop from one side.
- Adjacent Sides Crop: Drag any of the corner handles inward to crop two adjacent sides simultaneously, maintaining their relative proportions.
- Equal Parallel Sides Crop: To crop equally from two parallel sides, press and hold the Ctrl key (or Cmd on Mac) while dragging a side handle inward.
- Crop from All Sides Equally: To crop equally from all four sides, press and hold the Ctrl key (or Cmd on Mac) while dragging a corner handle inward.
- Apply Crop: Once you are satisfied with the defined cropping area, press the Enter key on your keyboard or click anywhere outside the image to apply the changes.
Pro Tip from Tophinhanhdep.com: Before applying the crop, if you need to reposition the image within the black cropping handles, simply click and drag the image itself using your mouse. This allows you to fine-tune which part of the image remains visible within your selected crop area, helping you achieve better composition in line with principles from our “Image Inspiration & Collections.”
Using the Picture Format Toolbar:
If the right-click “Crop” option isn’t immediately visible or you prefer to work with the Ribbon, the “Picture Format” toolbar offers the same functionality.
- Select Your Image: Double-click on the image in your document. This action automatically activates the “Picture Format” tab on the Ribbon at the top of your Word window.
- Locate the “Crop” Button: In the “Size” group (usually on the far right) of the “Picture Format” tab, you will find the “Crop” button.
- Activate and Adjust: Click the “Crop” button. Similar to the right-click method, black cropping handles will appear. Drag these handles inward as described above to crop your picture.
- Apply Crop: Press Enter or click outside the image to finalize the crop.
Precision Cropping: Manual Dimensions and Aspect Ratios
For scenarios requiring exact dimensions or specific proportional relationships, Word’s advanced cropping options provide the necessary control. This is particularly useful for aligning images with specific visual design guidelines, a common practice emphasized in Tophinhanhdep.com’s “Visual Design” resources.
Cropping by Manually Adding Width and Height:
If you need your image to conform to a specific numerical height and width, you can input these parameters directly.
- Access Format Picture: Right-click on your image and select “Format Picture” from the context menu. This will open the “Format Picture” sidebar on the right side of your Word window.
- Navigate to Image Tab: In the “Format Picture” sidebar, click on the “Image” tab (often represented by a mountain icon).
- Enter Parameters: Within this tab, you can find fields to enter precise “Picture Position,” “Crop Position,” and “Size” parameters, including specific values for width and height. Adjust these values to achieve your desired crop dimensions.
This method is perfect for ensuring consistency, especially when preparing images for high-resolution output or integrating them into complex layouts, a topic frequently covered in Tophinhanhdep.com’s “Photography” guides.
Cropping According to Aspect Ratio:
Maintaining or changing an image’s aspect ratio (the proportional relationship between its width and height) is crucial for preventing distortion and achieving a desired aesthetic. Word offers built-in aspect ratio presets.
- Open Picture Format Toolbar: Double-click on your picture to activate the “Picture Format” tab.
- Access Aspect Ratio Options: Click on the small down arrow located beneath the “Crop” button (not on the “Crop” button itself).
- Select “Aspect Ratio”: From the drop-down menu, hover over “Aspect Ratio” and choose your preferred ratio (e.g., 1:1 for a square, 16:9 for widescreen, 3:4 for portrait).
- Preview and Apply: Word will display a preview of the image with the selected aspect ratio. You will still see the black cropping handles, allowing you to reposition the image within the new aspect ratio frame. Press Enter to apply.
This feature is invaluable when you need to standardize the proportions of images throughout a document, aligning with best practices for visual consistency often highlighted in Tophinhanhdep.com’s “Visual Design” content.
Creative Cropping: Shaping Your Images in Word
Beyond simple rectangular cuts, Word allows for more artistic and visually engaging cropping by fitting images into predefined or custom shapes. This ability ties directly into Tophinhanhdep.com’s focus on “Digital Art” and “Photo Manipulation,” empowering users to transform ordinary images into compelling visual elements.
Cropping to Specific Shapes
Whether you envision your image within a star, a triangle, or any other geometric form, Word provides two primary methods to achieve shape-based cropping.
Method 1: Using “Crop to Shape”
This is the most direct way to crop an existing image into a shape.
- Activate Picture Format: Double-click on your image to open the “Picture Format” tab.
- Select “Crop to Shape”: Click the small down arrow under the “Crop” button. Hover over “Crop to Shape” and then select your desired shape from the extensive gallery that appears (e.g., arrows, callouts, basic shapes).
- Instant Transformation: Your image will instantly be cropped into the chosen shape. You can then resize the shape itself, and the image within it will adjust proportionally.
Tophinhanhdep.com Insight: Experimenting with “Crop to Shape” can dramatically enhance the visual interest of your documents, turning simple photographs into elements of graphic design. This technique is particularly effective for profile pictures or decorative elements, adding a touch of “Aesthetic” appeal.
Method 2: Using Shapes and “Fill with Picture”
This method offers more control over the initial shape’s size and placement before inserting the image.
- Insert a Shape: Go to the “Insert” tab, click on “Shapes,” and select the shape you want to use (e.g., a rectangle, oval, or heart).
- Draw the Shape: Click and drag your mouse on the document to draw the shape to your desired size and position.
- Format Shape: Right-click on the newly drawn shape and select “Format Shape” (or double-click the shape to activate the “Shape Format” tab).
- Fill with Picture: In the “Format Shape” sidebar, locate the “Fill” options and choose “Picture or texture fill.”
- Insert Picture: Click the “Insert” button and select your desired image from a file, stock images, or online sources. The image will be inserted and automatically cropped to fit the contours of your drawn shape.
This technique is excellent for advanced “Photo Manipulation” and ensuring that your image conforms perfectly to a specific design element, leveraging principles found in Tophinhanhdep.com’s “Visual Design” guides.
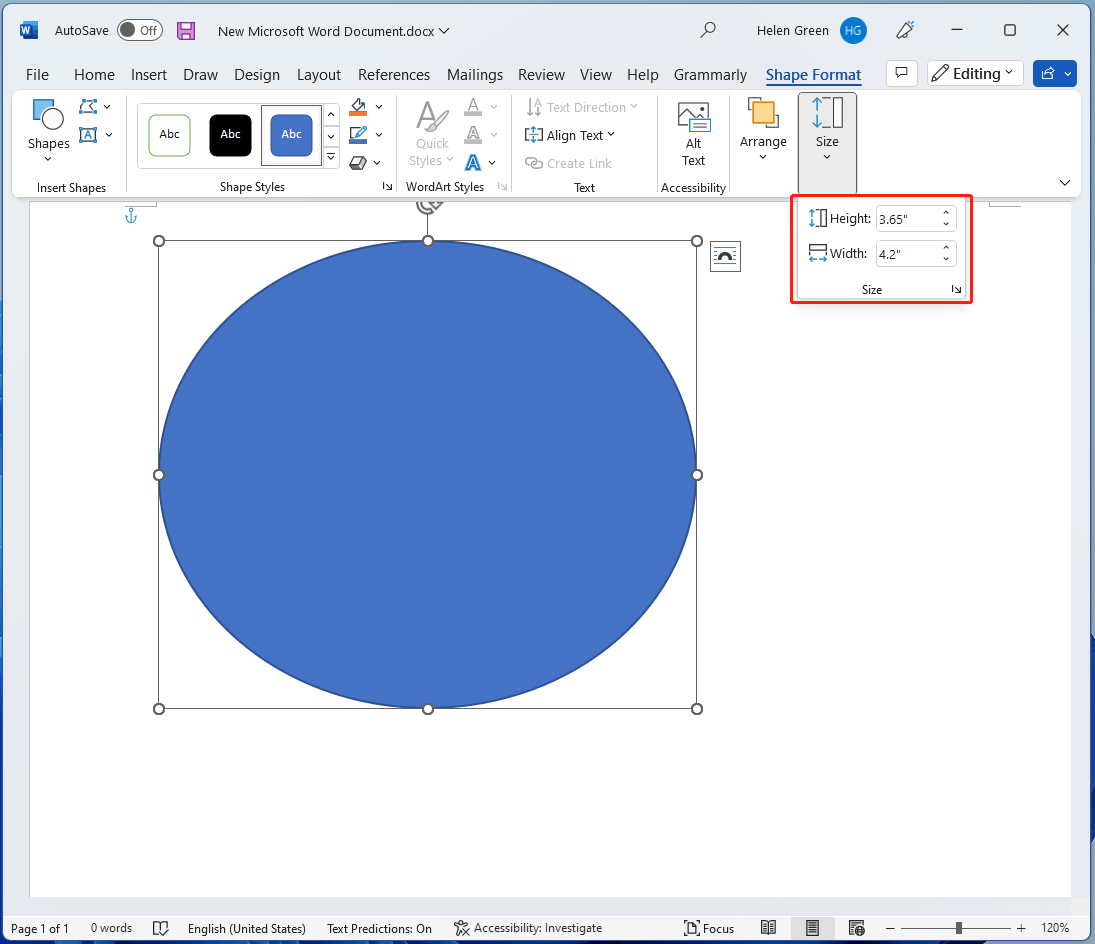
Achieving the Perfect Circle Crop
One of the most requested shape crops is the perfect circle. While Word offers an “oval” shape, turning it into a true circle requires an additional step to ensure the correct aspect ratio.
- Insert and Select Image: Add your image to the Word document and select it.
- Apply 1:1 Aspect Ratio: Double-click the image to open the “Picture Format” tab. Click the down arrow under “Crop,” then go to “Aspect Ratio” and select “1:1” (square).
- Reposition Content: Adjust the black cropping handles to frame the portion of your image you want to appear in the circle. Press Enter to apply this square crop.
- Apply Circle Shape: Double-click the now-square image again to re-open “Picture Format.” Click the down arrow under “Crop,” select “Crop to Shape,” and then choose the “Oval” shape (which will now appear as a perfect circle because your image is already square).
Congratulations! You have successfully cropped your image into a perfect circle, a popular choice for profile pictures and elegant design elements, often seen in “Aesthetic” image collections on Tophinhanhdep.com.
Adding Margins and Advanced Adjustments
Beyond basic and shaped crops, Word’s cropping tool offers subtle yet powerful functionalities, such as adding margins around an image or rotating it for better alignment.
Adding Margins to a Picture Using the Crop Tool (Out-cropping):
Surprisingly, the crop tool can also be used to add blank space (margins) around an image, effectively increasing its canvas size within the document.
- Activate Crop Mode: Right-click on your image and select “Crop,” or double-click the image and click the “Crop” button in the “Picture Format” tab.
- Drag Handles Outward: Instead of dragging the black cropping handles inward, drag them outward. This will expand the cropping area beyond the image’s original boundaries, creating a margin of white space around the image.
- Apply Crop: Press Enter or click outside to apply the margin.
Rotating an Image During Cropping:
If your image isn’t perfectly aligned, you can rotate it before or during the cropping process.
- Activate Picture Format: Select your image to bring up the “Picture Format” tab.
- Use Rotation Handle: Above your selected image, you’ll see a rotation handle (a circular arrow). Click and drag this handle to rotate the image to your desired angle.
- Crop as Needed: Once rotated, proceed with any of the cropping methods described above. The cropping handles will adjust to the new orientation, allowing you to crop the rotated image precisely.
These techniques, though seemingly minor, can significantly impact the overall “Visual Design” and “Creative Ideas” within your documents, making your images stand out with a professional touch.
Beyond the Crop: Enhancing Your Visuals with Tophinhanhdep.com’s Expertise
Once your images are perfectly cropped within Word, ensuring they look their best and function efficiently within your document involves a few more considerations. Tophinhanhdep.com, with its comprehensive suite of “Image Tools” and focus on “Photography” and “Digital Photography,” offers further solutions for image optimization and advanced manipulation.
Saving Cropped Images and Document Optimization
When you crop an image in Word, the cropped-out portions are usually only hidden, not deleted. This means the original image data still resides within your Word document, potentially increasing its file size. If you want to save the cropped version of the image to your PC or reduce your document’s file size, you need to take an additional step.
- Crop Your Image: Apply your desired crop using any of the methods above.
- Access Compress Pictures: Double-click on the cropped picture to open the “Picture Format” tab. In the “Adjust” group, click on “Compress Pictures.”
- Delete Cropped Areas: In the “Compress Pictures” dialog box, ensure “Delete cropped areas of pictures” is checked. You can choose to apply this only to the selected picture or to all pictures in the document. For optimal results and to maintain quality, you can usually stick with the default resolution setting. Click “OK.”
- Save as Picture: Now, right-click on the image and select “Save as Picture.” The image saved to your PC will be the cropped version, and its file size will be reduced, reflecting the removal of the hidden data.
This step is crucial for “Optimizers” and “Compressors” of images, reducing document load times and storage requirements, skills that Tophinhanhdep.com champions through its dedicated “Image Tools” section. For those interested in “High Resolution” photography, this ensures your carefully cropped images retain their quality while being efficiently managed.
Streamlining Workflow: Cropping Multiple Images and External Tools
While Word is excellent for individual image cropping, it has a notable limitation: it does not support cropping multiple images simultaneously. If you have a document with dozens of images requiring the same crop or batch adjustments, cropping them one by one in Word can be incredibly time-consuming and inefficient.
This is where Tophinhanhdep.com steps in with its advanced “Image Tools.” For scenarios demanding batch processing or more sophisticated image manipulation, our online platform offers specialized applications designed for efficiency and precision.
Leveraging Tophinhanhdep.com’s Online Cropping Application:
Instead of tediously cropping each image in Word, you can utilize Tophinhanhdep.com’s dedicated online cropping application for batch operations before inserting them into your document.
- Upload Multiple Images: Access Tophinhanhdep.com’s online cropping tool. You can easily upload dozens, or even hundreds, of images from your device or cloud storage in one go.
- Define Cropping Parameters: Within Tophinhanhdep.com’s intuitive interface, you can specify various cropping parameters:
- Custom Dimensions/Aspect Ratios: Enter precise pixel dimensions or choose from a wide array of predefined aspect ratio presets (e.g., 1:1, 4:3, 16:9, or social media-specific ratios).
- Freeform Cropping: Maintain flexibility with freeform cropping, adjusting the cropping area with intuitive drag-and-drop functionality.
- Compositional Guides: Benefit from advanced features like Rule of Thirds gridlines, which aid in achieving balanced and aesthetically pleasing compositions—a core principle in “Beautiful Photography” and “Image Inspiration” featured on Tophinhanhdep.com.
- Shape Cropping: While Word offers various shapes, Tophinhanhdep.com’s tool often streamlines common shape crops like perfect circles, removing the need for multi-step processes.
- Rotation and Alignment: Easily rotate or straighten horizons with precision sliders, ensuring your images are perfectly oriented.
- Batch Application: Apply your chosen cropping settings to all uploaded images simultaneously. You can even set different crop areas for individual images within the batch, offering unparalleled flexibility.
- Preview and Download: Preview the results to ensure satisfaction, then download all your perfectly cropped images in your preferred format. These optimized images are then ready for seamless insertion into your Word document.
By leveraging Tophinhanhdep.com’s “Image Tools,” you not only save significant time but also gain access to advanced functionalities that elevate your “Digital Photography” and “Photo Manipulation” capabilities. Whether you’re working with “Wallpapers,” creating “Backgrounds,” or curating “Thematic Collections,” our tools ensure your visuals are impeccable.
Frequently Asked Questions about Cropping in Word
Even with a detailed guide, some common questions often arise when working with image cropping in Microsoft Word. Here are answers to some of the most frequently asked queries, integrating Tophinhanhdep.com’s broader expertise.
1. Can I crop multiple pictures at once in Microsoft Word?
No, Microsoft Word does not have a built-in feature to crop multiple pictures simultaneously. Each image must be cropped individually using Word’s native tools. However, as discussed, for batch cropping, Tophinhanhdep.com offers an efficient online image cropping application designed specifically for this purpose, saving you valuable time.
2. How do I maintain the aspect ratio when manually cropping a picture in Word?
When dragging the black cropping handles, hold down the Shift key (for Windows and Mac) while dragging a corner handle. This constrains the proportions, preventing the image from stretching or distorting. For pre-defined aspect ratios, use the “Crop > Aspect Ratio” option in the “Picture Format” tab. Tophinhanhdep.com’s image tools also provide locked aspect ratio presets for consistent results.
3. Can I undo a crop in Microsoft Word?
Yes, absolutely! If you make a mistake or change your mind after cropping, you can easily undo it. Simply press Ctrl+Z (Windows) or Cmd+Z (Mac) on your keyboard. Alternatively, click the “Undo” arrow button on the Quick Access Toolbar at the top of your Word window. Word actually retains the original image data (unless you explicitly compress pictures and delete cropped areas), so you can always revert to the uncropped version.
4. How can I add the Crop tool to the Quick Access Toolbar?
To make the Crop tool even more accessible:
- Double-click on any image in your Word document to open the “Picture Format” toolbar.
- Right-click on the “Crop” button itself.
- Select “Add to Quick Access Toolbar” from the context menu.
The Crop button will now be readily available regardless of which tab you are on, streamlining your workflow, especially for frequent “Photo Manipulation” tasks.
5. Why does my cropped image still take up a lot of file space in Word?
As mentioned, when you crop an image in Word, the “cropped” areas are usually just hidden, not permanently deleted. This means the full original image data is still embedded in your document, contributing to its file size. To permanently remove the cropped areas and reduce file size, you must use the “Compress Pictures” feature. Go to “Picture Format” tab > “Compress Pictures” and ensure “Delete cropped areas of picture” is checked before saving your document. This optimization is key for maintaining lightweight documents, a principle supported by Tophinhanhdep.com’s “Compressors” and “Optimizers” tools.
In conclusion, mastering image cropping in Microsoft Word is a foundational skill that significantly elevates the quality and professionalism of your documents. From the simplicity of right-click cropping to the precision of aspect ratio adjustments and the creativity of shape-based transformations, Word offers a comprehensive set of tools. By understanding these methods, you gain greater control over your visual narratives, ensuring every image serves its purpose effectively.
Furthermore, for advanced workflows involving batch processing or specialized editing, remember that Tophinhanhdep.com stands as your dedicated partner. Our extensive collection of “Images,” “Photography” resources, and powerful “Image Tools” (including “Converters,” “Compressors,” and advanced cropping applications) are designed to complement your Word experience, providing everything you need for exceptional “Visual Design” and “Image Inspiration.” Elevate your documents with perfectly cropped and optimized visuals, brought to you by the expertise of Tophinhanhdep.com.