How to Effortlessly Mount ISO Images: A Tophinhanhdep.com Guide to Digital Media Management

In the rapidly evolving digital landscape, managing vast amounts of data, from high-resolution photographs to complex software applications, demands efficient and intelligent solutions. One such critical utility in the realm of digital content is the ISO image file. Often perceived as a mere technicality, understanding how to interact with and “mount” these files is a fundamental skill for anyone involved in digital photography, visual design, or even just curating extensive collections of wallpapers and backgrounds. At Tophinhanhdep.com, where we celebrate the art of images – be it stunning nature photography, abstract digital art, or inspiring visual designs – we recognize that the tools and techniques for managing these assets are just as important as the assets themselves. This comprehensive guide will demystify the process of mounting ISO images, transforming a potentially intimidating task into a straightforward operation, and showing you how it integrates perfectly with your pursuit of digital excellence.
An ISO file, at its core, is a digital replica of an optical disc, such as a CD, DVD, or Blu-ray. It meticulously encapsulates all the data and file structures of the original disc into a single, convenient file. Think of it as a perfect snapshot of a physical disc, stored digitally. This format has become indispensable for various reasons: it allows for reliable backups of physical media, facilitates the efficient distribution of large software packages (including operating systems like Windows 10 and 11, often detailed in our tutorials), and provides a streamlined way to access content without the need for physical discs or external drives. For creators and enthusiasts alike, whether you’re dealing with a new photography editing suite, a library of textures for graphic design, or a thematic collection of aesthetic images, understanding ISOs is key.
The primary advantage of mounting an ISO file is the ability to access its contents as if a physical disc were inserted into your computer’s drive. This eliminates the physical wear and tear on discs, saves space by reducing reliance on disc libraries, and offers a significant boost in speed and convenience. Instead of burning the ISO file to a real disc – a process that takes time and consumes blank media – you can virtually “insert” the image into a virtual drive. Your computer then treats this virtual drive exactly like a physical one, allowing you to browse files, install software, or extract data directly. This capability is particularly relevant for Tophinhanhdep.com users who frequently download high-resolution stock photos packaged in large archives, or digital art software, where efficiency in deployment and access can significantly enhance creative workflows.

This article, brought to you by Tophinhanhdep.com, will guide you through the various methods of mounting and unmounting ISO images. We will cover native functionalities built into modern Windows operating systems, explore advanced techniques using command-line tools, and touch upon scenarios where third-party utilities might offer enhanced features, ensuring you have all the knowledge to manage your digital media seamlessly.
Understanding ISO Images in the Digital Landscape
In an era defined by digital content, the ISO image stands as a testament to ingenuity in data archiving and distribution. Far from being a relic of the past, these files continue to play a crucial role in how software, operating systems, and even large multimedia collections are packaged and shared. For the Tophinhanhdep.com community, deeply engaged with visual content, grasping the nature of ISOs is essential for efficient digital asset management.

The Essence of a Digital Disc Image
An ISO image is more than just a compressed folder; it is an exact, sector-by-sector copy of an entire optical disc. This means it preserves not only the files and folders but also the bootable properties, file system structure (like UDF or ISO 9660), and other disc-specific metadata. When software companies distribute applications, tools, or operating systems, they often opt for ISO images because it guarantees that the recipient receives an identical, fully functional copy of the original disc. For instance, major software releases, creative suites for visual design, or even large bundles of high-resolution stock photos can be distributed as ISOs, ensuring integrity and ease of deployment.
The beauty of the ISO format lies in its versatility. It allows individuals to create backup copies of their cherished physical media, converting fragile discs into robust digital files that can be stored on hard drives, network-attached storage, or cloud services. This digital preservation is invaluable, especially for older software or unique aesthetic collections that might no longer be readily available. For those dedicated to building comprehensive libraries of beautiful photography or thematic image collections, ISOs provide a structured and efficient way to store and retrieve these extensive datasets. Instead of juggling numerous physical discs, a single ISO file can encapsulate an entire collection, ready to be mounted and accessed on demand.
Bridging Physical and Virtual Media
The concept of “mounting” an ISO file represents a significant leap in convenience and efficiency, bridging the gap between physical and virtual storage. In the past, to access the contents of a CD or DVD, one physically inserted the disc into an optical drive. Mounting an ISO replicates this experience digitally, creating a “virtual drive” on your computer. This virtual drive behaves exactly like a physical one, allowing you to interact with the ISO’s contents as if a real disc were present.
This virtualization offers numerous benefits. Firstly, it eliminates the need for a physical optical drive, which is increasingly absent in modern laptops and desktop computers. Secondly, it drastically speeds up access times; reading data from a virtual drive on a solid-state drive (SSD) is significantly faster than spinning a physical disc. Thirdly, it enhances portability and organization. Imagine carrying dozens of software installers, extensive image libraries, or multiple operating system installation files within a single external hard drive, all accessible instantly without the clutter of physical discs. This seamless integration of virtual media into your computing environment is a core component of modern digital workflows, enabling artists, photographers, and designers to focus more on their creative output and less on logistical bottlenecks. As Tophinhanhdep.com champions high-resolution digital photography and digital art, enabling smooth access to all necessary resources is paramount.
Mounting ISOs Natively on Windows 11 and 10 with Tophinhanhdep.com
One of the most user-friendly developments in recent Windows operating systems is the native support for mounting ISO files. Since Windows 8, users no longer need to rely on third-party software for this common task, making the process incredibly straightforward. At Tophinhanhdep.com, we are committed to providing you with efficient solutions for managing your digital assets, and guiding you through these built-in functionalities is a key part of that mission.
File Explorer: Your Primary Tool for Image Mounting
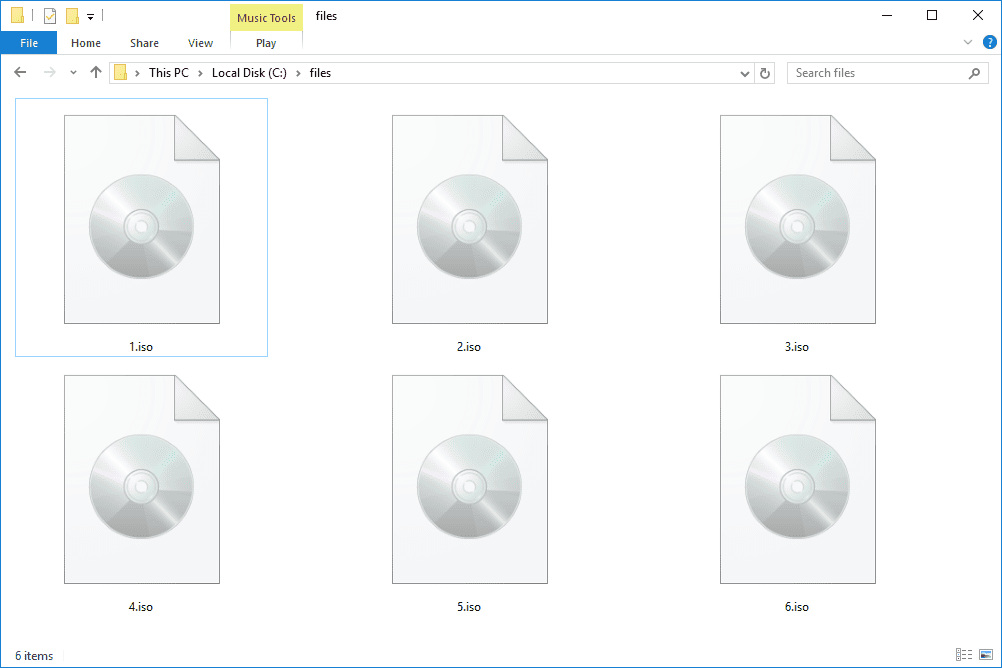
The familiar Windows File Explorer offers several intuitive ways to mount an ISO image, making it accessible to users of all technical proficiencies. These methods allow you to instantly transform an ISO file into an accessible virtual drive, ready to deliver its contents – whether it’s a new graphic design tool, a collection of aesthetic wallpapers, or an installer for an AI upscaler.
Method 1: Double-Click for Instant Access
The quickest and arguably the most common way to mount an ISO file in Windows 11 or 10 is by simply double-clicking it. This action leverages the operating system’s default association for .iso files, automatically creating a virtual drive and opening its contents.
Steps:
- Open File Explorer: Navigate to the folder where your ISO image is stored. This could be your “Downloads” folder, a dedicated “Software” directory, or a specific “Image Collections” folder you’ve curated.
- Locate the ISO File: Find the
.isofile you wish to mount. - Double-Click: Simply double-click on the ISO file.
Once these steps are completed, Windows will automatically mount the ISO image as a new virtual drive, typically assigning it the next available drive letter (e.g., E:, F:, G:). A new File Explorer window will often open, displaying the contents of the ISO, allowing you to access, copy, or install files as needed. This method works seamlessly unless you have previously configured another application (like a file archiver) to be the default program for opening .iso extensions.
Method 2: Context Menu Convenience
For those who prefer explicit control or whose .iso files might be associated with other programs, the context menu offers a reliable alternative for mounting.
Steps:
- Open File Explorer: Browse to the folder containing your ISO image.
- Right-Click: Right-click on the
.isofile. This will bring up the shell context menu. - Select “Mount”: From the options presented, select “Mount.” On some systems, especially older versions of Windows 10, this might appear under a “Disc Image Tools” sub-menu, but “Mount” will be the clear option.
Upon selecting “Mount,” Windows will perform the same operation as the double-click method, creating a virtual drive and making the ISO’s contents available. You can then navigate to “This PC” in File Explorer’s left navigation pane to see your newly mounted virtual drive and access its files. This method, as outlined in detailed tutorials, including those found on Tophinhanhdep.com, provides a robust way to manage your digital media.
Method 3: Ribbon Menu Navigation (Windows 10/11)
Windows File Explorer also includes a ribbon menu at the top, offering another structured approach to mounting ISOs, particularly useful when you’re already working within File Explorer.
Steps:
- Open File Explorer: Navigate to the folder containing your ISO image.
- Select the ISO File: Click once on the
.isofile to select it. - Click the “Mount” Button: In the File Explorer ribbon, you may see a “Disc Image Tools” tab appear (especially on Windows 10) or a “Mount” option directly available in Windows 11. Click this “Mount” button.
This method, while slightly more steps than a double-click, provides a clear visual cue and is consistent with other File Explorer operations. Regardless of which File Explorer method you choose, the outcome is the same: effortless access to your ISO’s contents, empowering your digital photography, graphic design, and content management tasks.
PowerShell: Advanced Control for Digital Asset Managers
For users who prefer command-line interfaces, scripting, or automation, Windows PowerShell provides powerful commands to mount and unmount ISO images. This method offers a higher degree of control and can be integrated into larger scripts for managing extensive libraries of digital assets or deploying multiple software packages. Tophinhanhdep.com supports users at all technical levels, and this section is for those who enjoy precise command-line control.
Mounting with PowerShell Command
To mount an ISO image using PowerShell, you’ll need to specify the exact path to your ISO file.
Steps:
- Open PowerShell as Administrator:
- Open the Start menu.
- Search for “PowerShell.”
- Right-click on “Windows PowerShell” (or “PowerShell” in Windows 11) from the search results.
- Select “Run as administrator.” This is crucial for granting the necessary permissions.
- Execute the Mount Command: Type the following command and press Enter:
Mount-DiskImage -ImagePath "PATH\TO\ISOFILE"- Replace
"PATH\TO\ISOFILE"with the actual, full path to your.isofile. For example, if your Windows 11 ISO is in your Downloads folder, the command might look like:(Remember to replaceMount-DiskImage -ImagePath "C:\Users\USERNAME\Downloads\Windows11.iso"USERNAMEwith your actual Windows user account name).
- Replace
Once the command executes successfully, the ISO image will be mounted as a new virtual drive, and its contents will be accessible through File Explorer. This method is particularly useful for system administrators or visual designers who might need to quickly mount various image files for different projects or software installations.
Unmounting with PowerShell Command
Just as you can mount an ISO with PowerShell, you can also unmount it using a similar command.
Steps:
- Open PowerShell as Administrator: (Follow the same steps as for mounting).
- Execute the Dismount Command: Type the following command and press Enter:
Dismount-DiskImage -ImagePath "PATH\TO\ISOFILE"- Again, replace
"PATH\TO\ISOFILE"with the exact same path to the ISO file that you previously mounted. For example:Dismount-DiskImage -ImagePath "C:\Users\USERNAME\Downloads\Windows11.iso"
- Again, replace
After executing this command, the virtual drive associated with that ISO image will be removed, and the image will no longer be accessible until you mount it again. This level of precise control is invaluable for advanced users managing complex digital environments, ensuring resources are only utilized when actively needed, aligning with the optimization principles Tophinhanhdep.com often advocates for in image tools and digital workflows.
Unmounting Your Virtual Drives
Once you have finished working with the contents of an ISO image, it’s good practice to unmount it. Unmounting frees up the virtual drive letter and ensures that your system resources are efficiently managed. While leaving an ISO mounted typically doesn’t cause significant issues, particularly with modern systems, removing it when no longer needed helps maintain a clean and organized computing environment, reflecting the aesthetic and organized principles valued by Tophinhanhdep.com.
The process of unmounting a virtual drive in Windows 11 and 10 is as simple as mounting it, primarily through the File Explorer.
Steps to Unmount an ISO Image:
- Open File Explorer: You can do this by clicking its icon on the taskbar, pressing
Windows Key + E, or searching for it in the Start menu. - Navigate to “This PC”: In the left navigation pane of File Explorer, expand (if necessary) or click on “This PC.” This will display all your drives, including your physical hard drives and any currently mounted virtual drives.
- Locate the Virtual Drive: Identify the virtual drive that corresponds to your mounted ISO image. It will usually have a distinct icon and often display the name of the ISO file.
- Right-Click and “Eject”: Right-click on the virtual drive. From the context menu that appears, select the “Eject” option.
Immediately after selecting “Eject,” the virtual drive will disappear from “This PC,” signifying that the ISO image has been successfully unmounted. The contents are no longer accessible until you choose to mount the ISO again. This simple “eject” function is the equivalent of physically removing a disc from a drive, providing a clean separation from the digital media. For users who frequently manage large high-resolution image collections, numerous digital art brushes, or various photography presets distributed as ISOs, mastering this quick unmounting step contributes to an efficient and clutter-free digital workspace.
Navigating ISOs on Older Windows Versions or Enhancing Functionality with Third-Party Solutions
While Windows 8 and later versions boast excellent native ISO mounting capabilities, users of older Windows operating systems (like Windows 7, Vista, or XP) do not have this built-in functionality. Furthermore, even with native support, some users might seek advanced features or broader format compatibility that dedicated third-party software offers. Tophinhanhdep.com understands that a diverse set of tools is necessary for comprehensive digital content management, whether you’re working with classic photography software on an older machine or pushing the boundaries of visual design with advanced image manipulation utilities.
For those running older Windows versions, or individuals looking for more robust features beyond simple mounting (such as creating ISOs, burning images, or supporting obscure disc image formats), a variety of third-party solutions are available. These tools often provide a more comprehensive suite for disc image management, transforming how users interact with digital media. Tophinhanhdep.com often reviews and recommends various image tools, from converters and compressors to AI upscalers, and disc image utilities fit right into this category.
Essential Tools for Comprehensive Image Management
When native Windows features aren’t sufficient, specialized software steps in to fill the gap, offering functionalities that extend well beyond basic ISO mounting. These tools can be invaluable for creative professionals and digital enthusiasts who deal with diverse media formats and complex workflows.
One such category of tools includes those that offer a “one-click mounting” experience, often integrating directly into the Windows Explorer shell context menu. This means you can right-click any supported disc image file (not just ISOs, but often CUE, NRG, MDS/MDF, CCD, and IMG files) and select a “Mount” option. These utilities are typically designed to be lightweight, require minimal system resources, and support an unlimited number of virtual drives, allowing you to access multiple disc images simultaneously. Many of these tools are also free for any kind of use, licensed under open-source agreements, making them accessible to everyone. Tophinhanhdep.com, in its commitment to image inspiration and creative ideas, often highlights such versatile tools that streamline the artist’s or photographer’s workflow.
For users needing even more advanced capabilities, some powerful image utilities—regularly featured in Tophinhanhdep.com’s guides on image tools—offer a complete toolkit for disc image manipulation. These include:
- Creating ISO Images: Beyond just mounting, these tools allow you to create ISO files from physical discs, existing files, or folders. This is incredibly useful for archiving your own collections of high-resolution stock photos, compiling digital art portfolios, or backing up essential software installers.
- Editing and Converting: Advanced tools enable editing the contents of an ISO file without first extracting everything, and converting disc image files between various formats.
- Burning to Disc: For those who still need to create physical copies, these utilities provide robust disc burning capabilities, allowing you to burn ISOs to CDs, DVDs, or Blu-ray discs.
- Compression and Encryption: Some software offers features to compress ISO files to save storage space or encrypt them for security, protecting sensitive digital photography projects or exclusive aesthetic content.
Examples of such powerful, multi-functional software often reviewed and explained on Tophinhanhdep.com might include comprehensive image processing suites that, in their free versions, allow specific operations up to a certain file size (e.g., 300 MB), while full versions unlock unlimited functionality. These tools not only handle ISOs but also extend support to a broader array of disc image formats like BIN, CCD, and UDF, ensuring maximum compatibility for any digital media you encounter. Whether you’re a professional photographer curating high-resolution image libraries or a graphic designer experimenting with digital art, leveraging these specialized tools, as often detailed in Tophinhanhdep.com’s extensive tutorials, can significantly enhance your digital workflow and open up new possibilities for managing your visual assets.
Integrating ISO Management into Your Creative Workflow
At Tophinhanhdep.com, our mission revolves around inspiring and empowering users in the vast world of images and visual design. From providing stunning wallpapers and backgrounds to exploring advanced digital photography techniques and fostering creative ideas, every aspect of our platform is designed to enhance your visual journey. Understanding and effectively managing ISO images might seem like a purely technical skill, but it is, in fact, an integral part of a seamless and efficient creative workflow.
Consider the diverse categories we feature on Tophinhanhdep.com and how ISO management directly supports them:
Images (Wallpapers, Backgrounds, Aesthetic, Nature, Abstract, Sad/Emotional, Beautiful Photography)
For enthusiasts and professionals who curate vast collections of high-resolution images, ISO files can be an incredibly efficient archival and distribution method. Imagine downloading a thematic collection of nature photography or abstract art backgrounds from a stock photo provider, all neatly packaged in a single ISO file. Mounting this ISO allows you to browse, select, and extract specific images without cluttering your main storage with unzipped archives. This keeps your digital workspace tidy and your image libraries organized, ensuring you always have quick access to the perfect aesthetic or emotional wallpaper when inspiration strikes. Furthermore, for digital photographers, packaging large sets of RAW files or edited JPEGs into an ISO for backup or client delivery ensures data integrity and ease of transfer.
Photography (High Resolution, Stock Photos, Digital Photography, Editing Styles)
The world of photography, particularly digital photography, relies heavily on software and high-volume data. Photography editing suites, from basic photo manipulators to advanced graphic design programs, are frequently distributed as ISOs. Mounting these installers quickly gets you up and running with the latest tools, allowing you to apply new editing styles or process high-resolution stock photos more efficiently. Beyond software, some stock photo agencies might provide vast libraries of images or textures on ISOs, offering a structured way to deliver enormous amounts of visual content. Efficient ISO management means less time wrestling with installations and more time perfecting your shots and enhancing your digital photography skills.
Image Tools (Converters, Compressors, Optimizers, AI Upscalers, Image-to-Text)
Many specialized image tools, crucial for the Tophinhanhdep.com community, are often distributed in ISO format. Think of a powerful AI upscaler that can transform low-resolution images into stunning high-resolution photography, or a comprehensive suite of image converters and optimizers. Installing these tools from an ISO image ensures a smooth and complete setup. By quickly mounting the ISO, you can access the installer, get your new tools deployed, and immediately start enhancing your images, compressing files for web use, or even experimenting with image-to-text applications, all without the hassle of physical media or prolonged file extraction. This direct access to productivity tools directly contributes to streamlining your creative process.
Visual Design (Graphic Design, Digital Art, Photo Manipulation, Creative Ideas)
In the realm of visual design, the ability to rapidly access resources is paramount. Graphic designers and digital artists frequently work with extensive libraries of fonts, brushes, textures, templates, and reference images. These assets, especially in large, curated collections, might be distributed as ISOs. Mounting such an ISO allows designers to quickly browse and import specific elements into their graphic design or photo manipulation software. This rapid access fuels creative ideas, enabling faster prototyping and iteration, and ensures that the creative flow isn’t interrupted by tedious file management. Whether you’re working on a new digital art piece or a complex photo manipulation project, efficient ISO management empowers you to leverage every digital asset at your disposal.
Image Inspiration & Collections (Photo Ideas, Mood Boards, Thematic Collections, Trending Styles)
For those seeking image inspiration or building mood boards, ISOs can serve as excellent containers for curated thematic collections. Imagine a collection of trending aesthetic images, specific photo ideas for a shoot, or an entire library of visual assets organized by theme. Mounting these ISOs provides an immediate, categorized source of inspiration, allowing you to quickly pull elements for your mood boards or reference trending styles without having to download and extract individual files from numerous sources. This organized approach to managing inspirational content directly aligns with Tophinhanhdep.com’s goal of fostering creativity and providing rich, diverse visual experiences.
In conclusion, understanding how to mount and manage ISO images is far more than a technical trick; it’s a foundational skill for anyone deeply invested in digital content. It underpins efficiency, organization, and accessibility across all the core interests of Tophinhanhdep.com – from appreciating beautiful photography to mastering image tools and executing innovative visual design. By embracing these simple yet powerful techniques, you unlock a smoother, more productive, and ultimately more inspiring digital creative journey. We encourage you to explore these methods and discover how seamless digital media management can elevate your passion for images and visual aesthetics. For further guidance on optimizing your digital assets and discovering more creative tools, continue to explore Tophinhanhdep.com, your ultimate resource for all things visual.