Mastering Image Resizing in Adobe InDesign: A Comprehensive Guide

Adobe InDesign stands as an indispensable tool for graphic designers, publishers, and anyone involved in crafting visually rich documents such as magazines, brochures, posters, books, and digital layouts. Its robust capabilities allow for the seamless integration of text, vector graphics, and raster images, enabling the creation of professional and aesthetically pleasing designs. A fundamental skill within this powerful application, and often a point of initial challenge for new users, is effectively resizing images. Whether your goal is to perfectly align an image with your meticulously designed grid, prevent unwanted cropping, or avoid distortion, understanding the various methods of image resizing in InDesign is crucial. This guide from Tophinhanhdep.com will delve into the nuances of manipulating image dimensions within InDesign, ensuring your visual content always meets the highest standards of quality and presentation.
At Tophinhanhdep.com, we understand the pivotal role that high-quality visuals play across various domains, from stunning wallpapers and backgrounds to professional digital photography and graphic design. Our platform is dedicated to providing comprehensive resources on everything image-related, including practical guides like this one, advanced image tools, and endless inspiration. Proper image handling in InDesign is an extension of this commitment, empowering you to create compelling visual narratives that resonate with your audience.
Understanding Frames and Content in InDesign
Before diving into the specific resizing techniques, it’s vital to grasp a core concept in InDesign: the distinction between an image’s frame and its content. When you place an image into an InDesign document, you’re not just placing the image itself; you’re placing it within a frame. This frame acts as a container, controlling the visible area of the image and its position on your page. The image content, on the other hand, is the actual digital picture. Both can be resized independently or simultaneously, and understanding how each interacts is the key to successful image manipulation. This unique frame-based approach is what gives InDesign its unparalleled precision in visual design and layout.
Resizing the Image Frame Independently
![]()
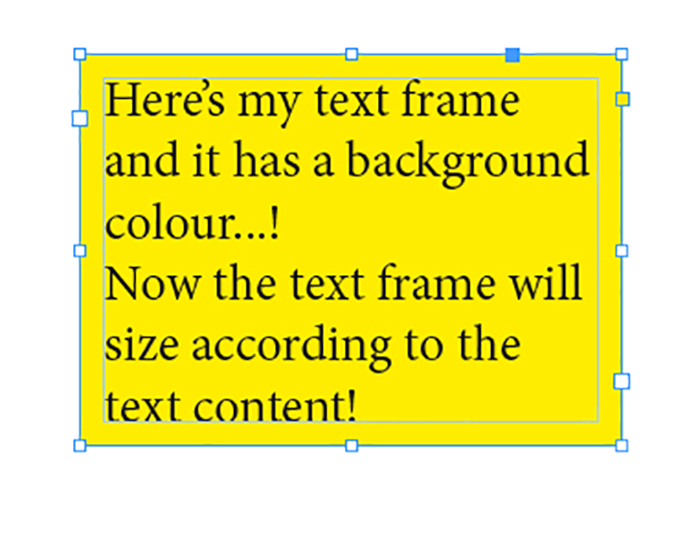
Often, you might need to adjust the boundaries of your image without altering the image itself. This is akin to cropping a photograph, but with the added flexibility of being able to “uncrop” later. Resizing the frame is a straightforward process and is usually the first step in positioning your visuals.
To resize only the frame holding your image:
- Select the Selection Tool (Black Arrow): This is the primary tool for selecting objects and frames in InDesign. You can access it from the Tools panel or by pressing ‘V’ on your keyboard.
- Click on the Image Frame: Once selected, you’ll see a bounding box with handles around the frame.
- Drag Corner or Side Handles: Click and drag any of the corner or side handles of this bounding box.
- Without holding Shift: Dragging handles without holding the Shift key allows you to freely adjust the height and width of the frame independently. This means you can stretch or compress the frame, effectively cropping or revealing more of the underlying image content. The image inside will not scale; only its visible area will change.
This method is incredibly useful for fine-tuning the composition within a layout, allowing you to focus on the desired portion of an image while maintaining its original scale. For instance, if you have a beautiful nature photograph placed in your document, and you want to highlight a specific detail like a flower, resizing the frame will allow you to zoom in on that detail without actually changing the flower’s size within the frame.
Resizing the Image Content Independently
Sometimes, the frame is perfectly sized for your layout, but the image within it needs to be scaled up or down. This is where you modify the actual image content without affecting its container frame. This technique is particularly important for maintaining consistent frame sizes across your design while adapting different images to fit.
To resize only the image content within its frame:
- Select the Selection Tool (Black Arrow) and Click the Frame: This initially selects the frame.
- Access the Content Grabber or Use Direct Selection Tool:
- Content Grabber: A small white circle (often referred to as the ‘Content Grabber’) will appear in the center of the image when the frame is selected. Clicking this circle will select the image content itself, indicated by a brown bounding box around the image (which might extend beyond the visible frame).
- Direct Selection Tool (White Arrow): Alternatively, you can directly select the image content by choosing the Direct Selection Tool from the Tools panel (or pressing ‘A’) and clicking on the image. This will also reveal the brown bounding box around the image content.
- Drag Corner Handles (with Shift for proportion): With the image content now selected (brown bounding box visible), click and drag any of its corner handles.
- Hold down the Shift key: This is crucial. Holding Shift while dragging will scale the image proportionally, preventing distortion. This ensures that your high-resolution photography maintains its aspect ratio and visual integrity.
- Without holding Shift: Dragging without the Shift key will distort the image, stretching or squishing it. This is generally undesirable unless you’re aiming for a very specific, stylized effect, which can sometimes be part of advanced photo manipulation techniques.
This method is essential when working with varied image sizes or aesthetic images that need to fit into predefined spaces without altering the overall page structure. For example, if you’re creating a mood board of thematic collections on Tophinhanhdep.com, you can quickly adjust individual photos to fit standardized frame sizes while preserving their original look.
Proportionate and Non-Proportionate Resizing
The decision to resize an image proportionally or non-proportionally significantly impacts its visual quality and overall presentation. Proportionate resizing is generally preferred to maintain the aspect ratio and prevent distortion, especially for aesthetic and beautiful photography. Non-proportionate resizing, while sometimes necessary for creative effects, carries the risk of degrading image quality if not handled carefully.
Resizing Images Proportionally (Maintaining Aspect Ratio)
Maintaining an image’s aspect ratio ensures that it scales uniformly, preserving its original shape and avoiding any stretched or squished appearance. This is almost always the goal when placing images in professional layouts. In InDesign, you have several powerful ways to achieve this, whether you’re adjusting just the image, just the frame, or both simultaneously.
-
Resizing Both Frame and Content Proportionally (with Selection Tool + Shift):
- Select the image frame with the Selection Tool (Black Arrow).
- Hold down Shift and then drag any of the corner handles of the frame’s bounding box.
- Crucially: For this to scale both the frame and content together, ensure the “Auto-Fit” option in the Control Panel is checked. The Auto-Fit feature, when enabled, automatically scales the content within the frame whenever the frame is resized. This is a powerful time-saver for maintaining a cohesive look.
-
Resizing Only Content Proportionally (with Direct Selection Tool + Shift):
- Use the Direct Selection Tool (White Arrow) or click the Content Grabber with the Selection Tool to select the image content itself (you’ll see the brown bounding box).
- Hold down Shift and drag any of the corner handles of the brown bounding box. The image will scale uniformly within its frame, leaving the frame size unchanged.
These methods are fundamental for ensuring your images, whether they are high-resolution stock photos or digital art, look exactly as intended within your designs. They uphold the visual integrity that defines quality graphic design.
Resizing Non-Proportionally (Distortion or Cropping)
While often discouraged for photographic content due to the risk of distortion, non-proportionate resizing can be intentionally used for specific design elements or to fit an image into an irregularly shaped frame. However, it’s more commonly encountered when you only want to adjust the frame’s dimensions, which results in cropping the image rather than distorting it.
-
Resizing Frame Non-Proportionally (Cropping):
- Select the image frame with the Selection Tool (Black Arrow).
- Drag any of the corner or side handles of the frame’s bounding box without holding the Shift key.
- This will change the dimensions of the frame, either horizontally or vertically, effectively cropping or revealing more of the image content. The image itself does not change size or aspect ratio; only the window through which you view it changes. This is extremely useful for fine-tuning the visible area of images like backgrounds or abstract art.
-
Resizing Content Non-Proportionally (Distortion):
- Select the image content using the Direct Selection Tool (White Arrow) or the Content Grabber.
- Drag any of the corner or side handles of the brown content bounding box without holding the Shift key.
- This action will stretch or compress the image, altering its aspect ratio and causing distortion. While generally to be avoided for realistic images, it can be employed for stylistic effects in visual design or certain digital art applications where intentional stretching is part of the creative vision.
Understanding the implications of both proportionate and non-proportionate resizing is critical. Always prioritize proportionate scaling for photography to maintain realism, and use non-proportionate scaling with caution and clear intent.
Advanced Resizing and Fitting Options
InDesign offers a powerful set of automated “Fitting” options that can quickly align your image content with its frame, saving significant time and ensuring consistency. These options are invaluable for managing multiple images, streamlining your workflow, and maintaining precise visual design standards.
Using the “Fitting” Options Menu
The “Fitting” options provide intelligent ways to resize images and frames relative to each other, often with a single click. You can access these options by right-clicking (PC) or Control-clicking (Mac) on a selected image frame, or by navigating to Object > Fitting in the main menu.
Here’s an overview of the key fitting options and their applications:
- Fill Frame Proportionally: This option scales the image proportionally until it completely fills the entire frame. If the image’s aspect ratio doesn’t perfectly match the frame’s, some parts of the image content may be cropped out, but no empty space will remain within the frame. This is ideal for background images or when you want an image to extend fully to the frame edges, even if it means losing some peripheral details.
- Fit Content Proportionally: This scales the image content proportionally to fit entirely within the frame. The aspect ratio is maintained, and the entire content remains visible. If the image’s aspect ratio doesn’t match the frame’s, empty space (letterboxing or pillarboxing) will appear along one dimension of the frame. This is perfect when you absolutely cannot crop any part of an image, such as a product shot or a full-figure photograph.
- Content-Aware Fit: This intelligent feature, often powered by AI, automatically scales and positions the content to fit the frame, considering the image’s aspect ratio, the frame’s dimensions, and the visual prominence of objects within the image. It aims to maximize visibility without significant cropping or empty space, making smart decisions about what parts of the image are most important. This is a game-changer for efficiently managing a large collection of images, such as stock photos or diverse aesthetic images.
- Fit Frame to Content: This option resizes the frame to perfectly encompass the entire image content without any distortion. The frame adjusts its dimensions to match the image’s bounding box. This is useful if you’ve placed an image and then want the frame to snugly fit around it, effectively “uncropping” any previously hidden parts.
- Fit Content to Frame: This scales the content non-proportionally to completely fill the frame. This means the image will be stretched or compressed to match both the width and height of the frame, potentially causing significant distortion. While generally avoided for photographs, it can be used for abstract or highly stylized imagery where distortion is acceptable or even desired.
- Center Content: This option centers the image content horizontally and vertically within its frame without any scaling. If the content is larger than the frame, it will overflow the frame boundaries, but its center will align with the frame’s center. This is useful for precise alignment when you’ve manually scaled the image.
Additionally, “Clear Frame Fitting Options” and “Frame Fitting Options” (which opens a dialog box for more precise control) allow you to manage and edit the default fitting settings for selected frames. These fitting options provide unparalleled control, enabling designers to quickly achieve their desired visual outcome, whether working with static images or preparing interactive elements for digital art.
Quality Considerations: Raster vs. Vector
When resizing images, especially in a professional design context, understanding the fundamental difference between raster and vector imagery is paramount for preserving quality. Tophinhanhdep.com, with its focus on high-resolution photography and digital art, always emphasizes this distinction.
-
Raster Images: These images are composed of a grid of pixels (picture elements). Photographs (like JPEGs, PNGs, TIFFs) are typically raster images.
- Scaling Up: When you enlarge a raster image significantly beyond its original resolution, the individual pixels become visible, leading to a pixelated or “blocky” appearance and a noticeable loss of quality. This is because InDesign has to “guess” new pixel information to fill the expanded space.
- Scaling Down: Scaling down raster images generally maintains quality, as you’re discarding pixel information rather than creating it. However, excessive reduction can still lead to loss of fine detail.
- Best Practice: Always try to work with high-resolution source images, especially if they are intended for print. If you need to upscale a raster image significantly and preserve quality, consider using advanced tools like AI Upscalers available on platforms like Tophinhanhdep.com.
-
Vector Images: These images are composed of mathematical paths, points, and curves rather than pixels. Illustrations, logos, and graphics created in programs like Adobe Illustrator are typically vector (e.g., AI, EPS, SVG).
- Scaling without Quality Loss: The significant advantage of vector imagery is that it can be scaled to any size, from a tiny icon to a billboard, without any loss of quality. The mathematical definitions simply recalculate for the new size, rendering sharp, crisp edges every time. This makes vector graphics ideal for logos, infographics, and digital art where scalability is essential.
Knowing whether you are working with a raster or vector image will inform your resizing strategy. For raster images, prioritize careful proportionate scaling and avoid extreme enlargements. For vector graphics, feel free to scale as needed, confident that quality will be maintained. This knowledge is a cornerstone of effective visual design and a principle we uphold at Tophinhanhdep.com when showcasing various types of images.
Optimizing Your Workflow and Exploring Alternatives
Mastering image resizing in InDesign not only improves the aesthetics of your documents but also significantly boosts your efficiency as a designer. Integrating these techniques into your daily workflow, alongside exploring complementary tools, ensures you always produce top-tier visual content.
Streamlining Resizing for Efficiency
To become truly proficient, consider these workflow optimizations:
- Keyboard Shortcuts: Memorize key shortcuts. Holding Shift for proportionate scaling is the most important. For combined frame and content scaling, checking the Auto-Fit box in the Control Panel simplifies the process, allowing you to use the Selection Tool + Shift key as a single action for both. You can also hold Alt (Windows) / Option (Mac) while dragging a corner handle (with or without Shift) to scale from the center of the object.
- Default Fitting Options: Set default fitting options for new frames if you consistently use a particular style (e.g., “Fit Content Proportionally” for all images). This can be done via
Object > Fitting > Frame Fitting Options...when no object is selected. - Practice and Experimentation: The best way to learn is by doing. Experiment with different images, frame sizes, and fitting options to see how they interact. This hands-on experience will solidify your understanding and speed up your design process.
Efficient resizing is not just about moving handles; it’s about making informed decisions quickly to maintain the integrity of your aesthetic images and high-resolution photography within the overarching visual design of your project.
External Tools and Batch Processing
While InDesign is powerful, it’s also a comprehensive desktop application that sometimes has a steep learning curve for specific tasks, especially for beginners. For quick, simple resizing, or for processing large batches of images outside of a document layout context, dedicated online image tools can be a more efficient solution.
Tophinhanhdep.com offers a suite of Image Tools that serve as excellent companions or alternatives for specific image processing needs:
- Online Image Compressors and Optimizers: Before even importing images into InDesign, using an online compressor or optimizer can reduce file sizes without noticeable quality loss, leading to faster InDesign document performance and smaller output files (especially for web-bound documents). These tools are ideal for preparing large volumes of background images or stock photos.
- AI Upscalers: If you have raster images that need to be enlarged beyond their original resolution without pixelation, Tophinhanhdep.com’s AI Upscalers can leverage artificial intelligence to intelligently add detail and increase resolution, making them suitable for larger print formats or high-resolution displays. This is a crucial tool when working with digital photography that wasn’t initially captured at a high enough resolution.
- Batch Resizers: For processing multiple images at once (e.g., resizing an entire folder of wallpapers or thematic collections to a consistent dimension), dedicated online batch resizers offer a streamlined approach. You can upload several images, define your desired output size (by pixels or percentage), choose to maintain aspect ratio, and then download all processed images simultaneously. This saves immense time compared to resizing each image individually in a desktop application.
These online tools are accessible directly from your browser, requiring no software installation, and are designed for ease of use. They complement InDesign by providing specialized functionalities that might be quicker or more automated for certain tasks, especially when preparing images before they enter the intricate layout environment of InDesign. Whether you’re dealing with abstract art, nature photography, or simply compiling image inspiration for a mood board, these tools can streamline your image preparation workflow.
Conclusion
Mastering how to resize an image in Adobe InDesign is a fundamental skill for any graphic designer, publisher, or creative professional. By understanding the interplay between image frames and their content, and by utilizing InDesign’s versatile tools—from the basic Selection and Direct Selection tools to the intelligent “Fitting” options and the “Auto-Fit” feature—you can ensure your visual content is always perfectly presented. The ability to resize proportionally, without cropping, or even intentionally distorting for artistic effect, provides the precision needed for professional visual design.
At Tophinhanhdep.com, we believe that stunning visuals are at the heart of effective communication and captivating aesthetics. Our platform is your ultimate resource for everything related to images: from providing high-quality wallpapers and backgrounds to offering insights into digital photography and comprehensive image tools. Whether you’re exploring creative ideas for photo manipulation, curating thematic collections, or simply seeking image inspiration, Tophinhanhdep.com supports your journey.
By applying the techniques outlined in this guide, you’re not just resizing images; you’re enhancing your ability to craft compelling narratives and create visually harmonious designs. Remember to consider the impact of raster vs. vector imagery on quality, and don’t hesitate to leverage Tophinhanhdep.com’s powerful online image tools for efficiency and advanced processing. Happy designing, and keep creating beautiful visuals!