Mastering Image Rotation: A Comprehensive Guide for Tophinhanhdep.com Users

In the vibrant world of digital imagery, where every pixel contributes to the overall aesthetic, the orientation of an image plays a crucial role. Whether you’re curating stunning wallpapers, perfecting a nature photograph, crafting an abstract piece of digital art, or simply preparing a document, knowing “how do I rotate an image” is a fundamental skill. A perfectly aligned image can transform a good visual into a great one, conveying the intended message and enhancing its appeal. Conversely, a crooked horizon or an upside-down portrait can detract significantly from even the most high-resolution photography.
At Tophinhanhdep.com, we understand the importance of visual excellence. Our platform is a hub for high-quality images, from breathtaking landscapes and aesthetic backgrounds to stock photos and creative graphic design. We also provide insights into various image tools, photography techniques, and visual design principles. This guide is designed to equip you with the knowledge and steps to effortlessly rotate images across different platforms, ensuring your visuals always meet the highest standards, perfectly aligning with the resources and inspiration you find on Tophinhanhdep.com. From basic adjustments in everyday software to intricate manipulations in professional editing suites, we’ll cover the essential techniques to master image rotation.
Understanding the Fundamentals of Image Rotation for Visual Excellence
Before diving into the specifics of various software, it’s essential to grasp the fundamental concepts behind image rotation. Understanding “why” and “how” different rotation types work will empower you to make informed decisions and achieve the desired visual outcome for your projects, whether they involve wallpapers, backgrounds, or detailed photo manipulation.
Why Image Orientation Matters in Visual Design
The orientation of an image profoundly impacts its visual narrative and aesthetic appeal. Imagine a magnificent nature photograph where the horizon line is slightly tilted, or a beautiful portrait that’s inadvertently sideways. Such misalignments can disrupt the viewer’s perception, creating a sense of unease or unprofessionalism. For content creators and visual enthusiasts leveraging Tophinhanhdep.com for resources, ensuring correct image orientation is paramount.
- Wallpapers and Backgrounds: A wallpaper with an incorrect orientation can look jarring on a device screen, undermining the aesthetic quality that users seek from Tophinhanhdep.com’s curated collections. Perfect rotation ensures the image fills the screen harmoniously.
- Professional and Digital Photography: In high-resolution and stock photos, precision is key. A slightly rotated photograph can render it unusable for professional purposes, requiring meticulous editing styles to correct.
- Aesthetic and Thematic Collections: When building mood boards or thematic collections (be it abstract, sad/emotional, or beautiful photography), consistent and correct orientation helps maintain a cohesive and intentional look, guiding the viewer’s eye as intended by the original photo ideas.
- Graphic Design and Digital Art: Within graphic design or digital art projects, individual elements, text, or shapes often need precise rotation to achieve balance, movement, or a specific creative idea. Misaligned elements can break the visual flow and reduce the impact of the overall design.
Correct image orientation isn’t just about fixing mistakes; it’s a creative tool. It allows you to present your images as intended, enhance storytelling, and ensure that every visual you create or use from Tophinhanhdep.com is impactful and aesthetically pleasing.
Exploring Various Types of Image Rotation
When we talk about rotating an image, we’re not just limited to turning it upside down. Digital tools offer a range of rotation options, each serving a distinct purpose in image manipulation.
- Fixed Angle Rotations (90, 180 Degrees): These are the most common and straightforward rotations. Turning an image 90 degrees clockwise or counterclockwise effectively shifts its orientation from portrait to landscape or vice versa. A 180-degree rotation flips the image completely upside down. These are often used to correct images taken with incorrect camera orientation or to quickly adjust layouts.
- Arbitrary (Specific Degree) Rotations: For fine-tuning and creative tilting, arbitrary rotation allows you to specify an exact angle, such as 15 degrees, 45 degrees, or any fractional degree. This is invaluable for straightening slightly crooked horizons in landscape photography, adding a dynamic tilt to a product shot, or creating unique visual designs.
- Flipping/Mirroring: While not strictly a rotation around a central point, flipping an image horizontally or vertically creates a mirror effect. This can be used for aesthetic purposes, to create reflections, or to match a layout where elements need to face a specific direction.
- Canvas Rotation vs. Object/Layer Rotation: It’s crucial to distinguish between rotating the entire canvas (the whole workspace) and rotating a specific object or layer within that canvas.
- Canvas Rotation: This affects the entire image, including all layers and the background. It changes the overall dimensions if the rotation is arbitrary, exposing new background areas. In some software, it might also refer to temporarily rotating your view of the canvas without affecting the actual image data.
- Object/Layer Rotation: This only affects the selected element—be it a picture, shape, text box, or a specific selection. The rest of the image remains untouched, allowing for precise manipulation of individual components within a complex visual design.
Understanding these different types of rotation is the first step towards effectively using image tools and achieving your desired visual outcomes, complementing the diverse image collections available on Tophinhanhdep.com.
Effortless Image Rotation in Microsoft Word for Document Enhancement
While Tophinhanhdep.com focuses on high-quality visuals, many users frequently integrate images into documents for presentations, reports, or creative projects. Microsoft Word is a widely used tool for this, and knowing how to properly orient your images within it is essential for maintaining a professional and polished appearance. Even the most stunning stock photos or beautiful photography from Tophinhanhdep.com can look subpar if not rotated correctly in your document.
Step-by-Step Manual Rotation in Word
Adjusting the orientation of a picture or shape in Microsoft Word can be surprisingly intuitive once you know where to look. This method is ideal for quick visual adjustments where extreme precision isn’t the primary concern.
- Open Your Document: Begin by opening the Microsoft Word document containing the image you wish to rotate.
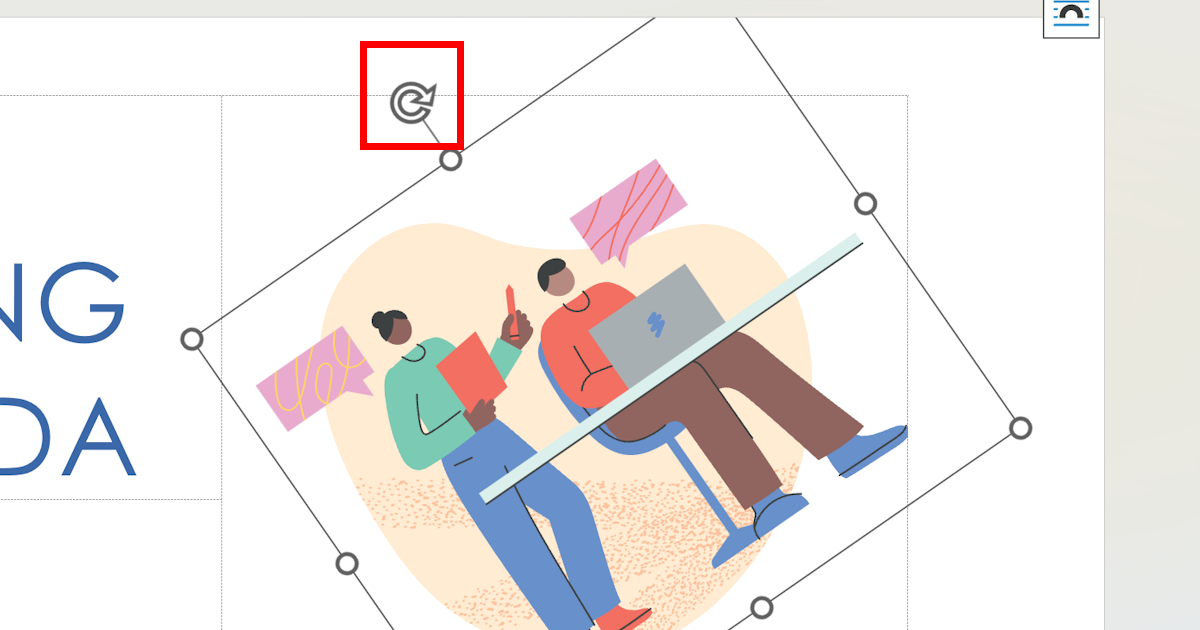
- Select the Image: Click on the picture or shape. You’ll notice a border appearing around it, along with small handles at the corners and sides, indicating that it’s selected.
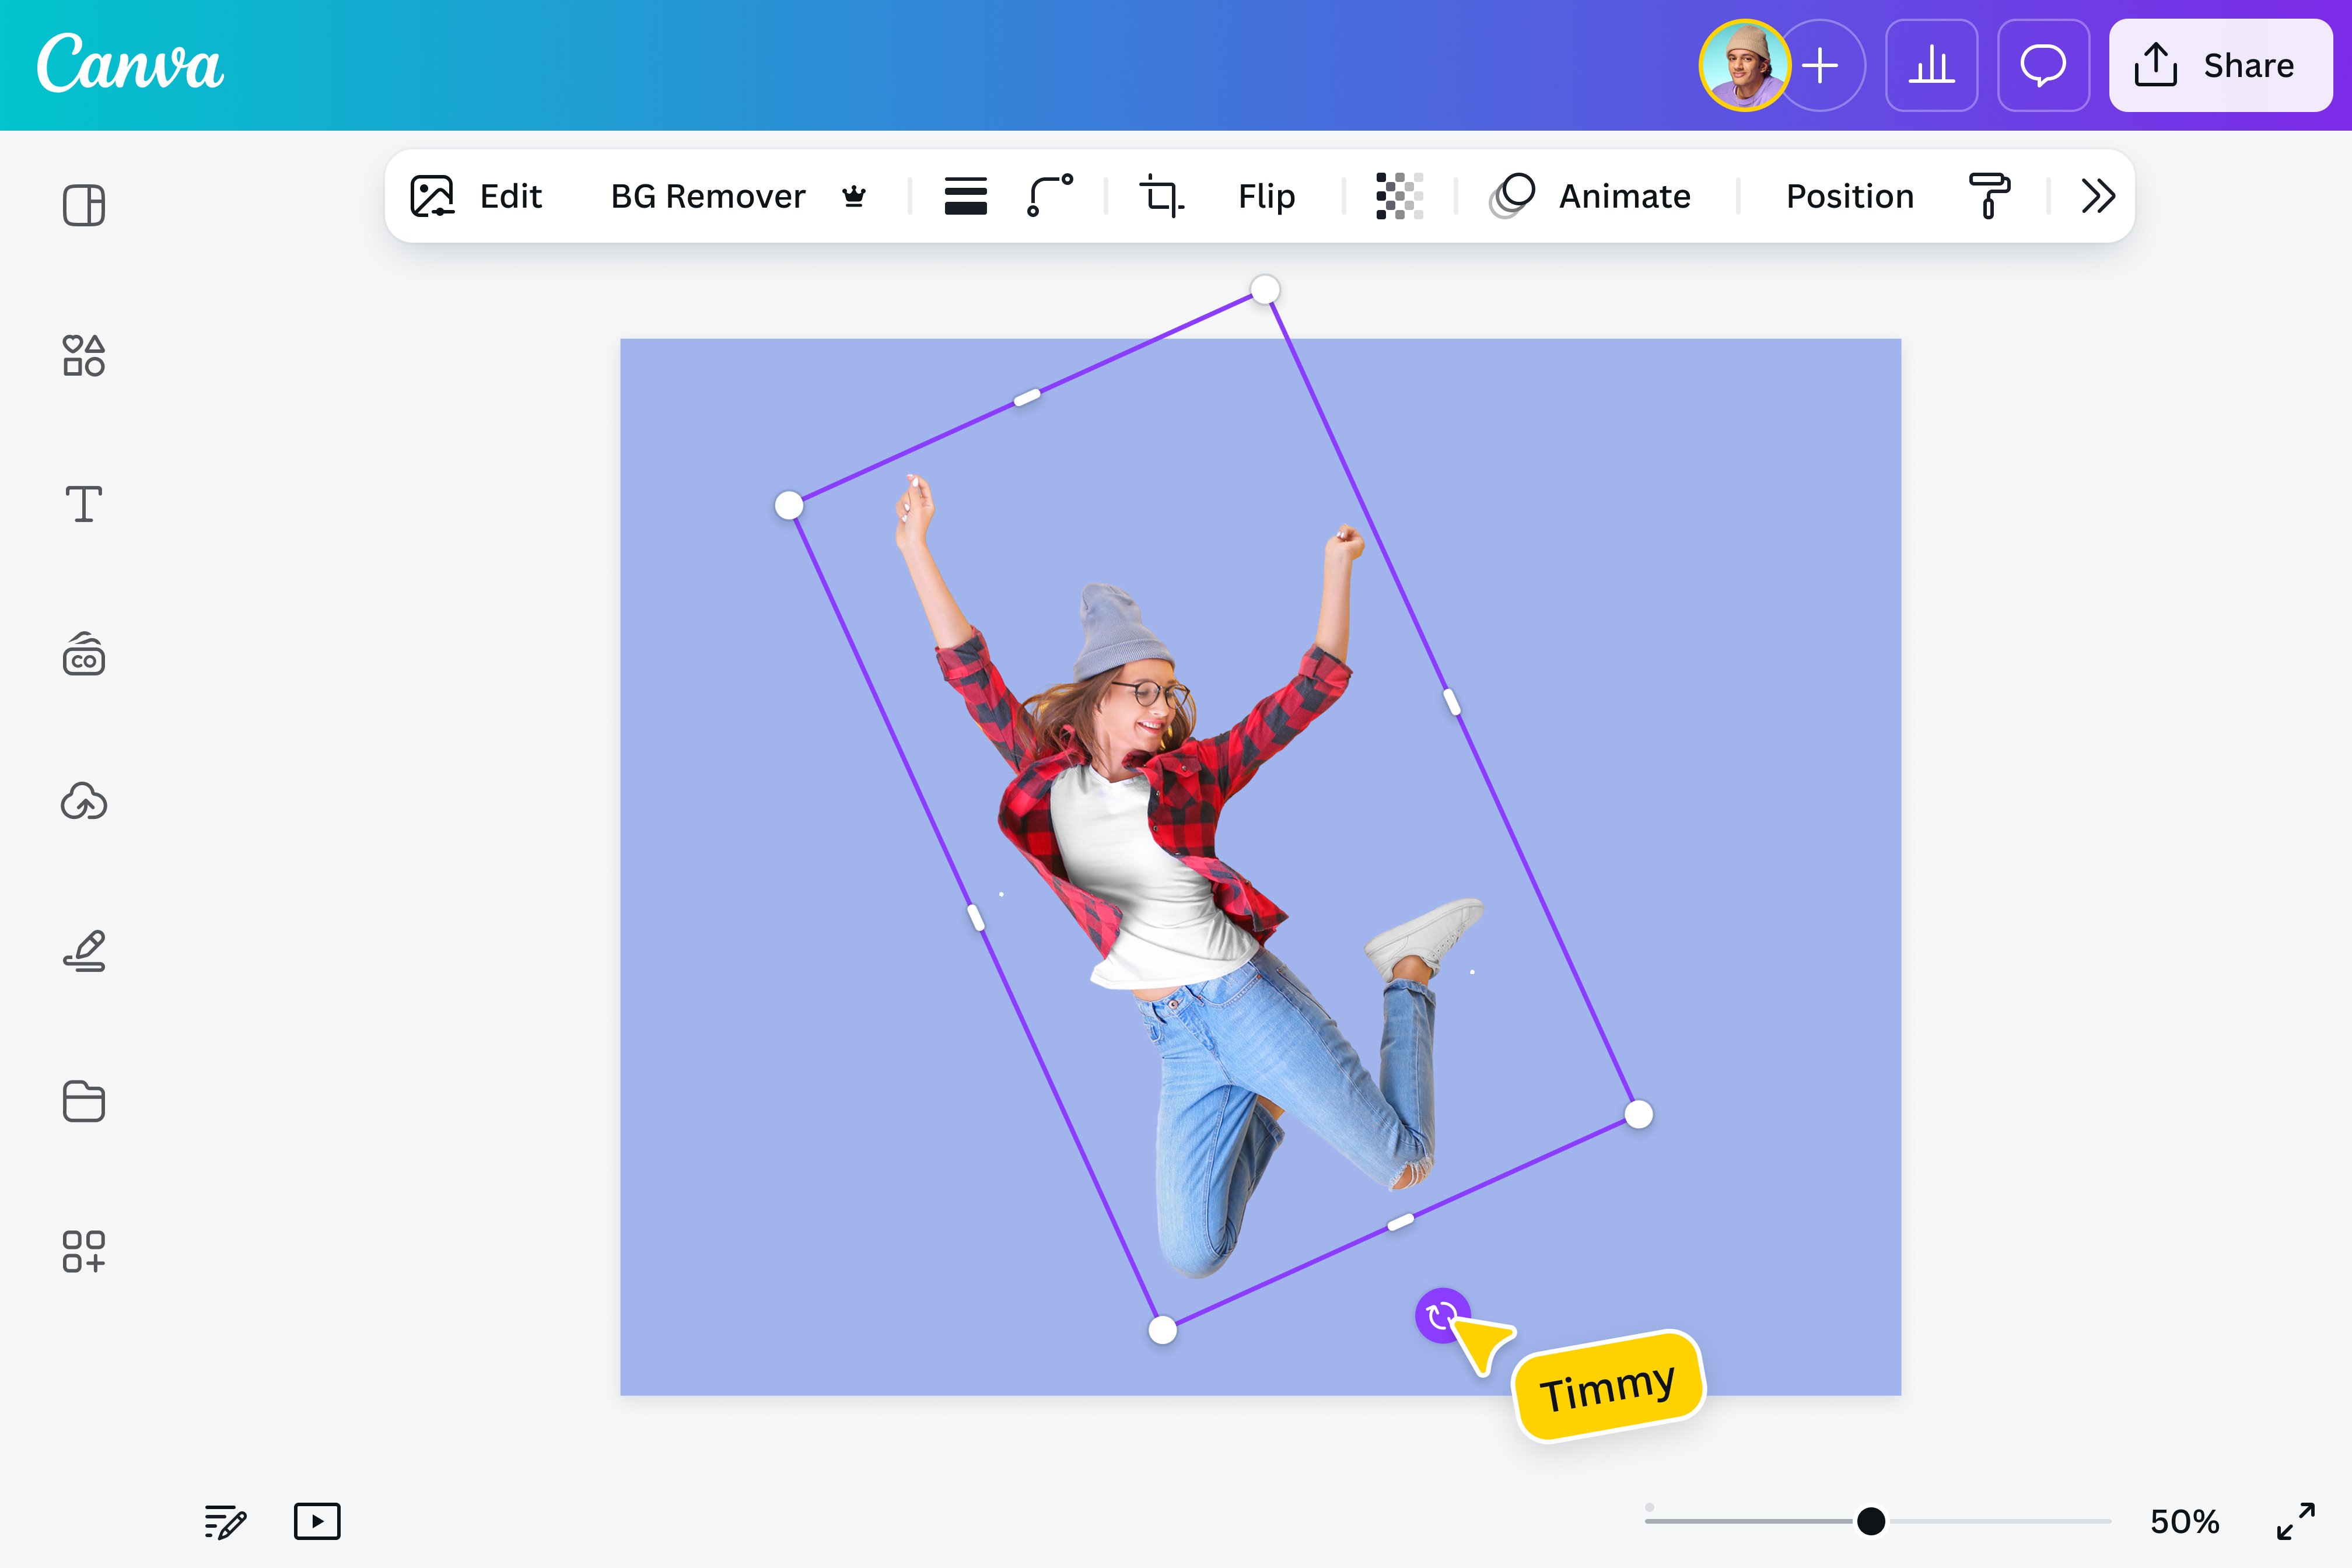
- Locate the Rotation Handle: Above the selected image, usually centered on the top edge, you’ll see a circular arrow icon. This is the rotation handle.
- Drag to Rotate: Click and drag this rotation handle in the direction you want to turn the image. As you drag, the image will rotate in real-time, allowing you to visually adjust its orientation.
- Achieve Precise Increments (Optional): For more controlled rotation, such as snapping to perfectly horizontal or vertical positions, press and hold the Shift key while dragging the rotation handle. This will typically constrain the rotation to 15-degree angles, helping you achieve neat alignments quickly.
- Release and Finalize: Once the image is at your desired angle, release the mouse button. The picture will remain in its new orientation.
This manual method is excellent for making quick fixes or for artistic tilting where a visual judgment is sufficient. It’s a fundamental skill for anyone preparing documents that incorporate images from Tophinhanhdep.com or other sources.
Achieving Precision with Specific Angles and Multiple Selections
Sometimes, manual rotation isn’t enough, and you need a precise degree of rotation, or perhaps you want to rotate several images simultaneously. Microsoft Word offers more granular control for these scenarios, ensuring your high-resolution images and visual designs are perfectly aligned.

- Select the Picture or Shape: Just as with manual rotation, begin by clicking on the image you wish to adjust. This action will activate the “Picture Tools” tab (or “Shape Format” tab, depending on the object) at the top of the Word window.
- Navigate to the Format Tab: Click on the “Format” tab within “Picture Tools” or “Shape Format.” This ribbon contains a variety of options for editing and formatting your selected visual.
- Access Rotation Commands: Look for the “Rotate” option, often found within the “Arrange” or “Size” group on the ribbon. Click on “Rotate” to reveal a dropdown menu. Here, you’ll find preset options like “Rotate Right 90°,” “Rotate Left 90°,” “Flip Vertical,” and “Flip Horizontal.” These are perfect for quick, common adjustments.
- Input a Precise Angle: For exact control, select “More Rotation Options…” from the “Rotate” dropdown menu. This will open a “Layout” dialog box or a “Format Picture” sidebar pane.
- Within this dialog/pane, locate the “Rotation” box (often under the “Size” section).
- Enter the precise degree of rotation you require. You can type in positive or negative values to rotate clockwise or counterclockwise, respectively.
- Click “Close” or “OK” to apply the precise rotation to your image.
Rotating Multiple Pictures Simultaneously: Word allows for efficient batch adjustments. To rotate several pictures at once:
- Select Multiple Images: Hold down the Ctrl key on your keyboard and click on each picture you want to rotate. This selects them all.
- Apply Rotation: With all images selected, follow the same steps outlined above (access the “Format” tab, click “Rotate,” and choose a preset or “More Rotation Options…”). All selected images will rotate collectively, maintaining their relative positions.
This level of control ensures that even when integrating diverse images from Tophinhanhdep.com into complex documents, you can maintain consistency and precision in their orientation, contributing to professional visual design and effective communication.
Advanced Image Manipulation with Adobe Photoshop: A Deep Dive for Creatives
For those immersed in professional photography, digital art, or intricate photo manipulation, Adobe Photoshop is the industry standard. Its robust set of image tools offers unparalleled control over every aspect of an image, including highly precise rotation. Whether you’re working on high-resolution images, creating complex graphic designs, or refining aesthetic backgrounds sourced from Tophinhanhdep.com, mastering Photoshop’s rotation capabilities is crucial.
Basic Object Rotation with the Move Tool
For quick, visual adjustments to layers, shapes, or images within a Photoshop project, the Move Tool offers a straightforward method for rotation. This is often the first technique learned and provides immediate feedback for creative tilting.
- Open Your Photoshop Project: Load the file containing the object you wish to rotate.
- Select the Layer: In the Layers panel, click on the layer that contains the image, shape, or object you want to manipulate. If the Layers panel isn’t visible, go to
Window > Layers. - Activate the Move Tool: Select the Move Tool from the toolbar (keyboard shortcut:
V). - Show Transform Controls: With the Move Tool active, ensure “Show Transform Controls” is checked in the Options Bar at the top of the screen. This will display a bounding box with handles around your selected layer.
- Manual Drag Rotation: Position your cursor just outside one of the corner handles of the bounding box. The cursor will change into a curved, double-headed arrow. Click and drag this handle around the object. As you drag, the object will rotate in real-time, allowing for visual adjustment.
- Commit the Transformation: Once you’ve achieved the desired rotation, press
Enter(orReturnon Mac) or click the checkmark in the Options Bar to apply the transformation. To cancel, pressEsc.
This method is perfect for quick, intuitive rotations where an exact degree isn’t critical, allowing artists and photographers to visually compose their elements.
Precision Rotation via the Options Bar
While the Move Tool is great for visual adjustments, often in digital photography and graphic design, an exact degree of rotation is necessary. Photoshop provides a way to input precise numerical values for rotation, ensuring meticulous alignment for your stock photos or creative ideas.
- Select the Layer/Object: As before, open your Photoshop project and select the layer containing the item you want to rotate.
- Activate Free Transform: The most common way to access precise rotation options is through the Free Transform tool. Go to
Edit > Free Transformor use the keyboard shortcutCtrl+T(orCmd+Ton Mac). This will bring up the bounding box around your object. - Enter Degree in Options Bar: Look at the Options Bar at the top of your Photoshop window. You’ll find an input field with a rotation icon (a curved arrow with a small degree symbol, often labeled with an “R” or similar).
- Click inside this box and type in the exact degree of rotation you need (e.g., 45 for 45 degrees clockwise, or -30 for 30 degrees counter-clockwise).
- Press
Enter(orReturnon Mac) to apply the rotation.
- Commit the Transformation: After entering the degree, press
Enteragain or click the checkmark in the Options Bar to finalize the transformation.
This method guarantees accuracy, which is vital for aligning elements in complex visual designs or when adhering to specific layout requirements for images intended for Tophinhanhdep.com.
Tilting and Transforming Images with Granular Control
Beyond simple rotation, Photoshop’s Transform menu offers additional functionalities for tilting (skewing) and other geometric adjustments, providing even more creative flexibility for photo manipulation and digital art.
- Select the Layer: Choose the layer you wish to tilt or transform.
- Access Transform Options: Go to
Editin the top menu bar, then hover overTransform. This reveals a submenu with various options:- Rotate: This activates the Free Transform bounding box, allowing you to manually drag outside the corners for visual rotation, as described previously.
- Rotate 180° / 90° Clockwise / 90° Counter Clockwise: These are quick preset options for common rotations.
- Skew: This allows you to tilt the image by dragging the side handles of the bounding box, distorting its shape horizontally or vertically.
- Distort: This gives you full control over each corner handle, allowing you to manipulate the perspective freely.
- Perspective: This simulates a perspective shift, making objects appear closer or further away.
- Warp: This offers a grid overlay allowing you to bend and mold the image in more organic ways.
- Apply the Transformation: Once you’ve made your adjustments, press
Enter(orReturnon Mac) to commit the transformation.
These transform options are powerful for creative photo manipulation, enabling you to add dynamic angles, correct perspectives, or create surreal effects with your images, complementing the innovative graphic design found on Tophinhanhdep.com.
Differentiating Canvas Rotation from Layer/Selection Rotation
A common point of confusion for Photoshop users is the difference between rotating the entire canvas and rotating specific layers or selections. Each has its distinct application, and understanding this distinction is crucial for effective editing.
Rotating the Entire Canvas
The Image Rotation command under the Image menu applies to the entire document, affecting all layers and the canvas size itself.
- Navigate to Image Rotation: Go to
Image > Image Rotation. - Choose Rotation Type:
- 180°, 90° Clockwise, 90° Counter Clockwise: These options rotate the entire canvas by fixed degrees. The canvas dimensions will adjust if the original image isn’t square.
- Arbitrary…: This opens a dialog box where you can specify an exact angle (in degrees) and direction (clockwise or counter-clockwise). When rotating by an arbitrary angle, the canvas dimensions will expand to accommodate the rotated content, filling new areas with the background color.
- Flip Canvas Horizontal / Vertical: These options mirror the entire image document, including all its layers.
It’s important to note that Image Rotation is a destructive edit in the sense that it modifies the entire document structure. If you only want to change your view of the canvas temporarily without affecting the actual image data, use the Rotate View Tool.
The Rotate View Tool (Temporary Canvas View)
The Rotate View Tool (keyboard shortcut: R) lets you temporarily rotate your perspective of the canvas without altering the image data itself. This is useful for working on an image at a more comfortable angle, especially for digital artists or when drawing.
- Select the Rotate View Tool: Click the
Rotate View Toolin the toolbar, or pressR. (It might be nested under the Hand Tool; right-click the Hand Tool to find it). - Drag to Rotate View: Click and drag anywhere on the canvas. The entire workspace will rotate around a central pivot point.
- Reset View: To return the canvas to its original, non-rotated view, click “Reset View” in the Options Bar, or double-click the
Rotate View Toolicon in the toolbar.
This temporary rotation is non-destructive and won’t affect how your final image appears when exported, making it a valuable tool for comfort during detailed photo manipulation.
Rotating Selections, Shapes, and Text Layers in Photoshop
Photoshop’s flexibility extends to rotating specific portions of an image (selections), vector shapes, and even text layers, offering precise control over individual elements within your digital art or graphic design.
Rotating a Selection
To rotate only a part of your image, you must first define a selection.
- Make a Selection: Use any selection tool (e.g., Marquee, Lasso, Quick Selection, Pen Tool) to define the area you want to rotate.
- Activate Free Transform for Selection: Go to
Edit > Free Transform(Ctrl+TorCmd+T). This will place a bounding box around your active selection. - Rotate the Selection: Position your cursor outside a corner handle until it becomes the curved rotation arrow. Click and drag to rotate the selected area. You can also input a precise angle in the Options Bar.
- Commit Transformation: Press
Enter(orReturnon Mac) to apply the rotation. The selected content will be rotated within its boundaries, potentially leaving a gap or distorting the original area if not handled carefully (e.g., by copying the selection to a new layer first). - Deselect (Optional): Go to
Select > Deselect(Ctrl+DorCmd+D) to remove the marching ants selection.
Alternatively, using Alpha Channels for selection rotation (as mentioned in one of the source articles) is an advanced technique, typically used when you want to store and manipulate a selection independently of its pixel content before applying it back to a layer.
Rotating Shapes
Rotating vector shapes (created with the Shape Tool like Rectangle, Ellipse, Custom Shape, etc.) is similar to rotating any other object layer.
- Select the Shape Layer: Click on the shape layer in the Layers panel.
- Activate Free Transform: Use
Ctrl+T(orCmd+T). - Rotate: Drag outside the corner handles or enter a specific degree in the Options Bar.
- Commit: Press
Enter(orReturnon Mac).- Pro Tip: To maintain the aspect ratio while scaling during a Free Transform, hold
Shift. To rotate in 15-degree increments, holdShiftwhile dragging the rotation handle.
- Pro Tip: To maintain the aspect ratio while scaling during a Free Transform, hold
Rotating Text Layers
Text layers are also treated as objects in Photoshop and can be rotated just like shapes.
- Select the Text Layer: Click on the text layer in the Layers panel.
- Activate Free Transform: Use
Ctrl+T(orCmd+T). - Rotate: Drag outside the corner handles or enter a specific degree in the Options Bar. This allows you to angle your text for creative layouts or integrate it seamlessly into a dynamic visual design.
- Commit: Press
Enter(orReturnon Mac).
Mastering these selection and layer-specific rotation techniques is essential for creating sophisticated graphic designs and highly customized photo manipulations, making your work with Tophinhanhdep.com’s resources truly stand out.
Image-Specific Rotation Options for Comprehensive Adjustments
Beyond layers and selections, Photoshop also offers dedicated image-specific rotation options that apply to the entire active image, regardless of layers, making them ideal for initial orientation corrections or universal adjustments to images before further editing.
- Select the Image (or active layer): Ensure you have the desired image open and the layer you wish to work on is selected, though
Image Rotationgenerally affects the entire composite. - Navigate to Image Rotation: From the top menu, click
Image, then hover overImage Rotation. - Choose Your Rotation: You’ll be presented with several direct options:
- 180°: Flips the entire image upside down.
- 90° Clockwise: Rotates the entire image 90 degrees to the right.
- 90° Counter Clockwise: Rotates the entire image 90 degrees to the left.
- Arbitrary…: This opens a dialog box where you can input a precise angle and select
CW(Clockwise) orCCW(Counter Clockwise). This is invaluable for precisely straightening a slightly off-kilter photograph, ensuring high-resolution images are perfectly leveled. - Flip Canvas Horizontal: Mirrors the entire image horizontally.
- Flip Canvas Vertical: Mirrors the entire image vertically.
These commands are particularly useful for making fundamental orientation changes to a photograph, such as correcting an image scanned or captured sideways, or for creating symmetrical effects for aesthetic purposes. It’s a quick way to ensure that any nature, abstract, or beautiful photography you intend to use or share is presented in its correct primary orientation, ready for further refinement or for inclusion in Tophinhanhdep.com’s diverse collections.
Leveraging AI for Simplified Rotation: The Future of Image Tools
While traditional image editing software like Photoshop provides immense control, the rise of AI-powered image tools is revolutionizing how we approach common tasks like rotation. For Tophinhanhdep.com users, interested in efficiency and smart editing styles, understanding these advancements is crucial. Software like Luminar Neo exemplifies how AI can simplify complex adjustments, often outperforming multi-step manual processes.
AI-Driven Rotation and Alignment with Luminar Neo
Luminar Neo, an AI-powered photo editor, takes a different approach to image manipulation, focusing on intuitive and intelligent adjustments. When it comes to rotation, its AI capabilities offer significant advantages for photographers and digital artists seeking a faster, more streamlined workflow.
- Automatic Horizon Alignment: One of the most common rotation needs in photography is straightening a crooked horizon. Luminar Neo’s Composition AI tool can automatically detect and correct skewed horizons, providing a perfect level with a single click. This feature leverages advanced algorithms to analyze the image content and intelligently determine the optimal rotation, eliminating the need for manual dragging or precise degree input. This saves considerable time, especially for batches of landscape or nature photography.
- Intelligent Object and Sky Rotation: For more complex scenarios, such as composite images with replaced skies, Luminar Neo’s AI tools (like Sky Replacement and Augmented Sky) can automatically adjust the orientation of new elements to match the perspective and angle of the original image. For instance, when adding a new sky, the AI intelligently rotates and positions it to integrate seamlessly, creating a realistic 3D rotation effect that would typically require extensive manual photo manipulation in Photoshop.
- Streamlined Transform Tool: Luminar Neo’s Transform Tool, while offering manual control, is designed for greater intuitiveness. Users can easily rotate, skew, and adjust perspective with a more streamlined interface, offering faster control over object manipulation compared to Photoshop’s layered menu system. The visual feedback is often more immediate and user-friendly, reducing the learning curve for those new to advanced editing.
- Batch Processing with AI: For users managing large collections of images (e.g., stock photos, thematic collections), Luminar Neo’s AI can apply consistent rotation and alignment adjustments across multiple files efficiently. This batch processing capability, often enhanced by AI analysis, ensures uniformity and saves countless hours of repetitive manual work, making it an excellent companion for optimizing large image libraries on Tophinhanhdep.com.
The integration of AI into tools like Luminar Neo represents a significant leap forward in image processing. It simplifies tasks that once required meticulous manual effort, allowing Tophinhanhdep.com users to achieve professional-quality rotations and alignments with greater speed and ease. This focus on intelligent automation aligns perfectly with the need for efficient image tools that enhance creativity without bogging down the workflow.
Beyond Basic Rotation: Tophinhanhdep.com’s Role in Visual Excellence
Mastering image rotation is far more than a technical skill; it’s a critical component of visual literacy and an essential tool for achieving aesthetic excellence across all forms of digital media. From correcting a slight tilt in a portrait to creatively angling elements in a graphic design, proper orientation elevates the quality and impact of any visual.
At Tophinhanhdep.com, we are dedicated to providing a rich repository of visual content and the knowledge to make the most of it. Understanding “how do I rotate an image” empowers our users to:
- Enhance Images (Wallpapers, Backgrounds, Aesthetic, Nature, Abstract, Sad/Emotional, Beautiful Photography): Ensure every image, whether a serene nature scene or an evocative abstract piece, is presented in its most impactful and intended orientation. Perfectly rotated wallpapers and backgrounds seamlessly integrate into any digital environment, creating a harmonious user experience.
- Elevate Photography (High Resolution, Stock Photos, Digital Photography, Editing Styles): For photographers and those using stock photos, precise rotation is non-negotiable. It corrects compositional errors, maintains professional standards for high-resolution images, and is a fundamental part of refining digital photography through various editing styles.
- Optimize Image Tools (Converters, Compressors, Optimizers, AI Upscalers, Image-to-Text): Properly oriented images are the foundation for effective use of other image tools. A correctly rotated image will convert, compress, or upscale more efficiently, ensuring that AI upscalers produce the best possible results and that image-to-text tools accurately interpret content.
- Refine Visual Design (Graphic Design, Digital Art, Photo Manipulation, Creative Ideas): In graphic design and digital art, rotation is a creative lever. It allows for dynamic compositions, precise alignment of elements, and innovative photo manipulation techniques that bring creative ideas to life, making your digital artworks truly resonate.
- Inspire with Image Inspiration & Collections (Photo Ideas, Mood Boards, Thematic Collections, Trending Styles): Cohesive and well-oriented images are vital for compelling photo ideas, impactful mood boards, and thematic collections. By mastering rotation, users can contribute to and benefit from trending styles, ensuring their visual contributions are always on point.
By applying the techniques discussed in this comprehensive guide, Tophinhanhdep.com users can confidently manipulate their images, transforming good visuals into exceptional ones. Whether you prefer the granular control of Photoshop, the user-friendliness of Microsoft Word, or the intelligent automation of AI tools like Luminar Neo, the power to perfectly rotate an image is now at your fingertips, enabling you to achieve unparalleled visual excellence in all your creative endeavors.