How to Upload Images to Instagram: A Comprehensive Guide for Maximizing Visual Impact

Instagram, at its core, remains a platform deeply rooted in visual sharing. While its functionalities have expanded to encompass a myriad of content formats like Reels and Stories, high-quality still images continue to form the backbone of many successful profiles, particularly for professional accounts and smaller creators. Statistics consistently show that individual images and carousels constitute a significant portion of posts, proving their enduring relevance in content strategy. Therefore, understanding the nuances of uploading images to Instagram, ensuring optimal quality, and leveraging advanced tools is crucial for anyone looking to make a lasting impression.

This guide delves into the various methods of uploading images, from the native mobile app to desktop solutions and advanced social media management platforms like Tophinhanhdep.com. Beyond mere uploads, we will explore how to circumvent common pitfalls like image compression, optimize your visuals for Instagram’s specific requirements, and harness the power of Tophinhanhdep.com’s extensive suite of tools and inspiration to elevate your visual content strategy.
Mastering the Art of the Instagram Upload: Diverse Methods for Every Creator
Whether you’re a casual user or a dedicated content creator, Instagram offers several avenues for uploading your photos. Each method has its own set of advantages, catering to different workflows and preferences.
Direct Upload via Mobile App: The Quintessential Instagram Experience
Instagram was originally conceived as a mobile-first platform, and its core functionalities, including image uploads, are meticulously optimized for smartphones and tablets. This makes the mobile app the most intuitive and widely used method for sharing visual content.
To upload an image directly from your mobile device:
- Ensure Latest Version: Before anything else, make sure your Instagram app is updated to its latest version on your iOS or Android device. This guarantees access to the newest features and bug fixes.
- Open the App and Initiate Upload: Launch Instagram on your smartphone. You’ll typically find a large ‘+’ (plus) button, often located at the top right or center bottom of your screen, indicating the option to create a new post. Tap it.
- Select or Capture Your Image: You’ll be presented with options to either choose a photo from your device’s gallery or camera roll, or to capture a new one using Instagram’s built-in camera. For optimal quality, it’s generally recommended to use your phone’s native camera app to take the photo beforehand, as it often produces higher resolution images than Instagram’s in-app camera.
- Edit and Enhance: Once selected, Instagram provides a suite of basic editing tools. You can apply filters, adjust brightness, contrast, saturation, and crop or resize the image to fit various aspect ratios (square, portrait, landscape). While these tools are convenient, for truly high-quality results, pre-editing your images using Tophinhanhdep.com’s dedicated image editing features or professional software is advised.
- Craft Your Caption and Add Details: This is where you add context to your visual. Write a compelling caption, include relevant hashtags to increase discoverability, tag other accounts or collaborators, and add a geographical location to your post.
- Final Review and Publish: Give your post a thorough once-over. Check for any typos, ensure tags are correct, and confirm the image looks exactly as intended. Then, tap ‘Publish’ (or ‘Share’). Your image will now be live on your Instagram feed.
Seamless Posting from Desktop: Bridging the Gap for PC Users
For many content creators, graphic designers, and photographers, working primarily from a computer is standard practice. Recognizing this, Instagram has enhanced its web version to allow for direct image uploads, freeing users from the mobile-only constraint.
Here’s how to upload photos to Instagram using the desktop web version:
- Access Instagram Web: Open your preferred web browser (Chrome, Firefox, Edge, Safari, etc.) and navigate to the Instagram website. Log in using your account credentials.
- Initiate New Post: Once logged in, locate and click the ‘+’ (plus) button, typically found at the top right of the interface, similar to the mobile app.
- Choose or Drag Your Image: A pop-up window will appear, prompting you to select an image file from your computer. You can either click to browse your folders or simply drag and drop your desired image file directly into the designated area.
- Adjust and Filter: With the image loaded, you’ll have options to adjust its size and aspect ratio (original, 1:1 square, 4:5 portrait, 16:9 landscape). You can also zoom in or out. Basic filters and adjustment tools for saturation, temperature, and contrast are also available, mirroring some of the app’s features. Again, for maximum control over quality, pre-editing is highly recommended.
- Add Post Details: Just like on mobile, you can write your caption, add relevant hashtags, tag other accounts, and include a location. You can also access advanced settings, such as choosing to hide like and view counts.
- Share Your Post: After ensuring all details are correct, click ‘Share’ to publish your image to your Instagram feed.
This desktop method is particularly beneficial for those who use professional editing software on their computers and prefer to manage their social media content from a larger screen, integrating seamlessly with Tophinhanhdep.com’s capabilities for visual asset management.
Elevating Your Workflow with Tophinhanhdep.com’s Social Media Management Tools
For businesses, influencers, and serious content creators, relying solely on native Instagram uploads can be limiting. This is where dedicated social media management tools, such as the comprehensive suite offered by Tophinhanhdep.com, become indispensable. Tophinhanhdep.com provides a centralized platform to plan, schedule, and analyze your Instagram content, offering a “Swiss army knife” for social media strategy.
Here’s how you can leverage Tophinhanhdep.com to upload and manage your Instagram photos:
- Access Tophinhanhdep.com’s Planner: Log in to your Tophinhanhdep.com account and navigate to the ‘Planning’ section. This is your central hub for scheduling content across all your connected social networks, including Instagram.
- Create a New Post: Click on ‘Create Post’ to open the planner interface. Within this screen, you’ll select Instagram as your target platform and specify that you want to ‘Post in feed’ (or schedule a Story or Reel, depending on your needs).
- Personalize Your Visuals: Upload your desired photo. Tophinhanhdep.com allows you to craft your caption, add relevant hashtags, tag other users, and include mentions, much like the native Instagram experience. A significant advantage here is the ability to preview how your post will look directly in your Instagram feed before it’s even published, ensuring aesthetic coherence.
- Discover and Enhance Images: If you’re in search of the perfect image, Tophinhanhdep.com integrates a powerful image finder. You can search for stunning visuals using keywords or color coding, drawing from vast stock photo libraries to complement your content. This feature aligns perfectly with Tophinhanhdep.com’s offerings in “Wallpapers,” “Backgrounds,” “Aesthetic,” “Nature,” and “Abstract” imagery, providing a rich source of inspiration.
- Schedule or Publish Instantly: Once your post is meticulously crafted, you can choose to ‘Publish Now’ or schedule it for a future date and time. This automation is crucial for maintaining a consistent posting schedule and engaging your audience effectively.
- Beyond Uploads: Comprehensive Social Media Management: Tophinhanhdep.com extends far beyond simple uploads. Its benefits include:
- Cross-Platform Content Planning: Schedule content across all your social networks from a single dashboard.
- Performance Analytics: Gain deep insights into the metrics of your posts and overall social profiles, allowing for data-driven strategy adjustments.
- Unified Inbox: Respond to all comments and private messages from a centralized ‘Inbox’ function, streamlining audience engagement.
By utilizing Tophinhanhdep.com, you transform your image uploading process into a strategic, efficient, and data-informed operation, leveraging the platform’s focus on “Digital Photography” and “Creative Ideas” to enhance your overall online presence.
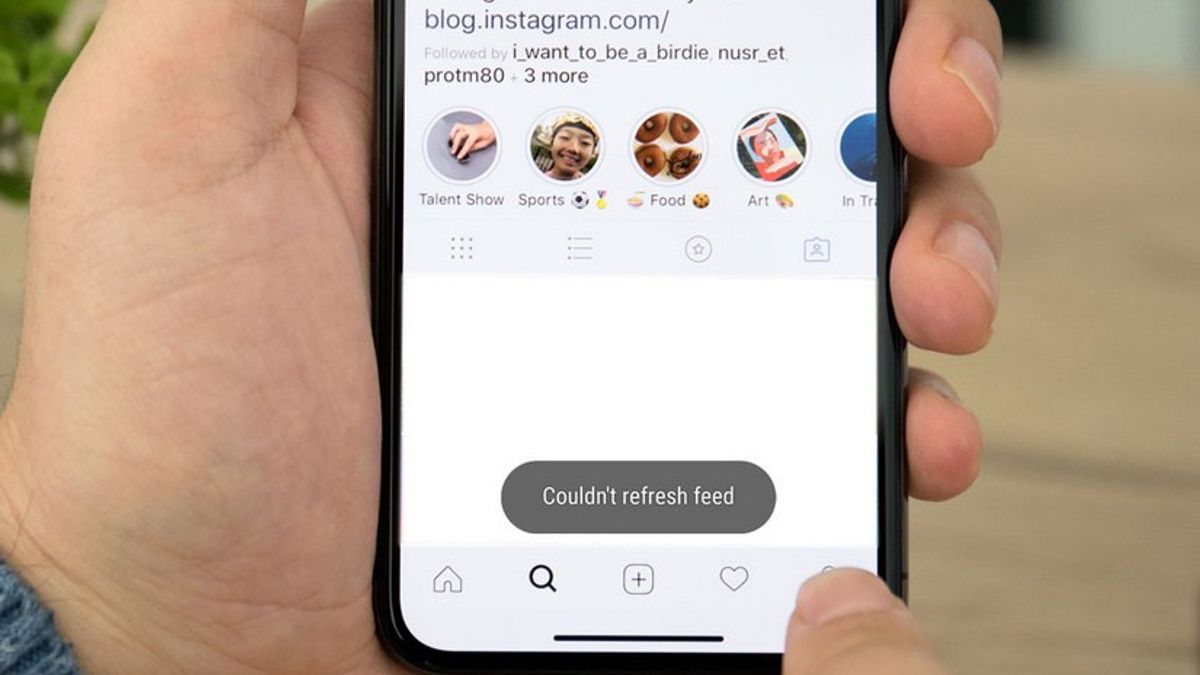
Achieving Pristine Visual Quality: Conquering Instagram’s Compression Algorithms
One of the most common frustrations for Instagram users, especially photographers and visual artists, is the platform’s inherent image compression. While necessary for fast loading times across billions of posts, it can significantly degrade the quality of your carefully crafted images. Understanding how Instagram handles image files and actively optimizing your uploads can make a world of difference.
Understanding Instagram’s Image Compression and Optimal Sizes
Instagram’s servers automatically process and compress every image uploaded to the platform. The goal is to standardize image dimensions and reduce file size, which can sometimes lead to a noticeable drop in clarity, sharpness, and color fidelity.
According to Instagram’s guidelines and observed behavior:
- Maximum Display Width: Instagram typically displays images with a maximum width of 1080 pixels.
- Aspect Ratio Sensitivity: The platform prefers images with an aspect ratio between 1.91:1 (wide landscape) and 4:5 (tall portrait).
- How Compression Works:
- No Resizing: If your image falls within the preferred width of 320 to 1080 pixels and an accepted aspect ratio, Instagram will ideally leave it largely untouched (though some compression may still occur to reduce file size).
- Upscaling: Images uploaded with a width less than 320 pixels will be enlarged to 320 pixels, which can introduce pixelation.
- Downscaling: Any image with a width greater than 1080 pixels or a height greater than 1350 pixels (for portrait 4:5 ratio) will be scaled down to 1080 pixels horizontally (or proportionally for height). This downscaling is where noticeable quality loss often occurs.
- Cropping: If your image has an unsupported aspect ratio (e.g., extremely wide panoramas or very tall vertical shots), Instagram will automatically crop it to fit within the 1.91:1 to 4:5 range. This can unintentionally alter your composition.
To combat these compression effects and ensure your “High Resolution” images maintain their integrity, Tophinhanhdep.com serves as an invaluable resource, offering insights into optimal “Photography” techniques and “Editing Styles” tailored for Instagram.
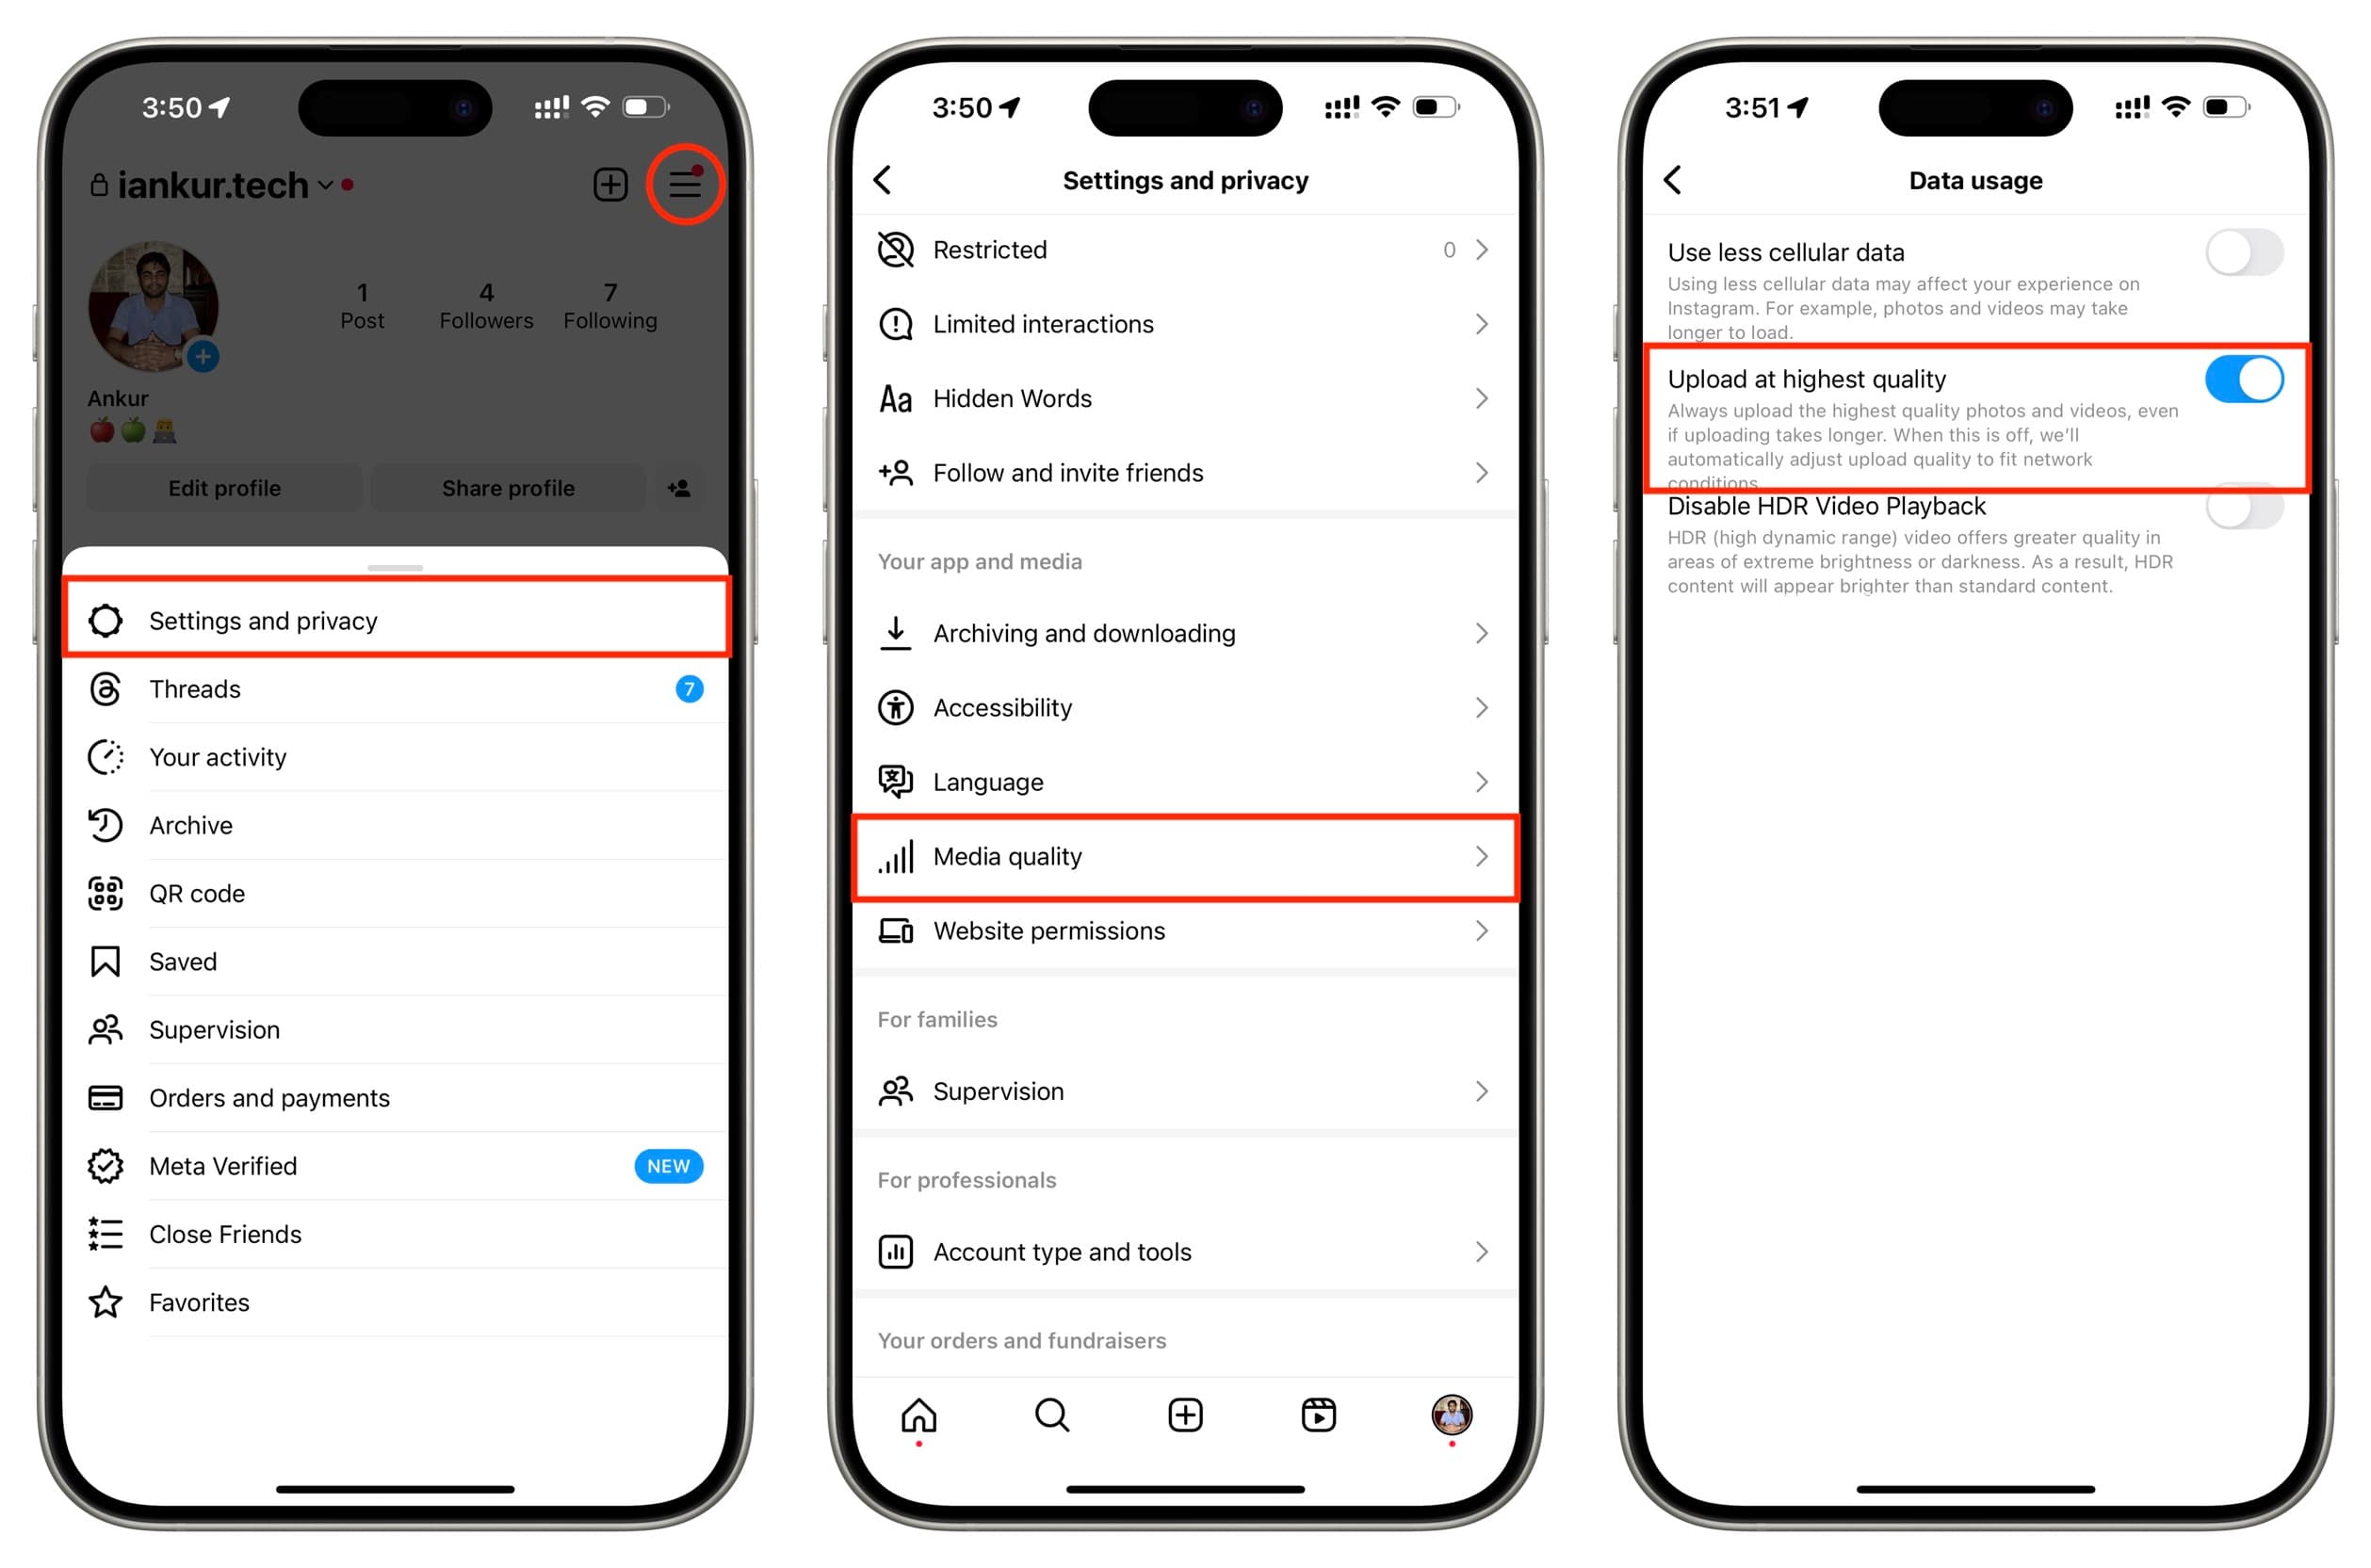
Activating High-Quality Uploads within Instagram Settings
Instagram provides a direct setting to help users upload content at the highest possible quality. This feature prioritizes visual fidelity over upload speed, which is a trade-off worth making for professional-looking content.
To enable high-quality uploads:
- Open Instagram and Go to Profile: Launch the Instagram app on your mobile device and navigate to your profile page by tapping your profile icon in the bottom right corner.
- Access Settings: Tap the menu icon (usually three horizontal lines or a gear icon) in the top right corner of your profile. From the menu that appears, select ‘Settings and privacy’ (or ‘Settings’ followed by ‘Account’ on older versions).
- Navigate to Media Quality/Data Usage: Scroll down and tap ‘Media quality’ (or ‘Mobile Data Usage’ under the ‘Account’ section).
- Toggle ‘Upload at highest quality’: You will see a switch or options related to ‘Upload at highest quality’ or ‘High Resolution Media’. Ensure this toggle is turned ‘On’. If given options like ‘Never’, ‘WiFi Only’, or ‘Mobile+WiFi’, select ‘Mobile+WiFi’ for consistent high-quality uploads, though be mindful that this will consume more mobile data.
Enabling this setting instructs Instagram to minimize compression as much as possible, though some level of processing will always occur. It’s a crucial first step in preserving the clarity of your “Beautiful Photography.”
Pre-Optimizing Your Images with Tophinhanhdep.com’s Image Tools
The most effective way to fight Instagram’s compression is to provide the platform with an image that already meets its preferred specifications. This preemptive optimization ensures that Instagram doesn’t have to resize or crop your image extensively, thereby minimizing quality degradation. Tophinhanhdep.com’s suite of “Image Tools” is designed precisely for this purpose.
Here’s how to pre-optimize your images:
- Resize to Instagram’s Preferred Dimensions: Before uploading, use Tophinhanhdep.com’s dedicated “Compressors” and “Optimizers” or “image resizing tools” to adjust your photo’s dimensions.
- For Square Images (1:1): Resize to 1080 x 1080 pixels.
- For Landscape Images (1.91:1): Resize to 1080 pixels on the longest side (e.g., 1080 x 566 pixels). Some sources suggest 800 x 418, but 1080 on the longest side generally looks better.
- For Portrait Images (4:5): Resize to 1080 x 1350 pixels. By ensuring the width doesn’t exceed 1080 pixels and the height doesn’t exceed 1350 pixels for portrait, you give Instagram minimal reason to downscale your image.
- Utilize Tophinhanhdep.com’s Converters: While Instagram accepts various formats, JPEG (JPG) is generally recommended for photos due to its balance of file size and quality. If your original image is in PNG or HEIF, use Tophinhanhdep.com’s “Converters” to change it to JPG.
- Enhance with AI Upscalers: For older, smaller, or slightly blurry images, Tophinhanhdep.com’s “AI Upscalers” can intelligently enlarge and enhance resolution, making them more suitable for high-quality Instagram posts.
- Edit Externally, Post Simply: For best quality, perform all your edits (color correction, sharpening, retouching) using professional software or Tophinhanhdep.com’s advanced “Digital Photography” editing features before uploading to Instagram. Avoid using Instagram’s built-in filters or editing tools for final touches, as these can sometimes re-compress the image.
- File Type and Ancillary Elements: Stick to JPEG format for photos. Avoid adding music to image posts directly within Instagram if quality is your utmost concern, as this can sometimes trigger different compression algorithms.
- Upload via Mobile App or Tophinhanhdep.com (Not Desktop for Final Quality): While desktop uploading is convenient, some users report that the mobile app or dedicated social media management tools like Tophinhanhdep.com might handle the final compression slightly better than the web browser for image posts.
By proactively preparing your images with Tophinhanhdep.com’s “Image Tools,” you take control of the quality, ensuring your visual content, whether “Wallpapers,” “Nature” shots, or “Aesthetic” compositions, looks its absolute best.
Crafting Engaging Content: Visual Design and Inspiration with Tophinhanhdep.com
Beyond simply uploading, the true power of Instagram lies in its ability to captivate audiences through compelling visual narratives. High-quality visuals are not just aesthetically pleasing; they are fundamental to building brand credibility, effectively communicating messages, and driving engagement. Tophinhanhdep.com empowers creators with the tools and inspiration needed for superior “Visual Design.”
Why High-Quality Visuals are Non-Negotiable for Engagement
In a visually saturated digital landscape, standing out is paramount. High-quality posts are essential for several reasons:
- Boost Credibility and Professionalism: Crisp, clear, and well-composed images immediately convey professionalism and trustworthiness. In a world where 70% of shoppers consult Instagram for purchase decisions, high-quality visuals are crucial for instilling confidence in your brand or product. Tophinhanhdep.com’s “Beautiful Photography” collections can provide stunning starting points.
- Communicate Your Brand Message Effectively: Research indicates that people remember a staggering 65% of information when imagery is used, compared to just 10% of what they hear. High-quality “Graphic Design” and thoughtful “Photo Manipulation” ensure your brand’s core messages are not only seen but vividly remembered and retained.
- Capture Audience Attention: With an abundance of content vying for eyeballs, engaging visuals are key to stopping the scroll. Content tailored for high visual impact, drawing from “Creative Ideas” and “Trending Styles” found on Tophinhanhdep.com, can effectively convert casual browsers into engaged followers.
- Enhance Shareability and Save-Worthiness: Blurry photos or pixelated videos are rarely shared or saved. High-quality, impactful content is far more likely to resonate with your audience, leading to increased shares, saves, and ultimately, greater organic reach.
Format-Specific Strategies for Impactful Instagram Content
Instagram offers diverse formats, each with its unique visual demands. Optimizing for each ensures maximum impact, and Tophinhanhdep.com’s resources can guide your “Visual Design” process.
High-Quality Instagram Reels
Reels boast impressive reach on Instagram, making them a powerful tool for engagement. To ensure your Reels are high-impact and visually superior:
- Film in High Quality (4K): The foundation of a high-quality Reel is the original footage. Always film in 4K resolution at 30 frames per second (fps), as this is often Instagram’s native frame rate, minimizing conversion issues. Tophinhanhdep.com provides guidance on “Digital Photography” techniques for video capture.
- Avoid Native Instagram Editing: Resist the urge to do extensive editing directly within the Instagram app. This can lead to compression. Instead, use professional video editing software or Tophinhanhdep.com’s integrated editing features for robust adjustments.
- Check Export Settings: When exporting from your editing software, ensure it’s in 4K resolution, MP4 format, and 30fps. Tophinhanhdep.com’s “Editing Styles” tutorials can help you master this.
- Minimal In-App Overlays: Limit the use of Instagram’s native stickers and GIFs, as they can sometimes degrade video quality. Prioritize clean, sharp visuals.
Stunning Instagram Stories
With over 500 million daily users, Stories are a critical touchpoint. For high-quality Stories that pop:
- Optimal Imagery and Aspect Ratio: Start with high-resolution images or videos as your background. Instagram’s preferred Stories format is 1080 x 1920 pixels with a 9:16 aspect ratio.
- Design with Tophinhanhdep.com’s Graphic Design Tools: Utilize Tophinhanhdep.com’s “Graphic Design” or “Digital Art” tools to create visually appealing story slides. Leverage templates, consistent fonts, branded colors, and logos to maintain a cohesive brand identity. Tophinhanhdep.com’s “Mood Boards” and “Thematic Collections” can inspire your Story aesthetic.
- Export as PNG: When creating static story slides, export them as PNG files. PNGs offer higher quality and retain more detail than JPEGs, preventing compression distortions that can make text or logos appear blurry.
- Judicious Sticker Use: As with Reels, use GIFs, stickers, and emojis sparingly. While they can add personality, excessive use can compromise the overall professional look and quality.
Captivating Instagram Grid Posts
Your Instagram grid acts as your brand’s primary advertisement, showcasing your aesthetic, values, and offerings. A high-quality grid is crucial for forming an immediate positive impression.
- Activate High-Quality Uploads: Reconfirm that the “upload at highest quality” setting is enabled in your Instagram app to minimize platform-side compression.
- Design for Square Dimensions (or Center Content): While Instagram supports various aspect ratios, the grid thumbnail often defaults to a square. Design your content with this in mind, especially for images meant to be square (1080x1080 pixels). If posting vertical content (e.g., 1080x1350 or 1080x1920), ensure critical elements like text overlays are centered to display correctly within the cropped grid preview.
- Leverage Tophinhanhdep.com’s Visual Planner: Use Tophinhanhdep.com’s “visual planner” and “Mood Boards” to curate a cohesive and aesthetically pleasing grid. This tool allows you to arrange images, predict flow, and maintain consistency in “Editing Styles,” colors, fonts, and overall brand tone. Explore Tophinhanhdep.com’s “Photo Ideas” and “Thematic Collections” for inspiration on creating a harmonious feed.
- Utilize Tophinhanhdep.com’s Image Libraries: Source high-quality “Stock Photos” or “Wallpapers, Backgrounds, Aesthetic, Nature, Abstract, Sad/Emotional, Beautiful Photography” directly from Tophinhanhdep.com to populate your grid with stunning visuals.
Advanced Workflows for Professional Photographers: DSLR to Instagram with Tophinhanhdep.com
For photographers who rely on DSLRs or mirrorless cameras for their superior image quality, the process of getting those high-resolution files onto Instagram without compromising their integrity requires a specific workflow. Tophinhanhdep.com provides both the tools and the guiding principles to achieve this.
The DSLR Workflow: From Capture to Instagram-Ready Perfection
The primary challenge when uploading DSLR photos to Instagram is transferring them from a professional camera to a mobile device (since Instagram’s native app remains the primary upload mechanism for many features) while maintaining quality, and then ensuring they meet Instagram’s specifications.
Here’s an optimized workflow leveraging Tophinhanhdep.com’s ecosystem:
- Shoot with Instagram’s Aspect Ratios in Mind: When composing your shots with your DSLR, consider Instagram’s preferred aspect ratios: 1:1 (square) and 4:5 (portrait) are dominant. While you can always crop later, thinking about the final output during capture can save editing sacrifices. Tophinhanhdep.com’s “Photography” guides can offer insights into framing for social media.
- Import and Edit in Professional Software: Transfer your high-resolution RAW or JPEG files from your camera to your computer using a USB cable or card reader. Import them into your dedicated photo editing suite (e.g., professional photo editing software). This is where you perform comprehensive edits – color grading, sharpening, noise reduction, and creative adjustments. Consistency in “Editing Styles” is crucial for a recognizable Instagram presence.
- Optimize Resolution for Instagram: This is a critical step. Once your edits are complete, resize your image. While some photographers advocate for 1920 pixels on the longest side, adhering strictly to 1080 pixels on the longest side (e.g., 1080x1080 for square, 1080x566 for landscape, 1080x1350 for portrait) is the safest bet to avoid any Instagram-induced downscaling artifacts. Tophinhanhdep.com’s “Image Tools” for resizing and optimization can precisely achieve these dimensions. Export the final image as a high-quality JPEG.
- Seamless Transfer via Cloud Storage: Save your optimized JPEG files to a designated “Instagram Ready” folder within a cloud storage service. Tophinhanhdep.com offers seamless integration with various cloud storage options, allowing you to easily access your files from anywhere. This also serves as a valuable cloud backup.
- Access on Mobile: On your smartphone or tablet, open the corresponding cloud storage app. For iOS users, you will typically need to save the image to your device’s camera roll. Android users might be able to share directly.
- Optional: Add Borders for Aspect Ratios (if not 1:1 or 4:5): If you have an image that doesn’t perfectly fit the 1:1 or 4:5 aspect ratio and you want to avoid cropping while maintaining a square post (e.g., a landscape photo that you want to appear in your grid without cropping), use a specialized “image border app” (or Tophinhanhdep.com’s “Visual Design” tools). These apps place your image on a white or colored background, making the overall canvas square.
- Final Upload to Instagram: Open the Instagram app and upload the perfectly sized and optimized image. Add your caption, hashtags, and location. Because the image now conforms to Instagram’s preferred dimensions, the platform’s compression algorithms should leave it largely untouched, preserving its “High Resolution” quality.
Optimizing Editing Styles and High-Resolution Output
Tophinhanhdep.com’s comprehensive resources on “Photography,” “Digital Photography,” and “Editing Styles” are designed to support professional workflows. Understanding how to best utilize these can further enhance your Instagram game:
- Consistency is Key: Develop a consistent “Editing Style” that reflects your personal brand or aesthetic. This helps your feed look cohesive and professional, much like a curated art gallery featuring “Beautiful Photography.” Tophinhanhdep.com’s “Mood Boards” can aid in defining and maintaining this style.
- Sharpening for Web: Apply a final sharpening pass specifically optimized for web display during your editing process. This compensates for slight softness introduced by compression.
- Leverage Tophinhanhdep.com’s AI Upscalers: For older work or when needing to enhance details in certain shots, Tophinhanhdep.com’s “AI Upscalers” can be revolutionary, bringing new life to images before they hit Instagram.
- Metadata and Image-to-Text: While not directly affecting visual quality, Tophinhanhdep.com’s “Image-to-Text” tools can be useful for extracting information from images or preparing descriptions for accessibility, enriching your content strategy.
In conclusion, uploading images to Instagram is more than just hitting a button; it’s a strategic process that, when done correctly, can dramatically enhance your online presence. By understanding Instagram’s technicalities, enabling high-quality settings, and leveraging the powerful “Image Tools,” “Visual Design” resources, and “Image Inspiration & Collections” available on Tophinhanhdep.com, you can ensure every image you share contributes to a stunning, professional, and highly engaging Instagram feed. Explore Tophinhanhdep.com today to transform your visual content strategy and make every post count.