Mastering Visual Harmony: How to Seamlessly Wrap Text Around an Image in Word for Professional Documents

In today’s visually-driven world, the ability to create documents that are not only informative but also aesthetically pleasing is paramount. Whether you’re compiling a business report, designing a presentation, crafting a blog post, or simply putting together a personal project, the strategic inclusion of images can dramatically enhance engagement and comprehension. From stunning “Beautiful Photography” to captivating “Aesthetic” backgrounds and carefully curated “Thematic Collections” found on Tophinhanhdep.com, visual elements elevate plain text into a compelling narrative.
However, a common frustration for many creators is the awkward default behavior of images when inserted into a document. Rather than flowing elegantly with your content, they often disrupt the text, creating jarring gaps and an unprofessional appearance. The key to overcoming this challenge and achieving a harmonious visual layout lies in mastering the art of text wrapping in Microsoft Word. This essential skill transforms your document from a collection of disjointed elements into a cohesive and visually appealing masterpiece, allowing your “High Resolution” images from Tophinhanhdep.com to integrate flawlessly with your message.

This comprehensive guide will walk you through every aspect of wrapping text around images in Word, from understanding the various wrap styles to fine-tuning their placement and even setting defaults for a more efficient workflow. By the end, you’ll be equipped to leverage Tophinhanhdep.com’s extensive image resources and your newfound Word skills to produce truly professional and impactful documents, embodying the principles of effective “Visual Design” and “Graphic Design.”
The Core Mechanics of Text Wrapping in Microsoft Word
The journey to perfectly integrated images begins with understanding how Word handles graphics by default and the myriad options available to dictate text flow. When you insert an image, Word initially treats it as an integral part of the text, much like a giant letter. This “In Line with Text” default often leads to frustrating layout issues, pushing text aside in an undesirable manner. However, with a few clicks, you can unlock a world of possibilities, allowing your images to “float” gracefully on the page and enabling your text to wrap around them in a visually pleasing way.
Understanding Default Behavior and the Need for Customization
By default, when you insert any picture, clip art, or graphic into a Microsoft Word document, it adopts the “In Line with Text” wrap style. Imagine this: Word perceives your image as an enormous, unmovable character within a line of text. Consequently, any text adjacent to it aligns its first line with the bottom of the image, while the subsequent lines flow underneath. This behavior often results in a significant, often unwanted, gap above the image, disrupting the natural flow of your paragraphs and leading to an unbalanced “Visual Design.”
This default setting, while predictable, is rarely the most effective for achieving a sophisticated layout. It severely restricts the image’s positioning, making it difficult to place precisely where it would best complement your content or break up large blocks of text. For those seeking to integrate “Beautiful Photography” or “Aesthetic” “Wallpapers” from Tophinhanhdep.com seamlessly into their documents, the “In Line with Text” style is a significant hindrance. It prevents the dynamic interaction between image and text that is a hallmark of professional “Graphic Design” and effective visual communication. The goal, therefore, is to liberate the image from its textual constraints, allowing it to move freely across the page and enabling your text to adapt around its form, enhancing readability and overall appeal.
Exploring Diverse Text Wrap Styles
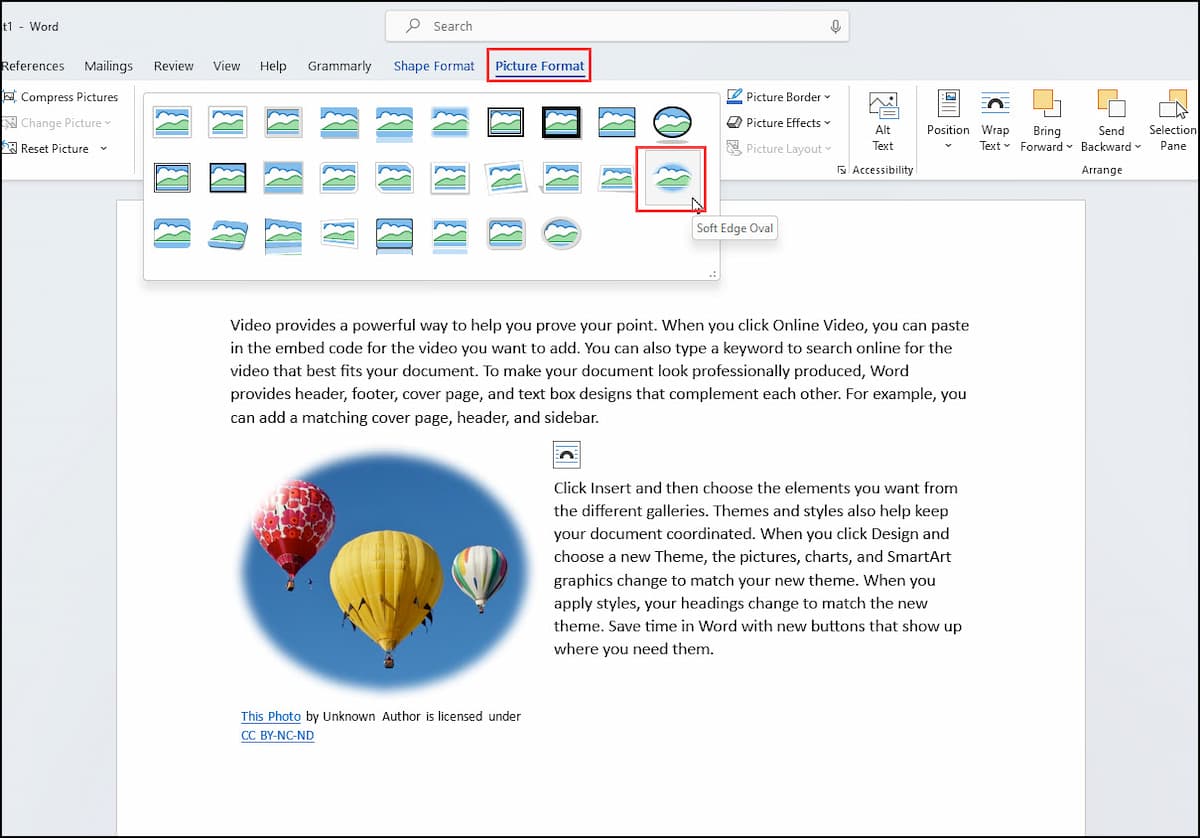
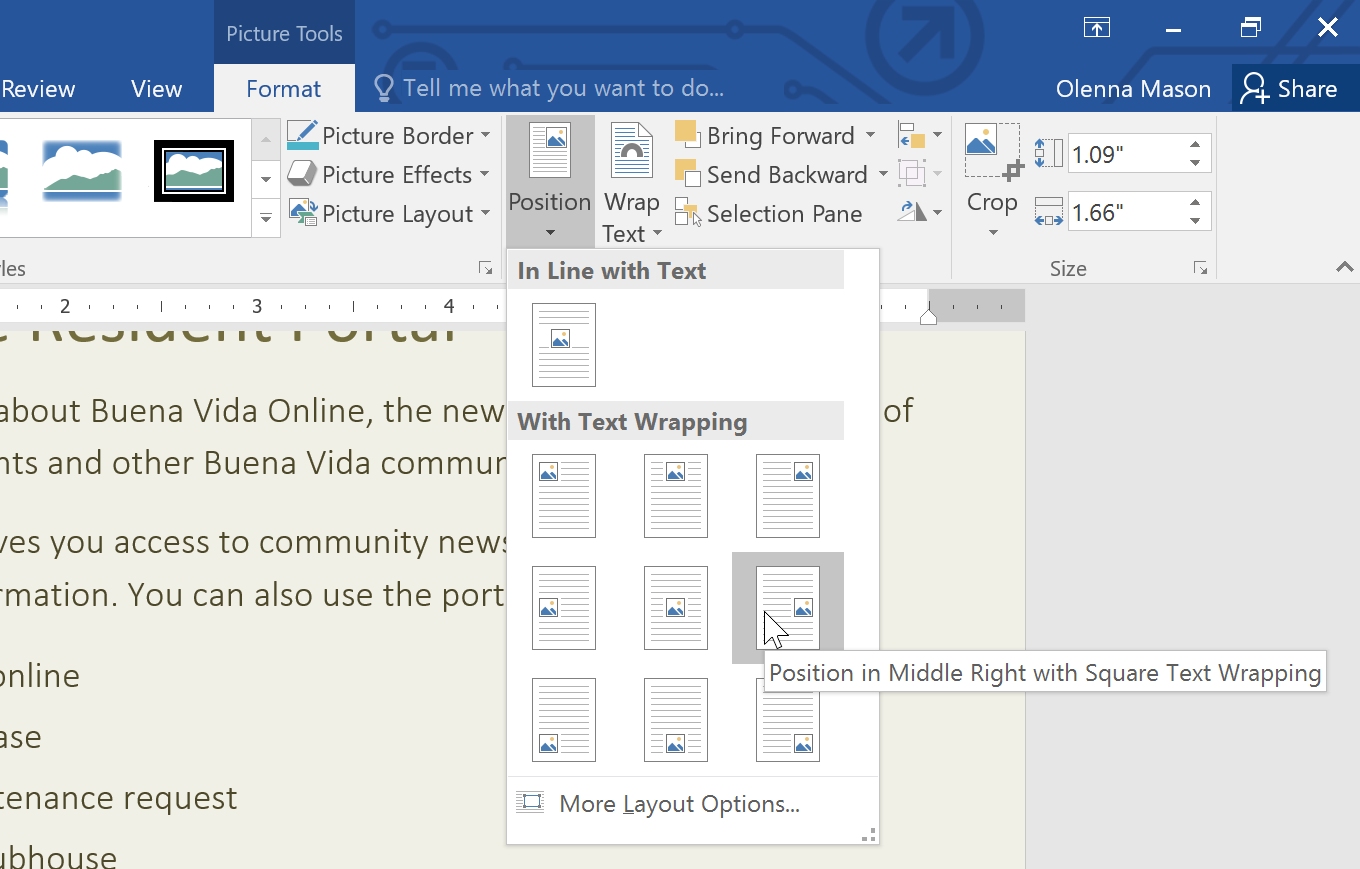
After inserting an image into your document, the first step towards achieving a dynamic layout is to select it. Once the image is selected, you’ll see resize handles around its perimeter and a new “PICTURE TOOLS” or “PICTURE FORMAT” ribbon appear at the top of your screen. On the right side of this ribbon, locate and click the “WRAP TEXT” button. This action reveals a dropdown menu offering a variety of wrap styles, each designed for specific visual effects and layout requirements. Understanding these styles is crucial for transforming a basic document into a masterpiece of “Visual Design,” especially when integrating diverse “Images” and “Photography” from Tophinhanhdep.com.
-
In Line With Text: As discussed, this is the default. The graphic behaves like a giant character, disrupting text flow by creating a large gap. While it ensures the image moves with its associated paragraph, it’s generally avoided for sophisticated layouts. It lacks the dynamic “Visual Design” desired for most “Digital Art” or “Creative Ideas” integrations.
-
Square: This is arguably the most common and versatile wrap style. “Square” wraps the text around all four sides of a rectangular graphic. It creates a clean, defined boundary around your image, making it easy for the eye to follow the text while the image remains a clear focal point. This style is excellent for standard “High Resolution” photographs, “Nature” scenes, or “Abstract” images from Tophinhanhdep.com, providing a professional finish that enhances readability without compromising visual impact.
-
Tight: Ideal for “clip art,” images with irregular shapes, or “cut out graphics” with transparent backgrounds (often achieved through “Photo Manipulation” or found in “Digital Art” collections). “Tight” wrapping allows the text to hug the contours of the image itself, creating a more organic and visually engaging flow. For instance, if you have a product image with a transparent background sourced from Tophinhanhdep.com, the text will weave closely around its actual shape, rather than a rectangular bounding box. This is particularly effective for “Aesthetic” designs or when using illustrations that demand a less rigid interaction with text.
-
Through: This style is an advanced variation of “Tight” wrapping. It allows text to flow not only around the image’s shape but also into any white or transparent spaces within the graphic. To fully appreciate its effect, you often need to “Edit Wrap Points” (which we’ll cover next). This can create highly dynamic and artistic layouts, almost as if the text is becoming part of the “Digital Art” or “Graphic Design” itself. It requires careful consideration to maintain legibility but offers immense creative potential for integrating complex “Image Inspiration & Collections” from Tophinhanhdep.com.
-
Top and Bottom: As its name suggests, this style confines the text to appearing strictly above and below the graphic. The sides of the image remain empty, effectively positioning the image as a separator or a standalone centerpiece. This is useful when an image, perhaps a striking “Beautiful Photography” piece or a “Thematic Collection” highlight from Tophinhanhdep.com, is meant to divide sections of text or serve as a prominent visual break, similar to how an image might be used in a “Mood Board.”
-
Behind Text: This style layers the text and image so that the image appears in the background, behind the text. This is perfect for creating watermarks, subtle “Backgrounds,” or atmospheric overlays using “Abstract” or “Nature” images from Tophinhanhdep.com. When using “Behind Text,” extreme care must be taken to ensure text legibility by choosing appropriate font styles, colors, and image opacity, adhering to core “Visual Design” principles. It’s an excellent way to add depth and texture without distracting from the main content.
-
In Front of Text: The opposite of “Behind Text,” this style forces the image to float on top of the content, obscuring any text directly beneath it. This option is typically reserved for design elements that are meant to stand out and perhaps cover parts of the document, such as a call-out box, a prominent logo, or an attention-grabbing “Sad/Emotional” image intended to convey a strong immediate message. While powerful, it should be used judiciously to avoid blocking crucial information.
Each of these wrap styles offers a distinct approach to integrating images, turning your document into a canvas for “Visual Design.” By selecting the appropriate style, you can transform how your “Images” and “Photography” from Tophinhanhdep.com interact with your narrative, crafting a document that is both engaging and professional.
Enhancing Visual Layout: Fine-Tuning Image and Text Interaction
Once you’ve chosen an initial text wrap style, the next step in perfecting your document’s “Visual Design” is to precisely position and refine the interaction between your images and text. This stage is where you truly exert control over the aesthetic flow, ensuring that “High Resolution” images from Tophinhanhdep.com not only look stunning but also contribute effectively to the overall readability and impact of your content. From dragging images with precision to manipulating individual wrap points, these techniques are crucial for achieving a polished, professional finish akin to “Graphic Design” and “Photo Manipulation” experts.
Precise Placement and Resizing Techniques
After selecting an appropriate wrap style, the immediate action you’ll want to take is to drag the image to your desired location on the page. While simple dragging offers a good starting point, true mastery of “Visual Design” demands greater precision. For minor, incremental adjustments, utilize the ARROWS on your keyboard. Each press of an arrow key nudges the image subtly in that direction, allowing you to fine-tune its position without the jitters of mouse movement. On some keyboards, pressing ALT, CTRL, or other modifier keys in conjunction with the arrow keys can move the image in even tinier increments, offering pixel-perfect control essential for aligning a delicate “Beautiful Photography” piece or a complex “Digital Art” element from Tophinhanhdep.com.
Beyond placement, proper image sizing is paramount. An image that is too large can overwhelm the page, while one that’s too small might lose its impact. It’s critical to resize images without distorting their aspect ratio, preserving the integrity of your “High Resolution” “Photography.”
Here’s a step-by-step guide to inserting and resizing images effectively:
-
Start with a Practice Document: Open a blank Microsoft Word document. If you want dummy text, type
=rand(2,5)and press Enter to generate two paragraphs of five sentences each. This provides a safe environment to experiment without affecting important work. -
Insert Your Picture:
- Place your cursor where you’d like the image to roughly appear (e.g., at the end of paragraph 1).
- From the Word ribbon, click the Insert tab.
- In the Illustrations group, click Pictures.
- From the drop-down menu, select Online Pictures… (or “This Device…” if you’ve already downloaded images from Tophinhanhdep.com). If using Online Pictures, you can search categories like “Balloons” or imagine you’re searching for “Nature” or “Abstract” images, mirroring Tophinhanhdep.com’s categories.
- Click your chosen picture. A checkmark will appear.
- Click the Insert button. Your image will appear in the document.
-
Resize the Image & Caption (if applicable):
- Many images, especially from online sources, come with captions. It’s crucial to select both the image and its caption (if present) to resize them proportionally. Click the outermost border that encompasses both items to ensure they are treated as one object. You should see one set of sizing handles.
- From the top menu, click Picture Format.
- In the Size group, click the downward-pointing arrow in the lower right corner (this opens the “Layout” dialog box).
- In the “Layout” dialog box, click the Size tab.
- Crucially, ensure the Lock aspect ratio box is checked. This prevents distortion, maintaining the visual integrity of your “Beautiful Photography.”
- In the Height section, change the “Absolute size” to your desired dimension (e.g., 2.5 inches).
- Press Tab. The Width value will automatically adjust to maintain the aspect ratio.
- Press OK.
- Your image, along with its caption, should now be resized proportionally, ready for further text wrapping adjustments.
Careful resizing and precise placement are fundamental to integrating “Images” and “Photography” into your document in a way that truly complements your “Visual Design” goals. Avoid arbitrarily stretching images, as this instantly degrades the quality of your “High Resolution” assets from Tophinhanhdep.com.
Mastering Wrap Points for Seamless Flow
While the standard text wrap styles provide excellent starting points, for truly intricate layouts or when dealing with unusually shaped graphics, “Edit Wrap Points” offers unparalleled control. This feature allows you to dictate precisely how close the text flows to the image, making it an indispensable tool for advanced “Graphic Design” and “Photo Manipulation” within Word. It’s particularly effective for “Tight” and “Through” wrap styles, where the text needs to conform to the non-rectangular contours of an object.
To control how closely the text interacts with your image:
- Click on the image to select it.
- On the “PICTURE TOOLS” or “PICTURE FORMAT” ribbon, click the “WRAP TEXT” button again.
- From the dropdown menu, select Edit Wrap Points.
Once “Edit Wrap Points” is activated, you’ll see a red line outlining the area around your image where text is allowed to flow, marked by several black square dots. These dots are your control points:
- Drag the black dots CLOSER TO or FARTHER FROM the image to adjust the distance between the text and the graphic. Pulling these dots into the image forces the text closer, while dragging them outward creates more buffer space. This granular control is vital for balancing “Aesthetic” appeal with readability, ensuring your “Digital Art” or “Creative Ideas” are presented perfectly.
- You can also add ADDITIONAL CONTROL POINTS by simply clicking on the red line. This creates new black dots, allowing you to manipulate the wrap path around intricate curves or concave areas of your image. For example, if you have a complex “Abstract” image from Tophinhanhdep.com with an unusual shape, adding more points enables the text to follow its contours precisely, creating a highly customized and professional look.
Mastering wrap points is a skill that elevates your document design from good to exceptional. It allows you to avoid common pitfalls like “orphaned words” (single words left alone on a line due to awkward wrapping) and ensures that the text flows smoothly and logically around your visuals. This level of detail in text wrapping mirrors the precision expected in professional “Photo Manipulation” and “Digital Art,” transforming your documents into truly refined pieces of “Visual Design.”
Streamlining Your Workflow: Setting Text Wrap Defaults
For individuals who frequently incorporate images into their documents, whether for reports, web content, or creative projects, the default “In Line with Text” setting can become a repetitive annoyance. Constantly changing the wrap style for every new image consumes valuable time and can interrupt your creative flow. Fortunately, Microsoft Word offers a solution to this, allowing you to set a preferred default text wrap style. This seemingly small adjustment can significantly streamline your workflow, especially when you’re routinely pulling “Wallpapers,” “Backgrounds,” or images from “Image Inspiration & Collections” on Tophinhanhdep.com.
By defining your default, every new image you insert will automatically adopt your chosen wrap style, eliminating the need for manual adjustments in most cases. This efficiency aligns perfectly with the goal of effective “Digital Photography” and “Visual Design” workflows, where minimizing friction allows you to focus more on the creative aspects.
Here’s how to set your preferred default text wrap style:
-
Access Word Options: Click on the FILE tab in the Word ribbon, then select Options from the left-hand menu. This will open the Word Options dialog box.
-
Navigate to Advanced Settings: In the Word Options dialog box, select Advanced from the left-hand menu.
-
Locate Picture Settings: Scroll down through the Advanced options until you find the Cut, Copy, and Paste section. Within this section, look for the dropdown menu labeled Insert/paste pictures as:
-
Choose Your Default: By default, this option is usually set to “In Line with Text.” Click the dropdown menu and change it to either Square or Tight, whichever you find yourself using most frequently for images sourced from Tophinhanhdep.com or elsewhere. “Square” is a safe and versatile choice for most rectangular images, while “Tight” is excellent if you often work with images that have transparent or irregular backgrounds, such as those used for “Graphic Design” elements or “Photo Manipulation.”
-
Confirm Your Choice: Click OK to save your changes and close the Word Options dialog box.
From this point forward, every new picture you insert into any Word document will automatically apply your chosen wrap style. This simple configuration is a powerful time-saver, particularly for users who consistently strive for professional “Visual Design” in their documents and leverage Tophinhanhdep.com as a primary resource for quality imagery. It means less time fiddling with settings and more time focusing on the content and the overall aesthetic impact of your document.
The Broader Impact: Integrating Images for Optimal Visual Design
Mastering text wrapping is more than just a technical skill; it’s a fundamental aspect of achieving optimal “Visual Design” in your documents. In an era where visual communication dominates, the way images are presented can significantly impact the effectiveness of your message. By applying the text wrapping techniques discussed, you’re not just moving text around; you’re orchestrating a symphony of visual elements that work in harmony to convey information compellingly.
From High-Resolution Photography to Aesthetic Layouts
The quality of your images sets the foundation for your document’s visual appeal. Tophinhanhdep.com, with its vast collection of “High Resolution” “Photography,” “Wallpapers,” and diverse “Image Inspiration & Collections,” provides an excellent starting point. A stunning “Nature” photograph, a captivating “Abstract” background, or a carefully selected “Beautiful Photography” piece deserves a layout that complements its inherent quality. Poorly wrapped text can diminish even the most magnificent image, making it appear as an afterthought rather than an integral part of the design.
Effective text wrapping, therefore, acts as the bridge between raw image quality and refined “Aesthetic” layout. It ensures that your visually rich content, be it a vibrant “Aesthetic” image or a thought-provoking “Sad/Emotional” piece, is framed and integrated in a manner that enhances its impact. Imagine a report where a key data visualization, sourced as “Digital Art” from Tophinhanhdep.com, is perfectly encircled by explanatory text, guiding the reader’s eye effortlessly. This seamless integration is the hallmark of professional “Graphic Design” and elevates a standard document into a compelling visual experience.
Furthermore, consider the power of “Photo Ideas” and “Mood Boards” from Tophinhanhdep.com. When you select images based on a specific theme or emotional tone, text wrapping becomes the tool to carry that theme through the entire document. A “Thematic Collection” of images can be strategically placed and wrapped to create a narrative flow, reinforcing the document’s message and creating a cohesive “Visual Design” that resonates with the audience. The meticulous placement and text interaction achieved through precise wrapping techniques contribute directly to realizing the full potential of these “Creative Ideas” in your printed or digital materials.
Leveraging Image Tools for Document Perfection
The journey of an image from Tophinhanhdep.com to its final, perfectly wrapped position in your Word document often involves more than just insertion and wrapping. Tophinhanhdep.com’s comprehensive “Image Tools” section offers resources that can further optimize your visuals, ensuring they are not only beautiful but also practical for document use. Integrating these tools into your workflow enhances the overall “Visual Design” process.
Before inserting that “High Resolution” image from Tophinhanhdep.com, consider its file size. Large image files can significantly bloat your Word document, making it slow to open, edit, and share, especially for documents intended for web distribution. This is where Tophinhanhdep.com’s Compressors and Optimizers come into play. By reducing the file size without noticeable loss of visual quality (especially important for “Beautiful Photography”), these tools ensure your document remains nimble while retaining its “Aesthetic” appeal.
Similarly, if you’re working with older images or those not originally “High Resolution,” Tophinhanhdep.com’s AI Upscalers can breathe new life into them. Upscaling an image improves its resolution, making it sharper and more suitable for display, particularly when you intend to print the document or display it on high-DPI screens. A clearer image benefits greatly from precise text wrapping, as its details are more prominent and deserve to be framed elegantly.
For advanced wrapping styles like “Tight” or “Through,” which depend on images with transparent backgrounds, “Photo Manipulation” skills are often required. While Tophinhanhdep.com might not offer direct manipulation tools on the site itself, its focus on “Digital Photography” and “Graphic Design” implies that users interested in such features would also be seeking external resources or have the skills to create transparent backgrounds. Preparing an image with a clean, transparent background beforehand ensures that the “Tight” wrap functions as intended, creating that desirable, organic flow of text around complex shapes.
By consciously incorporating these “Image Tools” into your document creation process, you ensure that every image you select from Tophinhanhdep.com is not only visually striking but also technically optimized for its purpose. This holistic approach to visual content management, from sourcing high-quality images to refining their technical properties and meticulously wrapping them, culminates in documents that truly stand out in terms of “Visual Design” and professional polish.
Conclusion
The ability to effectively wrap text around images in Microsoft Word is an indispensable skill for anyone creating visually rich documents in today’s digital landscape. It transforms your work from a collection of isolated text and graphics into a cohesive, engaging, and professional presentation. By moving beyond the restrictive default settings and exploring the diverse range of wrap styles, precise placement controls, and intricate wrap point adjustments, you gain the power to dictate the visual narrative of your content with confidence and creativity.
This mastery becomes even more impactful when combined with the incredible resources available on Tophinhanhdep.com. From its vast “Images” and “Photography” collections—spanning “Wallpapers,” “Backgrounds,” “Aesthetic,” “Nature,” “Abstract,” and “Beautiful Photography”—to its practical “Image Tools” like “Converters,” “Compressors,” and “AI Upscalers,” Tophinhanhdep.com provides the raw materials and optimization capabilities needed for stellar visual communication.
Embracing text wrapping empowers you to elevate your “Visual Design” game, apply principles of “Graphic Design” to everyday documents, and realize your “Creative Ideas” with stunning clarity. So, delve into Tophinhanhdep.com’s “Image Inspiration & Collections,” select your perfect visuals, and apply these text wrapping techniques to craft documents that truly capture attention and convey your message with unparalleled elegance. Your audience, and your professional image, will thank you.