How to Add an Image to a Webpage: A Comprehensive Guide from Tophinhanhdep.com

In today’s visually-driven digital landscape, images are more than just decorative elements; they are powerful tools for communication, engagement, and branding. From captivating wallpapers and immersive backgrounds to aesthetic compositions and stunning nature photography, visuals enhance user experience, convey emotions, and break up text, making content more digestible and appealing. At Tophinhanhdep.com, we understand the profound impact of compelling visuals, which is why we offer a vast collection of high-resolution images, digital art, and essential image tools to help you create truly remarkable web pages.
Adding an image to your webpage might seem like a straightforward task, but mastering the process involves understanding various technical approaches, optimizing your visuals for performance, and considering best practices for accessibility and design. This comprehensive guide will walk you through the different methods of integrating images into your web content, from the foundational principles of HTML to the streamlined workflows of modern content management systems and no-code platforms. We’ll also delve into optimization strategies, advanced design considerations, and how to leverage Tophinhanhdep.com’s resources—including our diverse image collections and powerful image tools—to ensure your visuals leave a lasting impression.
Understanding the Fundamentals: HTML for Image Embedding
The backbone of the internet, HTML (HyperText Markup Language), provides the most direct method for embedding images into a webpage. While modern platforms abstract much of this complexity, grasping the fundamental HTML tags and attributes for images is crucial for any web developer or content creator. It offers unparalleled control and a deeper understanding of how images are rendered on the web.
The Core HTML <img> Tag
At the heart of image embedding in HTML is the <img> tag. Unlike most HTML tags that come in pairs (like <p> and </p>), the <img> tag is a self-closing, or “empty,” tag. This means it stands alone, with all its necessary information contained within a single tag. It acts as a placeholder, instructing the browser where to find and display the image.
The most critical attribute of the <img> tag is src, which stands for “source.” This attribute tells the web browser the exact URL (Uniform Resource Locator) where the image file is located. For instance, if you’ve discovered a breathtaking piece of beautiful photography or an inspiring abstract art image on Tophinhanhdep.com, you would use its direct image URL here. It’s imperative that this URL is correct and points directly to the image file (e.g., ending in .jpg, .png, .gif). An incorrect URL will result in a broken image icon, diminishing the professionalism and aesthetic of your page.
Example of the src attribute:
<img src="https://www.tophinhanhdep.com/images/high-resolution-nature-wallpaper.jpg" alt="A serene high-resolution nature wallpaper featuring lush green mountains and a clear blue sky">Another indispensable attribute is alt, short for “alternative text.” This text serves multiple crucial functions:
- Accessibility: Screen readers use the
alttext to describe the image to visually impaired users, making your content inclusive. For an aesthetic or emotional image from Tophinhanhdep.com, thealttext can convey the mood or concept. - SEO (Search Engine Optimization): Search engines crawl
alttext to understand the content of your images, which can improve your page’s visibility in image search results and overall SEO. - Fallback: If the image fails to load (due to a broken
srclink, slow internet, or server issues), thealttext will be displayed in its place, providing context to the user.
Tophinhanhdep.com Pro Tip: Always provide descriptive alt text. For a sad/emotional image, describe the emotion it evokes. For an abstract image, describe its primary colors, shapes, or general impression. If an image is purely decorative (like a background pattern), you can use an empty alt attribute (alt="") to tell screen readers to skip it.
Before you can link an image, it must be hosted online. This could be on your own web server (via FTP), a cloud storage service, or a dedicated image hosting platform. When you download high-resolution stock photos or digital photography from Tophinhanhdep.com, remember to upload them to your own hosting environment. Directly linking to Tophinhanhdep.com (known as “hotlinking”) for an image you’ve used is generally not recommended, as it uses our bandwidth without direct traffic to our site. Always respect copyright and terms of service.
Controlling Image Dimensions and Appearance
While the src and alt attributes are essential for displaying an image, HTML also offers attributes to control its size and add extra interactivity.
The width and height attributes allow you to specify the display dimensions of an image in pixels or as a percentage of its container. For instance, width="500" would set the image width to 500 pixels.
<img src="image.jpg" alt="A beautiful autumn landscape" width="800" height="600">Tophinhanhdep.com’s Best Practice for Image Sizing: While these attributes can quickly resize an image, it’s generally better to resize the image file itself using editing software before uploading it. If you upload a massive high-resolution image (e.g., 4000px wide) and then use HTML to display it at 400px, the browser still has to download the entire large file, slowing down your page load speed. Tophinhanhdep.com offers powerful image compressors and optimizers that can reduce file sizes significantly without sacrificing the visual integrity of your beautiful photography or digital art. If you need a smaller image enlarged, our AI upscalers can intelligently increase resolution for optimal display.
The title attribute adds a tooltip that appears when a user hovers their mouse cursor over the image. This can be used for supplementary information, such as giving credit to a photographer or providing additional context for an aesthetic or abstract image.
<img src="image.jpg" alt="A dramatic mountain vista" title="Photography by Alex Johnson, exclusively on Tophinhanhdep.com">Finally, to make an image clickable, you can wrap the <img> tag within an <a> (anchor) tag, which creates a hyperlink. This is a common technique to allow users to click on a thumbnail to view a larger version of an image, or to navigate to another page.
<a href="https://www.tophinhanhdep.com/collections/nature-photography" target="_blank">
  <img src="https://www.tophinhanhdep.com/images/small-nature-icon.jpg" alt="Explore Tophinhanhdep.com's Nature Photography collection">
</a>
This method is excellent for creating interactive calls to action or directing visitors to specific thematic collections or mood boards on Tophinhanhdep.com.
Streamlining Image Integration: Content Management Systems and No-Code Platforms
While HTML provides the fundamental control, most modern websites are built using Content Management Systems (CMS) like WordPress or utilize no-code platforms such as Systeme.io or Apple Pages. These platforms offer intuitive interfaces that abstract away much of the underlying code, making image insertion a more streamlined and visually-driven process.
User-Friendly Image Uploads in CMS Platforms
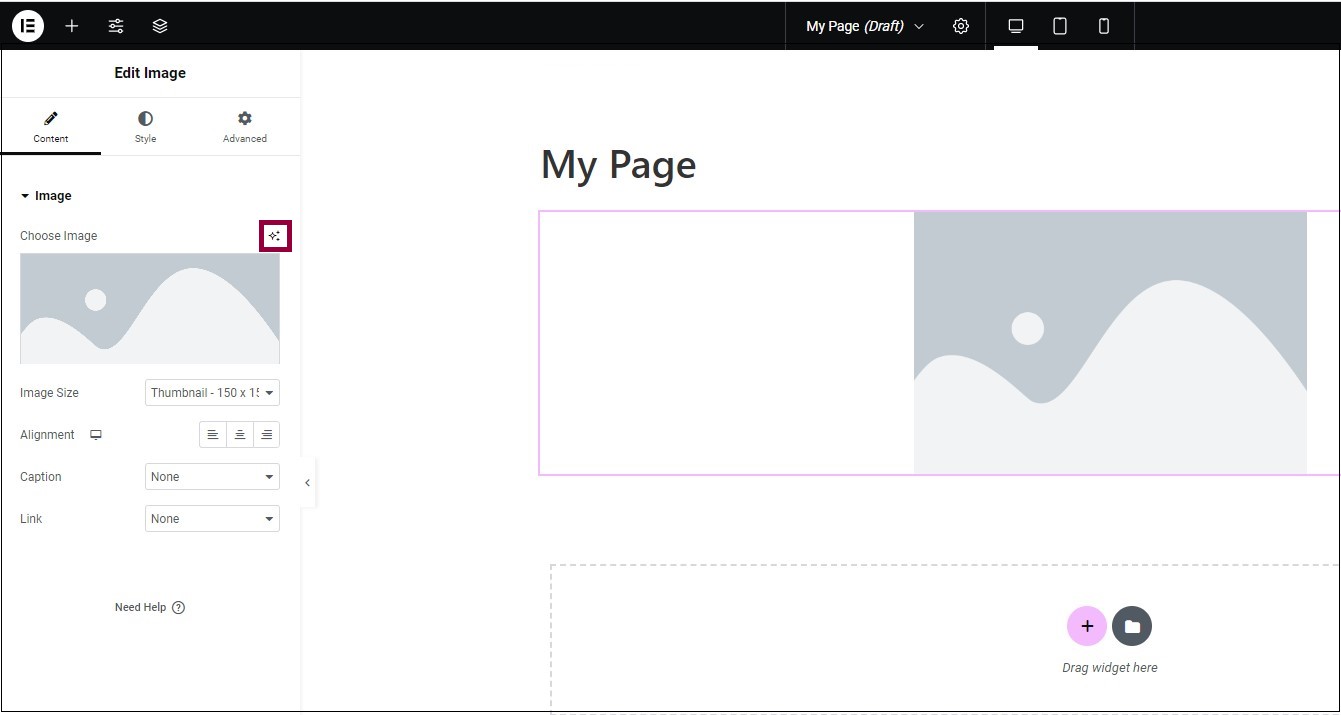
CMS platforms are designed to make content creation accessible to users without extensive coding knowledge. The process of adding images is typically guided through a visual editor, often involving a “Media Library” system.
The general workflow for adding an image in a CMS typically follows these steps:
- Place Your Cursor: Position your cursor in the text editor where you want the image to appear. Many CMS editors allow you to add images “inline” with text or on their own line.
- Click “Add Media”: Locate and click the “Add Media” button, which usually opens a dedicated media uploader interface.
- Upload or Select: You’ll typically have two options:
- Upload Files: Choose an image file directly from your computer. This is where you would upload any high-resolution stock photos or digital photography you’ve acquired from Tophinhanhdep.com.
- Media Library: Select an image that has already been uploaded to your website. This library serves as a repository for all your site’s visual assets, including wallpapers, backgrounds, and graphic design elements.
- Configure Attachment Details: Once an image is selected or uploaded, a panel will appear, allowing you to edit its details. This is crucial for:
- Title: A descriptive name for your image, often used internally by the CMS.
- Caption: Text that appears directly below the image on the page, useful for adding context or photo credits.
- Alternate Text (Alt Text): As discussed with HTML, this is vital for accessibility and SEO. Always fill this in with a concise, descriptive phrase, especially for aesthetic or abstract art images.
- Description: More detailed information about the image, which might appear on an “attachment page” if the image is linked to one.
- Configure Display Settings: Before inserting, you can usually control how the image will appear on the page:
- Alignment: Options like Left, Right, Center, or None determine how the image sits relative to surrounding text. “Left” or “Right” often allows text to “wrap” around the image, creating dynamic layouts.
- Link To: You can specify what happens when a user clicks the image. Options include linking to the original media file (full size), an attachment page, a custom URL (e.g., linking a beautiful photography piece to its collection on Tophinhanhdep.com), or disabling the link entirely.
- Size: CMS platforms often automatically generate several sizes (Thumbnail, Medium, Large, Full Size) from your uploaded image. You can select the most appropriate size for your layout.
Tophinhanhdep.com Recommendation: Even with a CMS that resizes images, pre-optimizing your high-resolution images with Tophinhanhdep.com’s compressors before uploading can significantly reduce file sizes and improve your website’s load times. This is particularly important for pages featuring many images like thematic collections or mood boards.
Drag-and-Drop Visual Editors
No-code platforms and page builders (often integrated into CMS or standalone) take visual content creation a step further with drag-and-drop interfaces. Tools like Systeme.io or the Pages app on iPad exemplify this approach, making image embedding exceptionally intuitive.
The process typically involves:
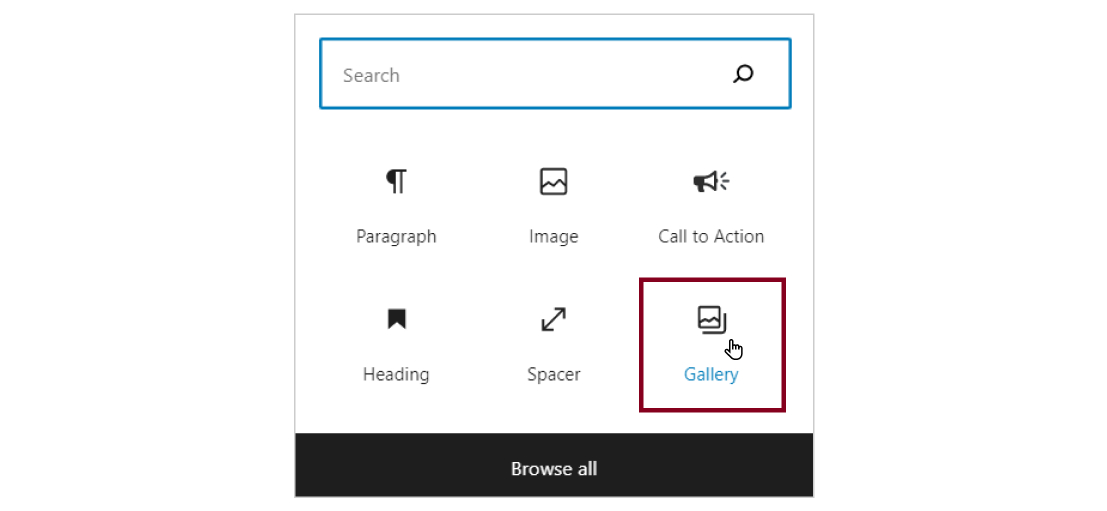
- Dragging an Image Element: From a sidebar or element panel, you’d literally drag an “Image” element onto your page layout.
- Selecting/Uploading the Image: Click on the dropped image element to bring up options to upload a new image from your computer or select one from an existing media library.
- Real-time Preview and Editing: One of the main advantages is the immediate visual feedback. You see exactly how the image looks on your page as you’re working. These editors often provide basic inline editing capabilities:
- Resizing Handles: Grab the corners or edges of the image to visually resize it.
- Basic Image Adjustments: Tools for cropping, rotating, or flipping the image might be available directly within the editor.
Tophinhanhdep.com Advice: While convenient, for advanced photo manipulation, detailed digital art creation, or precise aesthetic adjustments, it’s generally best to use professional editing software or Tophinhanhdep.com’s dedicated image tools before uploading. This ensures the highest quality for your backgrounds, wallpapers, or complex graphic design elements.
Most drag-and-drop editors also make it simple to turn an image into a clickable link. By selecting the image element, you’ll typically find a “Link” field where you can paste a URL or choose an existing page or file. This ease of linking makes it simple to integrate calls to action or guide users through your creative ideas and thematic collections.
Optimizing Your Visuals: Best Practices for Web Performance and Aesthetic Appeal
Adding images is just the first step; optimizing them is crucial for a fast, accessible, and visually stunning webpage. Unoptimized images are often the primary cause of slow loading times, frustrating users and negatively impacting search engine rankings. Tophinhanhdep.com champions the fusion of beautiful photography with technical excellence, providing both the images and the tools to achieve this.
The Importance of Image Optimization
Every image on your webpage contributes to its total file size. Larger total file sizes mean longer download times, especially for users on slower connections or mobile devices.
- Page Load Speed: This is paramount for user experience and SEO. Google, for instance, heavily prioritizes fast-loading pages.
- Tophinhanhdep.com Solution: Our suite of image tools, including image compressors and optimizers, is designed precisely for this challenge. They intelligently reduce file sizes by removing unnecessary data and applying efficient compression algorithms, without discernible loss in visual quality. This is especially vital for high-resolution images, wallpapers, and backgrounds downloaded from Tophinhanhdep.com.
- Choosing the Right File Format: Different image formats are suited for different types of visuals:
- JPEG (.jpg, .jpeg): Ideal for photographs and complex images with many colors and gradients, such as nature photography or beautiful photography. It offers excellent compression for these types of images.
- PNG (.png): Best for images requiring transparency (like logos or graphic design elements) or sharp, non-photographic images. It’s lossless, meaning it retains all original data, but often results in larger file sizes than JPEGs for photos.
- GIF (.gif): Suitable for simple animations and images with a limited color palette.
- WebP (.webp): A modern format that offers superior lossless and lossy compression for images on the web. It’s increasingly supported by browsers and can significantly reduce file sizes compared to JPEG and PNG. Tophinhanhdep.com’s converters can help you switch between these formats efficiently.
- Matching Image Dimensions: Avoid uploading an image that is significantly larger than its display size. For example, if an image will only ever appear as 600px wide on your page, there’s no need to upload a 2000px wide version.
- Tophinhanhdep.com’s AI Upscalers: Conversely, if you have a smaller image that you need to display larger without it appearing pixelated or blurry, Tophinhanhdep.com’s AI upscalers can intelligently increase its resolution, making it suitable for larger sections, hero images, or even backgrounds, preserving the quality of the original digital art or stock photos.
- Responsive Images: Ensure your images adapt gracefully to different screen sizes (desktops, tablets, phones).
- A common CSS technique is
img { max-width: 100%; height: auto; }. This ensures images scale down to fit their container without overflowing. Modern HTML also offers<picture>andsrcsetattributes to serve different image files based on screen size or resolution, further optimizing performance.
- A common CSS technique is
Enhancing Visuals for Impact
Beyond technical optimization, the aesthetic quality and strategic placement of your images are paramount to creating an engaging user experience.
- Visual Design Principles: Consider composition, color harmony, and the emotional tone your images convey.
- Tophinhanhdep.com Inspiration: Explore our curated collections of aesthetic images, abstract art, sad/emotional images, and vibrant nature photography to find visuals that perfectly resonate with your page’s message and theme. We provide endless photo ideas and thematic collections to spark your creativity.
- Digital Photography and Editing Styles: Consistency in editing styles (e.g., color grading, filters) across all your website images contributes to a cohesive and professional look. Tophinhanhdep.com serves as a fantastic resource for exploring various editing styles and finding inspiration for your digital photography projects.
- Graphic Design Integration: Images often function as integral components within a larger graphic design.
- Think about how text overlays, call-to-action buttons, and other graphic elements interact with your background images or hero shots. Tophinhanhdep.com is a treasure trove of creative ideas and raw assets for photo manipulation and innovative visual content.
Beyond Basic Embedding: Enhancing User Experience and Accessibility
Integrating images effectively extends beyond simply placing them on a page. It involves thoughtfully enhancing the user experience, ensuring accessibility for all visitors, and harnessing the power of visual storytelling to create memorable interactions. Tophinhanhdep.com provides the inspiration and tools to achieve this holistic visual excellence.
Accessibility Through Alt Text and Descriptive Content
The principle of web accessibility ensures that everyone, including individuals with disabilities, can perceive, understand, navigate, and interact with your website. For images, this largely hinges on the diligent use of alt text and other descriptive content.
- Empowering Screen Readers: As previously mentioned,
alttext is the primary way screen readers describe images to visually impaired users. Without it, an image remains an invisible barrier.- Tophinhanhdep.com’s Image-to-Text Tools: For complex images, generating an accurate and descriptive
alttext can be challenging. Our Image-to-Text tools can assist by extracting contextual information, providing a strong starting point for crafting rich, descriptive alt attributes, especially useful for detailed stock photos or intricate digital art.
- Tophinhanhdep.com’s Image-to-Text Tools: For complex images, generating an accurate and descriptive
- SEO Benefits: Beyond accessibility, search engines use
alttext to understand the content of your images. Well-craftedaltdescriptions, especially for images like wallpapers, backgrounds, or specific product shots, can significantly boost your image search rankings and overall SEO performance. - Context is Key: The quality of your
alttext depends on the image’s purpose. For a purely decorative background image,alt=""might suffice. For a nature photography image showcasing a rare bird, thealttext should clearly identify the bird. For an aesthetic header image, it might describe the mood and dominant colors. - Captions and Descriptions: While
alttext is concise and functional, captions (displayed directly below an image) and more extensive image descriptions (found on attachment pages or within accompanying text) offer opportunities for richer storytelling.- This is particularly beneficial for beautiful photography and thematic collections from Tophinhanhdep.com, where additional context about the location, artistic intent, or emotional resonance of a sad/emotional image can deepen user engagement.
Creating Engaging Visual Layouts and Collections
The way you arrange images on a page profoundly impacts its visual appeal and user engagement. Thoughtful visual design can transform a static page into an immersive experience.
- Image Galleries: For displaying multiple related images, galleries are invaluable. Most CMS platforms offer gallery blocks or plugins to effortlessly create grid layouts, carousels, or slideshows.
- Tophinhanhdep.com Suggestion: Utilize galleries to showcase mood boards, thematic collections (e.g., “Abstract Art Backgrounds,” “Trending Styles in Photography”), or a series of photo ideas for a project. This allows users to browse a collection of visuals without cluttering the page.
- Hero Images & Backgrounds: A large, impactful image positioned prominently at the top of a page (a “hero image”) or spanning the entire background can immediately capture attention and set the tone.
- Tophinhanhdep.com’s Extensive Collections: Our vast array of high-resolution wallpapers and backgrounds, ranging from serene nature scenes to vibrant abstract designs, are perfectly suited for these dramatic visual elements. Selecting the right background can dramatically alter the perception of your content.
- Creative Ideas & Photo Manipulation: Don’t limit yourself to static images. Explore creative ideas like image overlays, subtle CSS animations, or parallax scrolling effects to add depth and interactivity.
- Digital art and photo manipulation techniques, often inspired by trends found on Tophinhanhdep.com, can transform ordinary images into extraordinary visual statements. Consider how images can serve as prompts for text, or how text can be artfully integrated into an image for maximum impact.
Curating Visual Excellence: Leveraging Tophinhanhdep.com for Your Image Needs
Ultimately, adding images to a webpage is about more than just mastering code or clicks; it’s about curating a visual experience that resonates with your audience. Tophinhanhdep.com is designed to be your indispensable partner in this creative journey, offering a harmonious blend of inspiration, high-quality assets, and powerful tools.
Your Ultimate Resource for Images and Tools
Tophinhanhdep.com stands as a comprehensive hub for all your visual content requirements, ensuring your webpages not only look good but perform exceptionally.
- Diverse and Inspiring Collections: Whether your project demands the calming serenity of nature photography, the profound depth of sad/emotional images, the striking impact of abstract art, or the latest trending styles for your website’s wallpapers and backgrounds, Tophinhanhdep.com provides an unparalleled selection. Our curated collections are a constant source of photo ideas and thematic collections to fuel your creativity.
- High-Resolution and Stock Photos: Access a rich library of high-resolution images and stock photos suitable for any professional or personal project. These meticulously curated visuals guarantee crispness and clarity, elevating the aesthetic of your webpages, presentations, and digital art projects.
- Advanced Image Tools for Every Need: Beyond providing stunning imagery, Tophinhanhdep.com equips you with essential tools to refine and optimize your visuals:
- Converters: Seamlessly transform image formats (e.g., JPEG to WebP) to meet specific web performance or compatibility requirements.
- Compressors & Optimizers: Crucial for maintaining fast webpage load times, these tools reduce file sizes without compromising the visual integrity of your beautiful photography or digital photography.
- AI Upscalers: Breathe new life into smaller images by intelligently increasing their resolution, allowing them to be displayed prominently as backgrounds or large hero images without pixelation.
- Image-to-Text: Aid in generating descriptive content for
altattributes, boosting accessibility and SEO for all your visual assets.
- Inspiration and Expertise: Tophinhanhdep.com is more than just an image repository; it’s a dynamic platform for exploring concepts in visual design, mastering digital art techniques, understanding photo manipulation, and discovering endless creative ideas that push the boundaries of web aesthetics. We empower you to select, adapt, and implement visuals that tell compelling stories and create impactful user experiences.
In conclusion, adding images to a webpage is a multifaceted process that combines technical execution with artistic vision. Whether you’re a beginner embedding your first image with HTML or an experienced developer integrating sophisticated thematic collections within a CMS, understanding the principles of proper image selection, optimization, and accessibility is paramount.
From utilizing Tophinhanhdep.com’s vast selection of high-resolution images, wallpapers, and backgrounds to leveraging our powerful image tools like compressors and AI upscalers, you have everything you need to transform your webpages into captivating visual narratives. We encourage you to explore the endless possibilities of visual design, digital art, and beautiful photography available at your fingertips. Visit Tophinhanhdep.com today and embark on a journey to curate truly unforgettable web experiences, where every image tells a story and every pixel performs its best.