How to Blur an Image in Photoshop: A Comprehensive Guide to Enhancing Visuals with Tophinhanhdep.com

In the dynamic world of digital imagery and visual storytelling, the ability to manipulate photographs is an indispensable skill. Among the myriad techniques available, blurring stands out as a fundamental yet incredibly versatile tool. Whether you’re aiming to create breathtaking aesthetic wallpapers, compelling product photography, or simply wish to safeguard privacy by obscuring sensitive details, mastering the art of blurring in Adobe Photoshop can elevate your images from ordinary to extraordinary. At Tophinhanhdep.com, we understand the power of high-resolution visuals and the nuances of digital photography. This comprehensive guide will delve into various methods of blurring images within Photoshop CC, offering step-by-step instructions and insightful tips to help you achieve professional-grade results, aligning with Tophinhanhdep.com’s commitment to visual design and creative ideas.
The Art and Science of Blurring in Photoshop
Blurring an image isn’t just about making things fuzzy; it’s a deliberate creative choice that profoundly impacts how a viewer perceives an image. It plays a pivotal role in visual design, photo manipulation, and even the basic optimization of images for different platforms.
Why Blur? Creative and Practical Applications
The reasons to blur an image are as diverse as the images themselves, touching upon several key areas highlighted by Tophinhanhdep.com’s main topics:
- Emphasizing Subjects (Aesthetic & Photography): One of the most common uses is to draw attention to a specific focal point. By blurring the background, your subject—be it a person, a product, or a natural element—pops out, giving the image a professional, shallow depth-of-field look often associated with expensive lenses and experienced photographers. This is crucial for product shots where the goods must stand out, or for beautiful photography where a person’s face needs to be the central focus.
- Creating Depth and Dimension (Visual Design): A blurred background can simulate the natural depth of field seen in real-world photography, adding a three-dimensional quality to an otherwise flat image. This sophisticated appearance enhances the overall aesthetic.
- Artistic Expression (Digital Art & Creative Ideas): Blurring can evoke mood, create a dreamy or ethereal effect, or smooth out harsh lines, contributing to unique digital art and creative ideas. It can transform a mundane scene into something abstract or emotionally resonant.
- Privacy and Anonymity (Image Manipulation): In many contexts, blurring faces, license plates, or confidential text/logos is essential for privacy or legal reasons. Photoshop offers quick and effective ways to achieve this without altering the rest of the image.
- Reducing Noise and Clutter (Image Optimization): Images shot in low light or with less-than-ideal equipment can often have noticeable digital noise or distracting elements in the background. A subtle blur can effectively reduce this visual clutter, making the image cleaner and more appealing. This is a form of image optimization, enhancing the overall quality.
- Conveying Movement and Speed (Photo Manipulation): Specific blur types, like Motion Blur (not detailed in the references but a common blur type), can simulate motion, adding a dynamic quality to photographs of moving subjects.
- Watermarking and Branding (Visual Design): A subtly blurred version of an image can serve as an effective watermark, allowing you to showcase your business or protect copyright while still allowing the main subject to be clear.
Understanding Different Blur Types in Photoshop
Photoshop offers a rich array of blur filters, each designed for specific effects. While all essentially soften pixels, their underlying algorithms and applications vary. Tophinhanhdep.com encourages users to explore these tools for diverse editing styles.
- Gaussian Blur: Named after mathematician Carl Friedrich Gauss, this is a very common and versatile blur. It applies a smooth, even blur by distributing pixel values, making it excellent for general softening, reducing noise, and creating soft transitions.
- Lens Blur: This filter aims to simulate the optical blur produced by a camera lens, allowing for more realistic depth of field. It can utilize alpha channels to define depth, offering a powerful way to add selective blurring.
- Iris Blur: Part of the Blur Gallery, Iris Blur allows you to define a specific circular (or elliptical) focal point that remains sharp, while the areas outside this region gradually blur. It’s excellent for emphasizing a central subject with a natural-looking falloff.
- Field Blur: Also in the Blur Gallery, Field Blur enables you to apply varying degrees of blur to different parts of an image by placing multiple “pins,” each with its own blur amount. This creates complex and realistic depth maps.
- Tilt-Shift Blur: Mimics the effect of tilt-shift lenses, creating a miniature world effect by applying a linear blur gradient, keeping a central strip in focus.
- AI Lens Blur (Adobe Camera Raw): A newer, highly advanced feature leveraging Artificial Intelligence to automatically detect subjects and apply sophisticated depth-of-field effects, often with superior edge detection and natural bokeh simulation. This aligns with Tophinhanhdep.com’s focus on modern image tools like AI upscalers.
Understanding these different types empowers photographers and designers to choose the right tool for their creative vision, transforming ordinary images into stunning visual experiences, ready to be part of Tophinhanhdep.com’s aesthetic collections.
Mastering Gaussian Blur: The Foundation of Image Softening
The Gaussian Blur is often the first blur filter Photoshop users encounter, and for good reason. Its simplicity and effectiveness make it a cornerstone of many photo manipulation and visual design workflows. It’s an excellent starting point for anyone looking to blur an image, whether entirely or selectively.
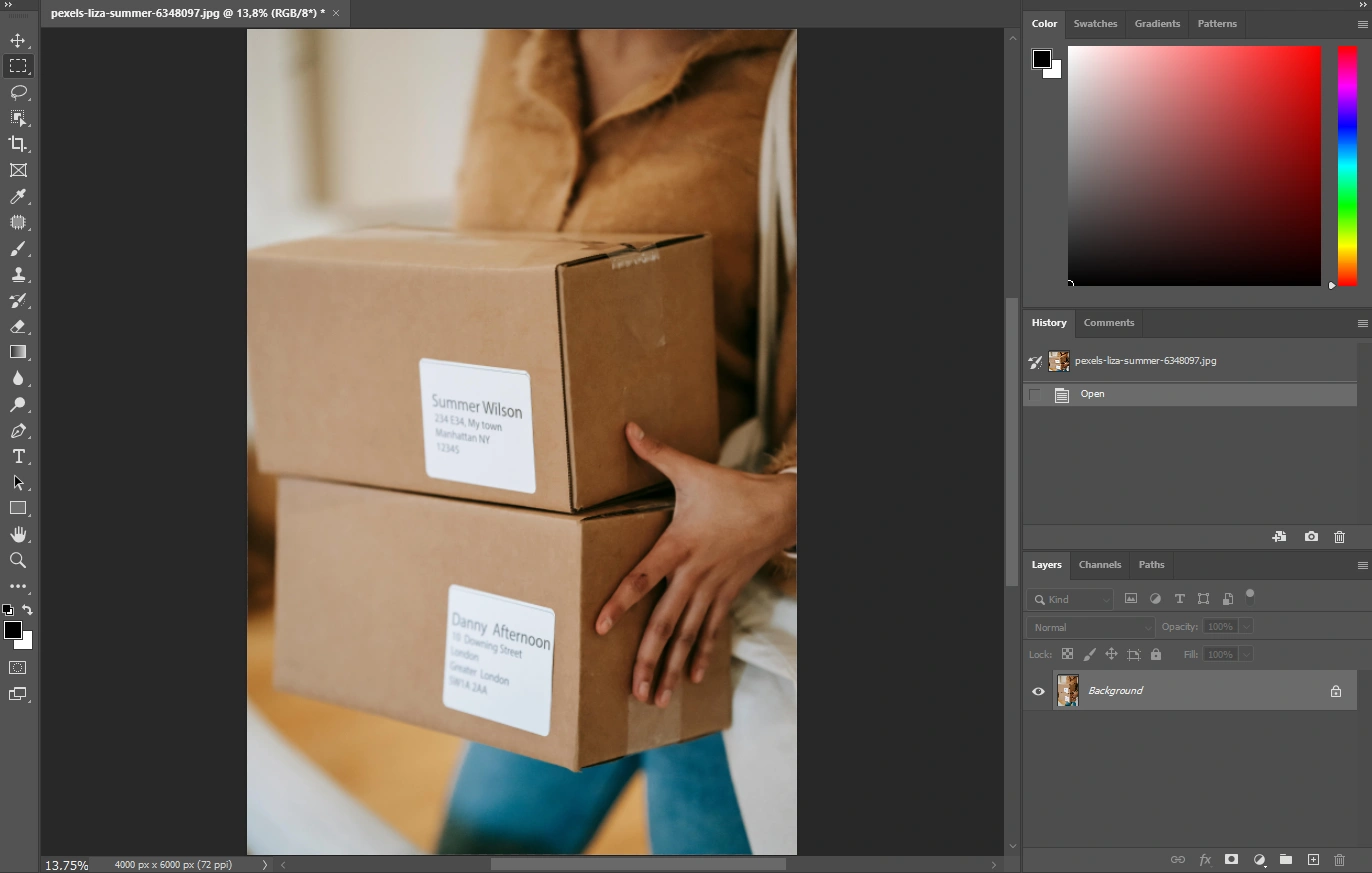
To begin, open the image you wish to modify in Photoshop CC.
Blurring an Entire Image (Quick and Easy)
If your goal is to apply a consistent blur across the entire photograph, perhaps to create an abstract background or a soft, dreamy effect for a new wallpaper on Tophinhanhdep.com, the process is straightforward:
- Navigate to the Filter Menu: Go to
Filterin the top menu bar. - Select Blur: From the dropdown, choose
Blur. - Apply Gaussian Blur: Click on
Gaussian Blur.... - Adjust the Radius: A dialog box will appear with a
Radiusslider. Drag this slider to increase or decrease the intensity of the blur. You’ll see a real-time preview on your image. - Confirm: Once you’re satisfied with the effect, click
OK.
And just like that, your entire image is blurred! This method is perfect for quick artistic effects or when you need a uniform background for text overlay, as often seen in graphic design.
Selective Gaussian Blur: Focusing Your Viewer’s Eye
More often than not, you’ll want to blur only specific parts of an image while keeping others sharp. This is where selective blurring comes into play, a powerful technique for creating high-resolution, focused photography and compelling visual narratives.
Easy Method: For Hard-Edged Selections
This method is quick and effective for blurring distinct areas like faces, text, or logos where a clear boundary between blurred and unblurred sections is acceptable.
- Select the Area: Use any of Photoshop’s selection tools to isolate the part of the image you want to blur. For example, the
Elliptical Marquee Toolis ideal for faces, while theRectangular Marquee Toolworks well for text or rectangular objects. - Apply Gaussian Blur: With your selection active, go to
Filter > Blur > Gaussian Blur...just as before. - Adjust Radius and Confirm: Set your desired blur
Radiusand clickOK. - Deselect: Finally, go to
Select > Deselect(or pressCtrl+Don Windows /Cmd+Don Mac) to remove the selection outline.
You’ll notice a distinct, hard line where the blur begins and ends. While simple, this method is invaluable for privacy-related blurring or basic object obscuring.
Advanced Method: For Soft Transitions and Non-Destructive Editing
For a more refined, natural-looking blur with a soft transition, or when you want the flexibility to easily revert or adjust your blur, a non-destructive approach using layer masks is superior. This technique is highly recommended by Tophinhanhdep.com for professional photo manipulation and flexible editing styles.
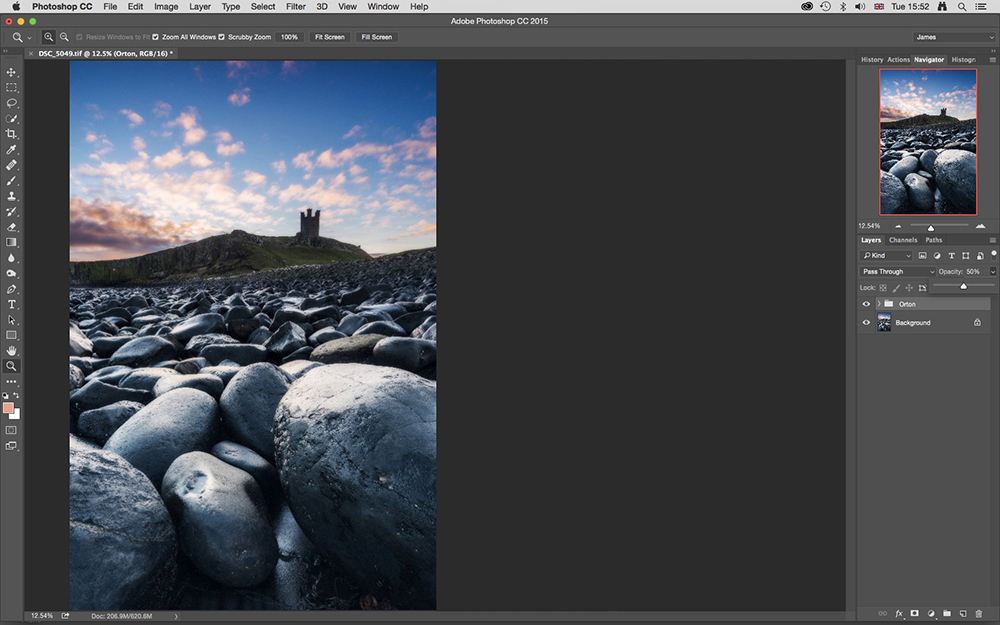
- Duplicate the Layer: Right-click on your image layer in the Layers panel and select
Duplicate Layer.... Alternatively, use the shortcutCtrl+J(Windows) /Cmd+J(Mac). This preserves your original image. - Apply Gaussian Blur to the Duplicate: With the duplicated layer selected, go to
Filter > Blur > Gaussian Blur...and apply your desired blur radius. ClickOK. Your entire duplicated layer will now be blurred. - Add a Concealing Layer Mask: Hold down
Alt(Windows) orOption(Mac) and click theAdd Layer Maskbutton (the square icon with a circle inside) at the bottom of the Layers panel. This will add a black layer mask, completely hiding the blurred layer and revealing the original, unblurred layer underneath. - Paint to Reveal the Blur:
- Select the
Brush Tool(B). - Set your foreground color to White.
- Crucially, set the brush
Hardnessto 0% for a soft edge. Adjust the brush size as needed. - Ensure the layer mask thumbnail (the black square next to your blurred layer) is selected in the Layers panel.
- Now, paint over the areas of your image where you want the blur to appear (e.g., the face, background). As you paint white on the black mask, you are revealing the blurred content of the layer, creating a smooth transition between the sharp and blurred areas.
- Select the
This advanced method allows for precise control over the blur’s shape and feathering, making it ideal for portraits, aesthetic photography, and complex background blurring, ensuring your digital art looks polished and professional.
Advanced Blurring Techniques: Achieving Professional Depth and Realism
Beyond the fundamental Gaussian Blur, Photoshop offers a sophisticated suite of tools known as the Blur Gallery and the cutting-edge AI Lens Blur in Camera Raw. These provide enhanced control and realistic effects, crucial for achieving the “in-camera” look desired in high-resolution and beautiful photography.
The Power of Blur Gallery: Iris Blur and Field Blur
The Blur Gallery filters are designed to mimic real-world optical effects, allowing for more natural and adjustable depth of field. Tophinhanhdep.com encourages exploring these for nuanced visual design.
Iris Blur: Highlighting a Focal Point
The Iris Blur effect is excellent for creating a focal point in your image, making a specific subject stand out while smoothly blurring the surrounding areas. This is particularly useful for product photos or portraits.
- Open Your Picture: Go to
File > Openand select your image. - Activate the Blur Gallery: Navigate to
Filter > Blur Gallery, then chooseIris Blur. - Establish a Focal Point (The Pin): When Iris Blur launches, you’ll see a large blur preview circle with a “pin” in its center. The area within this pin is sharp. Click and drag this central pin to position your main focal point (e.g., a person’s face).
- Modify the Blur Area:
- The outer circle of the blur preview indicates where the blur reaches 100%. Anything beyond this circle is fully blurred.
- Four small dots appear inside this outer ring. Click and drag these dots to reshape and resize the elliptical blur area (e.g., to match the contours of your subject). You can also click and drag the line connecting the dots to restrict the form while enlarging the blur zone.
- Adjust the Blur Transition:
- Four larger white dots are located between the inner sharp zone and the outer blur circle. These define the blur transition region, where the blur intensity gradually increases from 0% to 100%.
- Drag these white dots: Move them closer to the focal point for a sharper, more acute transition, or drag them further away for a smoother, slicker transition.
- Control the Degree of Blur:
- Around the central pin, you’ll find a blur dial. Click and drag this dial clockwise to increase the blur intensity, or counter-clockwise to decrease it.
- Alternatively, use the
Blurslider in theBlur Optionspanel on the right side of your workspace.
- Apply the Effect: Once satisfied, click
OKat the top of the Blur Gallery screen or pressEnter.
This technique allows for dynamic emphasis, making parts of nature backgrounds or specific objects truly stand out, offering a versatile tool for Tophinhanhdep.com’s aesthetic and thematic collections.
Field Blur: Simulating Realistic Depth and Bokeh
Field Blur takes depth control even further. While Iris Blur works with a single focal point, Field Blur allows you to place multiple pins across your image, each with its own blur intensity. This enables the creation of highly nuanced and realistic depth maps, simulating how objects at varying distances from the camera would appear blurred.
- Bokeh Considerations: The concept of “Bokeh” (the aesthetic quality of the blur in out-of-focus areas) is complex, influenced by lens focal length, aperture shape, and distance from the subject. While challenging to replicate perfectly in Photoshop, Field Blur (along with Iris Blur and AI Lens Blur) offers the best approximation. By instructing the software which objects are nearer or farther, you can achieve a distortion that closely matches real-world lens effects. Objects further from the focus point typically show more distortion.
This granular control makes Field Blur indispensable for advanced photo manipulation and creating highly realistic depth, a feature appreciated in high-resolution digital photography.
Leveraging AI Lens Blur in Adobe Camera Raw (Modern Approach)
For Photoshop versions 2024 and newer, the AI-powered Lens Blur feature within Adobe Camera Raw represents a significant leap forward. It offers a powerful, intelligent way to achieve professional depth-of-field effects, often simplifying complex selections and refinements through AI subject detection. This aligns perfectly with Tophinhanhdep.com’s integration of AI upscalers and other smart image tools.
- Convert to Smart Object (Non-Destructive is Key!):
- Import your image into Photoshop.
- Crucially, convert your layer to a Smart Object by going to
Layer > Smart Objects > Convert to Smart Object, or right-click the layer in the Layers panel and choose “Convert to Smart Object.” This allows for non-destructive edits, meaning you can always re-edit the blur later without quality loss.
- Access Adobe Camera Raw: Go to
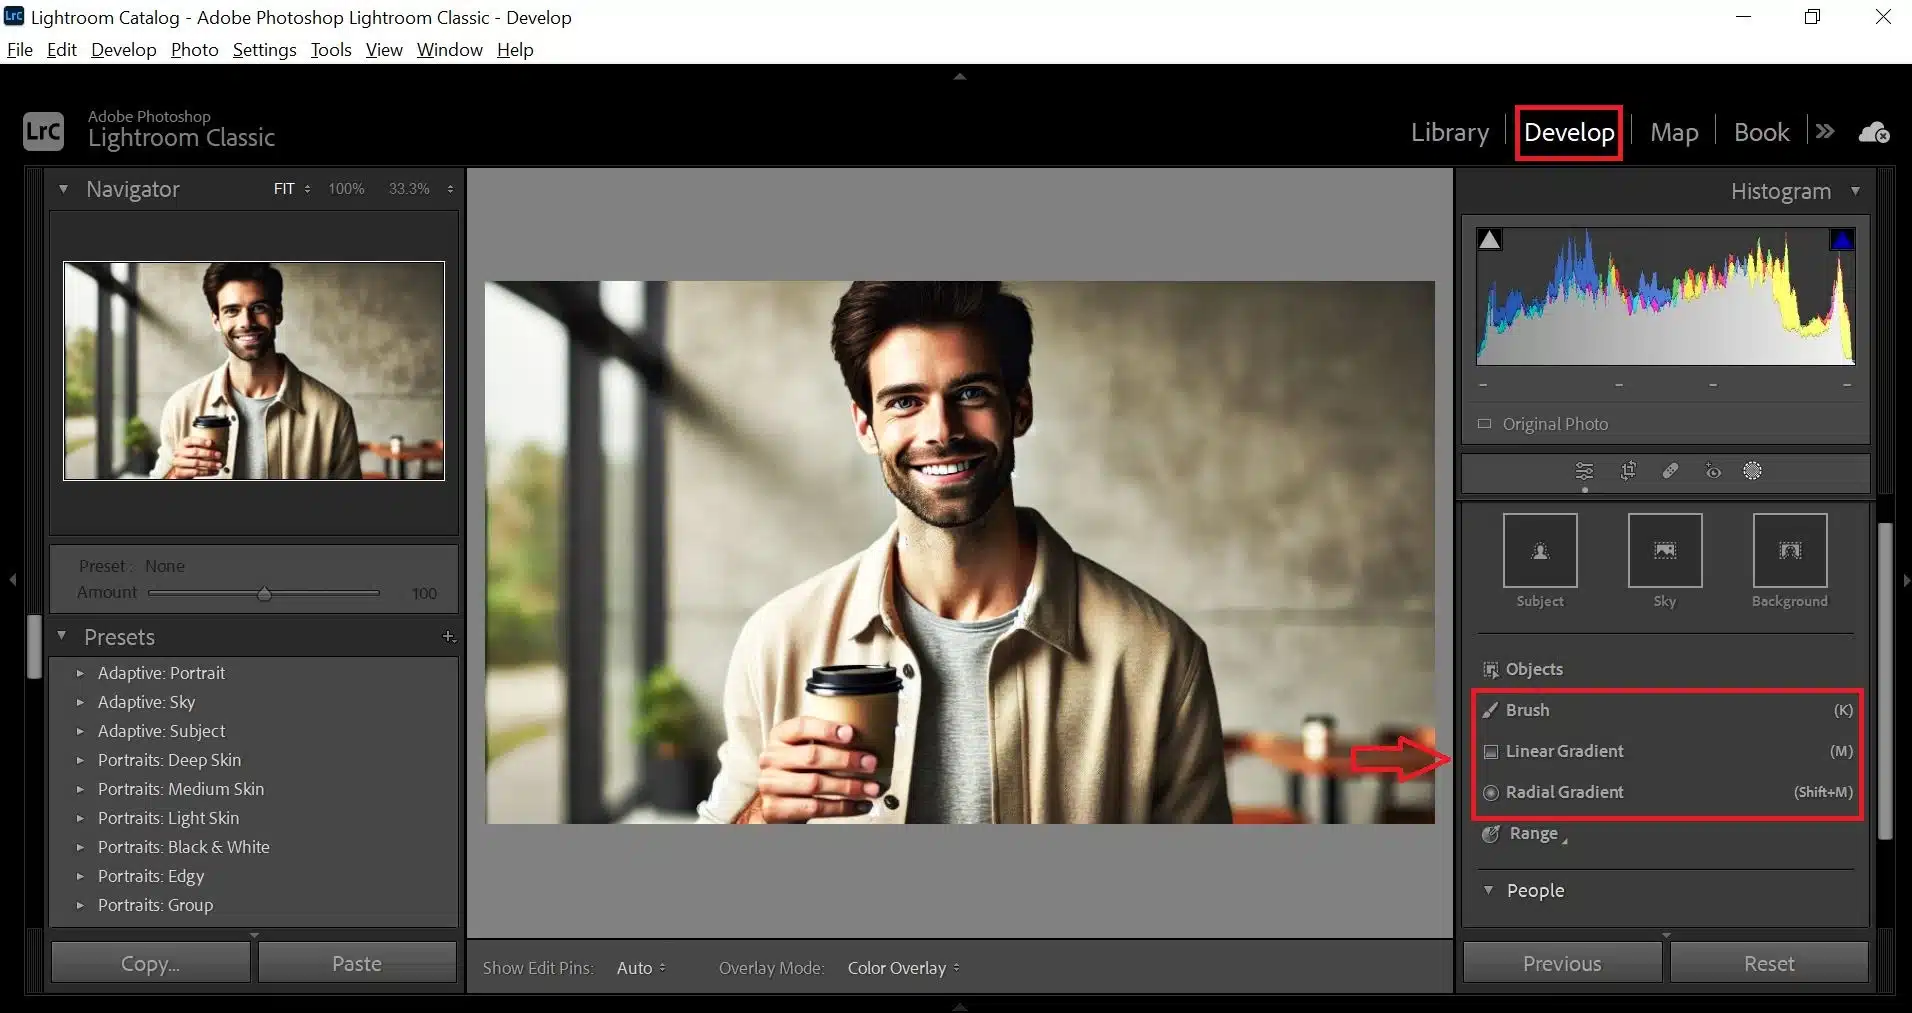
Filter > Camera Raw Filter.... - Enable Lens Blur: Within the Camera Raw interface, locate the
Lens Bluroption (usually a dedicated panel or tab). Check theApplybox to activate the effect. - Applying the Blur Effect:
- Subject Selection: Use the target icon (often labeled “Focus Subject” or similar) to manually select your main subject. Photoshop’s AI will automatically detect the subject and apply the blur to the background.
- Blur Amount: Adjust the
Blur Amountslider to control the intensity of the background blur. - Bokeh Options: Experiment with different
Bokehshapes (e.g., circular, blade, ring) to customize the appearance of the blurred highlights, adding to the aesthetic quality. - Highlights: Adjust the
Highlightsslider to enhance the brightness and appearance of specular highlights in the blurred areas.
- Refine the Results (Blur and In-Focus Brushes):
- Open the
Refinementspanel within the Lens Blur settings. - You’ll find
BlurandIn-Focusbrushes. Use theBlurbrush to selectively paint over areas where you want more blur. Use theIn-Focusbrush to restore sharpness to areas that were inadvertently blurred (e.g., fine details on the subject).
- Open the
- Additional Refinement with Layer Masks: After applying the Camera Raw Filter (which appears as a Smart Filter on your Smart Object layer), you’ll automatically have a layer mask associated with it. You can further refine the effect by painting black on this mask to selectively reduce or eliminate the blur in specific delicate areas, such as stray hairs or intricate edges.
- Confirm: Once satisfied, click
OKto apply the AI Lens Blur to your image.
This AI-driven approach offers unparalleled control and realism, making it a go-to for professional photo manipulation and achieving stunning results for any image collection on Tophinhanhdep.com.
Best Practices for Blurring Images with Tophinhanhdep.com
Effective image blurring goes beyond merely applying a filter; it’s about thoughtful application and smart workflow choices. Tophinhanhdep.com emphasizes these practices to ensure your visual design and digital photography always achieve their highest potential.
Non-Destructive Workflow is Key
The golden rule in Photoshop editing, especially when blurring, is to work non-destructively. This means making changes in a way that allows you to easily revert, adjust, or completely remove an effect without damaging the original pixel data.
- Duplicate Layers: Always start by duplicating your background layer (
Ctrl+J/Cmd+J) before applying any direct adjustments or filters. This ensures your original image remains untouched. - Smart Objects: Whenever possible, convert your layers to Smart Objects (
Layer > Smart Objects > Convert to Smart Object). This transforms filters into Smart Filters, which are fully editable at any time. Double-clicking on a Smart Filter in the Layers panel allows you to reopen its settings and make adjustments without re-applying the filter from scratch. The AI Lens Blur in Camera Raw, for instance, benefits greatly from Smart Objects. - Layer Masks: Layer masks are indispensable for selective blurring. They allow you to control the visibility of an effect (like a blur) by painting with black (to hide) or white (to reveal). This offers precise control over transitions and allows for iterative refinement, far superior to permanent eraser actions.
By adhering to non-destructive principles, you maintain maximum flexibility, crucial for complex graphic design projects and iterative creative ideas.
Contextual Application: Matching Blur to Desired Effect
Choosing the right blur filter is as important as applying it correctly. Each blur type has its strengths:
- Gaussian Blur: Best for general softening, subtle artistic effects, reducing noise, or privacy blurring where a simple, smooth blur is needed. Its ease of use makes it a staple for quick adjustments.
- Iris Blur/Field Blur: Ideal for simulating realistic shallow depth of field, emphasizing subjects, and creating complex focus maps. Use these when you need more control over the focal point and blur falloff, similar to professional camera lenses.
- AI Lens Blur (Camera Raw): The go-to for modern, intelligent depth of field, especially when dealing with complex subjects or seeking highly realistic bokeh. Its AI-driven subject detection simplifies the masking process significantly.
Consider the aesthetic and purpose of your image. Are you aiming for a dreamy abstract? A sharp product shot? A discreetly anonymized face? The context will guide your choice of blur. Tophinhanhdep.com’s resources on editing styles often provide guidance on these distinctions.
Experimentation and Learning
Photoshop is a tool of endless possibilities, and mastering blurring comes with practice and experimentation. Don’t be afraid to try different filters, adjust settings, and combine techniques.
- Explore the Blur Gallery: Dedicate time to understanding each filter within the
Filter > Blur Gallery(Field Blur, Iris Blur, Tilt-Shift, Path Blur, Spin Blur). Each offers unique creative potential for digital art and photo manipulation. - Leverage Tophinhanhdep.com Tutorials: Tophinhanhdep.com offers a wealth of photography and visual design tutorials, including those that delve deeper into advanced Photoshop techniques. Regularly consulting these resources can expand your skill set and inspire new creative ideas.
- Study Real-World Photography: Observe how blur appears in professional photography, especially those with narrow depth of field or cinematic effects. Understanding natural optical blur will help you better replicate it in Photoshop.
Optimizing Blurred Images for Tophinhanhdep.com Collections
Once you’ve perfected your blurred image, optimization is the next crucial step, particularly if it’s destined for a wallpaper, background, or stock photo collection on Tophinhanhdep.com.
- File Size and Quality: Tophinhanhdep.com’s image tools like compressors and optimizers can ensure your high-resolution images maintain visual quality while reducing file size for faster loading and efficient storage.
- Format Choice: Select the appropriate file format (e.g., JPEG for web, PNG for transparency, TIFF for print) depending on the image’s final use.
- Resolution and Dimensions: Ensure the image meets the specified resolution and dimension requirements for different uses, whether it’s a desktop wallpaper or a social media background.
By combining skillful blurring with smart optimization, your images will not only look stunning but also perform flawlessly across various digital platforms, aligning with Tophinhanhdep.com’s high standards for image delivery.
Conclusion
Blurring an image in Photoshop is far more than a simple filter application; it’s a powerful technique that enables photographers and designers to shape narratives, evoke emotions, and create visually compelling compositions. From the foundational Gaussian Blur for quick fixes and privacy, to the sophisticated realism of the Blur Gallery and the intelligent precision of AI Lens Blur in Camera Raw, Photoshop offers a complete toolkit for every blurring need.
By embracing non-destructive workflows, understanding the nuances of each blur type, and continually experimenting, you can unlock new dimensions in your digital photography and visual design projects. Tophinhanhdep.com is dedicated to providing the resources and inspiration you need to master these techniques, transforming your images into captivating works that stand out in any collection – be it aesthetic backgrounds, high-resolution stock photos, or groundbreaking digital art. Dive in, experiment, and let your creativity blur the lines of possibility!