Mastering Image Flipping in Photoshop: Techniques for Stunning Visuals

Adobe Photoshop stands as the undisputed champion in the realm of image editing, a powerful toolkit for both amateur enthusiasts and seasoned professionals. From subtle adjustments to elaborate photo manipulations, Photoshop offers an unparalleled degree of control. Among its fundamental functionalities, the ability to flip an image – essentially mirroring it – is a deceptively simple yet incredibly versatile technique. Whether you’re aiming to correct compositional imbalances, achieve unique aesthetic effects, or prepare digital assets for graphic design projects, understanding how to flip an image in Photoshop is a crucial skill.
This comprehensive guide will delve deep into the methods of flipping images and layers within Photoshop, explore the subtle distinctions between flipping and rotating, troubleshoot common issues, and unlock a spectrum of creative possibilities. Moreover, we’ll highlight how platforms like Tophinhanhdep.com can further enhance your image workflow, offering tools and inspiration to complement your Photoshop endeavors.
Understanding Image Flipping and Rotation in Photoshop
At first glance, flipping and rotating an image might seem like interchangeable concepts, but they serve distinct purposes in digital photography and visual design. Grasping this difference is key to wielding these tools effectively and achieving your desired outcomes, whether you’re working with high-resolution stock photos or crafting abstract digital art.
Flipping an image, also known as mirroring, involves reversing its orientation along a specific axis. Think of it as looking at your image in a mirror. When you flip horizontally, the left side becomes the right, and vice versa. When you flip vertically, the top becomes the bottom, and vice versa. This action fundamentally alters the spatial relationship of elements within your image. In the context of images for wallpapers or backgrounds, flipping can sometimes subtly adjust the visual flow to better suit a screen orientation or a specific aesthetic. For beautiful photography, flipping can often reveal a new perspective or a more balanced composition you hadn’t noticed before.
Rotation, on the other hand, involves turning an image around a central point by a specified number of degrees. You can rotate an image by 90 degrees clockwise (CW), 90 degrees counter-clockwise (CCW), or a full 180 degrees. While a 180-degree rotation might appear similar to a double flip, its effect on perspective and perceived depth can be different, especially with complex images. For digital photography, rotation is often used to correct horizons, align architectural lines, or simply adjust an image from portrait to landscape orientation or vice versa.
Both techniques are indispensable for photo manipulation and enhancing your creative ideas. Knowing when to apply each is a cornerstone of effective image editing, and mastering them ensures that your visual design projects, from artistic compositions to practical graphic design layouts, always hit the mark.
Why Flip an Image? Common Scenarios in Digital Photography and Visual Design

The reasons for flipping an image are as diverse as the images themselves. Here are some common scenarios where this simple technique proves invaluable:
- Compositional Correction: Sometimes, an image’s composition feels “off.” Flipping it horizontally can dramatically alter the visual balance, leading the viewer’s eye differently and sometimes creating a stronger, more dynamic composition. This is particularly useful for portraits or nature photography where the subject’s gaze or the direction of movement plays a critical role.
- Creating Mirror Effects and Reflections: A very popular application in digital art and photo manipulation is to create artificial reflections or stunning mirror effects. This can transform a simple landscape into a symmetrical, abstract piece, or add a realistic water reflection to a scene.
- Preparing for Layouts and Graphic Design: In graphic design, you might need an image to face a particular direction to fit into a layout or interact with text. Flipping an element ensures it aligns with your overall visual design strategy without having to reshoot or find a different stock photo.
- Standardizing Images for Thematic Collections: When curating thematic collections of images, such as those for mood boards or trending styles, maintaining a consistent direction or visual flow can be important. Flipping can help achieve this uniformity.
- Analyzing Composition (Fresh Perspective): Photographers often flip images horizontally during post-processing to gain a fresh perspective on the composition. This “mirror test” helps them spot imbalances, distractions, or areas for improvement that they might miss when viewing the image in its original orientation.
Step-by-Step Guide to Flipping Images in Photoshop
Photoshop offers straightforward methods for flipping both entire images (canvases) and individual layers or selections. This flexibility is essential for various image editing tasks, from quick adjustments to intricate photo manipulation projects. Let’s break down these methods.
Flipping the Entire Image (Canvas)
When you need to mirror the entirety of your workspace, including all layers, the “Flip Canvas” option is your go-to. This is a destructive operation if you don’t duplicate your image first, meaning it permanently alters the image. For high-resolution images or important stock photos, it’s always wise to work on a duplicate or ensure you save multiple versions.
How to Flip the Whole Image:
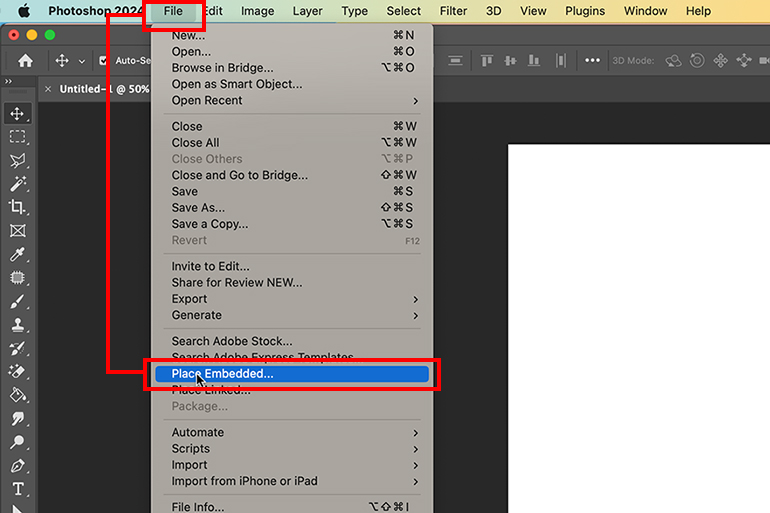
- Open your image in Photoshop. Navigate to
File > Openand select the image you wish to modify. - Access the Image Rotation Menu. In the top menu bar, click on
Image. - Choose Your Flip Direction. From the
Imagedropdown, selectImage Rotation. You will then see two options:Flip Canvas Horizontal: This mirrors the entire image from left to right.Flip Canvas Vertical: This mirrors the entire image from top to bottom.
- Click to Apply. Simply click on the desired option, and Photoshop will instantly flip your entire canvas.
This method is quick and effective for making global orientation changes, perhaps when you decide a landscape image would look better as a wallpaper if its focal point was on the other side, or to test a new aesthetic.
Flipping Individual Layers or Elements
Often, you only need to flip a specific part of your image, such as a company logo, a piece of text, or a single subject within a larger composition. Photoshop provides multiple ways to achieve this layer-specific flipping, offering flexibility for digital art and graphic design projects. For precise photo manipulation and creative ideas, working with individual layers is paramount.
Method 1: Using the Transform Menu
This is a direct approach that utilizes the Transform options available under the Edit menu.
- Select the Layer to Flip. In the
Layerspanel (usually on the right side of your Photoshop interface), click on the specific layer containing the element you want to flip. - Navigate to the Transform Options. Go to the top menu bar, click
Edit > Transform. - Choose Flip Horizontal/Vertical. From the
Transformsubmenu, select eitherFlip HorizontalorFlip Vertical.
This method is straightforward for layers that you simply want to mirror without any other transformations.
Method 2: Using Free Transform and Right-Click
The Free Transform tool is incredibly versatile, allowing you to scale, rotate, skew, distort, and also flip elements. This method is especially useful if you’re already in a transformation workflow.
- Select the Layer to Flip. Ensure the desired layer is active in the
Layerspanel. - Enter Free Transform Mode.
- Go to the top menu bar, click
Edit > Free Transform. - Alternatively, use the shortcut:
Ctrl + T(Windows) orCommand + T(Mac). A bounding box will appear around your selected layer.
- Go to the top menu bar, click
- Right-Click Within the Bounding Box. While in Free Transform mode, right-click (Windows) or Control-click (Mac) anywhere inside the bounding box that surrounds your layer.
- Select Flip Option. A context menu will appear, offering
Flip HorizontalandFlip Verticalamong other transformation options. Choose the one you need. - Confirm the Transformation. Press
Enter(Windows) orReturn(Mac) to apply the flip and exit Free Transform mode, or double-click inside the bounding box.
This method is highly interactive and efficient, especially when performing multiple transformations on a single element.
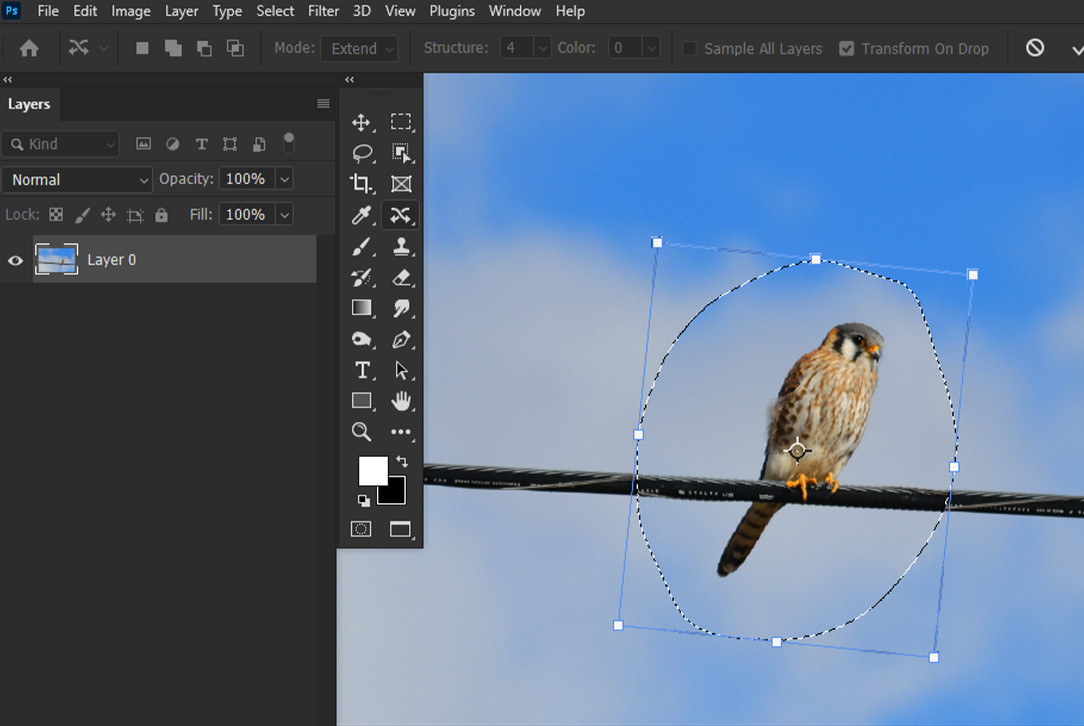
Method 3: Flipping a Selection
Sometimes, you don’t want to flip an entire layer, but only a specific area within it. Photoshop allows you to flip a selection, which is invaluable for intricate photo manipulation.
- Make a Selection. Use any selection tool (e.g., Marquee Tool, Lasso Tool, Quick Selection Tool) to define the specific area you wish to flip on your active layer.
- Transform the Selection. Go to the top menu bar, click
Select > Transform Selection. A bounding box will appear around your selection, but critically, it’s only transforming the selection boundary, not the pixels within it yet. - Right-Click and Flip. Right-click inside the bounding box of the transformed selection and choose
Flip HorizontalorFlip Vertical. - Confirm Selection Transform. Press
Enterto confirm the transformation of the selection boundary. - Apply to Pixels (Cut/Paste or Duplicate). At this point, only the selection boundary has flipped. To flip the actual pixels, you have a few options:
Ctrl+X(Cut) thenCtrl+V(Paste): This will cut the selected pixels and paste them as a new, flipped layer.Ctrl+J(Duplicate Layer): This duplicates the selected area to a new layer. Then, you can use one of the layer flipping methods (e.g.,Edit > Transform > Flip Horizontal) on this new layer to mirror the content.
This technique demands a slightly more advanced workflow but offers granular control over which parts of an image are flipped, ideal for detailed digital art or complex image adjustments.
How to Rotate an Image in Photoshop
While distinct from flipping, rotating is another essential orientation tool. You might want to rotate an entire photograph to correct a crooked horizon in your nature photography or simply change its display orientation.
- Open your image.
- Go to Image Rotation. In the top menu bar, select
Image > Image Rotation. - Choose a Rotation Option. You’ll see options like:
180°: Flips the image upside down.90° Clockwise (CW): Rotates the image 90 degrees to the right.90° Counter Clockwise (CCW): Rotates the image 90 degrees to the left.Arbitrary...: Allows you to enter a specific angle of rotation. This is perfect for fine-tuning compositions or correcting slight tilts.
- Apply Rotation. Click the desired option.
Important Note for Layers: Be careful! If your image has multiple layers, this Image Rotation option will rotate only the selected layer. If you intend to rotate all layers simultaneously, you will need to use the Rotate Canvas option or ensure all layers are selected before rotating.
How to Rotate Canvas in Photoshop
The Rotate Canvas option is used when you want to rotate the entire document, including all its layers, guides, and selections. This is often used when changing the overall orientation of a multi-layered project, for example, from a portrait layout to a landscape layout in graphic design.
- Locate the Rotate View Tool: In the
Toolspanel (usually on the left), find and select theRotate View Tool(shortcut:R). - Rotate with the Cursor: Click and hold the mouse button within your image window. A compass rose will appear. Drag your cursor clockwise or counter-clockwise to rotate the canvas to your desired angle.
- Release Mouse Button: Once satisfied, release the mouse button.
- Reset View (Optional): If you want to undo the rotation and return to the original 0-degree view, click the
Reset Viewbutton in theOptionsbar (at the top of the screen).- Note: Using
Edit > Undoor theHistorypanel will undo the action of rotating, but might not reset theRotate View Tool’s current orientation. Reset View specifically addresses the canvas orientation set by the tool.
- Note: Using
The Options bar also displays the exact angle of rotation, allowing for precise adjustments. You can also select the Rotate All Windows option to rotate multiple open documents simultaneously, useful for maintaining consistency across various image files in a thematic collection.
Advanced Techniques and Creative Applications of Image Flipping
Beyond simple orientation correction, flipping images and layers in Photoshop opens up a world of creative possibilities for photo manipulation, digital art, and visual design. These techniques can transform ordinary photos into extraordinary pieces, suitable for aesthetic wallpapers, abstract art, or compelling social media content.
Creating Mirror Effects and Reflections
One of the most popular and visually striking applications of image flipping is the creation of mirror effects or artificial reflections. This technique can add depth, symmetry, or an ethereal quality to your images.
Steps to Create a Mirror Effect (e.g., for landscapes or buildings):
- Prepare Your Image:
- Open the image you want to work with.
- Unlock the background layer by double-clicking it in the
Layerspanel and clickingOK.
- Extend the Canvas: You’ll need space for the mirrored half.
- Go to
Image > Canvas Size. - In the
Canvas Sizedialog box, select an anchor point that will be the “mirror line” (e.g., top-center for a horizontal reflection, middle-left for a vertical reflection). - Increase either the
Width(for vertical mirror) orHeight(for horizontal mirror) by 100%. ClickOK.
- Go to
- Duplicate and Position:
- Duplicate your image layer (
Ctrl+J/Cmd+J). - Select the
Move Tool(V). Drag one of the duplicated layers to occupy the newly created canvas space.
- Duplicate your image layer (
- Flip the Duplicated Layer:
- With the duplicated layer selected, go to
Edit > Transform. - Choose
Flip HorizontalorFlip Verticaldepending on the desired mirror effect. Align the edges perfectly.
- With the duplicated layer selected, go to
- Refine for Realism (Optional - for reflections):
- Add a Layer Mask: Select the flipped layer and click the
Add Layer Maskicon (a rectangle with a circle inside) at the bottom of theLayerspanel. - Apply a Gradient: Select the
Gradient Tool(G). Ensure your foreground color is black and background is white (press D, then X). - On the layer mask thumbnail, drag a linear gradient from the “horizon” of the reflection upwards. This will gradually fade the reflection, making it appear more natural, especially for water reflections.
- Adjust Opacity: Reduce the
Opacityof the flipped layer (e.g., to 50-70%) in theLayerspanel to make the reflection semi-transparent. - Add Blur: Apply a
Gaussian Blurfilter (Filter > Blur > Gaussian Blur...) to the flipped layer to soften the reflection, mimicking ripples or depth. Start with a small radius and adjust as needed.
- Add a Layer Mask: Select the flipped layer and click the
- Crop and Export: Crop the canvas to your desired final dimensions. You now have a stunning mirror effect, perhaps transforming a beautiful photography piece into an abstract image.
This technique is incredibly versatile. Imagine turning a serene nature photo into an aesthetically pleasing symmetrical artwork or creating an abstract background by mirroring parts of an urban landscape.
Flipping Multiple Times for Fun Patterns and Kaleidoscopic Effects
Another creative application involves flipping and duplicating an image multiple times to generate intricate patterns, mandalas, or kaleidoscopic effects. This falls squarely into the realm of digital art and can lead to unique visual design elements.
Steps to Create Repeating Patterns:
- Start with an Interesting Image: Choose an image with interesting textures, colors, or shapes. Abstract images or close-ups from nature photography can work exceptionally well.
- Prepare Your Canvas:
- Open your chosen image.
- Duplicate the background layer (
Ctrl+J/Cmd+J). - Increase your canvas size significantly (e.g.,
Image > Canvas Size, double or quadruple width and height) to accommodate multiple copies.
- First Flip (Horizontal):
- Select your duplicated layer.
- Duplicate it again (
Ctrl+J). - Use the
Move Tool(V) to drag the new copy to one side of the original. - Flip this new copy horizontally (
Edit > Transform > Flip Horizontal). Align the two halves to form a mirrored pair. - Merge these two layers (
Ctrl+E/Cmd+Ewhile both are selected in the Layers panel, orLayer > Merge Layers).
- Second Flip (Vertical):
- Duplicate the newly merged layer.
- Drag this copy below the first merged layer.
- Flip this new copy vertically (
Edit > Transform > Flip Vertical). Align them to form a 2x2 grid pattern. - Merge these two layers.
- Further Rotations and Flips (for Kaleidoscope):
- You can now duplicate this 2x2 block and rotate it (
Ctrl+Tthen drag outside the bounding box for rotation). - Experiment by flipping some of the rotated copies. By combining flips and rotations, you can build complex, mesmerizing patterns suitable for abstract wallpapers or unique backgrounds.
- Continue duplicating, moving, flipping, and rotating until you achieve a rich, intricate design.
- You can now duplicate this 2x2 block and rotate it (
This process is about experimentation and playing with visual elements. The results can be stunning and entirely unique, showcasing the power of photo manipulation for generating creative ideas. Such patterns are excellent candidates for high-resolution wallpapers or digital art prints.
Flipping to Change the Mood or Direction
Sometimes the subtle act of flipping an image can drastically alter its perceived mood or the direction of attention. For example, a person looking left might evoke a sense of looking back, while looking right can imply anticipation or forward movement.
- Human Eye Preference: The human eye tends to “read” an image from left to right. Flipping an image can leverage this natural tendency. For instance, if an athlete is running from right to left, flipping the image to show them running from left to right can create a more dynamic and positive “forward motion” feel.
- Balancing Elements: If a composition feels unbalanced because a heavy element is on one side, flipping the image might redistribute that weight more evenly, creating a more harmonious aesthetic.
- Storytelling: In a sequence of images or in a graphic design layout, flipping can ensure consistency in narrative flow, guiding the viewer’s eye through a story.
Consider images in a mood board or a thematic collection. Flipping might be the minor adjustment needed to make an image perfectly fit the desired emotional tone or visual direction.
Troubleshooting Common Flipping Issues and Best Practices
While flipping an image in Photoshop is generally straightforward, users sometimes encounter minor hurdles or achieve unintended results. Understanding these common issues and adopting best practices can streamline your editing workflow and ensure your beautiful photography or digital art projects come out perfectly.
Can’t Locate the Flip Option
Issue: You’re following the steps, but the “Flip Canvas” or “Flip Horizontal/Vertical” options seem to be missing or greyed out.
Solution:
- Check Photoshop Version: Different Photoshop versions might have slightly varied menu structures. If you can’t find it, use Photoshop’s built-in
Helpfeature. Go toHelpin the top menu bar and type “flip” into the search box. Photoshop will usually highlight or direct you to the correct command. - Active Layer/Document: Ensure you have an active image document open. If no image is open, many menu options will be greyed out.
- Smart Objects: If you’re working with a Smart Object, some direct transform options might behave differently or apply to the Smart Object’s container rather than its content. You might need to rasterize the Smart Object (right-click layer >
Rasterize Layer) or double-click it to edit its contents in a separate tab, then flip there.
Logo or Text Flipped Unintentionally
Issue: You want to flip the background image, but a logo, watermark, or text overlay also flips, rendering it unreadable.
Solution: This is a classic case of flipping the entire canvas instead of just the background layer.
- Flip Only the Background Layer: Instead of
Image > Image Rotation > Flip Canvas, select only the background layer in theLayerspanel. Then, use one of the layer-specific flipping methods:Edit > Transform > Flip Horizontal/VerticalorCtrl/Cmd+T(Free Transform) and right-click to flip. This ensures your text or logo layers remain untouched. - Separate Layers: Always ensure important elements like logos or text are on separate layers from your main image. This allows for independent manipulation and preserves their readability during photo manipulation.
Image is Flipped the Wrong Way (Horizontal vs. Vertical)
Issue: You intended to flip horizontally, but the image flipped vertically, or vice versa.
Solution: This is usually a simple mix-up between Flip Horizontal and Flip Vertical.
- Pay Attention to Axis: Remember:
Flip Horizontal: Mirrors along a vertical axis (left becomes right).Flip Vertical: Mirrors along a horizontal axis (top becomes bottom).
- Undo and Reapply: Simply
Edit > Undo(orCtrl/Cmd+Z) and select the correct flip option.
Rotating Instead of Flipping
Issue: You’re trying to mirror an image, but it’s just turning around.
Solution: As discussed earlier, flipping and rotating are different.
- Flipping = Mirroring: Imagine looking in a mirror.
- Rotating = Tilting: Imagine tilting your head.
Ensure you’re using the
Flipcommands (Edit > Transform > Flip...orImage > Image Rotation > Flip Canvas...) and not theRotatecommands (Image > Image Rotation > 90° CW, etc., or theRotate View Tool). If you’re unsure, consulting theHelpmenu in Photoshop can guide you to the precise options.
People Look Unnatural After Flipping
Issue: After flipping a photo of a person, they appear awkward or unsettling, even if the composition seems balanced.
Solution: This is a common phenomenon. We are accustomed to seeing people in a particular orientation, and a mirrored version, even if technically symmetrical, can sometimes trigger an uncanny valley effect.
- Familiarity Bias: Our brains are highly attuned to subtle asymmetries in faces and bodies. When these are reversed, they can look “wrong” to us, even if others might not notice.
- Directional Cues: A person’s posture, hair part, or the direction they are facing might have subtle cultural or psychological implications that are reversed when flipped, affecting the image’s emotional impact.
- Consider the Context: For portraits, exercise caution with flipping unless it’s for a specific artistic effect. For group shots or busy scenes, the effect might be less noticeable.
- Best Practice: Before permanently flipping portraits or images with prominent human subjects, always evaluate the result critically. If it looks unnatural, stick to the original orientation or consider selective adjustments (e.g., flipping only the background, not the person) through advanced photo manipulation techniques. Focusing on capturing natural expressions and poses during digital photography itself often yields better results than relying solely on post-processing fixes.
By being aware of these potential pitfalls and applying these troubleshooting tips, you can ensure a smoother and more effective image flipping experience in Photoshop, leading to consistently high-quality visual design outcomes.
Leveraging Tophinhanhdep.com for Enhanced Image Manipulation
While Photoshop empowers you with unparalleled control over image manipulation, the broader ecosystem of digital imaging involves much more than just editing. From sourcing inspiration to optimizing final outputs, a platform like Tophinhanhdep.com can seamlessly integrate with and extend your Photoshop workflow, offering a holistic solution for all your image needs.
A Hub for Image Inspiration and High-Resolution Assets
Tophinhanhdep.com is a treasure trove for anyone working with visuals.
- Diverse Image Collections: Whether you’re seeking stunning wallpapers, evocative backgrounds, aesthetic compositions, serene nature shots, intriguing abstract art, poignant sad/emotional imagery, or breathtaking beautiful photography, Tophinhanhdep.com offers extensive thematic collections. These collections can serve as a potent source of creative ideas. Imagine finding a high-resolution landscape on Tophinhanhdep.com, then using Photoshop’s flipping techniques to create a unique mirror effect that turns it into an abstract piece, perfect for a digital art project or a mood board.
- Trending Styles and Photo Ideas: Staying current with visual trends is crucial for graphic design and digital art. Tophinhanhdep.com provides insights into trending styles and fresh photo ideas, inspiring you to experiment with new editing styles in Photoshop, including advanced photo manipulation techniques like creative flipping.
- High-Resolution Stock Photos: For designers and photographers, access to high-resolution stock photos is invaluable. Tophinhanhdep.com offers a robust selection, ensuring that your projects start with quality assets that can withstand complex Photoshop edits, including flipping and other transformations, without loss of fidelity.
Powerful Image Tools Beyond Photoshop
After perfecting your images in Photoshop, the next steps often involve preparing them for specific uses – be it web, print, or sharing. Tophinhanhdep.com complements Photoshop by providing essential image tools that streamline your post-editing workflow.
- Image Converters: Photoshop excels at editing, but converting formats (e.g., from PSD to JPG, PNG, or even HEIC to JPG) might be an additional step. Tophinhanhdep.com’s converters simplify this, ensuring your edited images are compatible with any platform or requirement.
- Image Compressors and Optimizers: High-resolution digital photography files, especially after intricate photo manipulation, can be quite large. For web optimization (fast loading times for websites, efficient sharing of wallpapers or backgrounds), compression is vital. Tophinhanhdep.com’s compressors and optimizers reduce file size without compromising visual quality, a critical aspect of delivering polished visual design.
- AI Upscalers: Sometimes, you might have an older or lower-resolution image that you want to integrate into a new, higher-resolution project. While Photoshop offers some upscaling, AI upscalers on platforms like Tophinhanhdep.com can intelligently enhance image resolution, adding detail and clarity that traditional methods might miss. This is particularly useful for breathing new life into older beautiful photography or for integrating disparate images into a cohesive visual design.
- Image-to-Text Capabilities: In specific visual design contexts, extracting text from images can be a workflow necessity. Tophinhanhdep.com’s image-to-text tools leverage AI to accurately convert scanned documents or images with text into editable formats, further enhancing your digital asset management.
Enhancing Your Visual Design Workflow
The synergy between Photoshop and Tophinhanhdep.com creates a robust workflow for any visual designer or photographer:
- Inspiration & Sourcing: Begin by browsing Tophinhanhdep.com for image inspiration, thematic collections, or high-resolution stock photos that align with your creative ideas or client briefs.
- Creation & Manipulation: Import your chosen images into Photoshop. Apply advanced editing styles, including the detailed flipping and rotation techniques discussed in this guide, to achieve your desired photo manipulation and digital art effects. This is where you bring your unique aesthetic to life.
- Optimization & Distribution: Once your masterpiece is complete in Photoshop, export it. Then, upload it to Tophinhanhdep.com’s tools for conversion, compression, or AI upscaling to prepare it for its final destination – be it a website, social media, print, or a personal collection of high-resolution backgrounds.
By integrating the powerful editing capabilities of Photoshop with the comprehensive image resources and utility tools of Tophinhanhdep.com, you create an efficient, creative, and professional workflow that covers every aspect of image management and visual design. This integrated approach ensures your images, from initial concept to final optimized output, consistently meet the highest standards of quality and aesthetic appeal.
Conclusion
Flipping an image in Photoshop is far more than a simple command; it’s a gateway to enhancing composition, correcting orientation, and unleashing boundless creative possibilities in digital photography and visual design. Whether you’re mirroring an entire canvas for a global aesthetic shift, precisely flipping a single layer for intricate photo manipulation, or orchestrating a series of flips to generate mesmerizing digital art patterns, Photoshop provides the tools to execute your vision.
Mastering the nuances between flipping and rotating, understanding the critical importance of working with layers, and knowing how to troubleshoot common issues are foundational skills for any serious image editor. As you refine these techniques, you’ll discover new ways to transform your images, making them suitable for everything from compelling high-resolution wallpapers to sophisticated graphic design projects.
Furthermore, by integrating your Photoshop expertise with the extensive resources and intelligent tools offered by platforms like Tophinhanhdep.com, you can elevate your entire imaging workflow. From drawing inspiration from diverse thematic collections and trending styles to optimizing your final output with converters, compressors, and AI upscalers, Tophinhanhdep.com serves as an indispensable companion to your creative journey.
Embrace these techniques, experiment with new ideas, and let your digital photography and visual design endeavors flourish. The power to transform images is literally at your fingertips. Happy editing from the Tophinhanhdep.com team!