Mastering Image Insertion in HTML: A Comprehensive Guide for Dynamic Web Content

In the rapidly evolving digital landscape, visual content has emerged as an indispensable element for captivating audiences and conveying messages effectively. From stunning Wallpapers and Backgrounds that define the Aesthetic of a site, to evocative Nature scenes, intriguing Abstract art, poignant Sad/Emotional imagery, and Beautiful Photography that tells a story, images are the lifeblood of engaging web design. Understanding how to seamlessly integrate these visual assets into your web pages using HTML is a foundational skill for any web developer, designer, or content creator.
This guide delves into the core mechanics of inserting images in HTML, expanding beyond the basic <img> tag to cover essential best practices, optional enhancements, and the broader context of image management in modern web development. We will explore how Photography principles, Image Tools, Visual Design considerations, and Image Inspiration & Collections all converge to create a visually rich and high-performing website. Whether you are building a personal portfolio, a bustling e-commerce site, or an informative blog, mastering image insertion will elevate your web presence from functional to truly impactful.
The Fundamental <img> Tag: Your Gateway to Visual Web Content
The <img> tag is the cornerstone of embedding images into HTML documents. It’s a simple yet powerful element that acts as a placeholder for a picture, instructing the web browser where to fetch the image file and how to display it. Unlike many other HTML tags, <img> is a “self-closing” or “void” tag, meaning it doesn’t require a separate closing tag (like </img>). All the necessary information for the image is contained within its single tag.
Historically, the <img> tag has remained consistent, but its capabilities have evolved significantly with HTML5 and CSS3, allowing for more responsive and adaptive image displays. This evolution is crucial for Visual Design, enabling images to seamlessly adapt across various devices and screen sizes, a critical factor in today’s multi-device internet usage. When choosing images, thinking about the overall Aesthetic and how different types of Photography (e.g., High Resolution Stock Photos versus Digital Photography with specific Editing Styles) will contribute to your site’s look is paramount. The strategic use of images, whether for Mood Boards or Thematic Collections, directly influences the user’s perception and engagement.
Preparing Your Visual Assets: Quality, Format, and Hosting

Before you even touch a line of HTML, the preparation of your visual assets is a critical first step that directly impacts your website’s performance and visual quality. This phase integrates elements of Photography, Image Tools, and careful consideration of how your Images will be stored and accessed.
Uploading and Hosting Your Images
For an image to be displayed on a web page, it must first be accessible online. This involves uploading the image file to a web server. The method you choose depends on your website’s setup:
- Free Image Hosting Services: Platforms like Imgur, Flickr, or Photobucket offer free (often ad-supported) hosting. While convenient for quick embeds or personal projects, be aware of potential limitations on image quality, bandwidth caps (which can lead to images being taken down if they get too many views), and terms of service regarding commercial use. These are less ideal for professional websites due to reliability concerns and lack of direct control.
- Paid Web Hosts (Your Own Site): If you have a dedicated web hosting plan, the most professional approach is to upload images directly to your own server using an FTP (File Transfer Protocol) client like FileZilla or through your host’s
File Manager(e.g., hPanel’s File Manager).- Organization is Key: It’s highly recommended to create a dedicated directory (e.g.,
/images/or/assets/images/) to keep your image files organized, separate from your HTML, CSS, and JavaScript files. This makes managing your site much easier, especially as it grows. - File Naming Conventions: Use clear, descriptive, lowercase filenames with hyphens instead of spaces (e.g.,
beautiful-nature-wallpaper.jpginstead ofBeautiful Nature Wallpaper.jpg). This improves readability, SEO, and prevents issues with file paths on different operating systems.
- Organization is Key: It’s highly recommended to create a dedicated directory (e.g.,
- Content Management Systems (CMS) like WordPress: If your site runs on a CMS, you’ll typically upload images directly through the dashboard’s Media Library. This streamlines the process and automatically manages file paths and sometimes even generates responsive image sizes.
- Finding Image URLs in WordPress: After uploading via the Media Library, you can access the image details and find its “File URL.” This URL is what you’ll use in your HTML
srcattribute if you’re manually editing theme files or using an absolute path.
- Finding Image URLs in WordPress: After uploading via the Media Library, you can access the image details and find its “File URL.” This URL is what you’ll use in your HTML
- Legal & Ethical Considerations: When using images from other websites or sources, always
ask the creator for permissionbefore downloading and re-uploading them to your own host. This is crucial for respecting copyright and avoiding potential legal issues. ForStock Photos, ensure you understand and comply with the licensing agreements.
Choosing the Right Image: Quality, Format, and Optimization
The choice of image and its technical specifications significantly impact both the Visual Design and performance of your website.
- Image Quality and Resolution: For
High ResolutionPhotography, ensuring the image is crisp and clear is important. However,High Resolutiondoesn’t necessarily mean using the largest file size possible. Images should be appropriately sized for their display context on the web. A largeBeautiful Photographyshot might look stunning, but if it’s too large in file size, it will slow down your page. - Image Formats: Different image formats serve different purposes:
- JPEG/JPG: Best for
Photographyand images with many colors and subtle gradients (e.g.,Naturescenes,AestheticWallpapers). It uses lossy compression, meaning some data is discarded to reduce file size, which can lead to slight quality degradation. - PNG: Ideal for images requiring transparency (e.g., logos, icons,
Digital Artwith no backgrounds). It uses lossless compression, preserving image quality but often resulting in larger file sizes than JPEGs for photographs. - GIF: Suitable for simple animations and images with limited color palettes (e.g., cartoons, simple
Abstractgraphics). It’s generally not recommended forPhotographydue to its 256-color limit. - SVG (Scalable Vector Graphics): A vector format, meaning images are defined by mathematical paths rather than pixels. SVGs are excellent for logos, icons, and
Digital Artbecause they scale perfectly to any size without losing quality, making them incredibly versatile for responsiveVisual Design. - WebP/AVIF: Modern image formats offering superior compression and quality compared to JPEGs and PNGs, leading to faster load times. Browsers are increasingly supporting these, and they are becoming the go-to for optimized web images.
- JPEG/JPG: Best for
- Image Tools for Optimization: This is where
Image Toolsbecome indispensable. Before uploading, always optimize your images:- Compressors: Tools that reduce the file size of your images without significant perceptual loss in quality (e.g., TinyPNG, ImageOptim). This is crucial for web performance.
- Optimizers: More comprehensive tools that may perform compression, resizing, and format conversion.
- Converters: Change image formats (e.g., JPG to WebP).
- AI Upscalers: For instances where you have a lower resolution image (perhaps an older
Sad/Emotionalphoto) and need to improve its quality without re-shooting,AI Upscalerscan intelligently increase resolution. - Editing Styles: If you are working with
Digital Photographyor raw image files,Editing Stylesin software like Photoshop or GIMP are used to adjust colors, contrast, and apply artistic filters before optimization. This ensures your images align with the overallAestheticandCreative Ideasof your site.
Crafting the Core HTML: src and alt Attributes
With your images prepared and hosted, you’re ready to embed them into your HTML. The src and alt attributes are the two most fundamental components of the <img> tag, both critical for proper display and web accessibility.
Opening Your HTML File and Editor
To insert an image, you’ll need to open your HTML document in a text editor (like Visual Studio Code, Sublime Text, or Notepad++). For forums or specific platforms, you might type directly into a rich text editor that then converts your input into HTML, though some forums might use custom markup languages instead.
- Visual Studio Code (VS Code): A popular choice for web development. To insert an image, simply open your HTML file in VS Code. A common practice is to have both your HTML file (e.g.,
index.html) and your image file (e.g.,my-dog.jpg) within the same project folder. This simplifies pathing. After adding the code, pressingCtrl + Ssaves the file, and using the “Go Live” extension (often found in the bottom-right of the console) can quickly launch a local server to view your changes.
The src Attribute: Defining the Image Source
The src (short for “source”) attribute is a mandatory component of the <img> tag. It tells the web browser the location of the image file it needs to display. If src is incorrect, the image will not load, and typically a broken image icon will appear.
<img src="path/to/your/image.jpg">There are two main ways to specify the path to your image:
-
Relative Path: Used when the image file is located on the same server as your HTML document. The path is relative to the current HTML file’s location.
- Example 1 (Same Directory): If
my-dog.jpgis in the same folder asindex.html:<img src="my-dog.jpg"> - Example 2 (Subdirectory): If
my-dog.jpgis in animagesfolder that is a child of the current directory:<img src="images/my-dog.jpg"> - Example 3 (Parent Directory): If
my-dog.jpgis in a parent directory relative to the current HTML file:<img src="../my-dog.jpg"> - Relative paths are generally preferred for assets within your own website because they make your site more portable (e.g., moving from a local development environment to a live server).
- Example 1 (Same Directory): If
-
Absolute Path (Full URL): Used when the image is hosted on a different server, or when you want to specify the full web address.
- Example:
<img src="http://www.exampleimagehost.com/my-cute-dog.jpg"> - This is common when linking to
Stock Photosfrom a third-party provider or when embedding content from a CDN (Content Delivery Network).
- Example:
Important Warning: Do Not “Hotlink”!
Hotlinking refers to directly embedding an image from another person’s website using its absolute URL without their permission. While technically possible, this is considered extremely bad etiquette and can have negative consequences:
- Uses Their Bandwidth: Every time someone views your page, their browser requests the image from the original host, consuming their server resources and bandwidth.
- Unreliable: If the original site goes down, reorganizes its files, or decides to block your hotlink, your image will disappear, leaving a broken link on your page.
- Ethical Concerns: It’s essentially using someone else’s resources without providing them traffic or credit.
- Malicious Potential: Some webmasters intentionally replace hotlinked images with offensive or misleading content once they detect hotlinking.
Always upload images to your own host or use legitimate Stock Photos with proper licensing to avoid these issues.
The alt Attribute: Accessibility and SEO Best Practices
The alt (short for “alternative text”) attribute is another crucial, though often overlooked, attribute for the <img> tag. It provides a text description of the image, which serves several vital purposes:
- Accessibility for Visually Impaired Users: Screen readers, used by visually impaired individuals, will read the
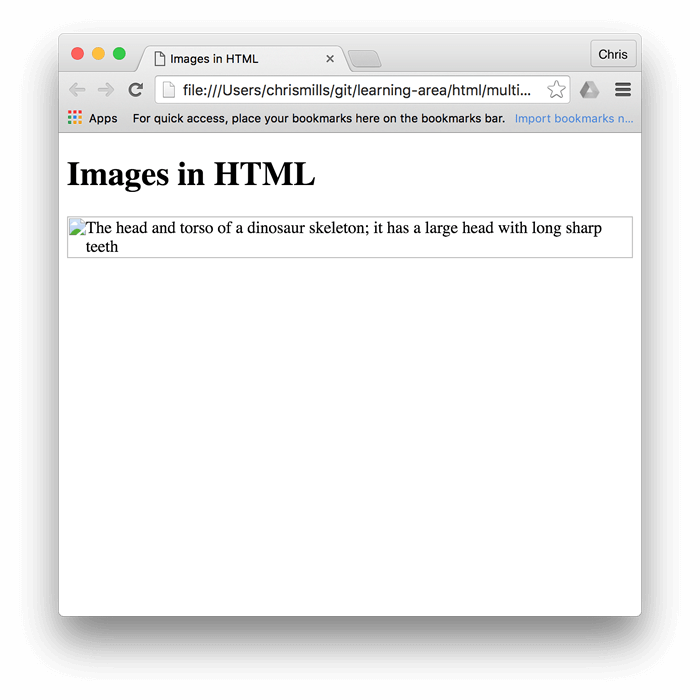
alttext aloud, describing the image content. This ensures that everyone can understand the visual information on your page. This is a fundamental aspect of inclusive web design. - Display When Image Fails to Load: If the image file cannot be loaded (due to an incorrect
src, slow internet connection, or server issues), thealttext will be displayed in its place, providing context to the user. - Search Engine Optimization (SEO): Search engines cannot “see” images in the same way humans do. The
alttext provides valuable information to search engine crawlers about the image’s content, helping them index it correctly. This can improve your image’s chances of appearing in image search results and contribute to your page’s overall SEO ranking. ForImage Toolsdevelopment,Image-to-Texttools could eventually automate alt text generation, but human review remains critical for accuracy and context.
<img src="my-cute-dog.jpg" alt="A golden retriever puppy eating a tangerine in a sunny garden.">Best Practices for alt Text:
- Be Descriptive: Provide a clear, concise description of the image’s content. Focus on what the image shows and its relevance to the surrounding text.
- Include Keywords (Naturally): If appropriate, incorporate relevant keywords into your
alttext, but avoid keyword stuffing. The primary goal is user experience and accessibility, not just SEO manipulation. - Context is King: Consider the context of the image. An image of a car might have
alt="red sports car"in a general article, butalt="vintage 1969 Ford Mustang fastback in racing red"on a classic car enthusiast site. - Decorative Images: If an image is purely decorative and doesn’t convey any meaningful information (e.g., a spacer GIF, a purely aesthetic border), it’s best to include an empty
altattribute (alt=""). This tells screen readers to skip the image. - Avoid Redundancy: Don’t start
alttext with phrases like “Image of…” or “Picture of…” as screen readers already announce that it’s an image.
By carefully crafting both src and alt attributes, you ensure your images are displayed correctly, are accessible to all users, and contribute positively to your website’s search engine visibility. After inserting the image code, remember to save your HTML file and refresh your browser to see the changes.
Fine-Tuning Your Visuals: Advanced <img> Attributes and Styling
Beyond the fundamental src and alt attributes, HTML provides several optional attributes and techniques to further control the appearance and behavior of your images. These adjustments are crucial for polished Visual Design and an enhanced user experience, allowing your Photography or Digital Art to integrate seamlessly into your page’s Aesthetic.
Controlling Image Dimensions: width and height
The width and height attributes allow you to specify the dimensions of an image directly within the <img> tag. These values are typically given in pixels or as a percentage of the containing element.
<img src="example.png" alt="A placeholder image" width="200" height="200">(Specifies the image to be 200 pixels wide and 200 pixels high.)
<img src="example.png" alt="A responsive image" width="100%" height="auto">(Specifies the image to be 100% of its container’s width, with height="auto" maintaining its aspect ratio.)
Why set width and height explicitly?
- Layout Stability: When a browser loads a page, it reserves space for images based on their specified
widthandheightbefore the image file itself has fully downloaded. If these attributes are missing, the browser must reflow the content once the image loads, which can cause jarring shifts in the page layout (known as Cumulative Layout Shift or CLS, a Core Web Vital metric). This negatively impacts the user experience, especially on image-heavy pages featuringWallpapersor largeBackgrounds. - Aspect Ratio: While you can set both
widthandheight, it’s often better to set only one (e.g.,width="100%") and let the other (height="auto"in CSS, or by default if not specified in HTML) adjust automatically to maintain the image’s original aspect ratio. This prevents distortion.
Best Practice: Resize Images Before Uploading!
While HTML attributes can resize an image on the fly, it’s generally a suboptimal approach for Photography and Digital Art intended for web display.
- Performance: If you upload a
High Resolutionimage (e.g., 4000x3000 pixels, 5MB file size) and then shrink it to 200x150 pixels usingwidthandheightattributes, the user’s browser still has to download the entire 5MB file. This is inefficient and drastically slows down page load times, especially for users on slower connections or mobile devices. - Quality: Browser-side resizing can sometimes result in lower-quality rendering compared to proper resizing in image editing software.
Recommendation:
Always resize your images to their intended display dimensions before uploading them to your web server using Image Tools or dedicated image Editing Styles software (e.g., Photoshop, GIMP, Affinity Photo). Then, use the width and height attributes in HTML to explicitly declare these already optimized dimensions. This combination ensures layout stability and optimal performance.
Adding Interactivity: Image Links and Tooltips
Images can be more than just static visuals; they can also serve as interactive elements, guiding users through your site or providing additional information.
Making an Image a Link (<a> tag)
To make an image clickable and link to another page or resource, you need to wrap the <img> tag within an <a> (anchor) tag. The href attribute of the <a> tag specifies the destination URL.
<a href="http://www.yourwebsite.com/destination-page.html">
    <img src="button-image.png" alt="Click here for more info" width="150" height="50">
</a>
This technique is common for navigation elements, clickable Backgrounds, Thematic Collections where clicking an image leads to a gallery, or Stock Photos that link to the photographer’s portfolio (Photography). When creating an image link, ensure the alt text accurately describes the destination or purpose of the link, not just the image itself. For example, alt="Visit our nature photography gallery" is more useful than alt="green forest".
Tooltips with the title Attribute
The title attribute can be added to an <img> tag to provide additional information that appears as a tooltip when a user hovers their mouse cursor over the image.
<img src="sunset-beach.jpg" alt="A beautiful sunset over the beach" title="Photograph by Jane Godfrey, available on Tophinhanhdep.com">The title attribute can be used to:
- Provide a brief caption or additional context.
- Credit the artist or source of
Beautiful Photography. - Offer a helpful hint or call to action.
While title attributes can enhance user experience for mouse users, they are not universally accessible (e.g., on touch devices). For critical information, always ensure it’s available in the main page content or alt text.
Responsive Images for Modern Web Design
In today’s multi-device world, images must look good and load efficiently on everything from tiny phone screens to large desktop monitors. This is where responsive image techniques come into play, integrating heavily with Visual Design and Graphic Design principles.
- CSS for Fluidity: Using CSS, you can make images fluid, meaning they scale proportionally with their parent container. A common technique is
img { max-width: 100%; height: auto; }. This ensures images don’t overflow their containers. - The
srcsetandsizesAttributes: For more advanced responsiveness, HTML5 introducedsrcsetandsizes.srcsetallows you to specify multiple image files (different resolutions or densities) for the same<img>tag. The browser then intelligently chooses the most appropriate image based on the user’s device, screen resolution, and viewport size.sizesprovides hints to the browser about the rendered width of the image at different breakpoints.- Example:
<img srcset="small.jpg 500w, medium.jpg 1000w, large.jpg 1500w"
     sizes="(max-width: 600px) 100vw, (max-width: 1200px) 50vw, 33vw"
     src="medium.jpg" alt="A responsive landscape image">
WallpapersorBackgroundsthat need to adapt dynamically, ensuring fast loading without sacrificing quality onHigh Resolutiondisplays. - The
<picture>Element: For even greater control, especially when you need to serve entirely different images for different contexts (e.g., a landscape image for desktop, a portrait image for mobile, or different image formats for browser compatibility), the<picture>element is used.<picture> <source media="(min-width: 800px)" srcset="large-desktop.webp" type="image/webp"> <source media="(min-width: 450px)" srcset="medium-tablet.webp" type="image/webp"> <img src="small-mobile.jpg" alt="A fallback image for smaller screens"> </picture>
These responsive techniques, while more complex than simple width and height attributes, are essential for modern web development, ensuring optimal display and performance across the vast array of devices used today.
Beyond Basic Insertion: Images in the Broader Web Ecosystem
Inserting an image in HTML is just one piece of the puzzle. The true impact of visual content on your website comes from understanding how images interact with the broader web ecosystem, influencing performance, Visual Design, and user engagement. This comprehensive view integrates all the website’s main topics, from Photography to Image Tools and Inspiration.
Visual Design Principles and Image Selection
Images are powerful communicative tools. Their selection and placement are fundamental to effective Visual Design, contributing to:
- Aesthetic Cohesion: Whether you’re aiming for a minimalist, vibrant, or
Sad/EmotionalAesthetic, the style of yourWallpapers,Backgrounds,Nature,Abstract, orBeautiful Photographymust be consistent. This reflects your brand identity and enhances user experience.Graphic DesignandDigital Artprinciples guide these choices, ensuring visual harmony. - Narrative and Emotion: Images can tell stories and evoke emotions more powerfully than text alone. A well-chosen
Beautiful Photographyshot orAbstractpiece can immediately set the tone for a page. Consider the emotional impact and the message you want to convey. - Hierarchy and Focus: Images can draw attention to specific areas of your page. Strategic placement and size can guide the user’s eye, emphasizing key content or calls to action.
Photo ManipulationandCreative Ideascome into play here, allowing images to be tailored to specific design needs. - Accessibility beyond Alt Text: While
alttext is crucial,Visual Designalso considers color contrast in images, avoiding flashing elements that could trigger seizures, and ensuring complex images are accompanied by sufficient descriptive text for all users.
Images and Website Performance
The performance implications of images cannot be overstated. Large, unoptimized images are a primary cause of slow-loading websites, leading to frustrated users and poor search engine rankings.
- Recap: The Imperative of Optimization: As discussed, using
Image ToolslikeCompressors,Optimizers, andConverters(e.g., to WebP) before uploading is non-negotiable. This directly impactsHigh ResolutionPhotographyto ensure it looks stunning without bogging down the site. - Lazy Loading: For images that are not immediately visible when a page loads (i.e., “below the fold”),
lazy loadingis a vital technique. This means the browser only loads the image file when it enters or is about to enter the viewport, saving bandwidth and speeding up initial page load times. Modern HTML supports this natively withloading="lazy":This is especially useful for<img src="my-image.jpg" alt="Description" loading="lazy">Image Collectionsor galleries where many images are present but not all are seen at once. - Content Delivery Networks (CDNs): For larger websites, storing images on a CDN can significantly improve load times. CDNs distribute your assets across multiple servers globally, so when a user requests an image, it’s served from the server geographically closest to them.
Image Inspiration and Curation
Finding the right images is an art form in itself, often requiring Image Inspiration & Collections.
- Sources for High-Quality Images:
- Original
Photography: The best way to ensure unique, on-brand visuals. Investing inDigital Photographysessions, hiring photographers, or taking your own high-quality photos provides exclusive content. Stock Photos: Websites like Unsplash, Pexels, Pixabay (free) or Shutterstock, Adobe Stock (paid) offer vast libraries ofHigh ResolutionStock Photos. Always check licensing terms carefully.Digital Artand Illustrations: For a uniqueAesthetic, consider commissioningDigital Artor using readily available illustrations.
- Original
- Developing a Visual Strategy:
Mood Boards: CreatingMood Boardshelps define the visual direction for your website. Collect examples ofWallpapers,Backgrounds,Natureshots,Abstractart, orSad/Emotionalimagery that align with your desiredAestheticand brand message.Thematic Collections: Organize your images intoThematic Collectionsthat complement different sections of your website.Trending Styles: While maintaining brand consistency, stay aware ofTrending StylesinVisual DesignandPhotographyto keep your website fresh and engaging.
Conclusion
Inserting an image in HTML, while seemingly a basic task, opens up a world of possibilities for enriching your web content and engaging your audience. From the foundational <img> tag with its essential src and alt attributes to the nuanced control offered by width, height, title, and advanced responsive image techniques, each element plays a vital role in crafting a high-quality web experience.
Beyond the code, remember that images are powerful storytellers. The deliberate selection of Wallpapers, Backgrounds, Aesthetic Photography—be it Nature, Abstract, or Sad/Emotional—combined with the strategic application of Image Tools for optimization, and a keen eye for Visual Design principles, transforms a simple web page into a captivating digital journey. By prioritizing image preparation, accessibility, and performance, you not only ensure your visuals load efficiently and look stunning, but you also create a more inclusive and enjoyable experience for every visitor to Tophinhanhdep.com. Embrace the power of the visual, and let your web pages truly come alive.