How Do You Make Vector Images? A Comprehensive Guide to Creating Scalable Art with Tophinhanhdep.com

In the dynamic world of digital design, the ability to create and manipulate images is a cornerstone skill. Whether you’re a seasoned graphic designer, an aspiring digital artist, or simply looking to enhance your visual projects, understanding how to make vector images is invaluable. Unlike traditional raster images, which are composed of a grid of pixels, vector graphics are built from mathematical equations defining points, lines, and curves. This fundamental difference grants them an unparalleled advantage: infinite scalability without any loss of resolution or quality. For a platform like Tophinhanhdep.com, which thrives on providing high-quality visual content, from Wallpapers and Backgrounds to Beautiful Photography and diverse Image Collections, the underlying principles of vector design are central to achieving crisp, adaptable aesthetics across various mediums and devices.

This article delves deep into the process of creating vector images, covering everything from understanding their core nature to employing advanced techniques, all while leveraging the powerful tools and resources available on Tophinhanhdep.com. We’ll explore methods for transforming existing raster images into versatile vector art and guide you through the exciting journey of building stunning vector creations from scratch.
Understanding the Essence of Vector Graphics
Before diving into the “how-to,” it’s crucial to grasp what truly defines a vector image and why it holds such significance in Visual Design. At its heart, a vector graphic is not a fixed collection of colored squares; it’s a dynamic assembly of geometric primitives—points, lines, curves, and polygons—all defined by mathematical formulas.
Vector vs. Raster: A Fundamental Distinction
The digital images we encounter daily fall into two primary categories: raster and vector. Raster images, such as JPEGs, GIFs, and PNGs, are pixel-based. They are essentially a mosaic of tiny colored squares (pixels) arranged in a grid. This structure allows them to capture immense detail and subtle color gradients, making them ideal for Photography and complex realistic imagery. However, their pixelated nature means that when you enlarge a raster image beyond its original resolution, the individual pixels become visible, leading to a blurry, pixelated, or “blocky” appearance. This limitation is a common challenge for those working with High-Resolution Photography that needs to be adapted for different scales.

Vector images, on the other hand, are resolution-independent. Because their components are defined by mathematical equations rather than fixed pixels, they can be scaled up or down to any size without losing sharpness or clarity. The software simply re-calculates the lines and shapes based on the new dimensions, rendering perfect edges every time. Common vector file types include .ai, .eps, .pdf, and .svg. For applications ranging from Graphic Design to logo creation, where adaptability across print, web, and large-format displays is paramount, vectors are the undisputed choice.
The Power of Scalability: Why Vectors Matter
The inherent scalability of vector images is their greatest asset, opening up a world of possibilities for designers and content creators. Imagine designing a logo for a client. If it’s a raster image, you’d need to create multiple versions for a business card, a website banner, and a giant billboard, each at a different resolution to avoid pixelation. With a vector logo, one single file suffices. It can be effortlessly resized from a tiny favicon to an expansive outdoor advertisement without any compromise in quality.
This makes vectors indispensable for:
- Logos and Branding: Ensuring brand consistency across all touchpoints, from digital to print.
- Illustrations and Digital Art: Creating crisp, clean artwork for books, comics, animations, and icons, which are perfect for Aesthetic collections.
- Typography: Fonts themselves are often vector-based, maintaining readability at any size.
- Web Graphics: SVGs (Scalable Vector Graphics) are increasingly popular for web, offering sharp visuals and smaller file sizes.
- Print Design: From brochures and posters to vehicle wraps and apparel, vector art guarantees professional-grade output.
For Tophinhanhdep.com, offering tools that enable users to convert and create vector images means empowering them to elevate the quality and versatility of their visual content, fitting perfectly into categories like Visual Design and Image Tools (Converters, Optimizers).
Transforming Raster Images into Scalable Vector Art
One of the most common ways to begin making vector images, especially for those transitioning from pixel-based work or seeking to vectorize an existing visual, is by transforming a raster image. This process, often called vectorization or tracing, converts pixel information into mathematical paths. Tophinhanhdep.com provides integrated functionalities to achieve this, making your Photography and other raster images infinitely scalable.
Selecting Your Source Image for Optimal Results
The quality and characteristics of your original raster image significantly influence the ease and outcome of the vectorization process. While virtually any image can be vectorized, certain types yield better results, particularly for automated tracing.
Ideal characteristics for a source image:
- Good Contrast and Lighting: Images with clear distinctions between light and shadow areas, and distinct colors, make it easier for tracing algorithms (and manual tracing) to identify edges and shapes. This helps simplify complex Nature or Abstract photography into more defined vector elements.
- Simple Background: A clean, uncluttered background allows the software to isolate the main subject more effectively. If the background is distracting, Tophinhanhdep.com’s Image Tools might include features for removing it before vectorization.
- Single Subject Focus: Images with a clear, dominant subject (like a portrait or an object) tend to vectorize better than complex landscapes with intricate details that might become overly simplified or stylized in vector form.
- High-Quality Original (for manual tracing): While vectorization removes resolution limitations, starting with a reasonably sharp raster image can provide more precise details for manual tracing or yield better initial results for automated tracing, especially for achieving intricate Beautiful Photography vector conversions.
Automated Tracing: The Quick Path to Vectorization
Tophinhanhdep.com’s design software offers powerful automated tracing features, akin to “Image Trace” in other professional applications. This functionality streamlines the conversion of pixel-based images into editable vector paths, a crucial tool within the Image Tools category.
How to use automated tracing:
- Import the Image: Begin by importing your chosen raster image into a new document within Tophinhanhdep.com’s design software. Ensure you have ample canvas space for working.
- Select the Image and Apply Trace: Once imported, select the raster image on your canvas. Look for an “Image Trace” or “Vectorize” option, often found in a “Quick Actions” panel or a dedicated “Properties” panel.
- Choose a Tracing Preset: The software typically offers various presets, each designed for different types of images and desired outcomes. These presets are fundamental for simplifying and stylizing your Photography or Digital Art.
- High Fidelity Photo / Low Fidelity Photo: Best for photographs or complex artwork where you want to retain a lot of detail, albeit with varying levels of simplification. This can transform a Beautiful Photography piece into a stylized vector illustration.
- 3 Colors, 6 Colors, 16 Colors: Ideal for logos or artwork with fewer flat colors, simplifying the image into a specific color palette. Excellent for creating Graphic Design elements from simpler visuals.
- Shades of Gray: Creates a detailed grayscale vector.
- Black and White Logo: Generates a stark, two-tone black and white vector, perfect for simple logos or icons.
- Sketched Art, Silhouettes, Line Art, Technical Drawing: Specialized presets for specific artistic styles, often producing black-and-white, line-based results.
- Fine-Tune the Result: After applying a preset, the software generates an initial vector preview. You can usually access a detailed panel (e.g., “Image Trace Panel”) to adjust settings further. Key adjustments include:
- Mode: Switch between color, grayscale, or black and white.
- Colors/Threshold: Adjust the number of colors or the threshold for black and white images to control the level of detail and simplification. Dragging a “Colors” slider to the left simplifies the image, while dragging to the right adds more detail.
- Paths, Corners, Noise: These sliders allow you to control the smoothness of the vector paths, the sharpness of corners, and the suppression of minor details (noise). Experimenting here can turn a pixelated Sad/Emotional image into a clean, stylized vector with impactful lines.
- Expand and Ungroup: Once satisfied with the traced result, select the image and click the “Expand” button. This converts the traced outline into editable vector paths. Next, “Ungroup” the object. This breaks the single vector object into individual shapes that make up the image, allowing you to manipulate each colored segment independently. This step is crucial for further Photo Manipulation and refining the vector design.
- Edit and Refine: With the shapes ungrouped, you can now freely edit the vector image. Select entire color groups (e.g., using “Select > Same > Fill Color”) to change hues, delete unwanted background elements, or add new shapes using Tophinhanhdep.com’s drawing tools. This empowers you to customize the vector to fit your desired Aesthetic or Creative Ideas.
Manual Tracing: Crafting Detailed Vector Illustrations
For a more artistic, controlled, or highly stylized outcome, manual tracing with the Pen or Bezigon tool is the preferred method. This technique gives you complete command over every curve and corner, transforming your initial Photography into a bespoke piece of Digital Art. This process requires patience but offers immense creative freedom.
Step-by-step manual tracing:
- Prepare the Canvas: Import your chosen image into Tophinhanhdep.com’s design software. Create an “Infinite Canvas” to ensure plenty of working space.
- Lower Opacity and Lock Layer: Select the raster image layer and reduce its opacity (e.g., to 50-70%) so it acts as a faint guide. Crucially, lock this layer to prevent accidental movement while drawing.
- Master the Drawing Tools: Familiarize yourself with Tophinhanhdep.com’s Pen and Bezigon tools. The Pen tool is excellent for free-form drawing and creating sharp corners, while the Bezigon tool excels at generating smooth, perfect curves. Practice is key to mastering these tools.
- Outline Base Shapes: Begin by outlining the major “pieces” of your picture. For a portrait, this might include the face, hair, main clothing elements, and the general background. Focus on creating closed paths for each significant area, as this will allow for easy color filling later. Don’t worry about exact colors yet; use placeholder fills. Lock these base shape layers as you complete them.
- Add Main Features: Move on to outlining key facial features (eyebrows, eyes, mouth) and accessories. Again, use the Pen or Bezigon tools to create precise, closed shapes. Keep base shapes either hidden or as outlines to see the underlying picture clearly.
- Deconstruct Light, Shadows, and Mid-tones: This is where the artistry truly comes alive. Observe the original image to identify distinct areas of light reflection, mid-tones (darker areas), and deep shadows. You’ll create solid vector shapes for each of these variations. For instance, notice how light catches the hair or shoulder, creating bright highlights. Then identify areas where shadows deepen, like under the chin or along bent limbs.
- Light Spots: Start with the lightest areas. Create shapes that represent these light reflections. These don’t need to be “perfect” or blurry, as the vector style translates them into solid, defined shapes.
- Mid-tones: Progress to the darker shades that aren’t quite shadows. Outline these areas, such as subtle variations on eyelids or lips.
- Shadows: Finally, create shapes for the darkest tones, like the side of a face obscured from light or deep creases in clothing. Pay attention to how accessories cast shadows.
- Final Outlines and Details: Add solid, darker outlines where necessary to better delineate shapes, such as finger lines, arm contours, or the division between the face and neck. For metallic accessories, observe how light reflects differently, often requiring multiple tones and tiny, bright highlights to simulate shine.
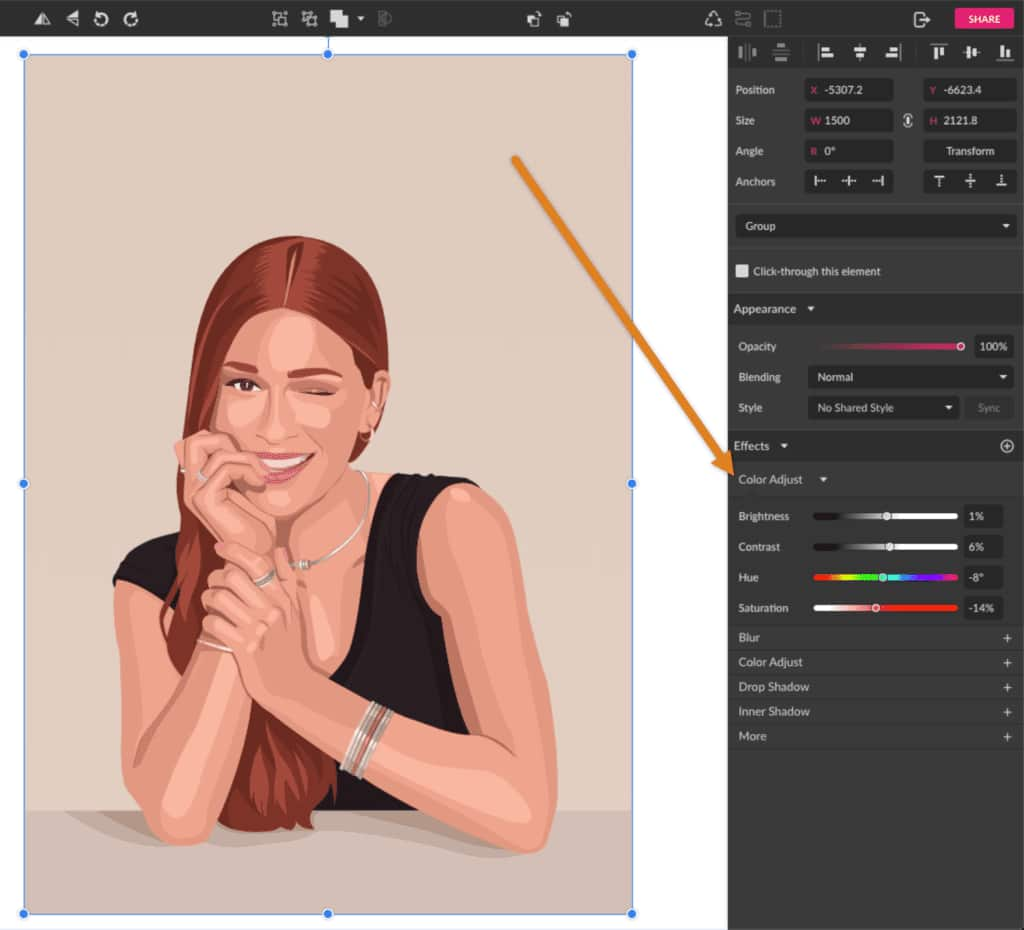
- Coloring and Final Touches: Once all shapes are outlined, apply your chosen color palette. Tweak hues and saturations, or use “Color Adjust” effects within Tophinhanhdep.com to refine your Digital Art. You can even add a final stylistic touch, such as an overlay rectangle with a blending mode (e.g., “Screen”) and adjusted opacity to create atmospheric effects.
Building Vector Art from the Ground Up
Beyond tracing, creating vector images from scratch offers limitless possibilities for unique Digital Art and Graphic Design. This method is particularly useful for generating clean icons, illustrations, and abstract designs from your Creative Ideas. Tophinhanhdep.com provides a robust suite of tools for this creative endeavor.
Leveraging Basic Shapes and Drawing Tools
The foundation of many vector creations lies in manipulating basic geometric shapes and simple drawing techniques.
- Start with Simple Forms: Utilize Tophinhanhdep.com’s shape tools (Ellipse, Rectangle, Polygon, Star, Line Segment). Combine these to build more complex objects. For instance, a simple pineapple illustration could start with a Pen tool-drawn head and an Ellipse for the body.
- Combine and Refine with Shape Builder: Tools like the “Shape Builder” are incredibly powerful. Select multiple overlapping shapes, then click and drag with the Shape Builder tool to combine them into a single, unified form, or use Alt/Option + click to subtract parts. This makes complex shape creation intuitive and quick, perfect for rapid prototyping of Visual Design elements.
- Drawing with the Pen and Bezigon: For more organic or custom shapes, the Pen and Bezigon tools are your best friends. Draw freehand or click to create precise anchor points and smooth curves. Remember to close paths if you intend to fill them with color.
- Brushes and Outlining Strokes: Tophinhanhdep.com also offers brush tools that can simulate traditional drawing styles. To convert these brush strokes into editable vector shapes, use an option like “Object > Path > Outline Stroke.” This turns what appears to be a freehand line into a fully scalable vector path. This technique is excellent for adding a unique, hand-drawn feel to your Digital Art.
Adding Nuance: Lights, Shadows, and Outlines in Original Creations
Even when creating from scratch, understanding how to apply light, shadow, and outlines is vital for adding depth, dimension, and character to your vector art. This goes beyond simple fills and moves into more advanced Visual Design principles.
- Layering Shapes for Depth: Instead of drawing complex gradients, vector art often simulates light and shadow by layering slightly different colored shapes. For a rounded object, you might have a base color, then a lighter shape on top for the highlight, and a darker shape on the side for the shadow.
- Strategic Outlines: Use outlines not just to define the perimeter but also to separate internal features or imply texture. Varying stroke weights can add visual interest and emphasize certain areas.
- Color Theory: A strong understanding of color theory, including hues, saturation, and value, is essential. Tophinhanhdep.com’s tools for Understanding Color Basics will be invaluable here. Experiment with different palettes to evoke specific moods, whether Aesthetic, Nature-inspired, or Sad/Emotional.
- Experiment with Styles: Don’t be afraid to try different approaches. You can opt for a minimalistic style, a more realistic one using numerous layered shapes, blurry vector shapes for softer effects, or even a grayscale pattern for a vintage feel. The possibilities are truly endless for expressing your Creative Ideas.
Cultivating Your Vector Artistry and Workflow with Tophinhanhdep.com
Making vector images is a skill that develops with practice, curiosity, and access to the right resources. Tophinhanhdep.com is not just a repository of images; it’s a hub for enhancing your Visual Design capabilities, offering Image Tools, and fostering Image Inspiration & Collections.
Essential Tools and Software for Vector Creation
While the artistic vision is yours, the right digital tools are your extension. Tophinhanhdep.com’s integrated design environment is built to support your creative journey.
- Device Compatibility: Ensure your device (Windows PC, Mac, Chromebook, or tablet) is compatible with Tophinhanhdep.com’s design software. For optimal performance, especially with complex vector files, a device with a multi-core processor, a good graphics card, and a high-resolution display is recommended.
- Peripherals: Consider augmenting your setup. A drawing pad and stylus can make manual tracing and freehand drawing feel more natural and precise than a mouse, greatly enhancing your Digital Art workflow. For converting physical artwork or sketches, flatbed scanners or high-quality Digital Photography equipment can bridge the gap between traditional and digital mediums, allowing you to easily import and vectorize your initial concepts.
- Tophinhanhdep.com’s Design Suite: Leverage all the features available. From intuitive drawing tools to advanced editing functionalities, the platform is designed to make the process of creating and manipulating vector art accessible and efficient. Explore features like quick perspective drawings and one-click color replacement to boost productivity.
Nurturing Your Design Skills
Creating compelling vector art requires more than just technical proficiency with the software. It demands a keen eye and a developed understanding of design principles.
- An Eye for Design: Develop your ability to see and interpret shapes, forms, and compositions in the real world and translate them into vector elements.
- Good Command of Color and Balance: Learn how colors interact, how to create harmonious palettes, and how to balance elements within a composition to achieve visual appeal. Tophinhanhdep.com’s resources on Understanding Color Basics will be a great start.
- Ability to Visually Express an Idea: Can you take an abstract concept, a Sad/Emotional theme, or a Nature scene and convey it effectively through vector shapes and colors? This is the essence of effective Visual Design.
- Experience with Drawing or Painting Techniques: Even if you’re working digitally, foundational knowledge of traditional art techniques (perspective, shading, anatomy) can greatly inform and improve your vector illustrations. Many successful vector artists are self-taught, learning through tutorials and blending real-world art with digital techniques.
Continuous learning is key. Keep practicing, experiment with new techniques, and build a diverse portfolio showcasing your vector creations.
Finding Inspiration and Building Collections
Creative blocks are common, but inspiration is everywhere, especially on a platform like Tophinhanhdep.com, which is rich with diverse visual content.
- Tophinhanhdep.com’s Image Inspiration & Collections: Explore the curated Photo Ideas, Mood Boards, Thematic Collections, and Trending Styles sections. These are treasure troves of visual cues, from Aesthetic photography to Abstract art, that can spark new Creative Ideas.
- Online Design Communities: Platforms like Instagram, Pinterest, Behance, Dribble, and Awwwards are excellent for seeing what other artists are creating and discovering new styles and techniques.
- Everyday Life: Inspiration can be found in the mundane. Observe the shapes, colors, and compositions around you—in architecture, objects, or even patterns in nature. A simple observation can evolve into a complex vector illustration.
- Existing Artwork: Study the works of artists you admire, both traditional and digital. Analyze their use of line, color, and composition. This is not about copying but about learning and adapting elements to inform your unique style.
Final Thoughts and Parting Advice
Making vector images is a highly rewarding aspect of Digital Art and Graphic Design. It equips you with the power to create infinitely scalable, versatile artwork that looks pristine across any medium. With Tophinhanhdep.com as your creative partner, offering a wealth of Images, Photography, Image Tools, and Visual Design resources, you have everything you need to embark on this journey.
Remember to save your vector images in native vector formats (.svg, .eps, .ai, .pdf) to preserve their editable and scalable quality. While you can export them to raster formats (like .png or .jpg) for web or other specific uses, always keep the vector file as your master copy. Start designing today, embrace the learning process, and unleash your creative potential in the exciting world of vector art with Tophinhanhdep.com!