How Do You Merge Images in Photoshop?

In the dynamic world of digital imagery, the ability to combine photographs is a cornerstone of creative expression and professional visual design. Whether you’re crafting a stunning digital artwork, designing compelling graphics, or simply enhancing a personal photograph, merging images in Photoshop unlocks a universe of possibilities. At Tophinhanhdep.com, we understand the power of high-resolution imagery and the innovative tools that transform simple pictures into breathtaking visual narratives. This comprehensive guide will walk you through various techniques for merging images in Photoshop, from fundamental layer blending to advanced AI-powered compositing, ensuring your creations align with the aesthetic and quality standards promoted on our platform.
Photoshop stands as an indispensable tool for photographers and graphic designers alike, offering unparalleled control over every pixel. While the idea of combining multiple distinct images into a single, cohesive masterpiece might seem daunting to newcomers, the process is surprisingly accessible once you grasp the core principles. From creating a dramatic collage, placing a subject into an unforgettable landscape, or seamlessly blending elements for artistic photo manipulation, Tophinhanhdep.com is here to guide your journey into the art of digital compositing.
Mastering Layer-Based Merging Techniques

The foundation of merging images in Photoshop lies in its robust layer system. Each image or element you introduce into your project exists on its own layer, providing complete control over its position, appearance, and interaction with other elements. This non-destructive approach allows for endless experimentation and refinement, central to producing high-quality visual design and beautiful photography.
Method 1: Precision Blending with Layer Masks
Layer Masks are perhaps the most versatile and popular method for merging images in Photoshop, offering granular control over transparency. Unlike simply reducing the opacity of an entire layer, layer masks allow you to selectively reveal or conceal parts of a layer, creating incredibly convincing and natural blends. This technique is invaluable for achieving a refined editing style, ensuring that your merged images contribute to a coherent aesthetic.
Opening and Arranging Your Images
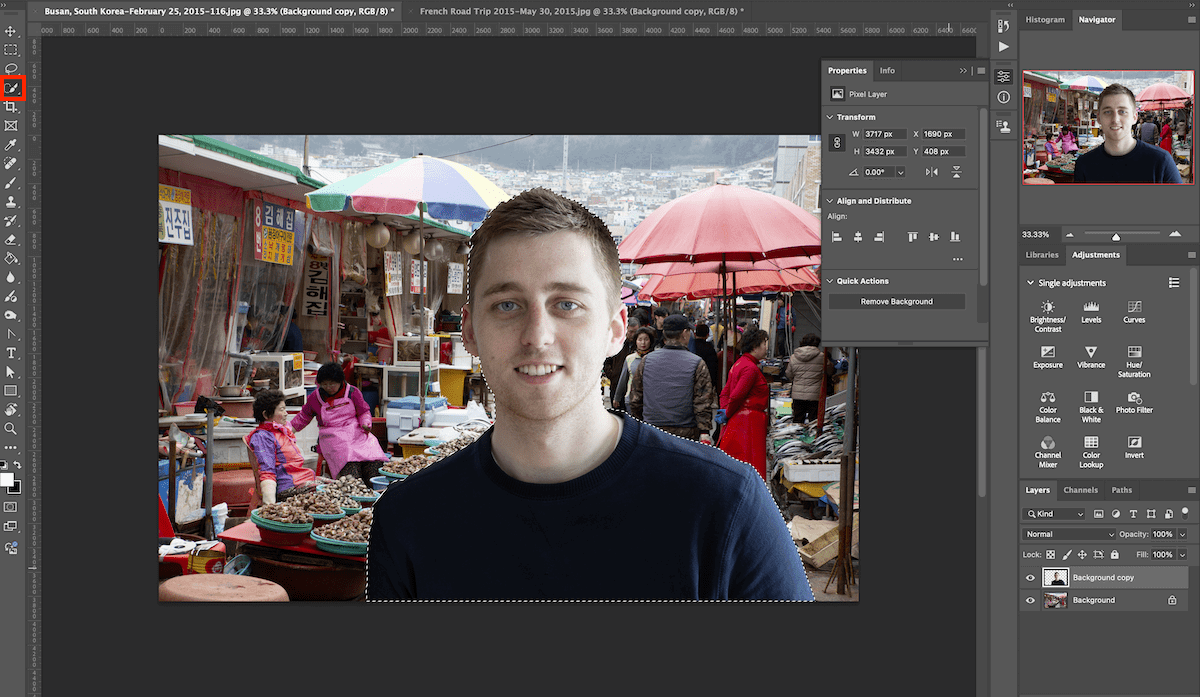
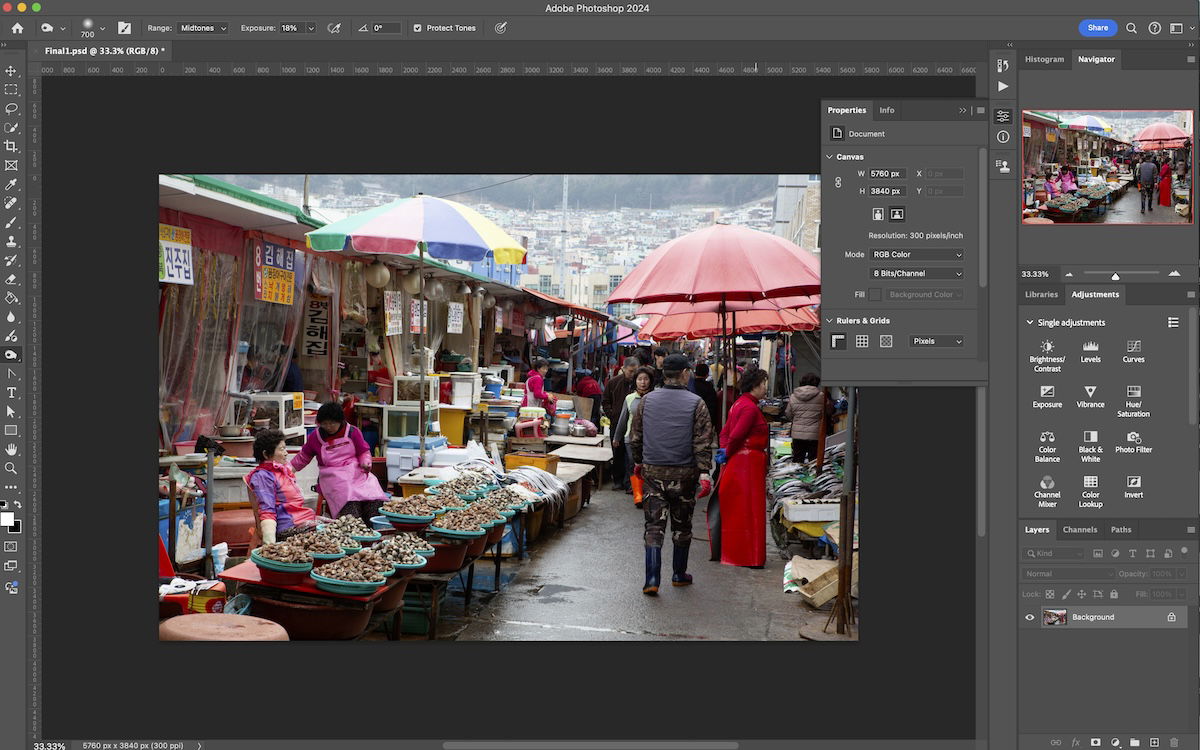
To begin, open the two images you wish to combine in Photoshop. It’s often beneficial if both images have similar dimensions and resolution, though Photoshop offers robust tools to adjust these later. Once open, create a new document (File > New) with dimensions appropriate for your final composition, considering the overall scale and intended use (e.g., a wallpaper, a social media background, or part of a larger graphic design project).
Next, use the Move Tool (V) to drag one of your source images into this new document. This image will typically serve as your background. Then, drag your second image—the one you intend to blend or overlay—into the same new document. You’ll notice both images now appear as separate layers in your Layers panel. Ensure the image you plan to modify or mask is positioned above the background layer.
Understanding and Applying Layer Masks for Selective Transparency
A layer mask essentially controls the visibility of its associated layer. White areas on the mask reveal the layer’s content, while black areas conceal it, allowing the layer below to show through. Grayscale values create partial transparency. This principle is fundamental to non-destructive editing and achieving seamless blends.
To add a layer mask, select the top layer in your Layers panel and click the “Add layer mask” icon (a rectangle with a circle inside) at the bottom of the panel. A white thumbnail will appear next to your layer’s preview, indicating an active layer mask. By default, this mask is entirely white, meaning your entire top layer is visible.
For initial blending, Photoshop’s Auto-Align Layers feature can be a lifesaver. Select both layers, go to Edit > Auto-Align Layers, choose “Auto,” and click OK. Photoshop will attempt to align common features, which is particularly useful for panoramas or focus stacking, but can also help with general image alignment before blending. Afterward, you might adjust the Opacity of the top layer temporarily to better visualize how the images overlap, which aids in planning your blend.
Refining the Blend with Brush and Gradient Tools
With the layer mask active (ensure the mask thumbnail is selected, not the layer thumbnail), you can begin painting on it to control transparency.
-
Using the Brush Tool:
- Set your foreground color to black (press D to reset to default black/white, then X to swap if needed).
- Select the
Brush Tool(B). Adjust its size ([and]) and, crucially, its hardness (a softer brush (0% hardness) creates gentler transitions, ideal for blending). - Paint with black on the mask over areas of the top layer you wish to hide. This reveals the background layer.
- If you make a mistake, swap your foreground color to white (X) and paint over the mistake to restore the top layer’s visibility.
- Painting with shades of gray creates varying degrees of transparency, useful for subtle blends.
-
Using the Gradient Tool:
- The
Gradient Tool(G) is excellent for creating smooth, linear, or radial transitions between images. - With the layer mask selected, ensure your foreground and background colors are set to black and white (D).
- Select a gradient type (e.g.,
Linear Gradient) from theOptions bar. - Click and drag across your image. The gradient will apply black to white (or vice-versa, depending on your foreground/background colors and gradient settings) across the mask, creating a gradual blend from one image to the other. For instance, dragging from left to right with black as the foreground will hide the left side of the top layer and gradually reveal it towards the right.
- The
This iterative process of painting and refining allows for highly precise and artistic merging, turning your creative ideas into digital art.
Saving Your Masterpiece for Further Editing or Sharing
Once you’re satisfied with your merged image, it’s crucial to save it correctly.
- For Further Editing: Save your file as a Photoshop Document (
.PSD). This preserves all your layers, layer masks, smart objects, and other editable elements. This is invaluable if you plan to revisit the project or iterate on your visual design. - For Sharing/Final Output:
- To create a flattened, single-layer image for web use (e.g., Tophinhanhdep.com wallpapers, social media), choose
File > Save As, then selectJPEGorPNG. JPEG is ideal for photographs due to its compression, while PNG supports transparency, useful for graphics. - For high-resolution print or professional archiving, consider
TIFFformat. TIFF supports a higher bit depth, various compressions (lossless options available), and can maintain layers if needed, offering superior quality and flexibility.
- To create a flattened, single-layer image for web use (e.g., Tophinhanhdep.com wallpapers, social media), choose
Understanding the purpose of your final image dictates the best saving format, ensuring your beautiful photography is optimized for its intended platform.
Method 2: Seamless Integration Using Blend Modes
Blend Modes offer a quicker and often more artistic way to merge images, influencing how the pixels of one layer interact with those of the layers beneath it based on their color and luminosity values. This method is excellent for adding textures, light effects, or creating stylized composites, aligning well with various editing styles and creative ideas.
Loading Images for Stacking and Initial Positioning
Similar to layer masks, you start by opening your images and bringing them into a single Photoshop document as separate layers. One effective way to do this is via File > Scripts > Load Files into Stack. This command allows you to select multiple images from your computer, and Photoshop will automatically open them in a single document, each on its own layer. For merging purposes, leave “Attempt to Automatically Align Source Images” and “Create Smart Object After Loading Layers” unchecked initially, unless you specifically need those functionalities (e.g., for panoramas).
Once loaded, you’ll see your images stacked in the Layers panel. Use the Move Tool (V) to reposition the layers. If you’re aligning them side-by-side, you might need to increase your canvas size (Image > Canvas Size) to accommodate both. To move an image precisely to the edge of the canvas or another image, activate View > Snap and View > Snap To > Document Boundaries. Then, as you drag with the Move Tool while holding Shift (to constrain movement), the layer will “snap” into place. If an image goes off-canvas, use Image > Reveal All to automatically resize the canvas to show all content.
Exploring Photoshop’s Blend Modes for Artistic Effects
Blend Modes are found in the Layers panel, usually a dropdown menu labeled “Normal” above the layers. Each blend mode applies a different mathematical formula to how the pixels of the active layer interact with those below it. Experimentation is key to discovering their creative potential:
- Normal: No blending, simply overlays the top layer.
- Darken, Multiply, Color Burn, Linear Burn: These modes primarily affect the darker areas, making the composite darker. Great for adding shadows or integrating darker textures.
- Lighten, Screen, Color Dodge, Linear Dodge (Add): These modes affect lighter areas, making the composite brighter. Ideal for light effects, glows, or adding clouds to a sky.
- Overlay, Soft Light, Hard Light, Vivid Light, Linear Light, Pin Light, Hard Mix: These modes increase contrast and impact based on the luminance of the underlying layers. They can be excellent for making details pop or adding dramatic atmospheric effects.
- Difference, Exclusion: These create interesting, often surreal, effects by inverting colors based on luminance differences.
- Hue, Saturation, Color, Luminosity: These transfer specific color properties from one layer to another, useful for color grading or creative color shifts.
Cycle through these modes using Shift + or Shift - (with the Move Tool active) to quickly preview the effects. This method is particularly effective for creating aesthetic and abstract imagery, or even enhancing backgrounds for your photos.
Adjusting Opacity and Fill for Subtlety
Alongside Blend Modes, Opacity and Fill sliders (also in the Layers panel) provide further control over your blend.
- Opacity: This universally controls the transparency of an entire layer. A lower opacity makes the top layer more transparent, allowing more of the underlying layers to show through. It’s often used in conjunction with blend modes to fine-tune the intensity of the blending effect. For example, using “Screen” mode at 50% opacity creates a subtle brightening effect.
- Fill: Similar to opacity,
Fillalso controls transparency, but it specifically affects the opacity of the pixels within the layer while preserving any layer styles (like drop shadows or strokes) applied to that layer. In most merging scenarios without layer styles,OpacityandFillwill appear to function similarly, butFilloffers nuances for advanced graphic design.
By combining Blend Modes with Opacity and Fill adjustments, you can achieve a vast array of creative ideas, from subtle photo manipulation to striking digital art. Remember that Photoshop allows you to combine multiple images, so you can stack several layers and adjust each with its own blend mode and opacity for complex compositions.
Advanced Merging and Problem Solving
Beyond the foundational techniques, Photoshop offers powerful features and strategies for more complex merging tasks, particularly in problem-solving common challenges and harnessing cutting-edge AI. These tools are vital for maintaining high-resolution quality and achieving polished results for digital photography and image tools.
Leveraging AI with Generative Fill for Background Merging
Adobe Photoshop’s Generative Fill, powered by AI, represents a significant leap in image manipulation. It allows users to seamlessly expand images, add or remove objects, and even merge elements by intelligently generating content that matches the surrounding pixels. This is particularly useful for blending images with similar backgrounds or creating entirely new, cohesive environments, aligning with Tophinhanhdep.com’s focus on innovative image tools and creative ideas.
Setting Up Your Canvas and Strategically Placing Images
To use Generative Fill for merging, start by setting up a new document (your canvas) in Photoshop. The canvas should be larger than the combined dimensions of your two images, providing ample empty space for the AI to work. For example, if you’re merging two landscape photos, create a wider canvas to place them side-by-side with a gap in the middle.
- Canvas Creation: Go to
File > Newand set your desired dimensions. Choose a resolution appropriate for your final output (e.g., 300 DPI for print, 72 DPI for web). - Image Placement: Import your two images into this new document (
File > Place Embedded). Position them on separate layers, leaving a noticeable gap between them where you want the merge to occur. Ensure the images are scaled appropriately usingEdit > Free Transform(Ctrl/Cmd + T) so they appear natural together. Converting images toSmart Objects(right-click layer >Convert to Smart Object) before scaling is recommended, as it prevents pixelation if you need to resize them multiple times, preserving high-resolution quality. - Selection for Blending: Select the
Rectangular Marquee Tool(M) or any other selection tool (Lasso, Quick Selection). Draw a selection that encompasses the empty space between your two images, and crucially, overlaps slightly into the edges of both images. This overlap provides the AI with essential context from both photos, allowing it to generate a seamless transition.
Utilizing Generative Fill to Create Cohesive Backgrounds
Once your selection is made, the Generative Fill process is remarkably straightforward:
- Activate Generative Fill: In the contextual task bar that appears after making a selection (or via
Edit > Generative Fill), click the “Generative Fill” button. - Enter a Prompt (Optional but Recommended): A text field will appear. You can leave it blank to let Photoshop intelligently fill the area based on the surrounding pixels, or you can enter a descriptive text prompt (e.g., “grassy field,” “dense forest,” “cloudy sky”) to guide the AI’s creation. For merging backgrounds, a blank prompt often works best if the existing backgrounds are similar, otherwise, a specific prompt can help define the transitional elements.
- Generate Variations: Click “Generate.” Photoshop will process your request and provide three different variations of the merged area. You can cycle through these options in the
Properties panel(or the contextual task bar) to choose the best fit. If none are satisfactory, click “Generate” again for a fresh set of options.
Generative Fill creates a new “Generative Layer” which is fully editable, allowing you to fine-tune the result using masks or other adjustments. This AI-driven tool transforms complex photo manipulation into an intuitive and creative process, making it easier to produce stunning backgrounds, aesthetic compositions, and innovative digital art for Tophinhanhdep.com.
Essential Tips for Fixing Mistakes and Enhancing Realism
Even with the best planning, mistakes happen, and achieving perfect realism often requires meticulous refinement. Photoshop offers a suite of tools and techniques to correct errors and enhance the believability of your merged images, contributing to a polished editing style.
Correcting Misalignments and Swapping Images
If, after merging, you find your images are not perfectly aligned or you wish to swap their positions, here’s how:
- Move Tool for Adjustment: Ensure the
Move Tool(V) is active. Select the layer you want to adjust in theLayers panel. You can then click and drag to reposition it. HoldingShiftwhile dragging will constrain its movement to horizontal or vertical axes. - Precise Alignment: For more precise alignment, especially when placing images side-by-side, activate
View > SnapandView > Snap To > Document Boundaries. Select the layer, then go toSelect > All(Ctrl/Cmd + A) to select the entire canvas. Now, with theMove Toolactive, use the alignment icons in theOptions bar(e.g., “Align Left Edges,” “Align Right Edges”) to snap your selected layer to the canvas boundaries. Repeat for other layers as needed. Deselect (Select > Deselector Ctrl/Cmd + D) when finished. - Swapping Layer Order: Simply drag layers up or down in the
Layers panelto change their stacking order. The top layer is always visible over those below it.
Applying Tonal and Color Adjustments for Visual Harmony
A convincing merge often depends on consistent lighting and color temperature across all elements. Even if your original images don’t match, Photoshop provides powerful adjustment layers to harmonize them.
- Adjustment Layers: Rather than directly editing pixel data, use
Adjustment Layers(found via the half-black, half-white circle icon at the bottom of theLayers panel). Options likeCurves,Levels,Color Balance,Hue/Saturation, andPhoto Filterallow you to non-destructively alter brightness, contrast, and color. - Clipping Masks for Local Adjustments: To apply an adjustment only to a specific merged layer (e.g., a foreground subject) without affecting the background, create a
Clipping Mask. With the adjustment layer directly above your target layer, right-click the adjustment layer and chooseCreate Clipping Mask(or Alt/Option + click between the two layers in theLayers panel). - Dodge and Burn Tools: For localized tonal adjustments (lightening or darkening specific areas), the
Dodge Tool(O) andBurn Tool(O) are excellent. Use them subtly with a lowExposuresetting to blend shadows and highlights, making the composite more believable.
Tools for Removing Unwanted Objects and Retouching
Sometimes, merged images contain imperfections or unwanted elements that disrupt the illusion.
- Clone Stamp Tool (S): This tool allows you to sample pixels from one area of your image and paint them onto another. It’s incredibly useful for duplicating textures, removing blemishes, or extending backgrounds seamlessly.
- Patch Tool (J): Part of the healing brush family, the
Patch Toolis ideal for removing larger, irregular objects. Select the unwanted area, then drag the selection to a clean “donor” area. Photoshop intelligently blends the sampled texture, color, and luminosity. It offers “Source” (fills selection with donor) and “Destination” (fills donor with selection) modes. - Generative Erase (AI-powered): For effortless removal, especially in Photoshop CC 2024+, select an object with a tool like the
Lasso Tool, then chooseGenerative Erasefrom the contextual task bar. Photoshop’s AI will intelligently remove the object and fill the space, often with astounding accuracy. - History Panel (F9) and Undo (Ctrl/Cmd + Z): Don’t forget these fundamental safety nets! The
History panelrecords your actions, allowing you to step back through multiple changes.Ctrl/Cmd + Zundoes your last action, and pressing it repeatedly (orCtrl/Cmd + Alt/Option + Zfor multiple undos) allows you to revert to earlier states, saving you from major errors.
By mastering these tools and techniques, you can ensure your merged images achieve a high degree of realism and artistic quality, whether for stock photos, digital photography, or complex photo manipulation projects.
Why Image Merging is Indispensable for Visual Creators
The art of merging images in Photoshop is far more than a technical skill; it’s a gateway to unparalleled creative freedom and efficiency for anyone engaged in visual creation, from graphic design to producing compelling digital art. On Tophinhanhdep.com, we see image merging as a fundamental capability that underpins various categories, from crafting unique wallpapers to generating high-resolution stock photos.
Enhancing Storytelling and Creative Expression
At its heart, image merging is about telling a story that a single photograph cannot convey. By combining elements from disparate sources, creators can construct narrative scenes, evoke specific emotions, and build entirely new realities.
- Constructing Narratives: Imagine a photograph of a solitary figure merged with an epic, stormy landscape. This combination immediately suggests a journey, a struggle, or profound contemplation. Merging allows photographers to transcend the limitations of a single moment in time, building richer stories.
- Evoking Emotions: Creative merging can turn abstract concepts into tangible visual experiences. A sad/emotional photograph might be enhanced by blending it with subtle, somber textures or symbolic elements, deepening its impact.
- Building Surreal and Fantasy Worlds: Digital artists frequently use merging techniques to create fantastical creatures, impossible landscapes, and surreal dreamscapes. This aligns perfectly with the “Digital Art” and “Creative Ideas” categories, pushing the boundaries of imagination.
Optimizing for Photography, Visual Design, and Digital Art
The practical applications of image merging span the entire spectrum of visual disciplines, offering tangible benefits for professionals and hobbyists alike.
- Photography Enhancement: In “Digital Photography,” merging is crucial for techniques like HDR (combining multiple exposures for a wider dynamic range), focus stacking (merging images with different focal points for overall sharpness), and creating panoramas. It’s also vital for product photography, allowing subjects to be seamlessly placed in ideal backgrounds, enhancing their appeal for e-commerce.
- Graphic Design: For “Graphic Design,” merging elements is a daily task. Crafting advertisements, posters, brochures, or website banners often requires integrating multiple images, text, and graphic elements into a cohesive design. Mastering merging ensures that all components look like they belong together.
- Digital Art and Photo Manipulation: Artists who create “Digital Art” and engage in “Photo Manipulation” rely heavily on merging. It enables them to combine diverse textures, effects, and subjects to form unique compositions. This could involve creating concept art, enhancing portraits with artistic backgrounds, or designing book covers.
From Wallpapers to High-Resolution Stock Photos: Diverse Applications
The versatility of image merging directly impacts the content Tophinhanhdep.com offers across its image collections.
- Aesthetic and Thematic Collections: Merging is used to create “Aesthetic” and “Thematic Collections” by ensuring a consistent visual style across various images. For example, a collection of “Nature” backgrounds might feature merged elements to create ideal lighting or compositions that weren’t possible in a single shot.
- Wallpapers and Backgrounds: High-quality “Wallpapers” and “Backgrounds” often benefit from expertly merged elements, allowing designers to create ideal scenes that fit various screen resolutions and themes. This includes blending elements for “Abstract” backgrounds or enhancing “Beautiful Photography” to serve as stunning desktop backdrops.
- Stock Photos: For “Stock Photos,” merging can be used to create versatile images by isolating subjects from their original backgrounds and placing them into clean, adaptable settings. This significantly increases the usability and appeal of stock imagery for a wide range of clients.
- Image Inspiration: The intricate “Photo Ideas” and “Mood Boards” featured on Tophinhanhdep.com often showcase the results of advanced merging, inspiring users to explore similar creative concepts in their own “Editing Styles.”
In essence, the ability to merge images in Photoshop is not just a skill but a powerful creative engine that drives innovation and excellence across all aspects of visual content creation, central to the vision of Tophinhanhdep.com.
Frequently Asked Questions About Merging Images in Photoshop
As you embark on your journey of image merging, you might encounter common questions. Here are some frequently asked questions and their answers, drawing from the best practices for digital photography and visual design.
Q: Can I use Photoshop to merge a picture with a background? A: Absolutely! Merging a picture with a background is one of the most common uses for Photoshop. The process involves placing both your subject picture and your chosen background on separate layers within the same document. Then, using tools like layer masks, selection tools, or even AI features like Generative Fill, you can seamlessly integrate the subject into the new background. Tophinhanhdep.com’s guides provide detailed steps for various approaches.
Q: How do I merge two photos in Photoshop? A: To merge two photos, start by opening both in Photoshop. Drag one image onto the other to place them in the same document on separate layers. From there, you have several primary methods:
- Layer Masks: The most flexible method, allowing you to selectively reveal parts of the top image while hiding others to blend with the bottom.
- Blend Modes: Apply a blend mode to the top layer to automatically calculate how its pixels interact with the layer below, creating various effects (e.g., darkening, lightening, or increasing contrast).
- Opacity: Simply reduce the opacity of the top layer to make it partially transparent, letting the bottom layer show through.
- Generative Fill: For intelligent, AI-powered blending, especially for backgrounds, make a selection between two images and use Generative Fill to create a natural transition.
Q: What is the best way to combine images in Photoshop? A: The “best” way depends on your desired outcome. However, using Layer Masks is generally considered the most professional and non-destructive method for combining images seamlessly. It provides maximum control over the blend and allows for easy adjustments without altering the original pixel data. For creative effects, Blend Modes are excellent. For complex background changes or image extensions, Generative Fill is rapidly becoming an indispensable tool, especially for digital art and high-resolution compositions.
Q: How can I combine multiple images into one using Photoshop? A: Combining multiple images follows the same principles as merging two, just on a larger scale.
- Open as Layers: Use
File > Scripts > Load Files into Stackto bring all images into a single document, each on its own layer. - Arrange: Use the
Move Tool(V) to position each image as desired. Adjust canvas size (Image > Canvas Size) if needed. - Blend: Apply layer masks to each overlaying layer, or utilize blend modes and opacity settings, to blend them with the layers beneath. For intricate compositions, you might use a combination of these methods, carefully masking and adjusting each layer for a cohesive result, creating complex visual design.
Q: What are some tips for beginners trying to merge photos in Photoshop? A: For beginners, Tophinhanhdep.com recommends:
- Start Simple: Begin with projects involving clear subjects and simple backgrounds.
- Learn Layers: Familiarize yourself with the
Layers paneland how to move, reorder, and group layers. - Master Layer Masks: Practice with layer masks; they are incredibly powerful and non-destructive. Use a soft-edged brush for smooth transitions.
- Experiment with Blend Modes: Play around with different blend modes to see their effects. They can offer quick and creative results.
- Use Adjustment Layers: Always use adjustment layers for color and tonal corrections. Clip them to individual layers for localized effects.
- Practice Patience: Photo manipulation takes time and attention to detail. Don’t be afraid to zoom in and work meticulously.
- Watch Tutorials: Follow step-by-step guides and video tutorials (like those found on Tophinhanhdep.com) to learn new techniques and shortcuts. Consistent practice is key to developing your editing styles and creating beautiful photography.
Conclusion
The journey of learning how to merge images in Photoshop is a rewarding one, opening up endless avenues for visual design, digital art, and stunning photography. From the precise control offered by layer masks to the artistic flair of blend modes and the groundbreaking capabilities of AI-powered Generative Fill, Photoshop provides a versatile toolkit for every creative vision.
At Tophinhanhdep.com, we believe that mastering these techniques is essential for anyone looking to produce compelling visuals, whether for aesthetic wallpapers, high-resolution stock photos, or intricate photo manipulation projects. The ability to seamlessly combine elements, correct imperfections, and harmonize disparate images empowers you to transform your creative ideas into captivating realities. Continue to explore, experiment, and refine your skills, and you’ll soon be crafting merged images that not only meet your artistic aspirations but also inspire others in the vast and vibrant world of digital imagery.