Mastering Image Movement in Word: A Comprehensive Guide to Dynamic Layouts

In today’s visually-driven world, the ability to seamlessly integrate and manipulate images within documents is paramount for effective communication. Whether you’re creating a report adorned with high-resolution photography, designing a brochure with aesthetic backgrounds, or crafting a presentation featuring abstract art, the precise placement of visual elements can profoundly impact your message. Microsoft Word, a ubiquitous word processing tool, offers robust features for managing images, yet many users find themselves wrestling with pictures that stubbornly refuse to move where desired. This comprehensive guide, drawing on expertise in visual design and image tools, from Tophinhanhdep.com, will demystify the process, empowering you to achieve complete control over your document’s visual flow. We’ll explore the fundamental techniques, advanced options, and common troubleshooting tips, ensuring your images — be they nature scenes, emotional expressions, or digital art — enhance your content rather than hinder it.
Unlocking Image Freedom: Understanding Word’s Default Behavior and Text Wrapping
When you first insert an image into a Word document, it often seems to have a mind of its own, disrupting text and making precise placement challenging. This behavior stems from Word’s default image handling, which treats graphics in a very specific way. Understanding this initial setting and the power of text wrapping is the first step towards achieving true visual freedom in your documents.
The “In Line with Text” Default: Why Images Don’t Move Freely
By default, when you insert any graphic into a Word document, it is inserted “In Line with Text.” This means the image is treated exactly like a character of text. Imagine typing a letter, and then suddenly typing a small, rectangular block within your sentence. That’s how Word perceives your image. It resides on the baseline of the text, moving around the page just as text is inserted, deleted, or formatted.
While this default ensures that your image maintains its relative position within a block of text, it severely limits your ability to move it freely, layer it, or have text flow around it. Attempts to drag an “In Line with Text” image will often result in the surrounding text shifting erratically, or the image snapping back to its original position as if anchored by an invisible string. For anyone looking to create visually dynamic documents, this default setting is the primary hurdle to overcome. It’s crucial to recognize that for images to truly “float” on the page, interacting fluidly with your document’s content, you must change this default wrapping style. This is especially important for designers looking to incorporate diverse image types – from wallpapers and backgrounds to detailed digital photography – with the flexibility that graphic design demands.
The Foundation of Fluid Layouts: Exploring Text Wrapping Options
Text wrapping is the cornerstone of dynamic image placement in Word. It dictates how an image interacts with the text around it, enabling you to break free from the “In Line with Text” constraint and position objects with much greater flexibility. Once text wrapping is enabled, Word no longer treats the image as a character but as a distinct object, allowing text to flow around, over, or behind it according to your chosen style.
How to Apply Text Wrapping (Layout Options button, Wrap Text button on Layout tab):
There are two primary ways to access text wrapping options:
- Layout Options Button: When an image is selected, a small “Layout Options” button (often a square icon with lines around it) appears near its top-right corner. Clicking this button reveals a dropdown menu with various wrapping choices. This is the quickest and most intuitive method for on-the-fly adjustments.
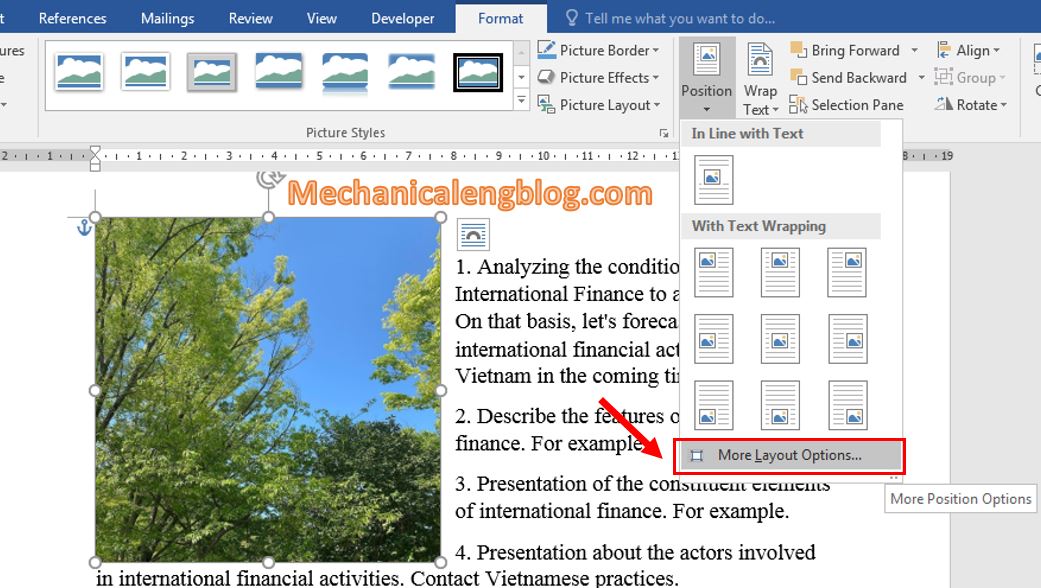
- Format Tab (Ribbon): With the image selected, a new contextual ribbon tab, usually labeled “Picture Format” or “Shape Format,” will appear. Within this tab, in the “Arrange” group, you’ll find a “Wrap Text” button. Clicking this also presents the same range of text wrapping options, often alongside “More Layout Options” for granular control.
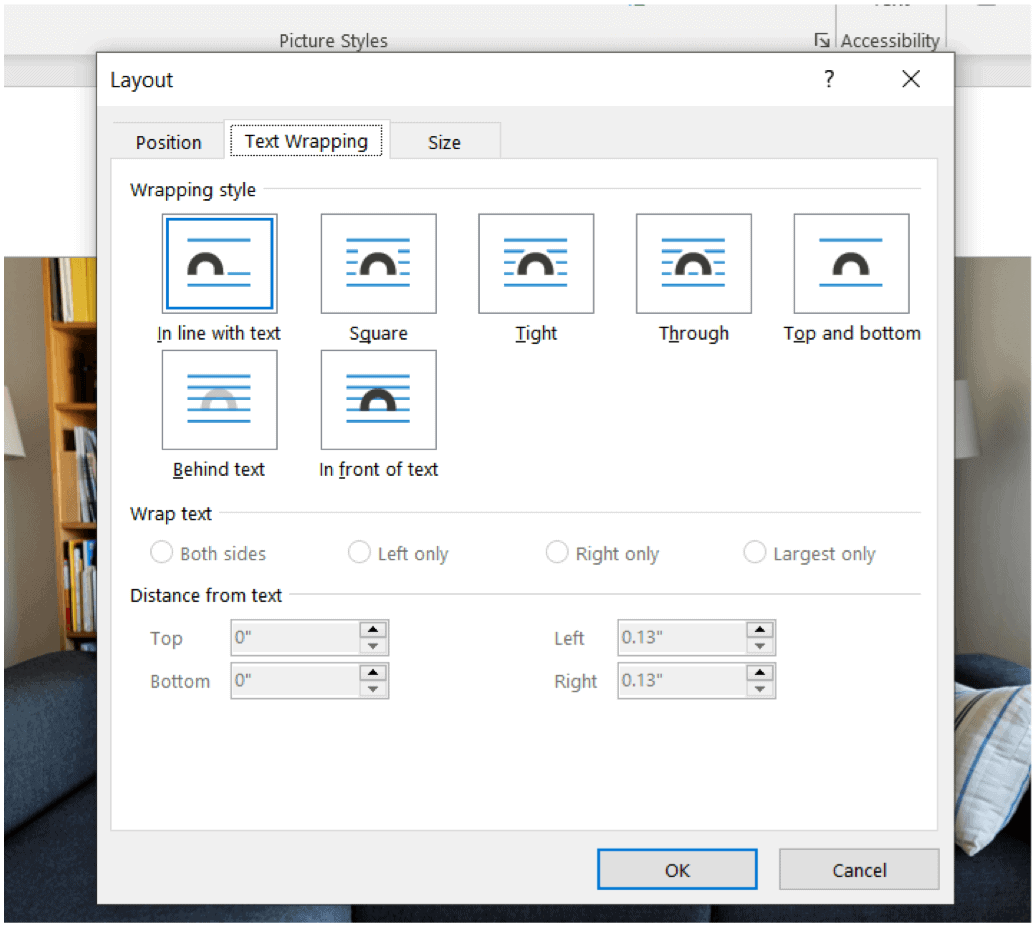
Key Text Wrapping Styles (Square, Tight, Through, Top and Bottom, Behind Text, In Front of Text):
Word offers several powerful text wrapping styles, each designed for different visual effects:
- In Line with Text: As discussed, this is the default. The image acts like a character.
- With Text Wrapping (Floating Options): These options enable free movement:
- Square: Text wraps around the bounding box of the image, creating a square or rectangular space around it. This is a very common and versatile option.
- Tight: Text wraps closely around the actual shape of the image, provided the image has a transparent background or an irregular shape. This creates a more organic look.
- Through: Similar to Tight, but text can flow into any open areas within the image’s irregular shape, such as a hole in a donut-shaped graphic.
- Top and Bottom: Text stops above the image and resumes below it, leaving blank space to the left and right of the image. Useful for images that span the width of a paragraph or column.
- Behind Text: The image is placed behind the text, allowing the text to flow completely over it. Ideal for backgrounds, watermarks, or subtle aesthetic elements.
- In Front of Text: The image is placed over the text, obscuring whatever is beneath it. Perfect for overlays, pop-up elements, or when you want the image to dominate the visual hierarchy.
Choosing the Right Wrap for Your Design:
The choice of text wrapping style depends entirely on your visual design goals. For a standard document where images are illustrative and blend with the text, “Square” or “Top and Bottom” are excellent choices. For more advanced graphic design, such as creating a digital art collage or a photo manipulation, “Tight” or “Through” can offer a more integrated look, while “Behind Text” allows for creative layering with abstract patterns or beautiful photography. When working with mood boards or thematic collections on Tophinhanhdep.com, consider how these wrapping options translate to your Word document to maintain visual consistency. Experimentation is key to discovering the best fit for each image within your document’s unique flow.
Precision and Control: Positioning, Alignment, and Advanced Layouts
Once an image is no longer “In Line with Text,” you gain immense control over its placement. Word provides a suite of tools for precise positioning and alignment, allowing you to fine-tune your document’s visual composition. These tools are invaluable for achieving professional-looking documents, whether you’re working with high-resolution stock photos or carefully curated image collections from Tophinhanhdep.com.
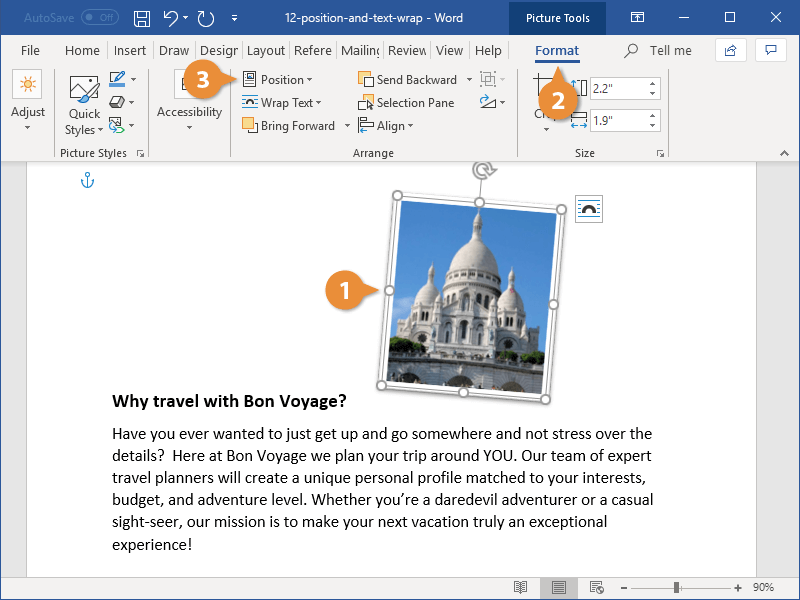
Automatic Positioning: Placing Images with the Position Menu
For quick and automatic placement, Word’s “Position” menu is a powerful shortcut. This feature allows you to snap an image to one of nine predefined locations on the page, automatically applying text wrapping to accommodate it.
To use the Position menu:
- Select the object.
- Access the Format Tab: Depending on the type of object (picture, shape, etc.), a contextual “Picture Tools” or “Shape Tools” ribbon group will appear. Within this group, click the “Format” tab.
- Click the Position button: In the “Arrange” group of the Format tab, locate and click the “Position” button.
- Select an Automatic Position: A dropdown menu will present nine options, typically aligning the image to the top-left, top-center, top-right, middle-left, middle-center, middle-right, bottom-left, bottom-center, or bottom-right of the page.
- Choose an option. Selecting one of these positions will not only move the image but also automatically apply a text wrapping style (usually “Square”) if one isn’t already set, forcing the text to flow around the image.
This method is excellent for quickly establishing the general layout of a document, ensuring consistent placement for elements like company logos or recurring visual motifs.
Fine-Tuning Placement: Drag-and-Drop, Arrow Keys, and Alignment Guides
While automatic positioning provides a good starting point, many visual design tasks require more nuanced control. Word offers several methods for precise, manual adjustment.
- Basic Drag-and-Drop: Once text wrapping is applied (any option other than “In Line with Text”), you can simply click and hold the image, then drag it to your desired location. Release the mouse button to drop it. This is the most intuitive way to move images freely.
- Using the Ctrl Key with Arrow Keys for Micro-Adjustments: For pixel-perfect placement, drag-and-drop might still feel too coarse. To move an image by tiny increments, select the picture, then hold down the Ctrl key and press any of the arrow keys (Up, Down, Left, Right). Each press will nudge the image a minuscule distance, allowing for extremely precise positioning relative to text or other visual elements. This is invaluable when perfecting the alignment of elements in complex visual designs or photography layouts.
- Leveraging Alignment Guides and Gridlines: Word includes visual aids to help you align objects consistently:
- Alignment Guides: When you click and drag an object, green dashed lines – “alignment guides” – will appear automatically when the object’s edge or center aligns with the margins, text, or other objects on the page. These guides provide instant visual feedback for horizontal and vertical alignment. To ensure they are active, select the image, go to the “Format” tab, click “Align,” and ensure “Use Alignment Guides” is checked.
- Gridlines: For a more structured background, you can display gridlines, which appear like graph paper behind your document content. To enable them, go to the “View” tab and check the “Gridlines” box in the “Show” section. Alternatively, from the “Align Objects” menu (under the “Format” tab), you can select “View Gridlines.” Gridlines are excellent for maintaining consistent spacing and symmetry across multiple images or design elements, aiding in the structured presentation of mood boards or thematic collections.
Advanced Layout Options: The Layout Dialog Box and Absolute Control
For ultimate control over an image’s size, position, and interaction with text, the “Layout” dialog box is your go-to tool. This comprehensive dialog allows for absolute measurements and intricate adjustments that go beyond the basic options.
To access the Layout dialog box:
- Select the picture.
- Click the Layout Options icon (the small square by the top-right corner of the selected image).
- Select “See more…” or “More Layout Options” at the bottom of the menu.
Within this dialog box, you’ll find several tabs, primarily “Position” and “Text Wrapping,” which offer:
- Setting Absolute Position and Relative Alignment: On the “Position” tab, you can specify exact horizontal and vertical measurements for your image, relative to the page, margins, or even a specific paragraph. You can input values in inches or centimeters, or define positions by percentage, offering granular control essential for professional graphic design and meticulous photo manipulation. If you find position options are grayed out, ensure you’ve selected a text wrapping option other than “In line with text” on the “Text Wrapping” tab first.
- Allowing Image Overlap: If you’re creating a complex visual composition with multiple images – perhaps layering abstract designs or collaging different elements from Tophinhanhdep.com’s image collections – you might want them to overlap. Within the “Layout” dialog box, on the “Position” tab, look for the “Options” group at the bottom and select the “Allow overlap” check box. You’ll need to do this for each image you intend to overlap.
- Grouping Multiple Images for Cohesive Movement: When you have several images or objects that need to move and resize together as a single unit, grouping them is indispensable.
- Select the first object.
- Hold down the Ctrl key and select the other objects.
- Right-click one of the selected objects, point to “Group,” and then select “Group.” Once grouped, you can move, resize, and rotate all objects simultaneously, treating them as one cohesive element. This is a game-changer for digital art and complex visual designs. If you can’t group images, ensure their layout is not “In line with text”; change it to any option under “With Text Wrapping.”
The Unseen Force: Understanding and Managing Anchors
For images with text wrapping applied (any option other than “In Line with Text”), Word introduces an important concept: the object anchor. While often overlooked, understanding anchors is crucial for predicting and controlling how your images behave as your document content changes.
What are Object Anchors?
An object anchor is a visual indicator that shows where a picture or object is logically tied within your document’s text flow. Essentially, it marks the paragraph with which the object is associated. When you move an image that uses text wrapping, you’ll notice a small anchor symbol appearing next to a paragraph. This means the image will maintain its position relative to that specific paragraph. If that paragraph moves (due to edits above it), the image will move with it, even if its visual position on the page seems fixed.
It’s important to note that anchors do not appear for “In Line with Text” pictures. As these are treated like text characters, they are tied directly to their insertion point and don’t require an anchor. However, for any floating image (Square, Tight, Behind Text, In Front of Text, etc.), the anchor becomes the underlying mechanism ensuring its stability within the document’s structure. Understanding this subtle but powerful connection is key to mastering image placement.
Displaying and Locking Anchors for Stable Layouts
While anchors are always present for floating objects, they are not always visible by default. Knowing how to display and, more importantly, lock them can provide an additional layer of control and stability for your document’s visual design.
Showing Formatting Marks and Object Anchors:
If you don’t see an object anchor when a floating picture is selected, you can enable its visibility:
- Show/Hide ¶ (Paragraph Marks): On the “Home” tab, in the “Paragraph” group, click the “Show/Hide ¶” button. This will reveal all formatting marks, including paragraph breaks, spaces, and object anchors.
- Always show anchors: For a more permanent solution, you can adjust Word’s display options:
- Go to File > Options > Display.
- Under “Always show these formatting marks on screen,” select the “Object anchors” check box.
Once visible, you can click and drag the anchor symbol to re-associate an image with a different paragraph. This is useful if you want an image to “stick” to a specific section of your text, even if that section is moved or edited.
Locking an Anchor (and its limitations for “In Line with Text” images):
A powerful feature for ensuring an image stays put, even if the text around its anchor point is deleted or extensively edited, is “locking” the anchor.
To lock an anchor:
- Select the picture.
- Click the Layout Options icon.
- Select “See more…”
- On the “Position” tab, in the “Options” group at the bottom, select the “Lock anchor” check box.
Locking an anchor prevents it from moving to another paragraph, effectively binding the image to its current textual context. This is incredibly useful for documents where visual elements must remain in fixed positions regardless of content revisions, ensuring the integrity of your visual design.
Important Note: Because anchors are not used for pictures placed “In Line with Text,” the anchor locking option, along with all other advanced positioning controls, is unavailable for inline images. To utilize anchor locking and other floating image features, you must first apply a text wrapping option that allows the image to float freely. This emphasizes the fundamental importance of moving beyond the default “In Line with Text” setting for any serious visual layout work in Word.
Practical Scenarios and Troubleshooting Image Movement
Even with a solid understanding of text wrapping, positioning, and anchors, specific scenarios can still present challenges. From images that seem impossible to select to the nuances of working with tables or the limitations of Word’s web version, mastering image movement involves knowing how to navigate these common hurdles.
When You Can’t Select a Picture: Using the Selection Pane
Imagine a situation where you’ve inserted multiple images, perhaps layered them using “Behind Text” or “In Front of Text,” and now you can’t seem to click and select a particular image. It’s likely that another object, such as a large block of text or another image, is overlapping it, preventing direct selection. In such cases, the “Selection Pane” becomes your indispensable tool.
To select a picture that’s hidden or difficult to click:
- Go to the “Home” tab on the Word ribbon.
- In the “Editing” group, click “Select,” then choose “Selection Pane…”
- A “Selection” pane will open on the right side of your Word window, listing every object (pictures, shapes, text boxes, etc.) present on the current page or within the document.
- Click on the name of the desired picture in the list. This will instantly select the image in your document, even if it’s hidden behind other elements.
The Selection Pane also allows you to reorder objects (moving them forward or backward) and temporarily hide them (by clicking the eye icon next to their name), which can be incredibly useful for isolating and editing individual elements within complex visual compositions, such as those you might create using Tophinhanhdep.com’s collections as inspiration.
Creative Layouts: Integrating Images with Tables
While tables are traditionally used for organizing data, they can also be powerful tools for structuring image layouts, especially when you need a grid-like arrangement or precise alignment that is resistant to text flow changes. This technique is particularly useful for creating catalogues of high-resolution stock photos or structured thematic collections.
Inserting Pictures into Table Cells:
- Create a table: Insert a table with the desired number of rows and columns (e.g., a 2x2 table for four images).
- Insert images into cells: Click inside a table cell, then go to the “Insert” tab > “Pictures” and select your image. Repeat for each cell.
- Manipulate table and cells: You can adjust cell dimensions, apply borders or shading, and control padding to fine-tune the spacing and layout of the pictures. Each image will initially be “In Line with Text” within its cell, but the cell itself provides a fixed container.
Enabling Text Wrapping within Tables:
If you want text to flow around the table itself (and thus around the images contained within), you can adjust the table properties:
- Right-click on the table (click the crosshairs icon that appears when you hover over the table).
- Select “Table Properties.”
- On the “Table” tab, under “Text Wrapping,” choose an option like “Around.” This allows text outside the table to flow around the table’s perimeter.
- You can also explore options within the “Cell” tab for more granular control over individual cell padding and text interaction.
Using tables offers a highly structured and organized approach to image placement, ideal for documents requiring a formal, professional, or gallery-like look.
Moving Images in Word for the Web: Current Limitations and Workarounds
While the desktop version of Microsoft Word offers extensive image manipulation capabilities, its web-based counterpart, Word for the web, has notable limitations, particularly concerning free image movement and text wrapping. This is an important distinction for users who frequently switch between platforms or collaborate online.
-
“Square Left” and “Square Right” Only: In Word for the web, the advanced text wrapping options like “Tight,” “Through,” “Behind Text,” or “In Front of Text” are largely unavailable. Instead, users are typically restricted to basic “In line with text” or very limited “Square Left” and “Square Right” wrapping options, often accessed via the right-click menu. This means you cannot drag images freely to any position on the page or achieve complex overlays. Images tend to behave much more rigidly, similar to the default “In Line with Text” behavior in the desktop version. This significantly constrains creative ideas for visual design and digital art when working exclusively in the web environment.
-
The Desktop Word Advantage (and its caveats for web rendering): If you require the full spectrum of image movement and text wrapping options, the recommended workaround is to “Open in Word” (the desktop application).
- In Word for the web, click the “Editing” button at the top right.
- Choose “Open in Desktop App” or “Open in Word.”
- Once in the desktop version, you can apply any text wrapping, positioning, and alignment options as described in this guide.
- After making your changes, press Ctrl+S to save the document back to its original cloud location.
Caveat: While Word for the web will retain the layout settings you applied in the desktop version, some users report that images positioned with complex wrapping might not render exactly in the same positions when viewed again in the web version. This is a crucial consideration for anyone relying on precise visual design for documents primarily consumed online. For critical visual fidelity, especially with intricate photo manipulation or specific aesthetic backgrounds, desktop Word remains the superior environment. Tophinhanhdep.com encourages users to be aware of these platform differences to optimize their workflow for image tools and visual design.
In conclusion, while Word for the web is convenient for basic editing, for advanced image layout and truly free movement, the desktop version is indispensable.
Conclusion
Mastering how to move images freely in Microsoft Word transforms your document creation from a struggle with rigid graphics into an empowered act of visual design. From understanding the initial “In Line with Text” default to harnessing the versatility of text wrapping options, the precision of the Position menu, the minute control of arrow keys, and the guiding hand of alignment tools, you now possess a comprehensive toolkit.
We’ve explored how to achieve automatic placement, fine-tune positions with drag-and-drop and micro-adjustments, and delve into the advanced “Layout” dialog box for absolute control and image overlap. The often-invisible object anchors have been demystified, revealing their role in stabilizing your layouts, while the Selection Pane stands ready to rescue stubbornly unselectable images. Even creative solutions like leveraging tables for structured image placement and navigating the limitations of Word for the web have been covered.
At Tophinhanhdep.com, we understand the profound impact of compelling visuals – from stunning wallpapers and aesthetic backgrounds to high-resolution photography and intricate digital art. The ability to effectively move and integrate these images within your documents is not just a technical skill; it’s a critical component of strong visual communication. By applying the techniques outlined in this guide, you can create documents that are not only informative but also visually engaging, professional, and truly reflective of your creative vision. Continue to explore and experiment, and let your images elevate your message with unparalleled freedom and flair.