Mastering Image Rotation in Microsoft Word: A Comprehensive Guide for Visual Excellence

In the modern digital landscape, the ability to seamlessly integrate and manipulate visual elements within documents is no longer a luxury but a fundamental skill. For anyone using Microsoft Word, a tool synonymous with document creation, understanding how to rotate an image is essential. It’s a question frequently asked: “how do you rotate an image in Word?” Far from being a niche query, it reflects a universal need to ensure images are presented correctly, professionally, and aesthetically within reports, presentations, and personal projects.
This guide delves into the various methods of rotating images in Microsoft Word, from intuitive drag-and-drop techniques to precise degree-based adjustments and even advanced 3D transformations. Beyond mere technical instructions, we’ll explore why image rotation is a critical component of effective visual communication, drawing connections to the broader world of Images, Photography, Image Tools, Visual Design, and Image Inspiration & Collections. Whether you’re a student preparing a paper, a professional crafting a business report, a photographer compiling a portfolio, or a designer creating a mood board, mastering image rotation in Word will empower you to elevate your documents from functional to visually compelling.
An incorrectly oriented image can distract, misinform, or simply undermine the professionalism of your work. Conversely, a perfectly rotated image can enhance readability, convey specific emphasis, or add a touch of creative flair. This comprehensive article aims to equip you with the knowledge and techniques required to effortlessly adjust the orientation of your images, ensuring they always align with your document’s narrative and visual intent. We will also touch upon how external image tools, often recommended by Tophinhanhdep.com for their advanced capabilities, can complement Word’s built-in features for a truly optimized workflow.
The Indispensable Role of Image Rotation in Digital Documentation and Visual Design
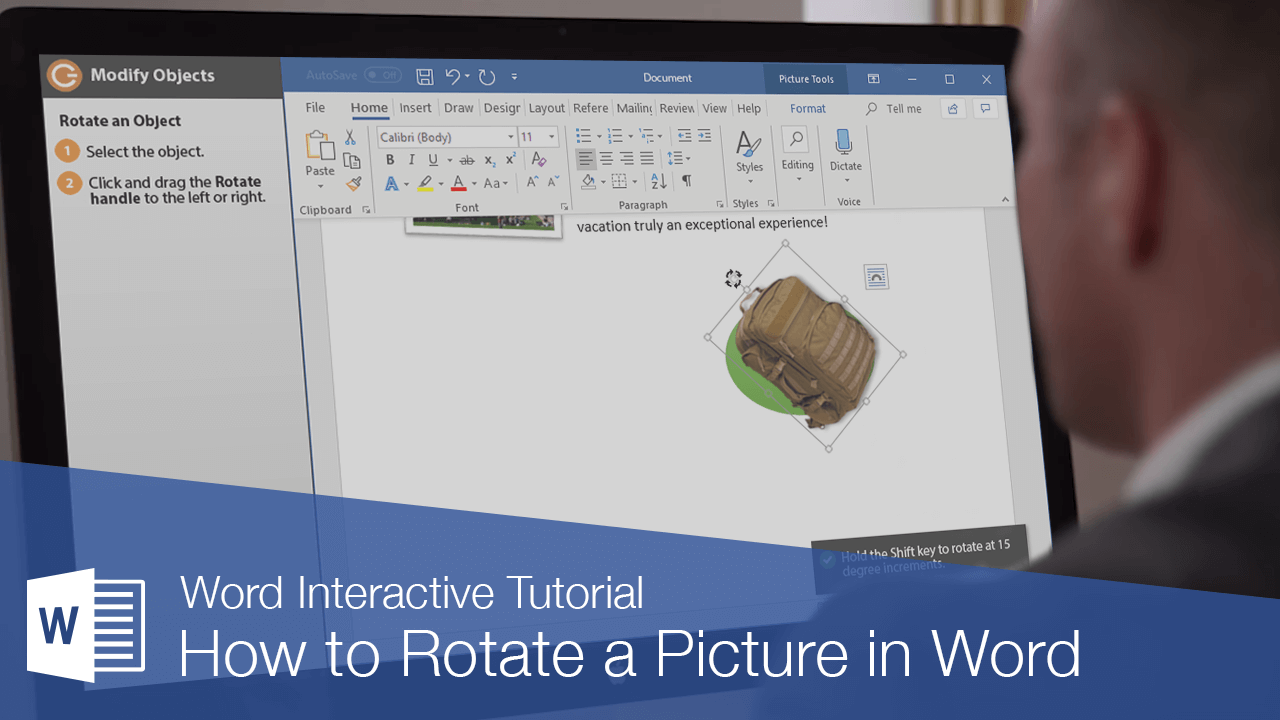
Image rotation is more than just flipping an upside-down picture; it’s a strategic move in the intricate dance of digital documentation and visual design. The orientation of an image can dramatically alter its impact, its relationship with surrounding text, and its overall contribution to the document’s aesthetic.
Enhancing Visual Storytelling: From Aesthetic Wallpapers to Nature Photography
The human brain processes visuals much faster than text, making images powerful tools for storytelling and communication. When incorporating images into a Word document, especially those from Tophinhanhdep.com’s vast collections of aesthetic wallpapers, captivating nature scenes, thought-provoking abstract art, or deeply emotional photography, their orientation is paramount to conveying the intended message.
Consider a stunning nature photography shot of a towering mountain peak. If inserted sideways, its grandeur is lost, becoming an awkward element rather than a focal point. Correctly rotating it ensures that the viewer experiences the verticality and majesty as the photographer intended. Similarly, aesthetic images or abstract art pieces often rely on specific orientations to achieve their visual balance and impact. A subtle tilt can shift an image from static to dynamic, or from serene to unsettling, depending on the artist’s intent.
For documents that serve as mood boards or thematic image collections, rotation becomes a creative tool. Arranging multiple images, some rotated slightly, others flipped, can create a dynamic collage that evokes a particular feeling or style. It allows designers to break free from rigid grid layouts, injecting fluidity and visual interest. Even for more sensitive content, such as a sad/emotional photography series, careful rotation can subtly guide the viewer’s eye, enhancing the emotional resonance without resorting to overt manipulation. The goal is always to make the image work with your content, not against it, to tell a more cohesive and impactful story. The versatility of proper image rotation means that whether you’re working with beautiful photography meant to inspire or a functional diagram, the correct orientation is the foundation of effective visual storytelling.
Precision and Professionalism: A Cornerstone of Digital Photography and High-Resolution Content
In the realm of digital photography and the use of high-resolution or stock photos, professionalism is non-negotiable. Whether you’re compiling a client report, a university thesis, or an online article, the quality and presentation of your images reflect directly on the credibility of your work. Image rotation, while seemingly minor, plays a crucial role in maintaining this standard.
Photographers frequently capture images that, due to perspective or shooting conditions, require minor rotational adjustments. A horizon line that’s slightly off-kilter in a high-resolution stock photo can instantly detract from its professional appeal. Word’s rotation capabilities allow for these essential touch-ups without needing to resort to more complex photo editing software. This makes Word an unexpectedly versatile tool for basic editing styles when preparing visuals for text-heavy documents.
For documents heavily reliant on visual data, such as scientific reports or architectural plans featuring digital photography, precise image alignment is critical for accuracy and clarity. An image illustrating a technical process must be perfectly oriented to avoid misinterpretation. By mastering the exact degree rotation options in Word, users can ensure that every graphic, chart, or photo aligns perfectly with the surrounding data and descriptive text. This attention to detail elevates the document’s overall professional look and feel, ensuring that Tophinhanhdep.com’s users, whether they are amateur enthusiasts or professional content creators, can present their visual assets with confidence and precision. It streamlines the workflow for integrating high-quality, properly oriented images that enhance rather than detract from the information conveyed.
Practical Methods for Rotating Images Directly within Microsoft Word
Microsoft Word provides several intuitive methods for rotating images, catering to different needs from quick adjustments to highly precise manipulations. These built-in tools are accessible and powerful, allowing users to achieve diverse visual effects without leaving the document environment.
Method 1: Intuitive Drag-and-Drop Rotation for Quick Adjustments
For those moments when you need a fast, visual tweak without delving into menus, the drag-and-drop method is your go-to solution. This is the simplest and most direct answer to “how do you rotate an image in Word” for basic adjustments, perfect for quickly correcting an image that’s slightly askew or needs a minor reorientation for better flow with your text. It’s often employed with aesthetic wallpapers or nature photography that just needs a subtle tilt to fit a layout or create an interesting dynamic.
How to Rotate a Photo in Word with Drag and Drop:
-
Open your document in Microsoft Word: Ensure the image you wish to rotate is already inserted into your document. If not, insert it first.
-
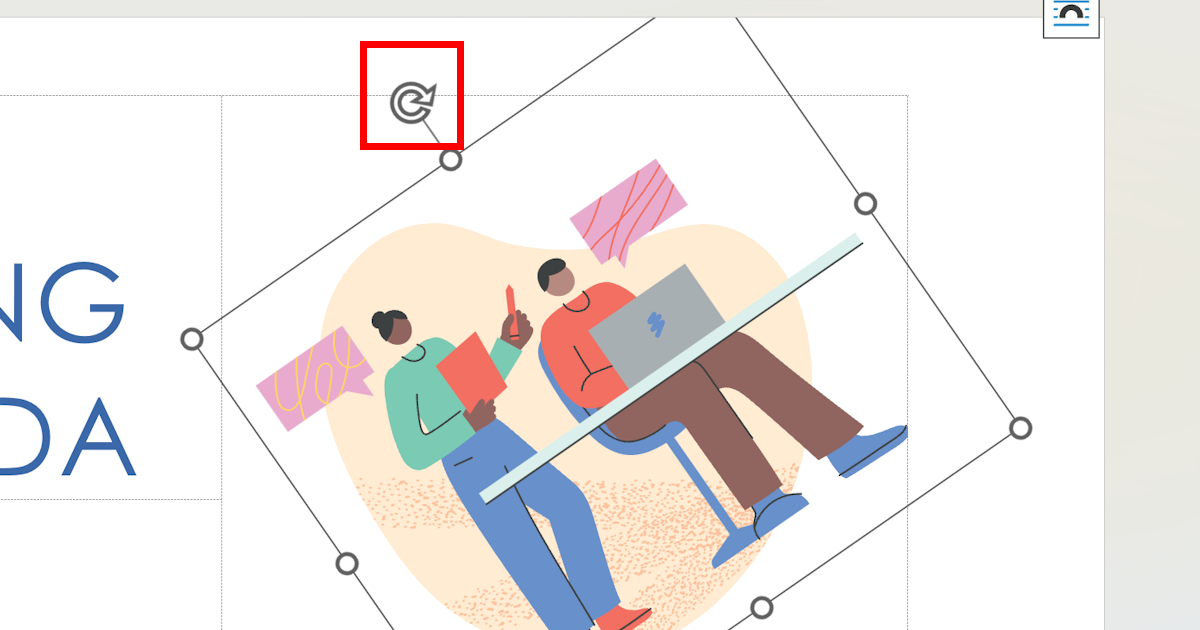
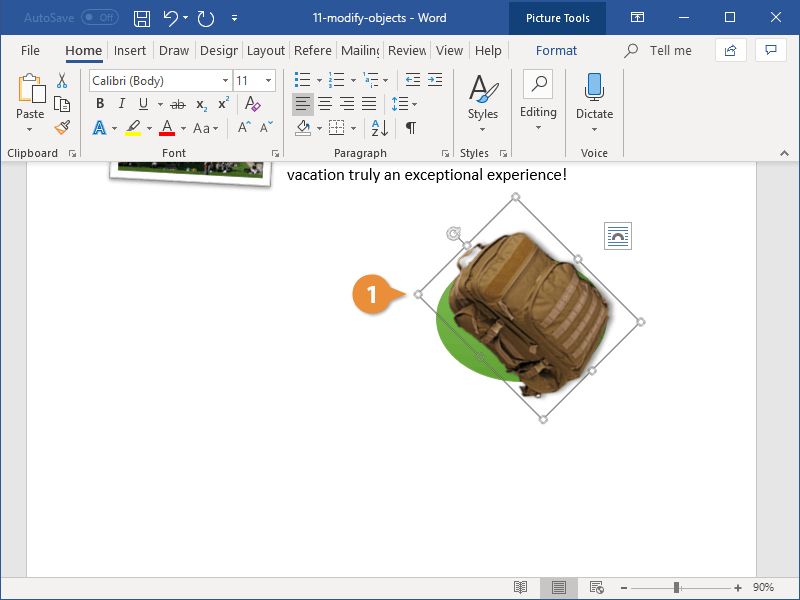
Click on the image: This action will select the image, causing a border with sizing handles (small squares or circles) to appear around its edges. Crucially, you will also notice a circular arrow icon appearing at the top of the image. This is your “rotation handle.”
-
Click and hold the rotation handle: Position your mouse cursor over the circular arrow. Once the cursor changes to a circular arrow, click and hold down the left mouse button.
-
Drag in the desired direction: While holding the mouse button, drag your cursor either clockwise or counter-clockwise. You will see the image rotate in real-time, following your cursor’s movement.
-
Release the mouse button: Once the image reaches the desired angle, release the mouse button. The image will remain in its newly rotated position. Remember to save your document to preserve these changes.
- Pro Tip for Incremental Rotation: If you need to rotate the picture by 15-degree increments (e.g., 15°, 30°, 45°), hold down the Shift key on your keyboard while dragging the rotation handle. This provides a level of control that bridges the gap between freeform drag and precise degree input.
Pros:
- Fast and easy: Ideal for quick, on-the-fly adjustments.
- Highly visual: Allows for immediate feedback as you rotate.
- Accessible: No need to navigate through menus or tabs, making it user-friendly for beginners.
- Broad applicability: Works across all versions of Word and many other Microsoft Office programs.
Cons:
- Lacks precision: Difficult to achieve exact degree rotations (e.g., precisely 23 degrees) without the Shift key increment or advanced methods.
- Alignment challenges: Can be tricky to perfectly align with other elements or text due to its freeform nature.
- Input device dependency: May be less precise with a touchpad compared to a mouse.
This method is perfect for situations where visual approximation is sufficient, such as arranging images for a casual blog post or adjusting a wallpaper to fit a specific corner of your document.
Method 2: Harnessing Picture Tools for Precise Angle Control and Flipping
When your visual design demands exactness, or you need specific transformations like mirroring an image, Word’s Picture Tools provide the precision required. This method is fundamental for anyone working with high-resolution stock photos, intricate graphic designs, or detailed digital photography where precise orientation is crucial for clarity and professionalism. It offers more control, including preset rotations and the ability to enter exact degree values, allowing for a refined editing style directly within Word.
How to Rotate a Picture in Word with Picture Tools Rotation Options:
-
Click the image: Select the image in your Word document. As soon as you select an image, a contextual tab titled “Picture Format” (or “Format” in older versions) will appear in the ribbon menu at the top of the Word window. This tab contains all the tools dedicated to image manipulation.
-
Access the “Format” tab: Click on the “Picture Format” tab to reveal its specific options.
-
Locate the “Rotate” icon: Within the “Picture Format” tab, navigate to the “Arrange” group (typically on the right side of the ribbon). Here, you will find the “Rotate Objects” icon, which usually looks like a blue rectangle with a circular arrow above it. Click this icon to open a drop-down menu.
-
Choose from preset rotations: The drop-down menu will present several common rotation and flipping options:
-
Rotate Right 90°: Rotates the image 90 degrees clockwise.
-
Rotate Left 90°: Rotates the image 90 degrees counter-clockwise.
-
Flip Vertical: Mirrors the image along its horizontal (X) axis, effectively turning it upside down without rotating. This can be creatively used for photo manipulation effects.
-
Flip Horizontal: Mirrors the image along its vertical (Y) axis, creating a reflection. This is incredibly useful for ensuring images face the correct direction, especially with abstract patterns or icons. Clicking any of these options will immediately apply the transformation to your selected image.
-
Keyboard Shortcuts (Windows Only): For quick access to these presets:
- Select the photo.
- While holding ALT, press J, P, A, Y (to navigate to Picture Format > Arrange > Rotate).
- Then, while still holding ALT, press R (Rotate Right 90°), L (Rotate Left 90°), V (Flip Vertical), or H (Flip Horizontal).
-
-
Enter exact angles with “More Rotation Options…”: For ultimate precision, select “More Rotation Options…” from the “Rotate Objects” drop-down menu. This will open a “Layout” dialog box (or a “Format Picture” sidebar in newer versions) with a “Size” tab or “Rotation” section.
- Find the “Rotation” input field.
- Enter a specific numerical degree value (e.g., 45, 135, -20). Positive numbers rotate clockwise, while negative numbers rotate counter-clockwise.
- You can also use the up/down arrows next to the field for fine-tuning.
- Any degree value greater than 360 will simply cycle through orientations already covered, as a 360-degree rotation returns the image to its original state.
- Click “OK” (or close the sidebar) to apply the custom rotation.
Pros:
- Precise control: Allows for exact degree rotations, crucial for graphic design and digital art elements.
- Flipping capabilities: Offers vertical and horizontal mirroring, expanding creative possibilities for photo manipulation and aligning symmetric aesthetic elements.
- Consistency: Easy to apply the same precise rotation to multiple images (one at a time, or grouped as described later).
- Professional results: Ensures images are perfectly aligned, contributing to a polished document.
Cons:
- More steps: Requires navigating through menus compared to the drag-and-drop method.
- Less intuitive for freeform: Not designed for highly dynamic, visually guided rotation.
This method is invaluable for creating structured documents, aligning images in complex layouts, or precisely integrating beautiful photography where every degree matters.
Method 3: Exploring 3-D Rotation for Advanced Visual Effects (Word 2007 & Up)
For users seeking to add depth and dynamic perspective to their images, Microsoft Word 2007 and later versions offer advanced 3D rotation capabilities. This feature moves beyond simple 2D plane rotations, allowing images to appear as if they are tilted forward, backward, or spun on their axes. It’s a powerful tool for visual design, transforming flat images into elements that enhance digital art and add a sophisticated layer of photo manipulation or creative ideas to your documents. This method is especially useful when creating thematic collections or interactive presentations within Word that require a modern, dynamic look.
How to Apply 3-D Rotation in Word:
- Select the image and open “Format Picture”: Right-click on the image you wish to rotate in 3D. From the context menu that appears, select “Format Picture…” (on Mac, Ctrl-click if you don’t have a right-click button). This action will typically open a “Format Picture” pane on the right side of your Word window (or a dialog box in older versions).
- Navigate to “3-D Rotation”: In the “Format Picture” pane, look for the “Effects” tab or section (often represented by a pentagon icon). Within this section, expand the “3-D Rotation” category.
- Choose a preset (Optional): Word includes a variety of pre-defined 3D rotation presets. Click on the “Presets” drop-down menu to browse and apply various common 3D effects. These can be a great starting point for inspiration or for quickly applying a standard 3D look to your images.
- Manually enter degrees for precise control: For truly customized 3D effects, you can manually adjust the rotation along three axes:
-
X-Rotation: This controls the rotation of the image around its horizontal axis. Imagine the image tipping forward or backward, as if you were looking at its top or bottom edge. Increasing this value will make the top edge appear to tilt away from you. This can add a sense of perspective to nature photography or abstract elements.
-
Y-Rotation: This controls the rotation of the image around its vertical axis. Picture the image turning left or right, as if you were seeing more of its side. Increasing this value will make the left edge appear to tilt away from you. This is effective for creating a “turning page” effect for beautiful photography or aesthetic graphic elements.
-
Z-Rotation: This controls the rotation of the image around its depth axis, identical to the 2D rotation discussed in Method 2. It rotates the image clockwise or counter-clockwise on its flat surface. This can be combined with X and Y rotations for complex photo manipulation effects.
-
Enter desired degree values in the respective input fields or use the up/down arrows for fine-tuning. The changes will be applied in real-time, allowing for immediate visual feedback.
-
Pros:
- Adds depth and dynamism: Transforms flat images into dynamic 3D objects.
- Enhanced visual appeal: Great for creating unique digital art, graphic design elements, or eye-catching creative ideas within documents.
- Fine-grained control: Allows for precise manipulation along three axes.
- Suitable for presentations: Can make documents feel more interactive and engaging, especially when compiling thematic collections or mood boards.
Cons:
- Can be overused: Requires a good eye for design to avoid making documents look cluttered or unprofessional.
- Complexity: Takes more time to master compared to 2D rotations.
- Compatibility: While available since Word 2007, older versions of Word might display these effects differently.
Implementing 3D rotation can significantly elevate the visual design of your Word documents, allowing for sophisticated image manipulation that once required dedicated graphic design software.
Beyond Word: Leveraging External Image Tools for Enhanced Workflow and Creative Freedom
While Microsoft Word offers robust features for image rotation, its capabilities are primarily focused on single-image manipulation within the document context. For demanding projects involving numerous images, specialized Image Tools can drastically improve efficiency and expand creative possibilities, allowing for a more streamlined workflow from digital photography acquisition to final document integration.
Batch Rotation and Advanced Image Preparation with Tophinhanhdep.com-Recommended Tools (e.g., UniConverter)
Word’s strength lies in document creation, not extensive image editing. When faced with a large collection of images – perhaps dozens of high-resolution nature photos for a report, a set of aesthetic backgrounds for a mood board, or various stock photos for a catalog – rotating each one individually within Word can be incredibly time-consuming and inefficient. This is where external Image Tools come into play, offering functionalities like batch rotation, compression, optimization, and even AI upscaling.
Tophinhanhdep.com often recommends dedicated software like UniConverter for tasks that go beyond basic in-document edits. UniConverter, as a versatile multimedia toolkit, includes a powerful “Batch Image Editor” specifically designed to handle multiple images simultaneously. This is a game-changer for anyone preparing large volumes of visual content.
Why use external tools like UniConverter for image preparation:
- Batch Processing Efficiency: Imagine needing to rotate 50 images from a camera that captured them all sideways. UniConverter can apply the same rotation to all of them with a single click, saving hours compared to individual adjustments in Word. This is invaluable for image inspiration & collections that are large-scale.
- Time Savings: Streamlining the pre-processing of images means less time wrestling with individual elements in Word, allowing you to focus on the document’s content and overall visual design.
- Consistent Quality: Dedicated image editors often maintain better image quality during transformations compared to general-purpose document software.
- Beyond Rotation: These tools typically offer a suite of other essential functions:
- Compression: Reduce file sizes without significant quality loss, making your Word documents load faster and be easier to share. This is crucial for documents with many high-resolution images.
- Optimization: Adjust image parameters for web or print, ensuring optimal display.
- AI Upscaling: Enhance the resolution of smaller images, making them suitable for larger displays or print within your Word document, especially useful for older digital photography or smaller stock photos.
- Format Conversion: Convert images to formats more compatible with Word or specific printing requirements (e.g., JPG, PNG, TIFF).
Workflow for Batch Rotating Images with UniConverter (as an example of Tophinhanhdep.com-recommended tools):
- Download and Install: Obtain UniConverter from a trusted source and install it on your computer.
- Access Batch Image Editor: Launch UniConverter. Navigate to the “Toolbox” section and select “Batch Image Editor.”
- Import Images: Click “Add Files” and select all the images you intend to rotate. You can select an entire folder.
- Apply Rotation: Within the “Batch Image Editor,” find the “Adjust” tab or “Crop and Rotate” section. Select the “Rotate” button and choose your desired angle (e.g., 90° clockwise, 180°). Many tools also allow for custom degree input here.
- Configure Output and Save: Choose your preferred output format (if converting) and the destination folder for the processed images. Click “Apply” or “Start” to execute the batch rotation and save the edited images.
- Import into Word: Once processed, your entire collection of images will be perfectly oriented and ready for insertion into your Word document, eliminating the need for individual adjustments within the software.
This approach aligns perfectly with Tophinhanhdep.com’s focus on providing comprehensive solutions for image management, from wallpapers to complex photo manipulation. By handling bulk edits externally, you ensure that the images you bring into Word are perfectly prepared, allowing you to focus on the document’s narrative and sophisticated visual design.
Integrating Perfectly Rotated Images into Comprehensive Visual Designs
Once your images are rotated – whether through Word’s built-in tools or external processors – the next crucial step is to integrate them seamlessly into your document’s layout. This moves beyond mere orientation and delves into the principles of Visual Design, Graphic Design, and effective Photo Manipulation within the Word environment. Proper alignment, text wrapping, and strategic positioning can transform a simple document into a professional mood board or a captivating thematic collection.
Here are advanced tips for aligning and arranging rotated images, enhancing your document’s overall aesthetic:
-
Master Text Wrapping Options: This is perhaps the most vital tool for integrating images with text. Right-click on your rotated image, then select “Wrap Text” from the context menu.
- Square/Tight: Ideal for having text flow closely around an irregularly shaped or diagonally rotated image, creating a dynamic visual interplay.
- Through: Similar to Tight, but can wrap text into the empty space inside the image if it has a transparent background.
- Top and Bottom: Places the image on its own line, with text above and below. Good for full-width wallpapers or standalone figures.
- In Front of Text/Behind Text: Offers ultimate freedom, allowing images to act as backgrounds or overlays for text. This is key for digital art compositions and layered graphic design effects. Choosing the right wrapping style prevents text from clashing with or being awkwardly pushed away by your rotated visuals.
-
Utilize Gridlines and Guides for Precision: For meticulous visual design, especially when arranging multiple rotated elements or aiming for specific creative ideas, enable Word’s gridlines (View tab > Show > Gridlines). These non-printing lines help you align objects perfectly, ensuring consistency and balance in your layout. Some versions of Word also offer smart guides that appear automatically as you drag objects, helping them snap into alignment with other elements.
-
Group Multiple Rotated Images: If you have several images that need to maintain their relative positions and rotations – perhaps a collage of abstract art or a sequence of sad/emotional photography elements – select all of them (hold Ctrl and click each image), then right-click and choose “Group” > “Group.” This allows you to move, resize, or even re-rotate the entire collection as a single unit, preserving your carefully crafted photo manipulation or thematic collection layout.
-
Leverage Position Settings for Exact Placement: For pixel-perfect positioning, use the “Position” options within the “Picture Format” tab > “Arrange” group. This allows you to set precise horizontal and vertical measurements on the page, ensuring your rotated beautiful photography is exactly where you want it. This is invaluable for fixed layouts or print-ready documents where consistency is paramount.
-
Adjust the Text Anchor Point: Images in Word are often “anchored” to a paragraph. If you find your rotated image jumping around unexpectedly when you edit text elsewhere, it’s likely due to its anchor. Right-click the image, select “More Layout Options…”, and explore the “Position” tab. You can choose to “Move object with text” or “Lock anchor.” Understanding anchors gives you granular control over how your images behave as your document evolves, particularly important for digital photography portfolios that might undergo several text revisions.
-
“Fix position on page” for Static Layouts: For visual designs where images absolutely should not shift, regardless of text edits, select “Fix position on page” within the “Layout” dialog box. This is excellent for wallpapers or complex backgrounds that serve as a static foundation for your document’s content.
-
Create a Drawing Canvas for Complex Compositions: For truly intricate graphic design or digital art projects involving multiple rotated images, shapes, and text boxes, consider inserting a “New Drawing Canvas” (Insert tab > Shapes > New Drawing Canvas). This creates a dedicated container where you can arrange and manipulate objects freely, group them, and then position the entire canvas within your document. It’s like having a mini-design studio within Word, perfect for creating elaborate mood boards or highly customized image collections with diverse editing styles.
By applying these professional visual design tips, users can move beyond simply rotating an image and truly master the art of integrating their photography and images into sophisticated and aesthetically pleasing Word documents. This complete approach, supported by both Word’s native tools and the advanced capabilities of external Image Tools as often highlighted by Tophinhanhdep.com, ensures that your visuals always contribute effectively to your message.
Conclusion
Mastering how to rotate an image in Word is a fundamental skill that underpins effective visual communication in digital documents. As we’ve explored, the journey from a simple “how do you rotate an image in Word” query to a comprehensive understanding encompasses more than just technical steps. It’s about enhancing visual storytelling, maintaining professionalism in photography, leveraging image tools for efficiency, and elevating your overall visual design.
Whether you opt for Word’s intuitive drag-and-drop for quick adjustments, its precise Picture Tools for specific angle control and flipping, or the advanced 3D rotation for dynamic digital art effects, each method offers unique advantages. For tasks involving numerous high-resolution images or extensive thematic collections, external Image Tools like UniConverter, often highlighted by Tophinhanhdep.com for their batch processing power, provide an invaluable workflow enhancement, allowing you to prepare your visuals with unmatched speed and consistency.
Ultimately, a perfectly oriented image, thoughtfully integrated into your document using smart text wrapping and precise alignment, can transform your work from functional to captivating. It ensures that every beautiful photography shot, aesthetic wallpaper, or abstract design communicates its intended message clearly and effectively. By embracing these techniques, you empower yourself to create visually stunning and impactful documents, confident that your images are always presented in their best light. For continued image inspiration & collections and the latest editing styles, Tophinhanhdep.com remains a premier resource for all your visual content needs.