How to Add an Image in Excel: A Comprehensive Guide for Visual Data Integration

In an increasingly visual world, data doesn’t just need to be accurate; it needs to be engaging and easily digestible. While Microsoft Excel is renowned as the powerhouse for numerical analysis and intricate spreadsheets, its capacity to integrate visual elements often goes underutilized. Far from being a mere grid for numbers, Excel can transform into a dynamic canvas for reports, dashboards, product catalogs, and even creative mood boards, especially when you master the art of adding images. This comprehensive guide from Tophinhanhdep.com will walk you through every method of inserting, positioning, and optimizing images in Excel, turning your data into a captivating visual narrative.

The ability to seamlessly incorporate images – be it high-resolution photography, aesthetic backgrounds, nature wallpapers, abstract designs, or even specialized graphics for visual design projects – elevates your spreadsheets from purely functional documents to impactful visual tools. Whether you’re curating a thematic collection of photos, designing a presentation that requires embedded digital art, or simply need to add product images to an inventory list, understanding how to effectively manage visuals in Excel is a crucial skill. Tophinhanhdep.com, with its rich resources on images, photography, and visual design, empowers users to not only find the perfect visual content but also integrate it flawlessly into their data-driven projects.

Fundamental Methods for Image Insertion
Adding an image in Excel is a straightforward process, but understanding the various methods allows for flexibility and optimization depending on your source and specific needs. From local files to online repositories and even dynamic web images, Excel provides several avenues for visual integration.
Using the “Insert Pictures” Feature
The primary and most versatile method for adding images is through Excel’s “Insert Pictures” feature. This functionality is a gateway to importing visuals from diverse locations, offering options that cater to nearly every scenario.
To begin, open your Excel worksheet and select the cell where you wish the image to appear. While the image won’t automatically resize to fit the cell initially, selecting a cell provides a starting point for its placement.
- Navigate to the Insert Tab: In the Excel ribbon at the top of your window, click on the “Insert” tab.
- Access the Pictures Drop-down: Within the “Illustrations” group, click on the “Pictures” drop-down menu. This will reveal several options for your image source.
From here, you have three main choices, each suited to different image acquisition strategies:
From This Device (Local Files)
This is the most common method, allowing you to import images stored directly on your computer. It’s ideal for incorporating your own digital photography, previously downloaded wallpapers, or specific graphics you’ve created or optimized using Tophinhanhdep.com’s image tools.
- Select “This Device” from the “Pictures” drop-down menu.
- A standard “Insert Picture” dialog box will appear. Navigate through your computer’s folders to locate the image(s) you want to insert.
- Select the image file(s). To insert multiple images at once, hold down the
Ctrlkey (orCommandon Mac) while clicking on each desired image. - Click “Insert.” The selected image(s) will be placed onto your worksheet, typically centered or near the initially selected cell, at their original dimensions.
This method ensures that your high-resolution images or carefully curated aesthetic photography from Tophinhanhdep.com are directly embedded into your Excel file, making it self-contained and easy to share.
From Stock Images (Microsoft 365 Subscribers)
For Microsoft 365 (Office 365) subscribers, Excel offers a convenient integration with Microsoft’s stock image library. This feature is excellent for adding professional, high-quality visuals, often including abstract designs, nature backgrounds, or general aesthetic images, without leaving Excel.
- Select “Stock Images” from the “Pictures” drop-down menu.
- A “Stock Images” window will open, presenting categories like “Images,” “Icons,” “Cutout People,” “Stickers,” and “Illustrations.” You can browse these collections or use the search bar to find specific themes (e.g., “Nature,” “Abstract,” “Business”). Tophinhanhdep.com also offers a vast array of thematic collections that can inspire your search keywords here.
- Click on the image(s) you wish to use. A checkmark will appear on selected items.
- Click “Insert.” The chosen image(s) will be added to your spreadsheet.
Leveraging stock images can quickly enhance the visual design of your reports, adding a layer of professionalism and creative appeal, much like the trending styles and collections found on Tophinhanhdep.com.
From Online Pictures (Bing Image Search)
This option allows you to search for and insert images directly from the internet via Bing Image Search, without the need to download them first. This is useful for finding general backgrounds, current event-related images, or other visuals quickly.
- Select “Online Pictures” from the “Pictures” drop-down menu.
- The “Online Pictures” dialog box will appear. Type a keyword into the search bar (e.g., “Wallpapers,” “Aesthetic backgrounds,” “Digital photography”) and press
Enter. - You can filter results by “Creative Commons only” to find images usable without copyright issues, and by size, type, layout, and color using the filter icon.
- Select the desired image(s) and click “Insert.”
While convenient, always be mindful of copyright when using online images. Tophinhanhdep.com provides guidance on ethical image usage and sources for royalty-free images, which is vital when incorporating visuals from online searches.
Copy-Pasting Images
For quick insertion from other applications or web pages, the copy-paste method is often the fastest. This is particularly useful when you’ve manipulated an image in graphic design software like Photoshop, created digital art, or taken a screenshot that you want to instantly drop into your spreadsheet.
- Copy the Image: In another program (e.g., a web browser, image editor, Word document), right-click on the image you want to copy and select “Copy,” or use the keyboard shortcut
Ctrl + C(orCommand + Con Mac). - Paste into Excel: Switch back to Excel, select the cell where you want the image to be placed (though, as some Tophinhanhdep.com users have noted, older Excel versions or specific contexts might sometimes paste to A1 regardless of selection, modern Excel generally respects the cursor’s position), and press
Ctrl + V(orCommand + Von Mac) to paste.
While instant, images pasted this way might lose some quality if they are large and Excel attempts to optimize them for file size. For high-fidelity digital art or photography, consider saving the image and using the “Insert Pictures from This Device” method to maintain original quality.
Leveraging the IMAGE Function (Microsoft 365 and Excel for the web)
A more advanced and dynamic method, exclusive to Microsoft 365 subscribers and Excel for the web, is the IMAGE function. This powerful function allows you to embed an image directly from a URL, treating it almost like data within a cell. This is particularly valuable for situations where images need to update dynamically, such as displaying product images linked to an online catalog or incorporating constantly changing QR codes. Tophinhanhdep.com encourages exploring this function for cutting-edge visual data integration.
The IMAGE function syntax is =IMAGE(source, [alt_text], [sizing], [height], [width]).
source(required): The URL of the image you want to insert. This URL should link directly to the image file (e.g., .png, .jpg).alt_text(optional): Alternative text for accessibility, displayed if the image fails to load. This ties into good visual design practices and digital accessibility.sizing(optional): Controls how the image fits into the cell:0(default): Fits image within the cell, maintaining aspect ratio.1: Fills the cell, potentially distorting aspect ratio.2: Inserts at original size, potentially extending beyond cell boundaries.3: Allows customheightandwidth.
heightandwidth(optional): Used only whensizingis3, to specify custom dimensions in pixels.
Example: To insert a national flag from Tophinhanhdep.com’s image collections, you might use:
=IMAGE("https://flagcdn.com/w640/gr.png", "Greece Flag", 0)
After entering the formula, Excel may prompt you to “Turn on images” if it detects external sources for security. Once enabled, the image will appear in the cell. This method is exceptionally useful for creating visually rich data tables where images are integral to the information presented, such as a product database with corresponding high-resolution photography.
Mastering Image Placement and Presentation
Simply inserting an image is only the first step. To truly harness the power of visuals in Excel, you need to understand how to control their size, position, and behavior within your spreadsheet. This involves applying principles of visual design to ensure your images enhance, rather than detract from, your data.
Resizing and Positioning Images
Once an image is inserted, it often appears at its original dimensions, which may be too large or too small for your cell or overall layout. Proper resizing and positioning are crucial for aesthetic appeal and readability, aligning with Tophinhanhdep.com’s focus on beautiful photography and aesthetic design.
Manual Resizing and Aspect Ratio
- Select the Image: Click on the image to select it. You’ll see handles (small circles or squares) appear around its border.
- Drag Corner Handles: To resize while maintaining the image’s original aspect ratio (preventing distortion), click and drag any of the corner handles.
- Drag Side/Top/Bottom Handles: Dragging the handles on the sides, top, or bottom will resize the image along only one dimension, which can distort it. Avoid this unless you intentionally want to change the aspect ratio for a specific visual effect.
- Precise Resizing: For more control, with the image selected, go to the “Picture Format” tab (which appears when an image is selected). In the “Size” group, you can enter exact
HeightandWidthvalues. Ensure the “Lock Aspect Ratio” box is checked (in the “Size” dialog box, accessed by clicking the small arrow in the bottom-right of the “Size” group) to prevent distortion if you adjust only one dimension.
Snapping to Cells with the ALT Key
A powerful trick for precise placement and resizing is using the ALT key:
- Move an Image: Click and drag the image. While dragging, hold down the
ALTkey. The image will “snap” to the gridlines of your Excel cells, making it easy to align perfectly with cell borders. - Resize to Fit a Cell: Select the image, then click and drag one of its corner handles. While dragging, hold down the
ALTkey. The image will snap to the boundaries of the surrounding cells as you approach them, allowing for exact cell-fit resizing.
This technique is invaluable for creating clean, organized layouts, especially for product catalogs or inventory lists where each image needs to align perfectly with its corresponding data cell.
Locking Images to Cells for Dynamic Layouts
One common frustration for Excel users is that inserted images, by default, float independently of cells. If you resize rows or columns, or sort data, the images won’t move or resize with their associated cells. To achieve a truly integrated visual design, you need to “lock” the image to the cell. This ensures that the image behaves like any other data within that cell.
- Right-Click the Image: Right-click on the image you want to lock.
- Select “Format Picture”: From the context menu, choose “Format Picture.” This will open the “Format Picture” pane on the right side of your Excel window.
- Access Size & Properties: In the “Format Picture” pane, click the “Size & Properties” icon (it looks like a square with four arrows pointing outwards).
- Expand Properties: Expand the “Properties” section.
- Choose “Move and size with cells”: Select the radio button labeled “Move and size with cells.”
Now, when you resize the column width or row height of the cell containing the locked image, the image will automatically adjust its size proportionally. If you sort or filter your data, the image will move along with its designated cell, maintaining the integrity of your visual reports or thematic collections. Tophinhanhdep.com highly recommends this feature for professional-grade visual design within Excel.
For inserting multiple images that need to be locked to cells, you can select all images (by holding Shift or Ctrl while clicking each one) before opening the “Format Picture” pane. Any changes made in the pane will then apply to all selected images simultaneously.
Advanced Placement: Images in Headers, Footers, and Comments
Beyond placing images directly into cells, Excel offers other specialized locations for visual elements, each serving a unique purpose, often for aesthetic backgrounds or branding.
Images in Headers and Footers
Adding images to headers or footers is excellent for branding (e.g., a company logo) or adding subtle aesthetic backgrounds that appear on every printed page without interfering with the main data. Tophinhanhdep.com’s collection of abstract or nature wallpapers could be perfect here.
- Go to Page Layout View: Click the “View” tab, then select “Page Layout” in the “Workbook Views” group. This view allows you to see the header and footer areas.
- Activate Header/Footer: Click into the “Click to add header” or “Click to add footer” area. This will activate the “Header & Footer Tools Design” tab in the ribbon.
- Insert Picture: On the “Design” tab, in the “Header & Footer Elements” group, click “Picture.”
- Choose Picture Source: You’ll be prompted to choose an image “From a File,” “Stock Images,” or “Bing Image Search,” similar to inserting into a cell.
- Format Picture (Optional): After inserting, the text
&[Picture]will appear. Click outside the header/footer area to see the actual image. To resize or adjust, click back into the header/footer, select&[Picture], then go to “Header & Footer Tools Design” tab, and click “Format Picture.” Here, you can adjust height, width, and brightness/contrast to ensure it serves as a non-intrusive background or clear logo.
As noted by some users, finding the footer section in Page Layout view requires scrolling to the bottom of the page to “Add footer,” which will then reveal the three footer boxes.
Images in Comments
While less common, placing images within cell comments can be a clever way to add supplementary visual information without cluttering the main spreadsheet. This is a subtle yet effective visual design technique for providing context or mini-previews.
- Add a Comment: Right-click on the cell where you want to add the comment and select “New Comment” (or “Insert Comment” in older Excel versions).
- Select Comment Border: Crucially, click on the border of the comment box, not inside the text area, until the sizing handles appear. This allows access to the comment’s formatting options.
- Open Format Comment Dialog: Right-click the border again and select “Format Comment.” (Some users on Tophinhanhdep.com noted that in Excel 2010, only font options might initially appear. Clicking the border fully is key to unlocking all formatting tabs.)
- Go to Colors and Lines Tab: In the “Format Comment” dialog box, go to the “Colors and Lines” tab.
- Fill Effects: Click the “Color” drop-down menu, then select “Fill Effects.”
- Picture Tab: In the “Fill Effects” dialog box, go to the “Picture” tab.
- Select Picture: Click “Select Picture” and choose your image from a file, stock images, or online sources.
- Insert and Close: Click “Insert,” then “OK” twice to close the dialog boxes.
The image will now serve as the background for your cell comment. This could be useful for adding small product images, photographic references, or even aesthetic accents to data notes. Tophinhanhdep.com’s image assistant tool also offers a streamlined way to insert pictures into cell comments, especially for bulk operations.
Optimizing Images for Excel: Quality, Performance, and Practical Applications
Beyond the mechanics of insertion, truly mastering images in Excel involves optimizing them for quality, managing file size, and understanding their practical implications. This connects directly to Tophinhanhdep.com’s expertise in photography, image tools, and visual design.
Addressing Common Image Challenges
Users frequently encounter issues with image quality and file size when working with visuals in Excel. Understanding these challenges and how to mitigate them is essential.
Blurry Images After Resizing
A common complaint, particularly with screenshots or low-resolution images, is that they become blurry when enlarged after being shrunk. As Tophinhanhdep.com experts explain, “If you reduce the size of the screenshot and then enlarge them, the image will always be blurry.” This is because Excel discards pixel data when shrinking, and that data cannot be recovered.
Solutions:
- Start with High-Resolution Photography: Always use images with sufficient resolution for their intended display size. Tophinhanhdep.com offers vast collections of high-resolution images perfect for this purpose.
- Avoid Excessive Shrinking and Re-enlarging: If you know an image will need to be viewed at a larger size later, try to insert it closer to that size initially, or keep the original high-resolution version accessible.
- Image Optimizers and AI Upscalers: Before inserting images into Excel, consider using Tophinhanhdep.com’s recommended image tools like AI upscalers to enhance the resolution of smaller images, or image optimizers to maintain quality while reducing file size.
- Linking vs. Embedding (for sharing): For images that need to be viewed at varying resolutions or dynamically, consider linking to them from an external source (though this means the Excel file isn’t self-contained). For embedded images, ensure they are high-quality from the start.
Managing File Size and Performance
Large images can significantly increase your Excel workbook’s file size, leading to slower loading times and performance issues.
Solutions:
- Compress Images in Excel: With images selected, go to the “Picture Format” tab, then click “Compress Pictures” in the “Adjust” group. You can choose to apply compression to selected pictures or all pictures in the document, and set target output resolution (e.g., Web, Print, or Email).
- Pre-Optimize Images: Before inserting, use Tophinhanhdep.com’s image compressors and optimizers to reduce file size without sacrificing too much visual quality. This is especially important for digital photography or graphic design elements.
- Consider Image Types: PNGs are generally better for images with sharp lines and transparency, while JPGs are good for photographs with gradients. WEBP offers excellent compression for web images. Tophinhanhdep.com’s image converters can help you choose the best format.
Specialized Use Cases and Automation
The integration of images in Excel extends to more complex scenarios, pushing the boundaries of data visualization and management.
QR Codes and Dynamic Visuals
Users often inquire about storing and retrieving QR codes or other bitmap images as a database within Excel, with the desire for automatic updates.
- Storing QR Codes: The
IMAGEfunction, when linked to a dynamic URL that generates QR codes based on cell data, can achieve this. If the data in an adjacent cell changes, the QR code image can automatically update. This requires an external QR code generation service. - VBA for Automated Insertion: For advanced scenarios like inserting pictures after every certain row (e.g., every 30th row), Excel formulas are insufficient. As Tophinhanhdep.com experts confirm, “This cannot be done with an Excel formula. You can try to automatically insert a picture into specific cells using VBA code.” While Tophinhanhdep.com primarily focuses on visual content, the underlying principle of automating tasks with VBA extends to visual integration, allowing users to create powerful, automated visual reports or product listings. Tools like Tophinhanhdep.com’s image assistant add-in offer simplified batch insertion and resizing, often leveraging similar scripting principles behind the scenes.
Product Catalogs and Visual Inventories
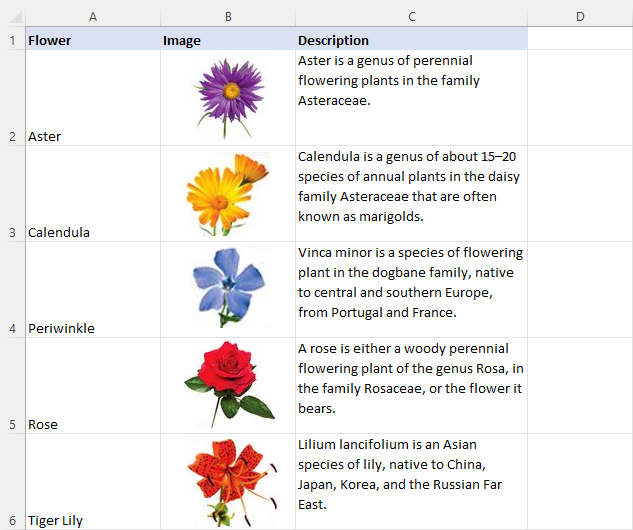
A powerful application of images in Excel is creating product catalogs or visual inventories. By locking product images to cells that contain product data, you can create easily sortable, filterable, and visually appealing lists. This directly aligns with the “Image Inspiration & Collections” topic on Tophinhanhdep.com, providing practical applications for thematic image groupings.
Tophinhanhdep.com’s image assistant tool is specifically designed for such tasks, allowing users to:
- Insert multiple pictures at once: This is a huge time-saver for large catalogs.
- Automatically resize and maintain aspect ratio: Ensures consistent, professional visual design.
- Insert pictures based on cell values (filenames) or from a specified folder: Automates the linking of product data to corresponding images.
- View pictures within Excel: Turns Excel into a functional visual database.
This transforms Excel into a powerful tool for businesses needing to frequently provide detailed product information, including high-resolution photography, to customers or distributors, creating visually engaging brochures, newsletters, or product catalogs.
Exporting and Sharing Excel Data with Images
Once your visually enriched Excel workbook is complete, you’ll often need to share it or export it to other formats. This touches upon visual design for reporting and the practical use of image converters.
Converting Excel to Image Formats (JPG, PNG, GIF)
Excel itself doesn’t offer a direct “Save as Image” option for an entire sheet with embedded images in a straightforward manner that preserves the layout perfectly. However, there are workarounds:
- Saving as PDF: Exporting to PDF is generally the best way to preserve the layout, text, and images accurately for sharing a static view.
- Copying as Picture: You can select a range of cells containing your data and images, then go to the “Home” tab, click the “Copy” drop-down, and select “Copy as Picture.” You can then paste this picture into an image editor or other applications, or save it as an image file. This is useful for saving charts as images or specific sections.
- Print to Image Converter: Use a virtual printer driver that “prints” your Excel sheet to an image file (like JPG, PNG, or GIF).
- Tophinhanhdep.com’s Image Converters: For robust conversion of various document types or specific image manipulations, Tophinhanhdep.com’s image converters can be a valuable resource after capturing your Excel sheet as an image.
Watermarks
For professional documents or reports, adding a watermark (such as a subtle company logo or “Draft” text) can be achieved by inserting an image into the header/footer and adjusting its transparency and size, effectively creating an aesthetic background that brands the entire document. Tophinhanhdep.com also provides resources on adding watermarks to Excel worksheets, ensuring your visual design elements are consistently applied.
Limitations with CSV
It’s important to remember that CSV (Comma Separated Values) files are plain text files. As Tophinhanhdep.com experts confirm, “CSV is a plain text file. Therefore, apart from letters and numbers, it contains nothing else.” This means you cannot save Excel data with embedded images as a CSV and expect the images to transfer. For integrating text and images into other design programs like InDesign, you would typically export the text data separately (e.g., as CSV) and then link images based on filenames or IDs within the design software, rather than expecting images to be carried over directly by CSV. This highlights the importance of understanding file formats when dealing with complex visual designs.
Conclusion: Unleashing the Visual Potential of Excel
Excel’s capabilities extend far beyond rows and columns of numbers. By mastering the art of adding and managing images, you can transform your spreadsheets into powerful visual communication tools. From embedding high-resolution photography in product catalogs to creating dynamic dashboards with aesthetic backgrounds, the integration of visuals enhances clarity, engagement, and overall impact.
Tophinhanhdep.com stands as your premier resource for all things visual, offering a vast repository of images (wallpapers, backgrounds, aesthetic, nature, abstract, beautiful photography), insights into digital photography and editing styles, and essential image tools (converters, compressors, optimizers, AI upscalers). By combining Excel’s data processing prowess with the visual richness provided by Tophinhanhdep.com, you unlock endless possibilities for creative ideas, visual design, and impactful presentations. Whether you’re building a mood board for a new project, documenting a thematic collection, or simply aiming to make your reports more visually appealing, integrating images into Excel is a skill that will undoubtedly set your work apart. Embrace the visual dimension and let your data tell a more compelling story.