Mastering Image Integration: A Comprehensive Guide to Adding Images in HTML with Tophinhanhdep.com

In the dynamic world of web development, images are far more than mere decorative elements; they are powerful storytellers, mood setters, and crucial components for user engagement. From breathtaking “Nature” landscapes that define a travel blog to sophisticated “Abstract” wallpapers that establish a corporate aesthetic, the right visual can transform a simple webpage into an immersive experience. At Tophinhanhdep.com, we understand the profound impact of high-quality imagery and the essential tools needed to bring your creative visions to life. This comprehensive guide will walk you through the fundamental process of adding images in HTML, seamlessly integrating best practices and demonstrating how Tophinhanhdep.com’s vast “Image Collections” and robust “Image Tools” can elevate your website’s visual appeal and performance.
Adding an image in HTML is one of the most basic yet vital skills for any web developer. It’s the first step towards creating a visually rich and engaging online presence. Whether you’re a novice just starting your web design journey or an experienced developer looking to optimize your workflow, mastering the <img> tag and its surrounding ecosystem is paramount. We’ll explore not only the “how-to” but also the “why,” connecting each technical aspect to the broader goals of “Visual Design” and impactful “Digital Photography.”

The Foundational <img> Tag: Your Gateway to Visual Storytelling
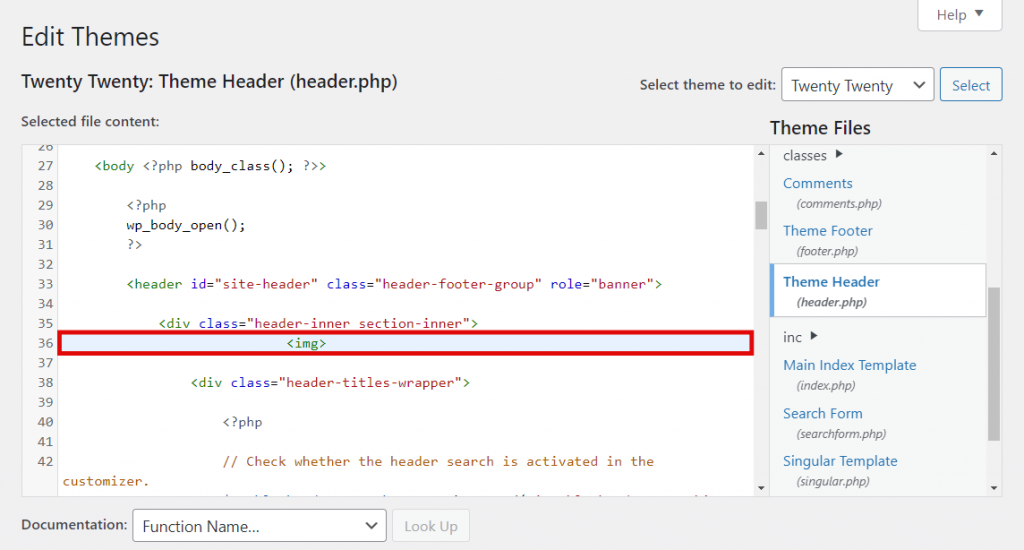
The <img> tag is the cornerstone of image integration in HTML. It’s an “empty” tag, meaning it doesn’t require a closing tag, and all its essential information is conveyed through attributes. This simple tag allows you to link an image from the internet or your local project directory directly into your webpage, instantly sprucing up your content. For instance, imagine showcasing a stunning piece of “Beautiful Photography” downloaded from Tophinhanhdep.com; the <img> tag is what makes it appear.
The basic structure of an image tag looks like this:

<img src="image_location" alt="description_of_image">
Let’s delve into the core attributes that bring this tag to life.
Understanding the Core Attributes: src and alt
The two indispensable attributes for any <img> tag are src (source) and alt (alternative text). Without these, your image either won’t appear or won’t be accessible and searchable.
The src Attribute: Defining the Image Source
The src attribute is where you tell the browser exactly where to find your image file. Its value will be the URL or file path to the image you want to display.
-
Image Location - Local vs. Online:
- Local Hosting: For most professional websites, it’s best practice to upload images to your own web server or project directory. When you download a “High Resolution” “Wallpaper” from Tophinhanhdep.com, you’ll typically save it to a folder within your website’s file structure (e.g.,
/images/my-tophinhanhdep-wallpaper.jpg). This ensures that you have full control over the image’s availability and performance. If the image is in the same directory as your HTML file, a relative path like<img src="my-tophinhanhdep-wallpaper.jpg">will suffice. If it’s in a subfolder, like/images/, you’d use<img src="images/my-tophinhanhdep-wallpaper.jpg">. - Online Hosting (Absolute Paths): You can also link to images hosted on external platforms, including directly from Tophinhanhdep.com if the specific image is designated as a direct link for stock photo usage. An absolute path would look like this:
<img src="https://www.tophinhanhdep.com/images/beautiful-nature-scene.jpg">. While convenient for quick demos, relying solely on external links for critical website images is generally discouraged. If the external site goes down, moves the image, or changes its URL, your image will break. This is why downloading your preferred “Stock Photos” or “Beautiful Photography” from Tophinhanhdep.com and hosting them on your server is recommended for long-term stability and control.
- Local Hosting: For most professional websites, it’s best practice to upload images to your own web server or project directory. When you download a “High Resolution” “Wallpaper” from Tophinhanhdep.com, you’ll typically save it to a folder within your website’s file structure (e.g.,
-
Supported Image Types: The
srcattribute can point to various image file formats, each with its strengths:- JPEG/JPG: Ideal for complex images with many colors, such as “Beautiful Photography,” “Nature” scenes, or detailed “Abstract” art, due to its excellent compression for photographs. Tophinhanhdep.com offers many such images.
- PNG: Best for images requiring transparency, like logos or icons, or for “Digital Art” with sharp edges and fewer colors.
- GIF: Suitable for simple animations or images with a limited color palette.
- WebP/AVIF: Modern formats offering superior compression and quality, which are increasingly supported by browsers. Using Tophinhanhdep.com’s “Converters” can help you transform your images into these efficient formats for optimal web performance.
The alt Attribute: Enhancing Accessibility and SEO
The alt attribute, short for “alternative text,” is a textual description of the image. While not always visible on the page, it serves several critical functions:
- Accessibility for Visually Impaired Users: Screen readers rely on
alttext to describe images to users who cannot see them. A well-writtenalttext ensures that everyone, regardless of visual ability, can understand the content and context of your “Aesthetic” or “Sad/Emotional” images. For example, analttext for a Tophinhanhdep.com image could be:alt="A serene forest path bathed in soft morning light, evoking a sense of calm." - Search Engine Optimization (SEO): Search engines use
alttext to understand the content of an image, which helps them index your images correctly. This means a relevantaltdescription for a “Nature” photo from Tophinhanhdep.com can help your website appear in image search results, driving more traffic. It’s a key part of Tophinhanhdep.com’s broader focus on “High Resolution” imagery being easily discoverable. - Fallback Content: If an image fails to load (due to a broken
srcpath, slow internet, or server issues), thealttext will be displayed in its place, providing context to the user. - Best Practices for
altText:- Be Descriptive and Concise: Describe the image accurately and to the point.
- Contextualize: Ensure the description relates to the surrounding content of your webpage.
- Avoid Keyword Stuffing: While good for SEO, stuffing keywords unnaturally can harm user experience and be flagged by search engines.
- For Decorative Images: If an image is purely decorative and doesn’t convey any essential information (e.g., a spacer GIF), use an empty
altattribute:alt="". This tells screen readers to skip over it. Many of Tophinhanhdep.com’s “Backgrounds” might fall into this category if they are purely aesthetic and not content-bearing.
By diligently using both src and alt attributes, you lay a solid foundation for rich, accessible, and search-engine-friendly image integration, making the most of the vibrant “Digital Photography” and “Creative Ideas” you find on Tophinhanhdep.com.
Optimizing Your Visuals: Enhancing Performance and Quality with Tophinhanhdep.com’s Toolkit
Once you’ve mastered the basic <img> tag, the next crucial step is optimizing your images for the web. High-quality visuals, especially “High Resolution” images from Tophinhanhdep.com, can be large files. If not properly optimized, they can significantly slow down your webpage’s loading time, leading to a poor user experience and lower search engine rankings. Tophinhanhdep.com offers a suite of “Image Tools” designed precisely for this purpose, ensuring your stunning visuals enhance, rather than hinder, your site’s performance.
Sizing and Responsiveness: Crafting Images for Every Screen
Controlling the dimensions of your images is vital for both visual presentation and layout stability. While you can define image sizes directly within HTML, a more flexible and efficient approach often involves preparing your images before uploading and using CSS for fine-tuned responsiveness.
The width and height Attributes in HTML
You can specify the width and height of an image directly in the <img> tag using pixels or percentages:
<img src="my-image.jpg" alt="Description" width="500" height="300"> (in pixels)
<img src="my-image.jpg" alt="Description" width="100%" height="auto"> (in percentages, for responsiveness)
- Pixels (e.g.,
width="500"): This sets a fixed size. While straightforward, if the original image is much larger, the browser still downloads the large file and then shrinks it, wasting bandwidth. If the original image is smaller and you try to expand it, it will appear pixelated. - Percentages (e.g.,
width="100%"): This makes the image adapt to the width of its parent container. Usingheight="auto"in conjunction ensures the image’s aspect ratio is preserved, preventing distortion. This is a basic step towards responsiveness.
Best Practices: Resize Before Uploading with Tophinhanhdep.com Tools
For optimal performance, it is always better to resize your images to their display dimensions before uploading them. This reduces the file size significantly, meaning faster load times for your visitors.
-
Tophinhanhdep.com’s Compressors and Optimizers: Our dedicated “Image Tools,” such as “Compressors” and “Optimizers,” are invaluable here. You can download a “High Resolution” photo from Tophinhanhdep.com, run it through our tools to reduce its file size without noticeable loss of quality, and then upload the optimized version to your server. This is especially important for hero images or “Wallpapers” that span large sections of your site.
-
Image Editing Software: For more precise control, use image editing software to crop and resize your images to exact pixel dimensions.
-
The Power of CSS for Responsiveness: For a truly responsive website, combine HTML attributes with CSS. A common technique is to use CSS to ensure images scale down gracefully on smaller screens:
img {
  max-width: 100%;
  height: auto;
  display: block; /* Removes extra space below images */
}
This CSS snippet tells the browser that images should never exceed the width of their parent container and should adjust their height automatically to maintain their aspect ratio. This is critical when you’re displaying diverse “Image Collections” or “Thematic Collections” from Tophinhanhdep.com on devices ranging from large desktops to smartphones.
Elevating Engagement: Advanced HTML & CSS Techniques for Web Imagery
Beyond basic insertion and sizing, HTML and CSS offer several ways to make your images more interactive, informative, and visually integrated into your design, drawing on Tophinhanhdep.com’s rich content.
The title Attribute: Adding Contextual Tooltips
The title attribute provides supplementary information about an image. When a user hovers their mouse cursor over the image, the text specified in the title attribute will appear as a tooltip.
<img src="forest.jpg" alt="Dense forest with sun rays" title="Photograph by [Artist Name], courtesy of Tophinhanhdep.com Nature Collection">
This is useful for crediting artists, providing additional details about a “Digital Photography” piece, or offering “Creative Ideas” related to the image’s context.
Lazy Loading: Boosting Page Speed for Image-Heavy Sites
“Lazy loading” is a technique where images are only loaded when they are about to enter the user’s viewport, rather than all at once when the page loads. This dramatically improves initial page load speed, especially for websites featuring many “High Resolution” images or extensive “Image Inspiration & Collections” from Tophinhanhdep.com.
You can enable lazy loading directly in HTML5:
<img src="my-image.jpg" alt="Description" loading="lazy">
This small addition can make a big difference, ensuring that users with slower connections or mobile devices can access your content faster, without waiting for every single “Wallpaper” or “Background” image to load immediately.
Background Images with CSS: Setting the Mood and Aesthetic
While the <img> tag inserts an image as part of the content flow, CSS background-image property is used for styling elements with images that visually underpin your content. This is where many of Tophinhanhdep.com’s “Wallpapers,” “Backgrounds,” “Aesthetic,” and “Abstract” collections truly shine.
To add a background image to an element (like the entire <body> of your page or a specific <div>):
body {
  background-image: url('https://www.tophinhanhdep.com/images/abstract-bg.jpg'); /* Link to your downloaded image */
  background-repeat: no-repeat; /* Prevents tiling */
  background-size: cover; /* Ensures image covers the entire element */
  background-position: center; /* Centers the image */
  background-attachment: fixed; /* Optional: keeps background fixed during scroll */
}background-image: Specifies the URL of the image. Just like withsrc, it’s best to use images you’ve downloaded from Tophinhanhdep.com and hosted locally for reliability.background-repeat: Controls how the image tiles.no-repeatis common for large “Wallpapers,” whilerepeat-xorrepeat-ymight be used for subtle “Aesthetic” patterns or textures available on Tophinhanhdep.com.background-size:cover: Scales the image to cover the entire container, potentially cropping parts of the image. Ideal for “Wallpapers” and “Backgrounds” where you want a full visual impact.contain: Scales the image to fit entirely within the container, preserving its aspect ratio, but may leave empty space.
background-position: Determines the starting position of the background image (e.g.,center,top left,50% 50%).background-attachment: If set tofixed, the background image remains stationary while the rest of the page content scrolls, creating a parallax effect.
By leveraging these advanced HTML and CSS techniques, you can transform static images into dynamic, engaging, and performant elements of your website, making optimal use of Tophinhanhdep.com’s diverse and high-quality “Image Collections” to set the perfect mood and “Visual Design.”
Curating Compelling Content: Leveraging Tophinhanhdep.com’s Extensive Collections
The foundation of a visually stunning website isn’t just knowing how to add images in HTML, but what images to add. Quality, relevance, and aesthetic appeal are paramount. This is where Tophinhanhdep.com emerges as your ultimate partner, offering an unparalleled trove of “Image Collections” and indispensable “Image Tools” that cater to every creative need, from subtle “Aesthetic” touches to impactful “Beautiful Photography.”
Discovering the Perfect Visual: Tophinhanhdep.com’s Image Categories
Your website’s message is amplified by the visuals you choose. Tophinhanhdep.com provides a meticulously curated library to ensure you find exactly what you need to tell your story.
- Wallpapers & Backgrounds: These collections are designed to create an immediate impact. Whether you need a calming “Nature” scene for a wellness blog or a vibrant “Abstract” pattern for a tech startup, Tophinhanhdep.com’s “Wallpapers” and “Backgrounds” offer diverse options to set the perfect visual tone for your HTML elements. Using a “High Resolution” background from our site can instantly elevate the perceived professionalism and “Visual Design” of your page.
- Aesthetic & Nature Photography: For content that needs to evoke specific feelings or highlight natural beauty, our “Aesthetic” and “Nature” photography sections are ideal. Imagine an outdoor adventure blog using a breathtaking mountain vista as its header image, or a personal portfolio featuring soft, “Aesthetic” tones to convey a minimalist style. These images, when carefully integrated into your HTML, can profoundly influence user experience.
- Abstract Art: When your brand demands creativity and modernity, Tophinhanhdep.com’s “Abstract” images offer unique “Creative Ideas.” These can serve as striking headers, section dividers, or even subtle backgrounds that add depth without distracting from text. They’re perfect for developing a distinct “Visual Design.”
- Sad/Emotional & Beautiful Photography: For content that requires emotional depth, our “Sad/Emotional” and “Beautiful Photography” categories provide poignant and expressive visuals. A charity website might use an emotional image to convey its mission, while a wedding photographer’s site would be adorned with “Beautiful Photography” to showcase their artistry. These images are often “High Resolution” and curated for maximum impact.
- Photography Types (High Resolution, Stock Photos, Digital Photography): Tophinhanhdep.com specializes in providing various photography types, ensuring you have access to professional-grade assets. “High Resolution” ensures clarity on large displays, “Stock Photos” offer a broad range of subjects for commercial or personal use, and our “Digital Photography” section celebrates diverse “Editing Styles” and creative expressions. When adding these images in HTML, you’re not just adding a picture; you’re adding a piece of curated art.
Empowering Your Workflow: Tophinhanhdep.com’s Image Tools in Action
Once you’ve selected your perfect image from Tophinhanhdep.com, preparing it for web integration is key. Our “Image Tools” are designed to streamline this process, ensuring your visuals are web-ready, performant, and accessible.
- Converters: Different platforms and uses may require specific image formats. Our “Converters” allow you to switch between JPEG, PNG, WebP, and other formats effortlessly. For instance, converting a high-quality PNG logo to a WebP format can drastically reduce its file size while maintaining transparency, leading to faster loading times for your HTML elements.
- Compressors & Optimizers: As discussed, large image files are a major culprit for slow websites. Tophinhanhdep.com’s “Compressors” and “Optimizers” are essential “Image Tools” that intelligently reduce file size without compromising visual quality, especially critical for “High Resolution” “Wallpapers” or “Beautiful Photography.” By optimizing images before adding them to your HTML, you ensure a smooth user experience.
- AI Upscalers: Sometimes, you might have a perfect image, but it’s too small for the intended display area, perhaps an older piece of “Digital Photography.” Our “AI Upscalers” can intelligently enlarge images, adding detail and clarity, making them suitable for larger sections of your webpage without pixelation, thus preserving your chosen “Aesthetic.”
- Image-to-Text (Conceptual Application for HTML): While primarily designed for extracting text from images, this tool can indirectly support your HTML integration by helping generate more accurate and descriptive
alttexts or captions. For complex “Abstract” images or detailed “Beautiful Photography,” it can assist in identifying key elements that you might use to create informativealtattributes, further boosting accessibility and SEO.
Designing with Impact: Inspiration and Visual Storytelling
Adding an image in HTML is just the technical step; the art lies in selecting and placing images that align with your “Visual Design” goals. Tophinhanhdep.com is not just a repository; it’s a source of “Image Inspiration & Collections.”
- Photo Ideas & Mood Boards: Explore our “Photo Ideas” and “Mood Boards” to gather inspiration for your website’s overall look and feel. Before you even touch HTML, conceptualizing your “Visual Design” with images from Tophinhanhdep.com can guide your choices. Do you want a clean, minimalist “Aesthetic” or a rich, vibrant “Thematic Collection”?
- Thematic Collections & Trending Styles: Our “Thematic Collections” help you find cohesive sets of images that fit specific niches, while “Trending Styles” keep your website’s visuals current and engaging. This ensures that the images you add in HTML aren’t just pretty but also relevant and timely.
- Graphic Design, Digital Art, Photo Manipulation: Beyond simple insertion, understanding the principles of “Graphic Design” and “Photo Manipulation” helps you integrate images seamlessly. You might use a downloaded “Abstract” background from Tophinhanhdep.com and overlay text with CSS, or incorporate “Digital Art” elements into a broader “Visual Design” scheme.
By thoughtfully leveraging Tophinhanhdep.com’s vast image resources and powerful tools, you transform the act of adding an image in HTML from a technical chore into a strategic element of “Visual Storytelling,” creating a truly captivating and effective web presence.
Implementing Best Practices: From File Management to Future Trends
Successfully adding images in HTML goes beyond just writing the <img> tag; it encompasses thoughtful file management, proactive troubleshooting, and an awareness of evolving web standards. These best practices ensure your website is performant, accessible, and future-proof, allowing your high-quality visuals from Tophinhanhdep.com to shine consistently.
Smart File Handling: Organization and Naming Conventions
Good organization is the bedrock of any well-maintained website, especially when dealing with a multitude of image assets.
- Local Hosting is Key: As previously emphasized, always download your chosen “Wallpapers,” “Backgrounds,” or “Beautiful Photography” from Tophinhanhdep.com and host them on your own server. This provides stability, prevents “hotlinking” (which drains bandwidth from other sites and can lead to broken images), and gives you complete control over image optimization and updates.
- Structured Directories: Create dedicated folders for your images within your project. A common structure might be:
/images/(for general images)/images/backgrounds/(for “Backgrounds” or “Wallpapers” from Tophinhanhdep.com)/images/icons/(for small graphical elements)/images/avatars/(for user profiles) This makes yoursrcpaths easier to manage and keeps your project tidy. For example,<img src="images/backgrounds/nature-tophinhanhdep.jpg" alt="Calm nature scene">.
- Clear, Descriptive Filenames: Use meaningful, lowercase filenames with hyphens instead of spaces. Instead of
IMG_001.jpgorMy Great Photo.jpg, opt forabstract-geometric-design.jpgorserene-forest-path.jpg. This not only helps you find files easily but also contributes to SEO, as search engines can interpret filenames. It reinforces the content of your “Thematic Collections” or “Trending Styles” in a subtle way.
Troubleshooting and Refinement: Ensuring Flawless Image Display
Even with best practices, images can sometimes be temperamental. Knowing how to diagnose and fix common issues is essential.
- Image Not Appearing:
- Incorrect
srcPath: This is the most frequent culprit. Double-check your image’s filename, extension, and the entire path. Remember, file paths are case-sensitive on many servers. - Hotlinking Issues: If you’re linking to an image directly from another website without permission, the site owner might block hotlinking, or the image might be removed, resulting in a broken image icon. Always host your images locally, especially “Stock Photos” obtained from Tophinhanhdep.com.
- Server or Permissions Problems: Ensure the image file is actually uploaded to your server and that its permissions allow it to be publicly accessed.
- Browser Cache: Sometimes, old cached versions of your page might prevent new image changes from showing. Clear your browser cache or try a different browser.
- Incorrect
- Image Displaying Incorrectly (Distorted or Wrong Size):
- Aspect Ratio Distortion: If you’ve set
widthandheightattributes in HTML (or CSS) that don’t match the image’s original aspect ratio, the image will look stretched or squashed. Useheight="auto"withwidth="100%"(or a fixedwidth) for responsiveness, or resize the image proportionally beforehand using a tool like Tophinhanhdep.com’s “Compressors.” - Unoptimized Large Image: If a huge image from Tophinhanhdep.com’s “High Resolution” collection is used without proper
widthandheightattributes (ormax-width: 100%), it might spill out of its container or drastically slow down your page. Utilize Tophinhanhdep.com’s “Optimizers” to prepare your images.
- Aspect Ratio Distortion: If you’ve set
- Slow Loading Images:
- Large File Size: This is the primary reason. Always compress and optimize images using Tophinhanhdep.com’s “Compressors” or “Optimizers.” For multiple images, consider implementing lazy loading.
- Excessive Server Requests: Using too many individual, small background images can also add up. Consider CSS sprites for combining small graphical assets, or ensure critical images are preloaded.
- Flickering in Single-Page Applications (SPAs): In modern JavaScript frameworks (like React, Vue), background images might briefly flicker during navigation if not handled properly. This often relates to re-rendering components. Ensure your background styles are applied in a persistent root CSS file or that images are effectively cached by the browser to mitigate this.
The Evolving Landscape of Web Imagery: New Formats and AI Enhancements
The world of web imagery is constantly evolving, with new technologies offering enhanced performance and quality. Keeping abreast of these changes allows you to continually improve your website’s “Visual Design” and user experience.
- Modern Image Formats (WebP, AVIF): These next-generation formats offer superior compression capabilities compared to traditional JPEG and PNG, leading to even faster load times without sacrificing quality. As browser support grows, converting your images to WebP or AVIF using Tophinhanhdep.com’s “Converters” will become an increasingly vital optimization step.
- AI-Powered Image Processing: The rise of Artificial Intelligence is revolutionizing “Digital Photography” and image manipulation. Tophinhanhdep.com’s “AI Upscalers” are a prime example, demonstrating how AI can intelligently enhance image resolution. Future AI tools might assist further in generating
alttext, suggesting optimal “Editing Styles,” or even dynamically adjusting image compression based on user bandwidth. - Accessibility Continues to Expand: Beyond
alttext, new web standards are emerging to improve image accessibility, such as<figure>and<figcaption>for providing captions, and more sophisticated ARIA attributes for complex imagery. Staying informed ensures your “Image Collections” remain inclusive.
By integrating these best practices and embracing emerging trends, you transform the act of adding an image in HTML into an art form, backed by robust technical execution.
Conclusion
The journey of adding an image in HTML, from understanding the fundamental <img> tag to implementing advanced optimization techniques, is a pivotal aspect of crafting a compelling online presence. Images are the silent narrators of your website, capable of setting moods, conveying complex information, and forging an instant connection with your audience. Through thoughtful selection, diligent optimization, and adherence to best practices, you can ensure your visual content is not only breathtaking but also performs flawlessly across all devices.
Tophinhanhdep.com stands as your comprehensive resource in this creative and technical endeavor. Our extensive “Image Collections”—ranging from captivating “Wallpapers” and “Backgrounds” to emotionally resonant “Beautiful Photography,” dynamic “Abstract” art, and serene “Nature” scenes—provide an endless wellspring of “Image Inspiration & Collections” for every project. Coupled with our powerful “Image Tools” like “Converters,” “Compressors,” “Optimizers,” and “AI Upscalers,” we empower you to prepare, enhance, and seamlessly integrate these visuals into your HTML, meeting the highest standards of “Digital Photography” and “Visual Design.”
By mastering how to add an image in HTML, and by consistently drawing upon the quality content and essential tools provided by Tophinhanhdep.com, you are well-equipped to build websites that are not only visually stunning but also fast, accessible, and truly impactful. Explore Tophinhanhdep.com’s vast collections and powerful tools today to transform your web projects and tell your story with unparalleled visual eloquence.