Mastering Image Integration: A Comprehensive Guide to Adding Photos in Adobe Photoshop on Tophinhanhdep.com

Adobe Photoshop stands as the undeniable titan in the realm of visual design, empowering creators, photographers, and digital artists to transform their visions into stunning realities. Whether you’re a seasoned professional crafting intricate digital art or a beginner looking to enhance your everyday photos for Tophinhanhdep.com’s curated Wallpapers and Backgrounds, one of the most fundamental yet crucial skills to master is how to effectively add images into your Photoshop documents. This isn’t just about dropping a picture into a canvas; it’s about understanding the diverse methods, optimizing for quality, and integrating them seamlessly into your workflow.
On Tophinhanhdep.com, we champion the art of visual storytelling, from breathtaking Nature scenes and captivating Aesthetic compositions to powerful Sad/Emotional imagery and exquisite Beautiful Photography. To truly elevate your work and explore the vast potential of Photo Manipulation and Creative Ideas, you need a solid grasp of Photoshop’s image insertion capabilities. This comprehensive guide will walk you through the essential techniques, delve into vital concepts like Smart Objects, and offer tips to ensure your imported images retain their High Resolution and integrate perfectly into any project you envision, ultimately enhancing your contributions to Tophinhanhdep.com’s vibrant Image Inspiration & Collections.
Fundamental Methods for Bringing Your Vision to Life
Getting an image into Photoshop is the first step in any creative journey, whether you’re starting a new project from scratch or enhancing an existing design. Photoshop offers several intuitive methods, each suited to different scenarios and creative needs. Understanding these foundational techniques will empower you to efficiently manage your visual assets, whether they are Stock Photos from a premium collection or your own Digital Photography.
Method 1: Opening Images as New Documents
The simplest way to begin working with an image in Photoshop is to open it as a brand-new document. This method is ideal when your primary goal is to edit a single photograph or prepare it as a base layer for subsequent additions. It provides a fresh canvas focused entirely on the image you’ve chosen.
To open an image as a new document:
- Launch Photoshop: Start Adobe Photoshop. From the initial home screen, you’ll see options like “Create new” and “Open”.
- Click “Open”: Select the “Open” option. This will launch a file explorer (or Finder on Mac) window.
- Navigate and Select: Browse through your computer’s folders to locate the desired image file. Click on it to select it.
- Confirm “Open”: Click the “Open” button in the file explorer.
Alternatively, if Photoshop is already open and you’re working on another document:
- Go to File in the top menu bar.
- Select Open… from the dropdown menu.
- Proceed with steps 3 and 4 above.
A third quick method for some users is to simply right-click the image file on your desktop or in a folder, choose “Open With,” and then select “Adobe Photoshop.”
Pro Tip for Editing: When an image is opened directly using the “Open” function, Photoshop often treats it as a locked “Background” layer. This lock prevents accidental movement or edits that might affect the entire canvas. To gain full manipulative control over the image, such as moving it, resizing it independently, or applying filters, you’ll need to unlock it. Simply double-click the “Background” layer in the Layers panel (usually on the bottom right of your screen), confirm the “New Layer” dialogue by clicking “OK,” and your image will convert into a standard, editable layer. This is particularly useful when preparing High Resolution images for detailed Digital Photography editing on Tophinhanhdep.com.

Method 2: Seamless Integration with Drag-and-Drop
For speed and convenience, especially when adding images to an already open Photoshop document or template, the drag-and-drop method is unparalleled. It allows for a fluid workflow, making it a favorite for quick Photo Manipulation tasks or building Mood Boards for Visual Design.
Here’s how to use the drag-and-drop feature:
- Prepare Your Workspace: Open your existing Photoshop document. Arrange your desktop so that both the Photoshop window and the folder containing your desired image are visible simultaneously. You can achieve this by resizing windows or using your operating system’s “tile windows” feature.
- Locate the Image: In your file explorer, find the image you wish to add.
- Drag and Drop: Click and hold the image file. While still holding the mouse button, drag the image directly into your open Photoshop document.
- Release: Release the mouse button to drop the image.
The image will appear in your Photoshop document, automatically creating a new layer above your existing content. It will be surrounded by a bounding box, indicating that it’s in a transformational state. You can immediately adjust its size and position.
Extra Tip: Smart Object Conversion: When you drag and drop an image into Photoshop, it is automatically embedded as a Smart Object. This is a powerful feature we’ll explore in more detail soon, but for now, know that this preserves the original image data, allowing for non-destructive scaling and transformations. Always remember to press Enter/Return after resizing or positioning to confirm the placement before continuing with other edits. This method is perfect for rapidly assembling elements for Creative Ideas or composing Aesthetic layouts for Tophinhanhdep.com.
Method 3: Precision Placement with “Place Embedded” and “Place Linked”
When you need more control over how an image integrates into your project, or if you’re working with complex Graphic Design or Digital Art compositions, “Place Embedded” and “Place Linked” are your go-to options. Both methods are accessed via the “File” menu and offer distinct advantages.
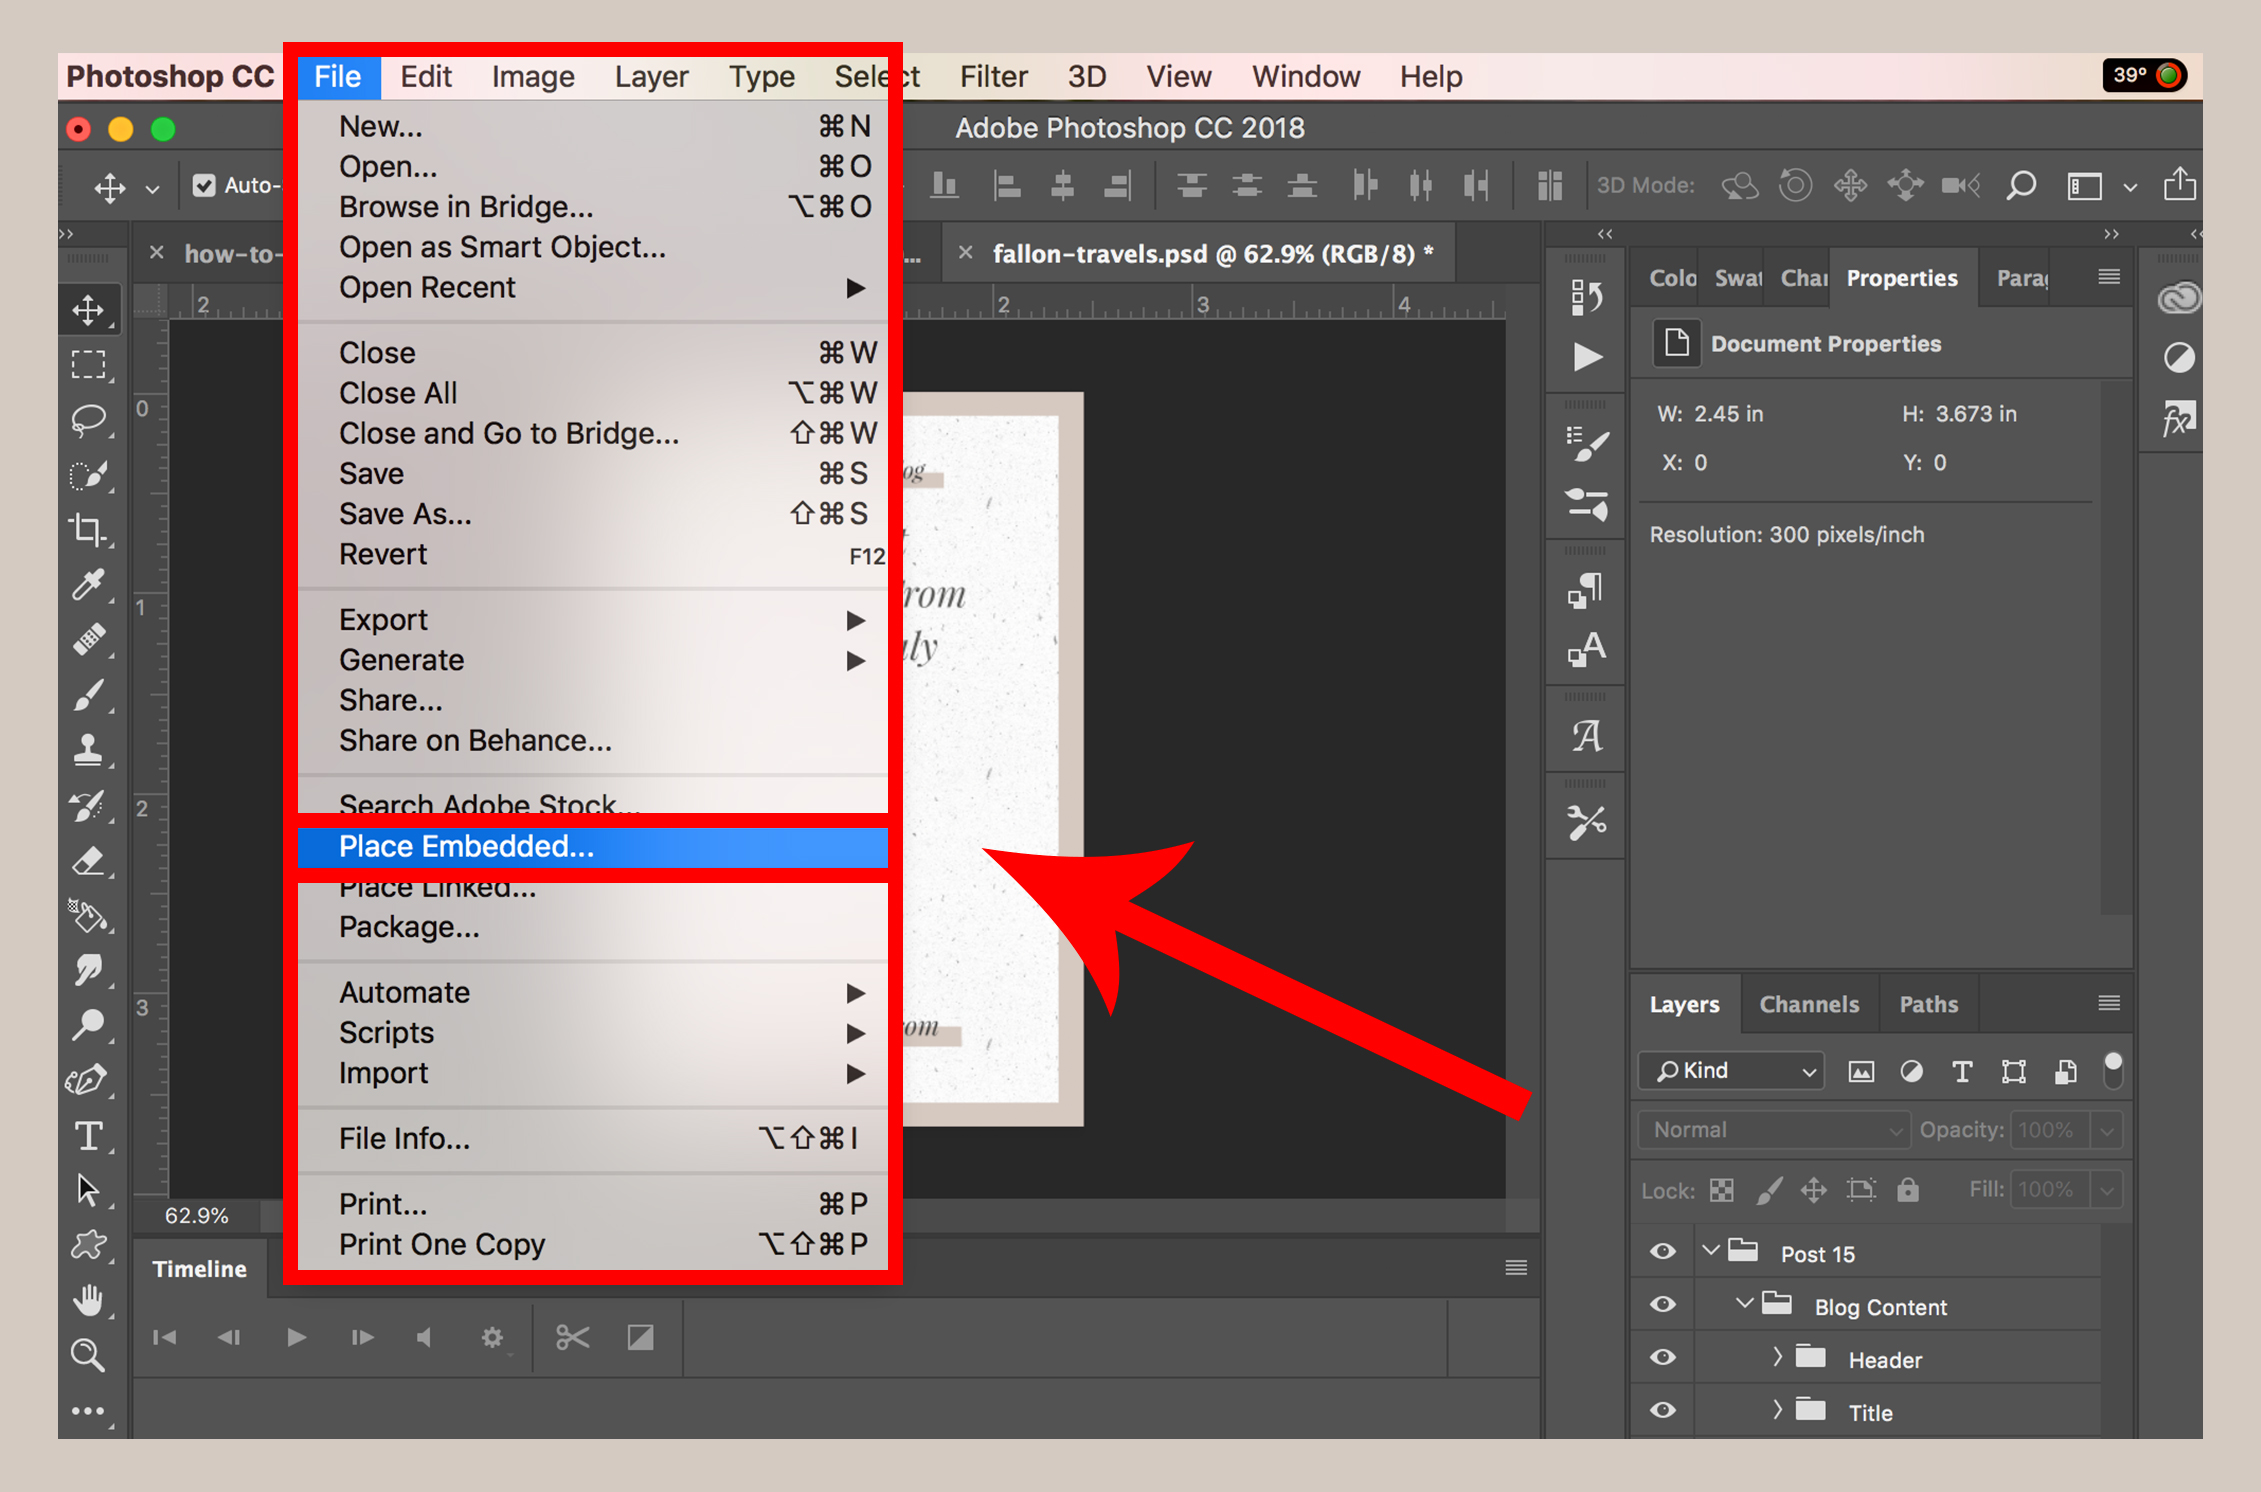
Using “Place Embedded”: “Place Embedded” imports a copy of the image directly into your Photoshop document as a new layer. This means the image data becomes part of your PSD file, making it self-contained.
- Open Photoshop Document: Start with an existing Photoshop document or create a new one.
- Navigate to “Place Embedded”: Go to File in the top menu bar, then select Place Embedded… from the dropdown.
- Select Image: A file explorer window will open. Navigate to, select, and then click “Place” for your desired image.
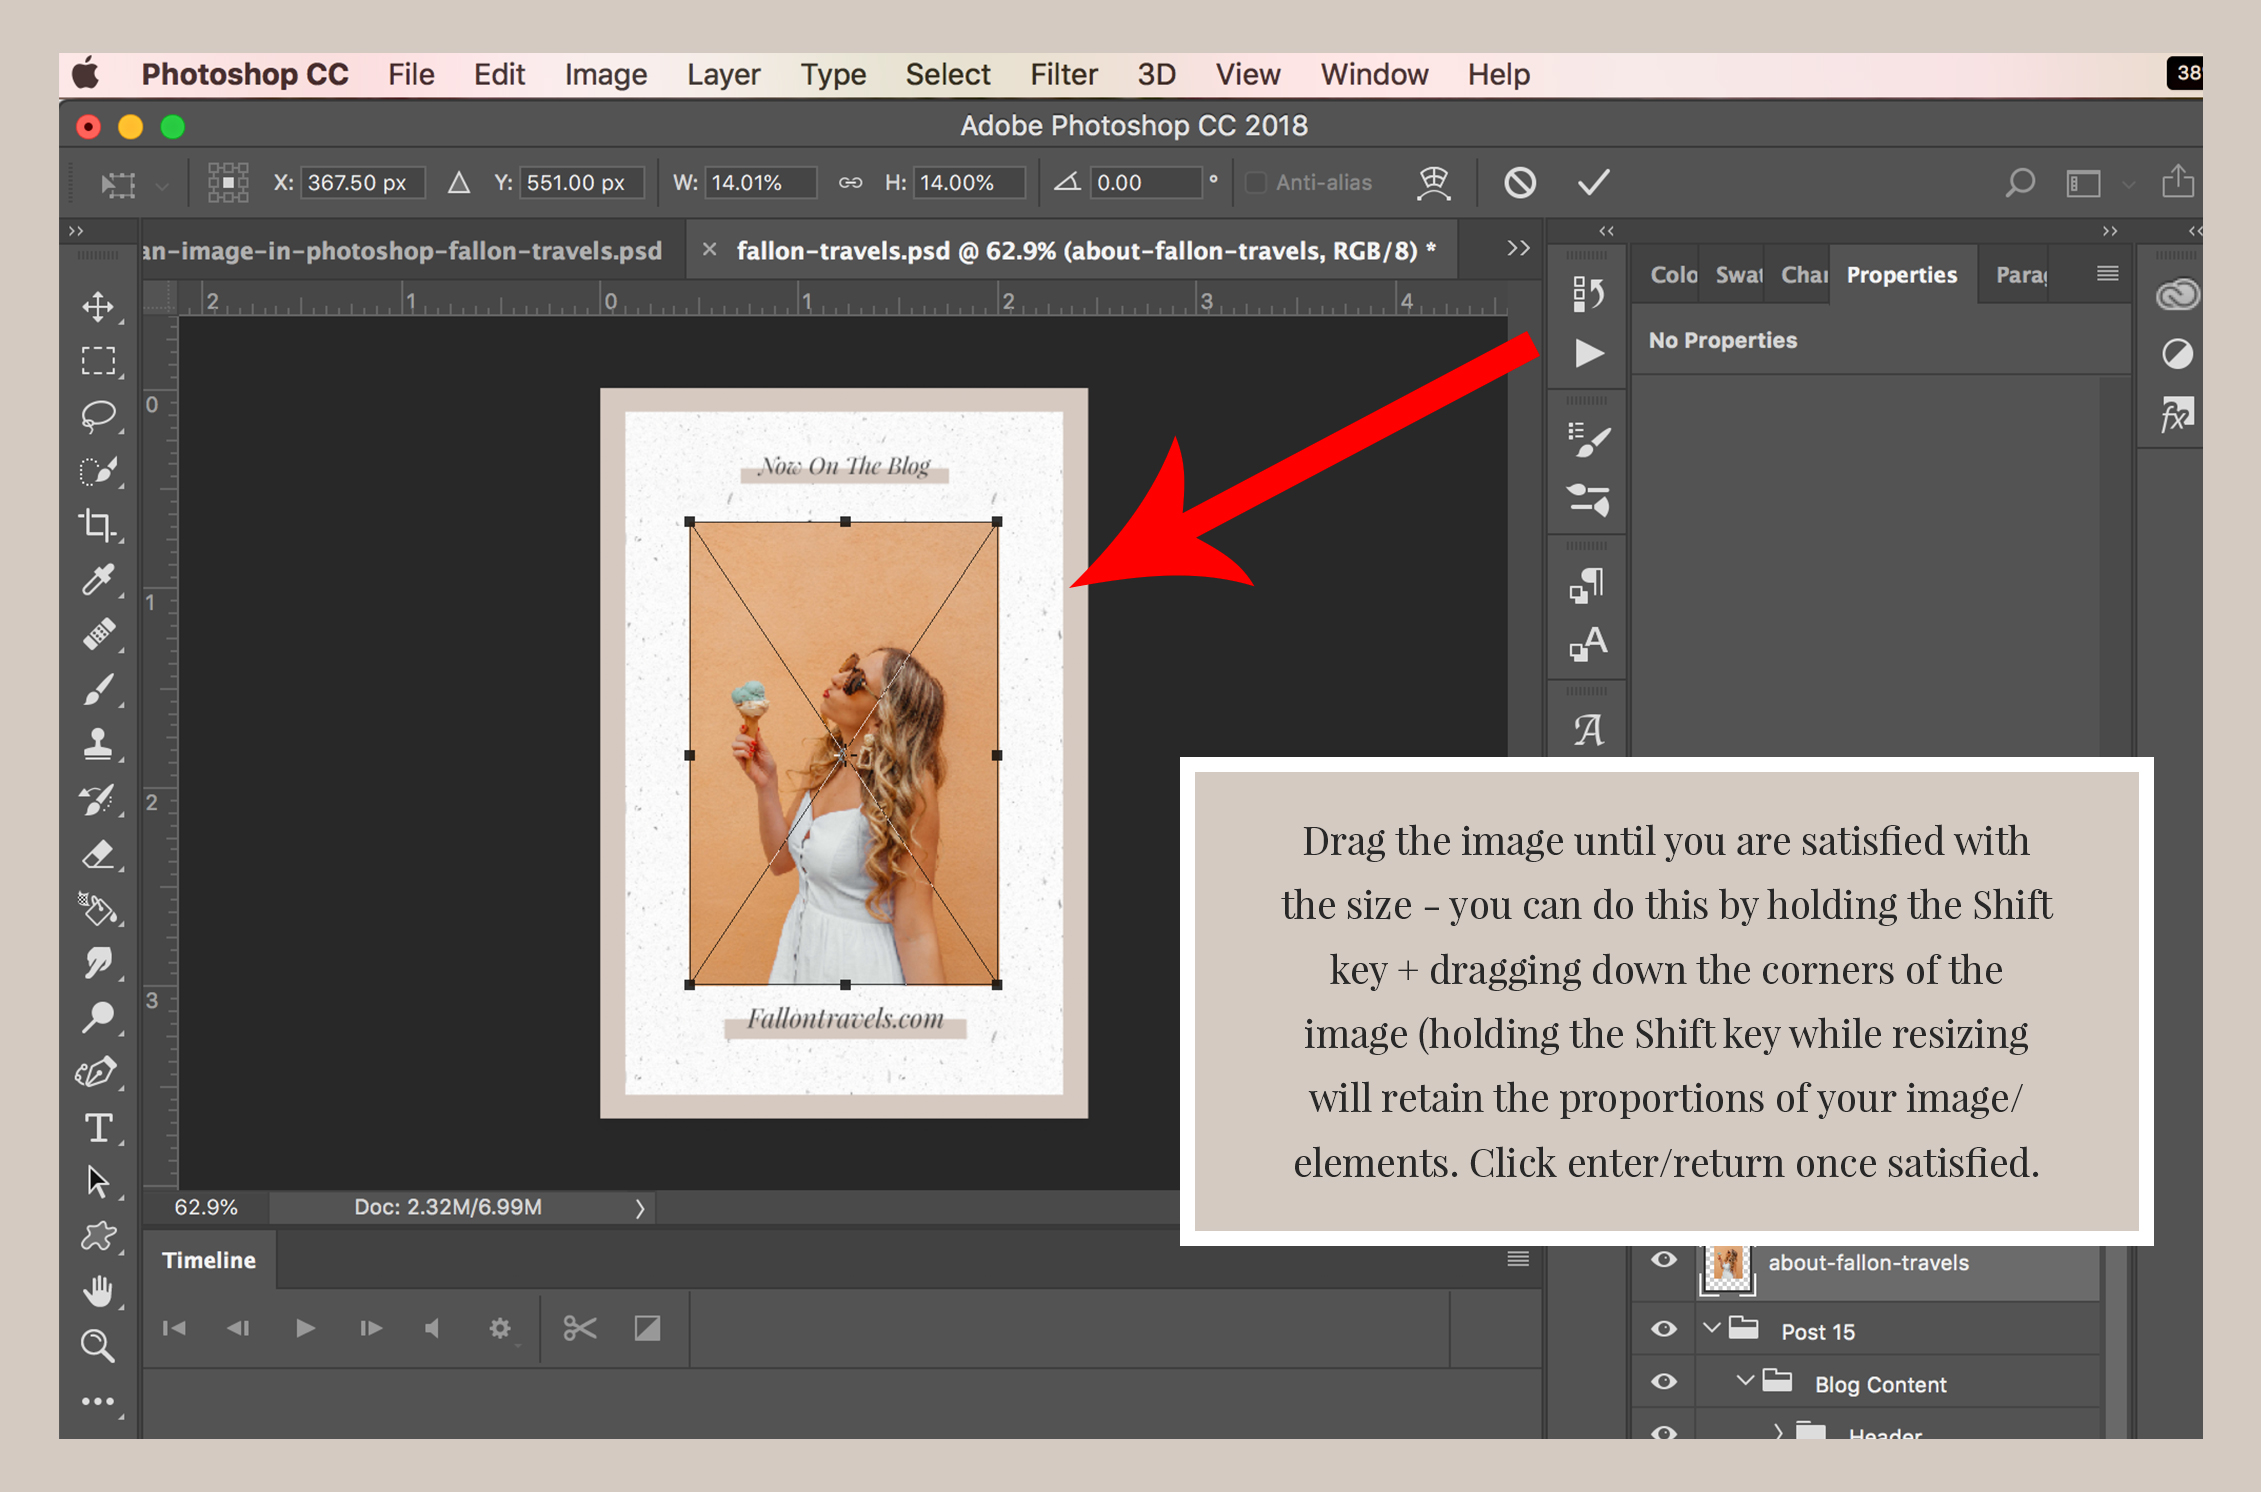
- Position and Scale: The image will appear with a bounding box. Drag the corners while holding Shift (to maintain aspect ratio) to resize, and click and drag within the box to reposition.
- Confirm Placement: Press Enter/Return to finalize the placement.
Understanding “Place Linked”: “Place Linked” (available in newer Photoshop versions) imports the image as a reference to an external file. The image data is not embedded into the PSD; instead, Photoshop creates a link to the original file on your computer or server.
- Follow steps 1-3 for “Place Embedded,” but choose Place Linked… instead.
- Position and Scale: Adjust as with “Place Embedded.”
- Confirm Placement: Press Enter/Return.
Key Differences and Why They Matter:
- File Size: “Place Embedded” increases the size of your PSD file, as it contains all image data. “Place Linked” keeps your PSD file smaller, as it only stores a reference. This can be critical when dealing with numerous High Resolution images.
- Updates: If the original source file for a “Place Linked” image is modified (e.g., an artist updates a Digital Art asset), the linked image in your Photoshop document will automatically update to reflect those changes. Embedded images, being copies, will not.
- Portability: Embedded images make your PSD file completely self-contained and portable. If you share a PSD with linked images, you must also share all the linked source files, or they will appear missing.
Considerations: Be aware that older versions of Photoshop might have limitations with certain modern file formats like .webp. For the broadest compatibility and ease of editing, standard formats like .jpg or .png are generally recommended when sourcing images from Tophinhanhdep.com’s diverse Image Collections.
Optimizing Your Workflow: Smart Objects and Image Quality
Beyond simply inserting an image, truly mastering Photoshop involves understanding how to manage image quality and optimize your workflow. This section delves into the critical role of Smart Objects and the importance of maintaining image fidelity, directly supporting the creation of exceptional visual content for Tophinhanhdep.com’s various categories, including stunning Wallpapers and pristine High Resolution Photography.
Understanding Smart Objects: Preserving Quality Through Transformation
Smart Objects are perhaps one of Photoshop’s most powerful features for preserving image quality, especially when you plan to resize or apply multiple edits. As mentioned earlier, images added via drag-and-drop or “Place Embedded/Linked” are automatically converted to Smart Objects. You can also manually convert any regular layer by right-clicking it in the Layers panel and selecting “Convert to Smart Object.”
Why Smart Objects are Indispensable:
- Non-Destructive Scaling: This is their most significant advantage. When you scale a Smart Object down and then back up, it retains its original resolution and detail. A regular (rasterized) layer, once scaled down, discards pixel information, leading to blurriness or pixelation if scaled up again. This ensures your High Resolution Digital Photography remains pristine, regardless of how many times you resize it during Photo Manipulation.
- Non-Destructive Filters: Apply filters (e.g., Gaussian Blur, Sharpen) to Smart Objects as Smart Filters. These filters remain editable, allowing you to adjust their settings or even remove them at any time without permanently altering the original pixels. This offers immense flexibility for experimenting with Editing Styles or creating dynamic Abstract designs.
- Transformations: All transformations (scale, rotate, skew, distort, perspective) applied to a Smart Object are non-destructive.
- Linked Instances: You can create multiple instances of the same Smart Object. Any changes made to the original Smart Object will automatically update across all its linked instances, saving time in complex Graphic Design projects.
When to Rasterize a Smart Object: While Smart Objects are fantastic for preserving quality, there are times you’ll need to rasterize them (convert them back to a regular pixel layer):
- Pixel-Based Edits: Tools like the Brush tool, Eraser tool, or Clone Stamp tool directly manipulate pixels. These tools cannot be applied directly to a Smart Object. You’ll need to rasterize the layer first (right-click layer > “Rasterize Layer”).
- File Size Management: Smart Objects retain all original image data, which can result in larger file sizes for your PSD document. If you’ve finalized all transformations and pixel edits, rasterizing can help reduce the overall file size, which might be beneficial for sharing or archival purposes, especially for large Image Collections.
Choosing between leaving an image as a Smart Object or rasterizing it depends on your current and future editing needs. For initial placement and flexible manipulation, Smart Objects are always preferred, ensuring your contributions to Tophinhanhdep.com maintain the highest possible visual standard.
Maintaining and Enhancing Image Fidelity
The quality of your final output heavily relies on the quality of your source images. Tophinhanhdep.com emphasizes the use of High Resolution imagery, and this principle starts at the very beginning of your Photoshop workflow.
- Start with High-Resolution Sources: Always try to use images with the highest possible resolution and minimal compression. Photoshop is excellent for refining images, but it has limitations when it comes to magically enhancing the quality of inherently low-resolution or heavily compressed images. If a low-res image is unavoidable, consider using advanced Image Tools like AI Upscalers before importing it into Photoshop to get the best possible starting point.
- Select Compatible Imagery for Composites: When integrating multiple images for Photo Manipulation or creating complex Visual Design scenes, pay close attention to the source images’ tones, hues, and lighting conditions. Attempting to blend a daytime shot into a nighttime background, or an image with harsh shadows into a soft-light scene, will inevitably look unrealistic. Thoughtful selection ensures a more seamless and believable composite, whether for Nature backgrounds or Aesthetic photo art.
- Master Proportional Resizing: Distorting an image by stretching or squishing it is a common pitfall. Always maintain the aspect ratio when resizing.
- Hold Shift: When using the Free Transform tool (Ctrl/Cmd + T on Windows, Cmd + T on Mac), click and drag any corner handle while holding down the Shift key. This constrains the proportions.
- Ratio Lock: In the options bar at the top (when Free Transform is active), click the chain-link icon between the width (W) and height (H) fields to lock the aspect ratio. Then, you can adjust either W or H, and the other dimension will automatically update proportionally.
By adhering to these principles of image fidelity, every image you import and manipulate will contribute to the stunning visual quality Tophinhanhdep.com is known for, be it in Thematic Collections or individual Beautiful Photography pieces.
Advanced Applications and Creative Techniques
Once you’re comfortable with the various methods of adding images and the power of Smart Objects, you can unlock a vast array of advanced applications and Creative Ideas within Photoshop. This section focuses on transforming images to build compelling Backgrounds and leveraging these techniques for intricate Digital Art and Visual Design projects, expanding the scope of what you can create for Tophinhanhdep.com.
Changing Backgrounds and Building Compositions
One of Photoshop’s most sought-after capabilities is the ability to change or add backgrounds, a core skill for professional Photo Manipulation and creating bespoke Wallpapers. This technique often involves combining multiple image insertion methods with selection and layering.
Steps to Add or Change a Background:
- Prepare Your Foreground Image: Open your main subject image (the one whose background you want to change). If it’s a “Background” layer, double-click it to convert it into an editable layer.
- Separate Foreground from Background: Carefully select and isolate your foreground subject from its original background. Tools like the Quick Selection tool, Magic Wand tool, Pen tool, or “Select Subject” (in newer versions) are excellent for this. Once selected, you can copy the subject to a new layer (Ctrl/Cmd + J) or refine the selection with a layer mask for non-destructive removal.
- Resize Your Canvas (if needed): If your new background image is larger or has different dimensions than your current canvas, you might need to expand your canvas to accommodate it. Press Ctrl + Alt + C (Windows) or Option + Cmd + C (Mac) to open the “Canvas Size” dialogue.
- To precisely set new dimensions, uncheck “Relative” and enter your desired width and height.
- To expand from current dimensions, check “Relative” and enter the desired additional pixels for width and height. Use the anchor point grid to determine which direction the canvas expands.
- Insert Your New Background:
- Image Background: Use Drag-and-Drop or File > Place Embedded… to bring your desired background image into the document. It will likely appear as a new layer above your foreground subject.
- Solid Color Background: Go to Layer > New Fill Layer > Solid Color… Name the layer (e.g., “New Background Color”) and choose your desired hue.
- Adjust Background and Layer Order:
- Resize Background: If using an image, use the Free Transform tool (Ctrl/Cmd + T) to scale and position the background to fit your canvas. Remember to maintain proportions by holding Shift or using the ratio lock.
- Rearrange Layers: In the Layers panel, click and drag your new background layer below your foreground subject layer. This places your subject on top of the new background.
- Refine and Blend: Once the background is in place, you can further refine the edges of your foreground subject, adjust colors, lighting, and apply effects to ensure a seamless blend, achieving professional-grade Photo Manipulation for stunning Backgrounds on Tophinhanhdep.com.
Leveraging Images for Digital Art and Thematic Collections
The ability to fluidly add and manipulate images is the cornerstone of Graphic Design and Digital Art. It allows artists to compose intricate scenes, integrate diverse elements, and realize complex Creative Ideas.
- Building Digital Art Composites: Digital artists frequently layer dozens or even hundreds of images, textures, and graphic elements to construct fantastical worlds or intricate abstract compositions. Each element is carefully added, scaled, masked, and blended using the techniques described, contributing to Tophinhanhdep.com’s diverse Abstract and Visual Design galleries.
- Creating Mood Boards and Thematic Collections: Designers use image insertion to quickly assemble Mood Boards that convey a visual direction or theme. By gathering various images—from Nature photography and Aesthetic shots to color palettes and typographic examples—they build a visual narrative. This process is fundamental to curating Thematic Collections and exploring Trending Styles for Image Inspiration & Collections on platforms like Tophinhanhdep.com.
- Applying Diverse Editing Styles: Once images are imported, the real magic of Photoshop’s Editing Styles comes into play. From cinematic color grading to vintage filters, or advanced retouching for Beautiful Photography, every style can be applied to individual layers or across a composite, transforming the raw imported images into cohesive artistic statements ready for sharing on Tophinhanhdep.com.
The versatility of image integration empowers creators to move beyond simple photo enhancements to creating immersive Digital Art, unique Wallpapers, and visually compelling Image Collections that resonate with specific moods, like Sad/Emotional narratives or uplifting natural beauty.
Conclusion: Unleashing Your Creative Potential with Photoshop on Tophinhanhdep.com
Mastering how to add images in Photoshop is more than just a technical skill; it’s the gateway to unlocking boundless creative potential. Whether you’re opening a single High Resolution photograph for retouching, dragging multiple Stock Photos to construct a vibrant Aesthetic collage, or precisely placing elements for a complex Graphic Design project, the methods discussed – from opening new documents and seamless drag-and-drop to precision-oriented “Place Embedded” and “Place Linked” – form the bedrock of any successful Photoshop endeavor.
The understanding of Smart Objects is paramount in today’s digital landscape, ensuring your valuable Digital Photography retains its integrity and High Resolution quality throughout countless transformations. By prioritizing quality, maintaining aspect ratios, and thoughtfully selecting your source imagery, you lay the foundation for truly remarkable Visual Design and Photo Manipulation. From transforming mundane backgrounds into dynamic Wallpapers to building intricate Abstract art and Thematic Collections, Photoshop provides the tools, and Tophinhanhdep.com provides the inspiration.
As you embark on your creative journey, remember that efficiency is key. Just as Tophinhanhdep.com offers various Image Tools like Compressors and Optimizers, external devices like a TourBox creative console can further streamline your Photoshop workflow. Its customizable dials and buttons can map to frequent commands, allowing you to focus more on your artistry and less on repetitive clicks, making complex edits for Beautiful Photography or Creative Ideas more intuitive.
Explore these techniques, experiment with different Editing Styles, and let your imagination soar. Tophinhanhdep.com is your ultimate resource for Image Inspiration & Collections, Trending Styles, and High Resolution assets to fuel your artistic endeavors. Start integrating, start creating, and let your visual stories unfold!