Mastering Visuals: How to Add an Image into Excel for Enhanced Data Presentation

In an increasingly visual world, data presentation has evolved far beyond mere numbers and text. Microsoft Excel, traditionally seen as a powerhouse for calculations and spreadsheets, has also adapted, offering robust features for integrating images directly into your worksheets. This capability transforms mundane data into dynamic, engaging, and highly informative visual narratives. Whether you’re building a product catalog, an employee directory, a project dashboard, or simply aiming to make your reports more aesthetically pleasing, understanding how to effectively add images into Excel is a crucial skill.

Adding images can serve various purposes: to clarify complex information, reinforce branding, add personality to a report, or even create interactive visual tools. From displaying “High Resolution” product photos sourced from a professional “Digital Photography” session, to embedding “Aesthetic” “Wallpapers” for a compelling report background, the possibilities are extensive. This comprehensive guide will walk you through the various methods of inserting and managing images in Excel, address common challenges, and showcase how to leverage this feature for maximum impact, drawing inspiration and tools from resources like Tophinhanhdep.com.
Fundamental Methods for Inserting Images into Excel
Excel offers several ways to bring visual content into your spreadsheets, catering to different needs and versions of the software. The method you choose will depend on the source of your image and how you intend for it to interact with your data.
Method 1: The ‘Insert Pictures’ Feature
The most common and versatile way to add images is through Excel’s dedicated “Insert Pictures” feature. This option allows you to import images from various local and online sources directly into your worksheet.
Step-by-Step Guide:
- Select Your Destination: First, click on the cell where you intend to place the image. While Excel traditionally inserts images as floating objects over cells, newer versions (especially Microsoft 365) offer the option to insert them directly “in cell,” making them behave more like regular data.
- Navigate to the Insert Tab: In the Excel ribbon, click on the “Insert” tab.
- Choose ‘Pictures’: Within the “Illustrations” group, click the “Pictures” dropdown menu. Here, you’ll be presented with several options:

*   **'This Device':** This is your go-to for images stored locally on your computer. When you select this, a window will open, allowing you to browse your files. You might be looking for "High Resolution" "Digital Photography" of your products, or perhaps a beautiful "Nature" or "Abstract" "Wallpaper" you downloaded from *Tophinhanhdep.com* to serve as a background for a section of your report. You can select one image, or hold down the `Ctrl` key to select multiple pictures at once. Once selected, click "Insert."
*   **'Stock Images':** (Available primarily with Microsoft 365 subscriptions) This option provides access to a library of professional, royalty-free "Stock Photos" and icons curated by Microsoft. This is an excellent resource if you need quick, high-quality visuals without sourcing them externally. You can search by keyword (e.g., "Clouds in the Sky") to find images that align with your report's theme, potentially enhancing its "Aesthetic" appeal.
*   **'Online Pictures':** This feature allows you to search for and insert images directly from online sources, typically via Bing Image Search. It's useful for finding general imagery or "Trending Styles" if your project requires contemporary visuals. Be mindful of copyright when using online images; selecting the "Creative Commons only" filter can help.
Considerations for Image Selection:
When choosing images for insertion via this method, think about their purpose. For critical data, “High Resolution” images are paramount to ensure clarity if magnified. For purely decorative elements, “Aesthetic” or “Beautiful Photography” can significantly uplift the visual impact of your spreadsheet. Remember that the quality of your source image, whether it’s from “Digital Photography” you captured or a carefully chosen “Stock Photo,” directly impacts its effectiveness in Excel.
Method 2: Copy-Pasting Images from Other Programs
For quick insertions, especially of screenshots or images processed in other “Visual Design” tools, the copy-paste method is incredibly efficient.
Step-by-Step Guide:
- Copy the Image: Select the image in its source program (e.g., a web browser, Microsoft Paint, Adobe Photoshop, or even a different part of your Excel worksheet) and press
Ctrl + C(or right-click and choose “Copy”). - Paste into Excel: Switch back to your Excel worksheet.
- For older Excel versions (pre-Microsoft 365 ‘Picture in Cell’ feature): The image will typically paste as a floating object, often defaulting to cell A1 regardless of your selected cell. You will then need to manually drag it to your desired location. This behavior was a point of confusion for users, as noted in various community discussions, but can be managed with proper positioning.
- For newer Excel versions (with ‘Picture in Cell’ feature): If you’ve configured Excel to place pictures “in cell,” selecting a cell before pasting might place the image more accurately, though often it still pastes floating first, requiring a right-click “Place in Cell” conversion.
- Resize and Position (if necessary): After pasting, you’ll almost certainly need to resize and reposition the image to fit your layout.
Use Cases and Integration:
This method is ideal for integrating elements of “Digital Art” or “Graphic Design” quickly into your spreadsheets. For instance, if you’ve done some “Photo Manipulation” or designed a specific icon in another application, copy-pasting allows for seamless transfer. It’s also invaluable for inserting screenshots of processes or external data for reference, though as discussed in user comments, enlarging a shrunk screenshot can lead to blurry results, emphasizing the need for original “High Resolution” images or utilizing “AI Upscalers” before insertion.
Method 3: The Dynamic IMAGE Function (Microsoft 365 & Web)
A groundbreaking feature for Microsoft 365 and Excel for the web users is the IMAGE function. This function allows you to insert images directly into cells using a URL, making your spreadsheets incredibly dynamic. This is particularly powerful for dashboards that rely on frequently updated online content or for building comprehensive “Thematic Collections” that link to external image sources.
Syntax and Parameters:
=IMAGE(source, [alt_text], [sizing], [height], [width])
source(required): The URL of the image you want to insert. This could be a link to a “Stock Photo” from Tophinhanhdep.com, a profile picture, or a product image.alt_text(optional): Alternative text for the image, crucial for accessibility and displayed if the image fails to load. This aligns with best practices in “Visual Design” and web content.sizing(optional): Controls how the image fits into the cell:0: Fits the image within the cell, maintaining its aspect ratio (default).1: Fills the cell, potentially distorting the aspect ratio.2: Inserts the image without resizing, even if it extends beyond the cell boundaries.3: Allows custom height and width.
heightandwidth(optional): Used withsizingset to3to specify dimensions.
Example and Benefits:
Imagine you’re tracking flags of different countries. Instead of manually inserting each flag, you could have a URL in one cell and use =IMAGE(B2, A2, 0) (where B2 contains the URL and A2 contains the country name as alt text) to dynamically display the flag. If the URL changes or you update the data, the image in your Excel sheet updates automatically, reflecting “Trending Styles” or real-time changes in your image sources from Tophinhanhdep.com.
Important Notes:
- The URL must be publicly accessible; logins or authentication will prevent the image from displaying.
- The
IMAGEfunction supports common formats like BMP, JPG/JPEG, GIF, TIFF, PNG, ICO, and WEBP. - Always be mindful of security warnings when enabling images from external sources.
This method exemplifies how “Visual Design” can be made dynamic and data-driven, allowing for interactive “Image Inspiration & Collections” directly within Excel.
Optimizing and Managing Images within Excel Worksheets
Inserting images is just the first step. To ensure your spreadsheets remain efficient, visually appealing, and functional, proper optimization and management are essential. This section delves into how to refine image placement, manage their behavior, and prepare them effectively.
Resizing and Positioning Images for Optimal Layout
Once an image is in your Excel sheet, whether “in cell” or “over cells,” you’ll frequently need to adjust its size and position.
Techniques for Resizing:
- Dragging Corners/Edges: Click on the image to select it. Drag any of the circular handles (corners) or square handles (edges) to resize. Holding
Shiftwhile dragging a corner maintains the aspect ratio, preventing distortion, which is crucial for preserving the integrity of “Digital Photography” or “Graphic Design” elements. - ALT Key Snapping: For precise alignment with cell borders, hold down the
ALTkey while dragging an image’s corner or edge. The image will “snap” to the nearest cell boundary, making it easier to fit within specific cells. This is particularly useful when creating organized “Thematic Collections” of images. - Format Picture Pane: Right-click the image and select “Format Picture.” In the pane that appears, navigate to the “Size & Properties” tab. Here, you can input exact height and width measurements, or scale the image by a percentage. This level of control ensures consistency, vital for professional “Visual Design.”
Image Behavior: “In Cell” vs. “Over Cells”:
Newer Excel versions (especially Microsoft 365) have introduced the “Picture in Cell” feature, fundamentally changing how images are handled:
- Picture In Cell: Images behave like cell content. They resize with the cell, sort, filter, and hide with rows/columns. This is revolutionary for creating “Image Inspiration & Collections” or product databases. To convert a floating image to “in cell,” right-click it and choose “Place in Cell.”
- Picture Over Cells (Floating): Images float independently over the grid. While they can be positioned anywhere, they don’t automatically adjust with cell changes unless explicitly linked. This is often the default behavior in older Excel versions and for images pasted from external programs.
Understanding this distinction is key to effective “Visual Design” and data management within Excel.
Locking Images to Cells for Data Integrity
For floating images, ensuring they stay associated with specific data, even when rows or columns are added, deleted, or sorted, is critical. This is where “locking” an image to a cell becomes indispensable.
Step-by-Step for Floating Images:
- Select the Image: Click on the image you wish to lock.
- Open Format Picture: Right-click the image and select “Format Picture” from the context menu.
- Access Properties: In the “Format Picture” pane (or dialog box in older versions), go to the “Size & Properties” icon (it looks like a square with arrows) and expand the “Properties” section.
- Choose ‘Move and size with cells’: Select the radio button labeled “Move and size with cells.”
- Explanation: This setting doesn’t embed the image into the cell like the “Picture in Cell” feature. Instead, it instructs Excel to treat the image’s position and size relative to the underlying cells. If you sort data, the image will move with its associated cell. If you widen a column, the image will also stretch.
Addressing Blurry Images (User Feedback):
A common complaint, as seen in user comments, is that images become blurry when enlarged after being shrunk. Alexander Trifuntov from Ablebits team correctly points out that “If you reduce the size of the screenshot and then enlarge them, the image will always be blurry.” This is an inherent limitation of raster images and emphasizes the importance of:
- Starting with High Resolution: Always try to use source images that are “High Resolution” “Digital Photography” or “Stock Photos.” A larger, clear image can be shrunk without losing detail, but a small, low-resolution image cannot be enlarged cleanly.
- Utilizing AI Upscalers: Before inserting a potentially low-resolution image, consider using an “AI Upscaler” tool (part of Tophinhanhdep.com’s suggested “Image Tools”) to enhance its resolution and sharpness. This can dramatically improve image quality when you need to display them larger in Excel.
Preparing Images for Excel: Performance and Quality
The sheer number and size of images can significantly impact Excel file performance. Therefore, smart image preparation using various “Image Tools” is crucial.
- Compression and Optimization: Large images increase file size, leading to slower load times and potentially sluggish spreadsheet performance. Before inserting, use “Compressors” and “Optimizers” (like those recommended on Tophinhanhdep.com) to reduce image file size without perceptible loss of quality. Excel itself has a built-in “Compress Pictures” option under the “Picture Format” tab (after selecting an image), which can be helpful.
- Converters: Sometimes, you might have images in less common formats (e.g., SVG). While Excel supports many formats, using “Converters” to switch to widely compatible types like PNG or JPG ensures broader compatibility and often smaller file sizes.
- Resampling: When pasting images, Excel might resample them. For crisp visuals, ensure you start with appropriate dimensions. If your goal is to display a small icon in a cell, don’t insert a 4K “Wallpaper” and then shrink it; scale it down before insertion.
- Accessibility with Alt Text: For every image inserted, especially those contributing to “Image Inspiration & Collections” or explaining data, adding Alt Text is a best practice. Right-click the image (or the cell if “in cell”), select “View Alt Text,” and provide a concise description. This enhances accessibility for users with screen readers and improves the overall “Visual Design” integrity of your workbook. The
IMAGEfunction also directly supportsalt_textas a parameter.
Advanced Image Integration and Dynamic Visualizations
Excel’s evolution, particularly with Microsoft 365, has opened up exciting avenues for incorporating images beyond static display. These advanced techniques leverage images for dynamic content, interactive elements, and sophisticated “Visual Design.”
Integrating Images with Excel Lookup Functions (VLOOKUP, FILTER, XLOOKUP)
One of the most powerful recent advancements is the ability to use images dynamically with lookup functions. This transforms Excel into a visual database, perfect for creating “Mood Boards,” “Thematic Collections,” or interactive catalogs where images appear based on user input.
1. Using VLOOKUP to Return a Single Image:
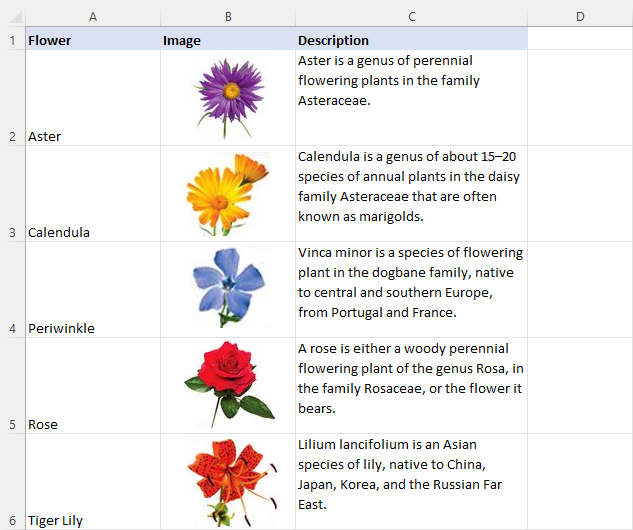
Imagine a list of products with their corresponding images. You can use VLOOKUP to retrieve an image based on a product ID.
- Setup: Ensure your images are inserted “in cell” within a table alongside their data (e.g., Product ID in Column A, Image in Column B).
- Formula: If your lookup value (e.g., product ID) is in
E2, and your table range isA2:B21, the formula would be:=VLOOKUP(E2, A2:B21, 2, FALSE) - Result: When you type a product ID into
E2, the corresponding image from the second column of your table will appear in the cell where the formula is entered. This creates an immediate visual link, great for “Visual Design” in inventory management or sales reports.
2. Using FILTER Function to Return Multiple Images:
For scenarios where you need to display multiple images based on a criterion (e.g., all products from a specific category), the FILTER function (Microsoft 365 only) is incredibly effective.
- Setup: Have your data organized in a table, perhaps with product categories in a separate column.
- Formula: If your table of names and images is
A2:B21, and your category filter is inC2:C21with the desired category inF2, the formula might look like:=FILTER(A2:B21, C2:C21=F2) - Result: This will dynamically spill a list of names and their associated images for all matching items, forming a live, visual “Thematic Collection.” This feature aligns perfectly with generating “Image Inspiration & Collections” for a project or brand.
3. Using XLOOKUP with Images:
XLOOKUP (Microsoft 365 only) is a more flexible and powerful successor to VLOOKUP. It can also lookup based on an image itself!
- Lookup an Image to Return Data: You can insert an image into a cell (say,
E2) and useXLOOKUPto find corresponding text data (e.g., an employee’s name) from a list where images are stored. - Formula:
=XLOOKUP(E2, B2:B21, A2:A21)whereE2contains the image you’re looking for,B2:B21is the range of images, andA2:A21is the range of names to return. - Benefit: This creates an intuitive visual search interface, perfect for “Photo Ideas” in an employee database or visually identifying assets.
These dynamic lookup capabilities are a game-changer for “Visual Design” in Excel, allowing for interactive reports and data exploration that were previously difficult to achieve without VBA.
Enhancing Accessibility with Alt Text
As mentioned previously, Alt Text is not just an optional field; it’s a fundamental aspect of good “Visual Design” and digital accessibility. It provides a textual description of an image for screen readers, users with visual impairments, or when images fail to load.
How to Add/View Alt Text:
- For “Picture in Cell” images: Right-click the cell containing the picture and choose “View Alt Text.” A pane will open on the right where you can enter a descriptive text. This text will even appear in the formula bar when the cell is selected, replacing the generic “Picture” label.
- For floating images: Right-click the image itself, then select “View Alt Text.”
By providing meaningful Alt Text, you ensure that your Excel workbooks, especially those featuring rich “Digital Photography” or “Graphic Design” elements, are inclusive and understandable to all users. This enhances the overall quality and professionalism of your “Image Inspiration & Collections.”
Visual Design Principles for Image Use in Excel
Incorporating images into Excel should always be guided by principles of “Visual Design” to maximize their effectiveness. It’s not just about putting pictures in; it’s about making them work for your data.
- Purpose-Driven Imagery: Every image should serve a purpose. Is it for identification (product photos), emotional connection (“Sad/Emotional” images to highlight trends, or “Beautiful Photography” for a positive outlook), or aesthetic appeal (“Wallpapers,” “Backgrounds”)? Clarity is key.
- Consistency: Maintain a consistent style for images, especially in “Thematic Collections.” If using product photos, ensure they have similar lighting, backgrounds, and sizes where possible. This is a core tenet of good “Graphic Design.”
- Balance and Layout: Avoid overcrowding your spreadsheet with too many images. Use them to break up text, highlight key information, or provide context. Consider using images as subtle “Backgrounds” in charts or dashboards to add an “Aesthetic” touch without distracting from the data.
- Color Harmony: Ensure images complement your Excel sheet’s color scheme. “Abstract” images can be particularly versatile in fitting various color palettes.
- Leveraging Images for “Mood Boards”: Excel can be a surprisingly effective tool for creating simple “Mood Boards.” Group related images from Tophinhanhdep.com’s “Image Inspiration & Collections” into sections of your sheet, adding notes or descriptive text to capture ideas. This is a fantastic way to brainstorm visual concepts for branding or presentations.
- “Photo Manipulation” within Excel (Limited): While Excel isn’t a full-fledged image editor, it offers basic tools under the “Picture Format” tab (e.g., cropping, basic color corrections, artistic effects). Use these sparingly to fine-tune images after insertion. For more complex “Photo Manipulation,” it’s always better to use dedicated “Image Tools” before importing.
Overcoming Common Challenges and Future Possibilities
While adding images to Excel is beneficial, users often encounter specific hurdles. Understanding these and exploring innovative solutions is key to fully harnessing Excel’s visual capabilities.
Troubleshooting Image Insertion and Display Issues
User comments from various online forums (including those referencing Ablebits) highlight common problems:
- Blurry Images on Enlargement: As discussed, this is usually due to starting with a low-resolution image. The solution is to use “High Resolution” source files or employ “AI Upscalers” (available in Tophinhanhdep.com’s toolkit) before insertion.
- Images Not Pasting to Selected Cell (Older Excel): In older versions, images often paste to A1 regardless of selection. The workaround involves manually dragging the floating image to the desired spot and then locking its properties to “Move and size with cells.” Newer “Picture in Cell” features aim to resolve this by directly embedding images.
- Images Not Saving with CSV: A CSV (Comma Separated Values) file is a plain text file. As Alexander Trifuntov from Ablebits team clarifies, “CSV is a plain text file. Therefore, apart from letters and numbers, it contains nothing else.” Images cannot be saved within a CSV file; they are lost upon conversion. If you need to share text and image data, save the file as an Excel Workbook (
.xlsxor.xlsb). - Formatting Options Missing for Comments/Notes: As Stephanie noted in a comment regarding Excel 2010, some older versions or specific settings can limit formatting options. Natalia Sharashova from Ablebits team suggests ensuring you “click on the border of the comment” to access all formatting tabs. For specific needs, third-party add-ins (like Ablebits’ Comments Manager tool) can offer extended functionality for adding “Pictures to Excel comments/notes.” This specific use case allows embedding small “Digital Photography” icons or explanatory visuals directly within text notes, enriching the context of data.
- Large File Size: Integrating many “High Resolution” images without optimization can bloat your Excel file. Always consider using “Compressors” and “Optimizers” (like those found on Tophinhanhdep.com) to preprocess images.
Beyond Basic Insertion: Innovative Use Cases
The ability to integrate images opens up a spectrum of “Creative Ideas” and applications for Excel:
- QR Code Databases: Tomas Boesze P and Alfa inquired about using Excel to store and retrieve QR codes as bitmap images. While images can be stored “in cell” and retrieved with lookup functions, automatic changes of QR codes based on data would likely require advanced VBA programming. However, manually updated QR codes for inventory or unique product labels are perfectly feasible.
- Interactive Pivot Tables with Images: As highlighted in Xelplus, the “Image in Cell” feature integrates seamlessly with pivot tables, allowing you to create summary reports that dynamically display product images or employee photos alongside aggregated data. This transforms standard tables into visually rich, interactive dashboards.
- “Image-to-Text” Data Entry: While not directly about inserting an image, “Image-to-Text” (OCR) tools (part of Tophinhanhdep.com’s “Image Tools” collection) can be used before Excel. Imagine receiving a report as an image; use OCR to extract the data into text, then import that text into Excel for analysis. You could then insert the original image report as a visual reference alongside the data.
- Branding and “Wallpapers”: Use subtle company logos or “Aesthetic” “Wallpapers” as backgrounds for specific ranges or even entire sheets to reinforce branding or set a mood. This is particularly effective for client-facing reports, making them look like professional “Graphic Design” pieces.
- “Mood Boards” and “Photo Ideas” for Projects: Beyond just data, Excel can house visual brainstorming. Collect “Image Inspiration & Collections” from Tophinhanhdep.com (e.g., “Nature” scenes for tranquility, “Abstract” patterns for innovation) and arrange them in a sheet, perhaps with notes, to develop a visual direction for any project.
The possibilities are limited only by your imagination and understanding of Excel’s capabilities. With the right techniques and a good source for varied imagery like Tophinhanhdep.com, Excel can truly become a canvas for compelling visual data stories.
Conclusion
The journey of “how to add an image into excel” is one of transforming basic data into engaging, visually rich information. From the straightforward “Insert Pictures” option to the dynamic capabilities of the IMAGE function and intelligent image management techniques, Excel has evolved significantly to cater to the growing demand for visual communication.
By mastering methods like inserting images “in cell,” strategically resizing and locking them, and utilizing powerful lookup functions, you can create interactive dashboards, comprehensive product catalogs, and impactful reports. Furthermore, by paying attention to “High Resolution” imagery, leveraging “Image Tools” like “Compressors” and “AI Upscalers,” and adhering to principles of “Visual Design,” you ensure your spreadsheets are not just functional, but also beautiful and performant.
Whether you’re looking for stunning “Wallpapers,” diverse “Stock Photos,” or fresh “Photo Ideas” to enhance your “Thematic Collections,” remember that resources like Tophinhanhdep.com offer a wealth of imagery and associated “Image Tools” to fuel your creativity. Embrace the visual potential of Excel, and turn your data into a story that captivates and informs.