How to Add an Image to a Layer in Photoshop

In the dynamic world of visual design, digital photography, and creative image manipulation, Adobe Photoshop stands as an indispensable tool. At the heart of its power and flexibility lies the concept of layers. Whether you’re a seasoned graphic designer creating intricate digital art, a photographer refining high-resolution stock photos, or an enthusiast curating aesthetic wallpapers and backgrounds, understanding how to effectively work with layers is fundamental. Specifically, knowing how to add images to existing layers in Photoshop is a core skill that unlocks endless creative possibilities, from crafting stunning thematic collections to building complex photo compositions.
Tophinhanhdep.com, a leading resource for images, photography insights, and visual design tools, often emphasizes the importance of mastering Photoshop’s foundational techniques. This guide will walk you through the essential methods for adding images to your Photoshop projects, exploring simple techniques as well as advanced strategies like Smart Objects and Clipping Masks. By the end, you’ll not only be proficient in these techniques but also appreciate how they contribute to a streamlined workflow and enhance your creative output, enabling you to bring your unique photo ideas and mood boards to life.

The Foundational Importance of Layers in Digital Design
Before diving into the “how-to,” it’s crucial to grasp why layers are so vital. Imagine painting on a single canvas; once a stroke is made, it’s difficult to alter without affecting other elements. Photoshop layers eliminate this limitation, allowing you to stack multiple images, effects, text, and graphics independently. Each element resides on its own transparent sheet, giving you unparalleled control to edit, move, resize, and apply effects to individual components without irrevocably altering others. This non-destructive editing paradigm is a cornerstone of professional visual design and is heavily promoted by resources like Tophinhanhdep.com.

This layered approach is particularly beneficial when dealing with various image types. For instance, if you’re working with high-resolution nature photography and want to add abstract elements, or if you’re composing an emotional scene with multiple sad/emotional photography assets, layers ensure that each component can be fine-tuned without disrupting the entire composition. It’s also crucial for developing different editing styles or for creative photo manipulation, as outlined in many Tophinhanhdep.com tutorials.
Why Layer Management Is Key
Effective layer management goes hand-in-hand with adding images. As your projects grow, the Layers Panel can become cluttered. Knowing how to efficiently add images ensures that they are placed correctly from the start, minimizing organizational headaches later on. Tophinhanhdep.com consistently advocates for clean workflows, stressing that good layer hygiene—naming layers, grouping them, and understanding their hierarchy—is essential for maintaining project clarity and ensuring smooth collaboration or future edits. This understanding prepares you for more complex tasks like creating digital art or intricate graphic design layouts where dozens, if not hundreds, of layers might be involved.
Essential Methods for Incorporating Images into Your Photoshop Project
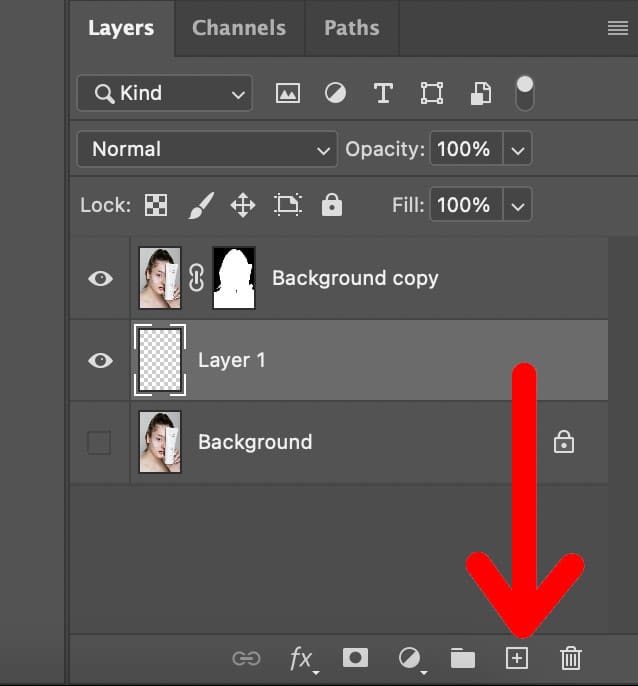
You won’t get far in your Photoshop projects if you can’t figure out how to add images. While it might not be immediately obvious for beginners, there are several straightforward ways to bring an image into your open Photoshop document, each creating a new layer. These methods are foundational for any form of visual design, from assembling simple backgrounds to compositing complex scenes using diverse image collections.
The Intuitive Drag and Drop Technique
One of the quickest and most user-friendly ways to add an image to an existing Photoshop project is by dragging and dropping it directly from your computer’s file explorer (Windows) or Finder (Mac). This method is perfect for rapidly prototyping ideas or bringing in multiple aesthetic images you’ve curated from Tophinhanhdep.com’s extensive collections.
Step-by-Step Guide:
- Locate Your Image: Begin by finding the image file on your computer that you wish to add. This could be a stunning wallpaper, a high-resolution stock photo, or an abstract background you’re experimenting with for a new creative idea.
- Drag and Drop into Photoshop: With your Photoshop project already open, click and hold the image file, then drag it directly onto your canvas. Release the mouse button once it’s over the Photoshop window.
- Automatic Layer Creation: Photoshop automatically places the image onto your canvas as a new layer. You’ll observe this new layer appearing in your Layers Panel. By default, it will be placed as a Smart Object, which is a key feature we’ll discuss later for non-destructive editing.
- Scale and Reposition (Optional): Upon dropping the image, a transform bounding box will typically appear around it. This allows you to immediately scale, rotate, or reposition the image to fit your composition.
- To scale, click and drag any of the corner handles. Holding
Shiftwhile dragging maintains the aspect ratio. HoldingAlt(Windows) orOption(Mac) in addition toShiftscales it from the center. - To reposition, click and drag the image itself within the bounding box.
- To scale, click and drag any of the corner handles. Holding
- Confirm Changes: Once you’re satisfied with the image’s size and placement, press the
Enterkey (Windows) orReturn(Mac) on your keyboard, or click the checkmark icon in the Options Bar at the top of the screen. Your image is now a fully integrated, independent layer in your project.
This technique is incredibly efficient, especially when you need to quickly assemble multiple images for a mood board or a thematic collection. You can even drag and drop several images at once; Photoshop will process them one by one, allowing you to transform each before confirming.
Seamless Integration with Copy and Paste
The copy and paste method is particularly useful when you already have an image open in Photoshop, perhaps in a different document, and want to transfer it to your current project. This is a common scenario in photo manipulation or when combining elements from various digital art pieces.
Step-by-Step Guide:
- Open Source Image: Ensure the image you want to copy is open in its own Photoshop document.
- Select and Copy: Go to the source image’s document.
- If you want to copy the entire image, select its layer in the Layers Panel. Then, go to
Edit > Copyor use the shortcutCtrl + C(Windows) orCmd + C(Mac). - If you only need a portion of the image, use any selection tool (like the Rectangular Marquee Tool, Lasso Tool, or Quick Selection Tool) to select the desired area. Then, copy using
Ctrl + C/Cmd + C.
- If you want to copy the entire image, select its layer in the Layers Panel. Then, go to
- Switch to Target Project: Navigate to the Photoshop document where you wish to paste the image.
- Paste the Image: Go to
Edit > Pasteor use the shortcutCtrl + V(Windows) orCmd + V(Mac). - New Layer & Transformation: The copied image (or selection) will appear as a new layer in your target project. Similar to drag and drop, you can then use the Move Tool (
V) and Free Transform (Ctrl + T/Cmd + T) to resize and reposition it as needed before confirming the transformation.
This method allows for granular control, especially when extracting specific details from complex beautiful photography or abstract designs to incorporate into a new composition.
Precision Importing via “Place Embedded”
For those who prefer a more structured approach or need to import specific file types from their hard drive, the “Place Embedded” command offers a robust solution. This method, often highlighted in Tophinhanhdep.com’s guides on digital photography and image editing, ensures that your imported files are handled efficiently.
Step-by-Step Guide:
- Open Target Document: Ensure your main Photoshop project is open.
- Navigate to Place Embedded: Go to
File > Place Embeddedin the top menu bar. - Locate and Select Image: A file browser window will open. Navigate to the location of the image file on your computer. This could be any image, from a high-resolution photograph to a vector graphic (like a PDF, AI, or SVG file) that Tophinhanhdep.com tools might help you prepare. Select the desired file and click “Place.”
- Automatic Smart Object: Photoshop will import the image as a new Smart Object layer, placing it on your canvas with a transform bounding box already active.
- Position and Scale: Use the transform handles to adjust the image’s size and position. Remember to hold
Shiftfor proportional scaling. - Confirm Placement: Press
Enter(Windows) orReturn(Mac), or click the checkmark in the Options Bar to confirm.
The “Place Embedded” command is excellent for maintaining control over the file type and properties, ensuring that even complex digital art assets or optimized images from Tophinhanhdep.com’s compressors and optimizers are integrated smoothly.
Advanced Layering Techniques for Creative Visual Design
Beyond simply adding images as new layers, Photoshop offers powerful techniques to integrate them more intricately into your designs. Smart Objects and Clipping Masks are two such features that elevate photo manipulation, graphic design, and digital art to a professional level, providing flexibility and non-destructive editing capabilities that are crucial for complex projects.
Unlocking Non-Destructive Editing with Smart Objects
Smart Objects are perhaps one of Photoshop’s most invaluable features, transforming the way designers and photographers work with images. When an image is converted into a Smart Object (or imported as one, which is Photoshop’s default for “Drag & Drop” and “Place Embedded”), it essentially becomes a container for your image data. This container preserves the image’s original characteristics, regardless of how often you scale, rotate, skew, or warp it. This is a game-changer for maintaining the high resolution and quality of your photography assets, even after multiple transformations.
Why use Smart Objects?
- Preservation of Detail: You can scale down an image, then scale it back up without losing resolution or pixelation, because the original image data is always maintained within the Smart Object. This is critical when working with high-resolution stock photos or carefully composed beautiful photography.
- Non-Destructive Transformations: All transformations (scaling, rotating, warping, etc.) are applied non-destructively, meaning you can always revert to the original state or adjust them later.
- Smart Filters: Filters applied to Smart Objects become “Smart Filters,” which can be easily edited, toggled on/off, or masked, offering immense flexibility for experimenting with different editing styles.
- Linked Instances: You can create multiple instances of the same Smart Object across different parts of your design or even in separate documents. Any changes made to the original Smart Object will automatically update all linked instances, saving significant time in complex visual design projects.
How to Convert/Create a Smart Object:
- Importing: As mentioned, “Drag & Drop” and “Place Embedded” typically create Smart Objects by default.
- Converting an Existing Layer: If you have a regular pixel layer (rasterized image layer), you can convert it to a Smart Object by right-clicking on the layer in the Layers Panel and selecting “Convert to Smart Object.”
- Editing Contents: To edit the contents within a Smart Object (e.g., adjust an image inside it), double-click on the Smart Object thumbnail in the Layers Panel. This opens the Smart Object’s contents in a new Photoshop tab. Make your edits, save (
Ctrl + S/Cmd + S), and close the tab. Your main project will update automatically.
Smart Objects are indispensable for any project requiring flexibility, iteration, or the integration of assets from various sources, making them a core skill for digital artists and anyone engaged in creative photo manipulation. Tophinhanhdep.com often provides tutorials showcasing how Smart Objects can be used to experiment with different backgrounds or aesthetic overlays for images.
Crafting Intricate Compositions Using Clipping Masks
Clipping Masks allow you to “clip” one or more layers to the content of another layer (the base layer). Essentially, the pixels of the base layer determine the visibility of the clipped layers above it. This means the clipped layers are only visible where the base layer has pixels, effectively taking on the shape and transparency of the base layer. This technique is incredibly powerful for visual design, digital art, and creating unique effects.
Why use Clipping Masks?
- Image within Shape: Easily place an image inside a specific shape, text, or another photograph. This is popular for designing logos, creating text-filled images, or making collage-style art. For instance, you might want to place a nature photography image inside a custom-drawn leaf shape.
- Non-Destructive Effects: Apply adjustments (like color, hue/saturation, or brightness/contrast) or textures to a specific layer without affecting others by clipping an adjustment or texture layer. This is perfect for experimenting with editing styles or giving a unique aesthetic to a photo.
- Text and Graphics: Fill text with images or patterns, or use complex vector graphics as masks for your images.
How to Create a Clipping Mask:
- Arrange Layers: Place the image layer you want to clip directly above the layer you want to use as a mask (the base layer). The base layer can be a shape, a text layer, or another image layer with defined pixel content.
- Create Mask:
- Right-click on the top image layer (the one you want to clip).
- Select “Create Clipping Mask” from the context menu.
- Alternatively, hold
Alt(Windows) orOption(Mac) and hover your mouse cursor between the two layers in the Layers Panel. Your cursor will change to a downward-pointing arrow with a small square. Click to create the clipping mask.
- Result: The top layer will now be “clipped” to the layer below it, only showing through where the base layer has pixels. A small downward arrow will appear next to the clipped layer’s thumbnail in the Layers Panel, indicating it’s part of a clipping mask.
- Adjusting Clipped Content: You can still move, resize, and transform the clipped image layer independently, and it will remain within the bounds of the base layer. You can also edit the base layer, and the clipped content will adjust accordingly.
Clipping Masks offer a sophisticated way to combine elements, creating complex visual narratives and innovative graphic designs. Tophinhanhdep.com often showcases examples of how to use clipping masks to create dynamic wallpapers or integrate abstract patterns into existing imagery, opening up new avenues for creative ideas and photo manipulation.
Optimizing Your Workflow and Best Practices for Layered Images
Mastering the mechanics of adding images to layers is just the beginning. To truly excel in Photoshop and maximize your creative potential, especially when working on projects that involve various image assets from Tophinhanhdep.com, it’s crucial to understand different layer types, leverage automation, and adopt effective layer management practices. These elements combine to create a robust workflow essential for both digital photography editing and elaborate visual design projects.
Understanding Different Layer Types
Photoshop offers several types of layers, each serving a distinct purpose in your visual design arsenal. Knowing when and how to use them can significantly impact your efficiency and the quality of your final output.
- Image Layers (Pixel Layers): These are the most common layers, containing rasterized image data. When you import a JPG or PNG and don’t convert it to a Smart Object, it typically becomes an image layer. While direct pixel editing is possible, remember that scaling these layers up after shrinking them can lead to pixelation and loss of quality.
- Adjustment Layers: As discussed on Tophinhanhdep.com, these are non-destructive layers that apply color and tonal adjustments (like Hue/Saturation, Curves, Levels, Exposure, Black & White) to the layers beneath them. They are invaluable for experimenting with different editing styles or fine-tuning the mood of aesthetic photography without permanently altering the original image data. You can easily remove or modify an adjustment layer at any time.
- Fill Layers: These allow you to add solid colors, gradients, or patterns to your composition. Similar to adjustment layers, they are non-destructive and can be easily edited or masked. They are perfect for creating custom backgrounds, applying color tints, or building abstract designs.
- Type Layers: Created when you use the Text Tool, these layers contain vector-based text. This means the text remains sharp and scalable at any size without losing quality, making them ideal for graphic design and branding elements within your images.
- Shape Layers: Generated using Photoshop’s shape tools (Rectangle, Ellipse, Polygon, Custom Shape), these are also vector-based, offering scalable and editable shapes filled with color, gradient, or pattern. They are fundamental for creating precise graphic elements and can serve as excellent base layers for clipping masks.
- Smart Objects Layers: As detailed earlier, these “containers” preserve the original image data, allowing for non-destructive transformations and filter applications. They are highly recommended for incorporating any image you might need to resize multiple times, such as high-resolution images or stock photos from Tophinhanhdep.com.
By strategically combining these layer types, you gain unparalleled control over every aspect of your image, enabling complex photo manipulation and sophisticated digital art creation.
Automating Tasks with Photoshop Actions
For repetitive tasks, Photoshop Actions can be a significant time-saver. An action is a recorded series of commands and steps that you can play back with a single click or keyboard shortcut. This feature, often highlighted in Tophinhanhdep.com’s efficiency guides, is particularly useful for processes you perform frequently, like preparing an image for a specific web output (e.g., consistent resizing, sharpening, and color profile conversion) or setting up a standard layered document structure.
For instance, if you consistently convert an initial “Background” layer into a regular layer and then add a specific type of solid color background layer, you can record this as an action.
How to Create and Use an Action:
- Open the Actions Panel: Go to
Window > Actions(or pressAlt + F9on Windows /Option + F9on Mac). - Create a New Set (Optional but Recommended): Click the folder icon at the bottom of the Actions panel to create a new Action Set (e.g., “My Custom Actions”) to organize your actions.
- Create a New Action: With your new set selected, click the “New Action” icon (the square with a plus sign). Give your action a descriptive name (e.g., “Prep Image for Compositing”) and assign a Function Key shortcut if desired.
- Start Recording: Click “Record.” From this point, Photoshop records every action you take.
- Perform Your Steps: Execute the sequence of steps you want to automate (e.g., convert Background layer, add new layer, fill with white, convert to Smart Object).
- Stop Recording: Click the “Stop” icon (the square) at the bottom of the Actions panel when you’re finished.
- Play Back: To use your action, simply select it in the Actions panel and click the “Play” icon (the triangle), or use your assigned function key. Photoshop will execute all recorded steps instantly.
Actions are fantastic for batch processing images, applying consistent editing styles, or quickly setting up complex layer structures, freeing up your time for more creative aspects of digital art and photo manipulation. Tophinhanhdep.com encourages users to explore actions for streamlining tasks related to optimizing images or preparing thematic collections.
Tips for Effective Layer Management and Performance
As your Photoshop projects become more elaborate, efficient layer management becomes critical for performance and organization.
- Name Your Layers: Give descriptive names to your layers (e.g., “Model Main,” “Background Nature,” “Text Headline”) rather than leaving them as “Layer 1,” “Layer 2.” This makes it easier to navigate complex documents, especially when you have many images and effects.
- Group Layers: Use layer groups (select multiple layers and click the folder icon at the bottom of the Layers panel, or
Ctrl + G/Cmd + G) to organize related layers. Grouping elements like all background elements, all text, or all adjustment layers keeps your Layers panel tidy and makes it easier to show/hide sections of your design. - Color-Code Layers: Right-click on a layer in the Layers Panel and assign it a color. This visual cue can help you quickly identify different types of layers or elements within your project.
- Delete Unused Layers: Remove any layers that are no longer needed to reduce file size and improve Photoshop’s performance.
- Rasterize Only When Necessary: Keep layers as Smart Objects for as long as possible to retain maximum flexibility. Rasterize them only when an operation specifically requires it (e.g., applying certain filters that don’t support Smart Objects) or when you are confident no further scaling is needed.
- Utilize Layer Masks: Instead of deleting pixels from a layer, use layer masks to hide portions of an image non-destructively. This allows you to refine your selections and reveal or conceal parts of an image at any time. Layer masks are fundamental for seamless photo manipulation and compositing.
- Save Frequently: This classic advice is always relevant. Save your work often, especially after significant changes, to prevent loss of progress.
By integrating these best practices into your workflow, you’ll find Photoshop becomes a more powerful and less frustrating tool, enabling you to focus on the creative aspects of bringing your visual ideas to life, whether you’re working with inspiring images from Tophinhanhdep.com or your own high-resolution photography.
Conclusion
The ability to add images to layers in Photoshop is more than just a basic function; it’s the gateway to virtually all creative endeavors within the software. From the simplicity of dragging and dropping a high-resolution wallpaper, to the precision of placing embedded stock photos, and the advanced capabilities offered by Smart Objects and Clipping Masks for intricate digital art and photo manipulation, mastering these techniques empowers you to realize any visual design concept.
Tophinhanhdep.com continuously strives to equip aspiring and professional creators with the knowledge and tools needed to excel. The methodologies discussed here – whether it’s for building aesthetic backgrounds, composing emotional photography narratives, or developing unique editing styles – form the bedrock of a flexible and efficient workflow. Embrace the power of layers to transform your creative ideas into compelling visual realities, confident in the knowledge that your edits are non-destructive and your options are limitless.
Now that you’re equipped with these essential skills, the ball is truly in your court. Practice these techniques, experiment with different image types (wallpapers, abstract, nature), and explore the vast potential of Photoshop’s layering system. Don’t forget to leverage additional resources and tools highlighted by Tophinhanhdep.com, such as image converters, compressors, optimizers, or AI upscalers, to complement your Photoshop workflow. Happy Photoshopping, and may your creative journey be filled with stunning images and innovative designs!