How to Add Images in Adobe InDesign: A Comprehensive Guide to Visual Document Creation

Adobe InDesign stands as a cornerstone in the world of graphic design and desktop publishing, enabling designers, marketers, and content creators to craft visually rich and professionally polished documents. From breathtaking magazines and engaging brochures to intricate annual reports and dynamic digital publications, images are the lifeblood of compelling visual communication. Knowing how to add images in InDesign effectively is not just a technical skill; it’s a fundamental aspect of digital art, photo manipulation, and creative visual design.
At Tophinhanhdep.com, we understand the power of images—whether they are high-resolution photography, aesthetic wallpapers, abstract backgrounds, or evocative sad/emotional visuals. Integrating these diverse image types seamlessly into your InDesign projects requires both technical proficiency and an understanding of design principles. This guide will walk you through the essential methods of inserting images into your InDesign documents, offering advanced tips for optimization, text integration, and workflow efficiency, all while keeping Tophinhanhdep.com’s core focus on stunning visuals and practical image tools in mind.

Understanding InDesign’s Image Handling Philosophy
Before diving into the mechanics of image placement, it’s crucial to grasp InDesign’s underlying approach to graphics. Unlike some other software where images might be directly embedded, InDesign primarily works with a linked file system. This philosophical choice impacts performance, file size, and workflow, making it a key concept for any designer.
Frames: The Foundation of Image Placement
In InDesign, every image, illustration, or even text block resides within a “frame” or “container.” These frames are essentially placeholders that define the boundaries and properties of the content they hold. When you place an image, InDesign either creates a frame for you automatically or you can direct it to place the image within an existing, pre-designed frame.
These frames offer immense flexibility in visual design. You can reshape them, apply effects, and use them to crop portions of your images without altering the original file. This non-destructive editing approach is a hallmark of professional graphic design workflows and aligns perfectly with the need for versatile photo manipulation and creative ideas.

Linked vs. Embedded Images: Performance and Workflow
By default, when you add an image in InDesign, it creates a link to the original graphic file stored on your computer or network. The InDesign document itself only stores a preview of the image and its location on your system. This “linked graphic” approach offers several significant advantages, especially when working with high-resolution photography or large collections of images:
- Smaller File Sizes: Your InDesign document remains relatively small, as it’s not storing the entire image data. This improves application performance and makes sharing project files more manageable.
- Easy Updates: If you edit the original image in an external program like Adobe Photoshop (perhaps applying a new editing style or refining a beautiful nature shot), InDesign will automatically detect the change and prompt you to update the link, ensuring your document always reflects the latest version. This is invaluable for maintaining consistent visual design and digital art projects.
- Centralized Management: The Links panel in InDesign provides a comprehensive overview of all images used in your document, including their format, file size, and dimensions. This panel allows you to relink, update, or even replace images, offering robust image management tools that are essential for complex projects or thematic collections.
While linking is the default and generally recommended practice, InDesign does offer the option to embed images. Embedding copies the entire image data directly into the InDesign document, making the document self-contained. This can be useful for small projects or when sharing a final document where the recipient might not have access to the original linked files. However, it increases the InDesign document’s file size and makes external updates more cumbersome. For most professional visual design tasks, especially those involving multiple images or collaborative workflows, linking remains the superior choice.
Core Methods for Inserting Images
InDesign offers several intuitive ways to add images, catering to different workflows and preferences. Whether you prioritize speed or precise control, there’s a method that fits your needs.
The “Place” Command: Precision and Control
The File > Place command (or the keyboard shortcut Cmd + D on macOS / Ctrl + D on Windows) is the most versatile and commonly used method for inserting images. It offers granular control over how and where your images appear.
-
Initiating the Command:
- Open your InDesign document.
- Go to File > Place in the Control panel at the top of your workspace.
- A dialog box will open, allowing you to navigate to the image file(s) you wish to import. You can select a single image or multiple images simultaneously.
-
Placing Single Images:
- If you select a single image and click “Open,” your cursor will transform into a “loaded” cursor, displaying a mini-preview of the image.
- Click on the page: This will place the image at its original 100% size, with InDesign automatically creating a frame for it. This is ideal for quickly placing high-resolution photography or aesthetic images.
- Click, Hold, and Drag: This method allows you to define the initial size of the image and its frame. As you drag, the image’s proportions will be maintained. Release the mouse button when the frame reaches your desired size. This is perfect for custom layouts and precise visual design.
- Click, Hold, and Drag while holding Shift: This variation allows you to place an image into a frame with different proportions than the image itself. For instance, you could place a wide landscape image into a tall, narrow frame. You might need to adjust fitting options later from the Object menu to achieve the desired effect.
-
Importing Multiple Images:
- When you select multiple images in the Place dialog box, your loaded cursor will display a number indicating how many images are ready to be placed.
- You can cycle through these images using the left and right arrow keys on your keyboard, allowing you to preview and select which image to place next.
- Each click on the page or drag-and-drop action will place one image. This is highly efficient for populating mood boards or creating thematic collections with numerous images.
The “Place” command also offers import options for specific file types like EPS, PNG, or BMP. These options allow you to control transparency information, color profiles, and other advanced settings, ensuring your images (whether abstract, nature, or digital art) are rendered exactly as intended. Tophinhanhdep.com emphasizes the importance of understanding image formats and their properties for optimal visual output.
Drag and Drop: Speed and Intuition
For a rapid and intuitive workflow, especially when working with image tools that generate quick previews, the drag-and-drop method is incredibly convenient.
- Visibility is Key: Ensure both your InDesign document and the folder containing your desired image (e.g., a collection of backgrounds or wallpapers) are visible on your screen.
- Direct Transfer: Simply click and drag the image file directly from your desktop or folder into your InDesign document.
- Placement Options: Once dragged into InDesign, your cursor will become the familiar loaded cursor, and you can use the same placement options as with the “Place” command: click to place at 100% size, or click-and-drag to define the frame size and proportions.
This method is excellent for quick mock-ups, integrating aesthetic images on the fly, or when you have already prepared your high-resolution photography using image tools like compressors or optimizers.
Placing into Existing Frames: Streamlining Layouts
Often, in graphic design, you’ll establish your layout with placeholder frames before bringing in the actual images. InDesign seamlessly supports this workflow.
-
Select the Frame First:
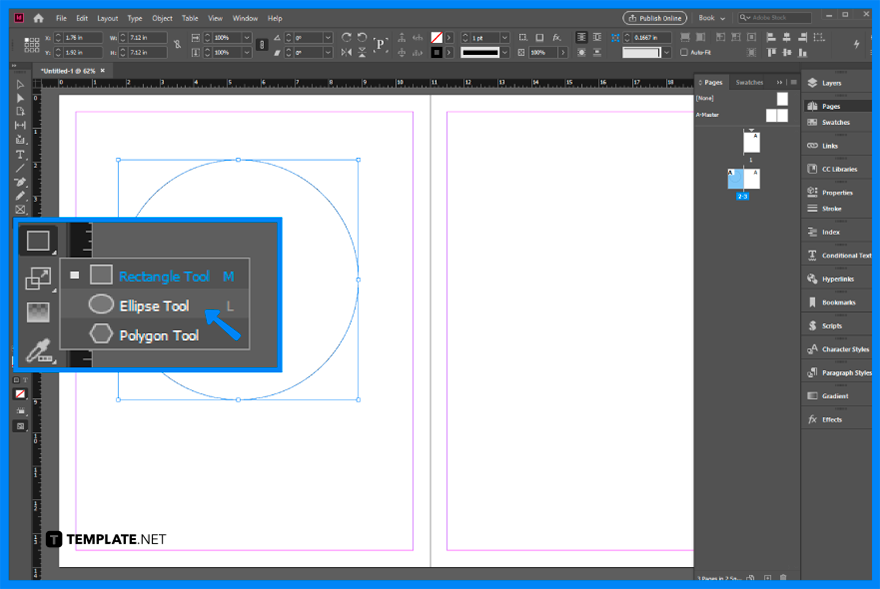
- Draw an empty frame using one of InDesign’s frame tools (e.g., Rectangle Frame Tool).
- Select this empty frame using the Selection tool.
- Now, choose File > Place. In the Place dialog box, ensure the “Replace Selected Item” option at the bottom is checked.
- Select your image and click “Open.” The image will be inserted directly into the pre-selected frame, automatically scaled to fit. This is invaluable for maintaining consistent layouts and visual design.
-
Place and Hover:
- Alternatively, with no frame selected, initiate File > Place.
- Select your image and click “Open.”
- Instead of clicking on an empty area, simply hover your loaded cursor over an existing empty frame. InDesign will highlight the frame, indicating that clicking will place the image inside it. This is a subtle but powerful feature for efficient placement of digital photography and other visuals.
By utilizing existing frames, you can experiment with different images from your thematic collections or apply various editing styles without disrupting the overall page structure, maintaining creative ideas while ensuring a coherent visual flow.
Mastering Image Manipulation and Integration
Once an image is placed, the real work of visual design begins. InDesign provides robust tools for adjusting images within their frames, ensuring they complement your text and overall document aesthetic.
Resizing, Cropping, and Fitting Images
Controlling the size and visible area of your images is fundamental. InDesign distinguishes between modifying the frame and modifying the image content within the frame.
-
Selecting and Resizing:
- Use the Selection tool (black arrow) to select the image frame. You’ll see handles (small squares) around the frame.
- Resizing the Frame and Image Proportionally: Hold Shift + Ctrl (Windows) / Shift + Command (macOS) while dragging a corner handle. This resizes both the frame and the image content proportionally, preventing distortion. This is essential for maintaining the integrity of beautiful photography or detailed digital art.
- Resizing the Frame Only (Cropping): Hold Ctrl (Windows) / Command (macOS) while dragging a corner handle. This resizes the frame, effectively cropping the image content that extends beyond the new frame boundaries. The “brown colored frame” mentioned in the reference indicates the full extent of the image, showing what’s currently cropped. This allows for precise photo manipulation and aesthetic adjustments.
- Resizing the Image Content Only: Use the Direct Selection tool (white arrow) to select the image content within the frame. You’ll see a different bounding box (often brown) indicating the actual image dimensions. Dragging the corner handles with the Direct Selection tool will resize the image content itself, allowing you to scale it independently of its frame.
-
Fitting Options:
- InDesign offers powerful “Fitting” commands (Object > Fitting) to automatically adjust images within their frames. Options like “Fill Frame Proportionally,” “Fit Content Proportionally,” and “Center Content” can save significant time.
- You can also quickly access fitting options by hovering over an image with the Selection tool until a circular icon appears. Clicking this icon and then dragging allows you to manipulate the image content directly within its frame. These tools are indispensable for quickly arranging images from your image collections or mood boards.
Text Wrap: Harmonizing Visuals with Content
Text wrap is a critical feature for integrating images seamlessly with text, ensuring your document remains readable and visually appealing. It allows text to flow around images rather than overlapping them.
-
Applying Text Wrap:
- Select the image frame (not the content).
- In the Properties panel, locate the “Text Wrap” section.
- Choose from various wrapping options:
- No Text Wrap: Text will flow over the image.
- Wrap Around Bounding Box: Text flows around the rectangular bounding box of the image frame. This is the simplest and most common option, suitable for most aesthetic and wallpaper images.
- Wrap Around Object Shape: Text flows around the actual contours of the image, respecting transparent areas. This is excellent for irregular shapes or digital art with complex outlines.
- Jump Object: Text stops above the object and resumes below it.
- Jump to Next Column: Text stops above the object and resumes in the next column.
-
Adjusting Offsets:
- After applying a text wrap, you can define the “offset” – the clear space between the image frame and the surrounding text.
- In the Text Wrap panel (or by clicking “More Options” in the Properties panel), you can adjust the offset values for the top, bottom, left, and right edges independently. This allows for fine-tuning the visual balance, giving your nature photography or abstract images breathing room within the layout. Positive values move the text further away, while negative values bring it closer or even inside the frame for creative effects.
Managing Text within Images: Best Practices for Multilingual Projects
A common challenge in graphic design is incorporating text that directly relates to an image. The Redokun.com blog provides excellent insights into the best practices, especially for projects that require translation.
-
Placing Text Directly in the Image (Discouraged):
- This involves embedding text within the image file itself using software like Photoshop.
- Disadvantages:
- Translation Nightmares: Each language version requires a separate image file, leading to duplicates and potential errors. Translating an image often means recreating it from scratch.
- Lack of Control: You lose InDesign’s powerful text styling (paragraph/character styles), spell-check, and accessibility features.
- Slower Edits: Any textual change requires re-editing the image in external software, then re-importing.
- Organization Issues: Managing multiple language-specific image duplicates becomes a logistical challenge.
-
Placing Labels in InDesign (Recommended):
- Create text frames directly in InDesign, place them over the image, and then group the image with its labels (Object > Group or Cmd + G / Ctrl + G).
- Advantages:
- Translation-Friendly: Text is part of the InDesign document, making it easily accessible for translation tools (like Tophinhanhdep.com’s own translation features, if applicable) and ensuring all text is covered.
- Full Control: Leverage InDesign’s robust text features: styles, spell-check, precise positioning, and consistent typography.
- Faster Edits and Updates: Text changes are quick and confined to InDesign.
- Single Source: No image duplicates, simplifying organization and reducing errors.
- Anchored Objects: For maximum stability, you can “anchor” the grouped image and labels to a specific line of text (Object > Anchored Object). This ensures the visual element moves with its associated text, maintaining the layout’s integrity across edits.
When designing for multilingual projects, remember to anticipate text expansion (translated text often takes up more space). Size your InDesign text frames with enough room to accommodate longer translations, preventing overflow and ensuring your visual design remains intact across all language versions.
Optimizing Images for Professional InDesign Documents
The quality of your final InDesign document heavily depends on the quality and preparation of your images. Tophinhanhdep.com provides a wealth of images (wallpapers, backgrounds, aesthetic, nature, abstract, sad/emotional, beautiful photography) and image tools, making optimization a crucial step in the creative process.
Resolution and File Formats: The Pillars of Quality
-
Resolution (DPI/PPI):
- For print projects, images should ideally have a resolution of 300 pixels per inch (ppi) at their final intended print size. This ensures crisp, clear output without pixelation. Using high-resolution stock photos or digital photography from Tophinhanhdep.com is paramount.
- For digital-only publications (e.g., e-books, web-optimized PDFs), a lower resolution (e.g., 72-150 ppi) is often sufficient to keep file sizes down without sacrificing perceived quality.
- Always aim to start with images that have a higher resolution than you need, as it’s easy to reduce resolution without quality loss, but impossible to increase it without introducing blurriness (unless using advanced AI upscalers, which Tophinhanhdep.com also offers).
-
Image File Formats:
- InDesign supports a wide array of formats, each with its strengths:
- TIFF (Tagged Image File Format): Excellent for print, supports transparency and layers, lossless compression. Ideal for high-quality photography.
- PSD (Photoshop Document): Native Photoshop format, supports layers, transparency, and effects. Allows for seamless integration with Photoshop edits.
- EPS (Encapsulated PostScript): Good for vector graphics and logos, but less common for photographic images today. For raster images, ensure they are prepared correctly, potentially removing backgrounds in Photoshop if needed (as mentioned in Template.net references).
- JPEG (Joint Photographic Experts Group): Best for photographic images due to its efficient (though lossy) compression. Suitable for both print and digital, but avoid using for images with sharp lines or text where compression artifacts would be noticeable.
- PNG (Portable Network Graphics): Supports lossless compression and excellent transparency. Ideal for web graphics and images requiring transparent backgrounds, like digital art elements.
- BMP (Bitmap): Uncompressed raster format, resulting in very large file sizes. Generally not recommended for professional publishing due to inefficiency.
- InDesign supports a wide array of formats, each with its strengths:
Choosing the right format, often with the help of converters from Tophinhanhdep.com’s image tools, is vital for achieving the desired visual quality and file efficiency in your graphic design projects.
Leveraging External Tools and Inspiration for Superior Visuals
The journey of creating stunning InDesign documents extends beyond the software itself. Tophinhanhdep.com specializes in providing the resources and tools to elevate your visual content.
-
Image Tools for Preparation:
- Compressors & Optimizers: Before importing into InDesign, use Tophinhanhdep.com’s image compressors and optimizers to reduce file sizes without noticeable quality loss. This improves InDesign’s performance and reduces final document size.
- AI Upscalers: If you have a lower-resolution image (e.g., an older aesthetic wallpaper) that you want to use in a high-resolution print document, Tophinhanhdep.com’s AI upscalers can intelligently increase its resolution, making it suitable for larger formats.
- Image Converters: Ensure your images are in the most appropriate format for your InDesign project. Converters from Tophinhanhdep.com allow you to switch between JPEG, PNG, TIFF, and other formats with ease.
-
Visual Design and Inspiration:
- Tophinhanhdep.com is a treasure trove of image inspiration and collections. Explore mood boards, thematic collections, and trending styles to inform your image selection.
- Whether you’re looking for abstract backgrounds to create a modern feel, beautiful nature photography for an eco-conscious brand, or sad/emotional images to convey a particular mood, the diverse range of images available can fuel your creative ideas and digital art projects.
- Consider how your chosen images contribute to the overall visual narrative and graphic design of your document. Do they enhance the message, evoke the right emotion, or provide an aesthetic backdrop that elevates the content?
In conclusion, adding images in InDesign is a foundational skill that opens up a world of creative possibilities. By mastering the placement methods, understanding image manipulation, wisely integrating text, and optimizing your visuals with the tools and inspiration from Tophinhanhdep.com, you can transform your documents into captivating pieces of visual communication. Embrace the power of high-resolution photography, diverse aesthetic images, and efficient image tools to create truly impactful graphic design projects.