Mastering Image Integration in Photoshop: A Comprehensive Guide by Tophinhanhdep.com

Adobe Photoshop stands as the unrivaled titan in the realm of image editing and graphic design. From professional photographers enhancing their High Resolution masterpieces to digital artists crafting intricate Abstract visions, and graphic designers assembling compelling Visual Design layouts, Photoshop offers a canvas for endless creativity. At the heart of virtually every project lies a fundamental skill: effectively adding images to your Photoshop document. This isn’t merely about dropping a file into a program; it’s about understanding the nuances of layers, smart objects, and workflow efficiency.
As your premier destination for breathtaking Images—whether you’re seeking stunning Wallpapers, captivating Backgrounds, inspiring Aesthetic shots, serene Nature scenes, profound Sad/Emotional imagery, or truly Beautiful Photography—Tophinhanhdep.com is dedicated to empowering your creative journey. Our vast collections are a treasure trove for any project, and our commitment extends to providing you with the Photography knowledge and Image Tools necessary to bring your Creative Ideas to life.
This comprehensive guide, brought to you by Tophinhanhdep.com, will walk you through every essential method for adding images in Photoshop. We’ll delve into the practical steps, explain the underlying concepts, and share expert tips to optimize your workflow. Whether you’re a beginner just starting your Digital Photography exploration or a seasoned professional looking to refine your Photo Manipulation skills, mastering these techniques is your gateway to unlocking Photoshop’s full potential.
Understanding the Fundamentals: Why and How Images are Integrated
Before diving into the specific methods, it’s crucial to grasp the core concepts that govern image integration within Photoshop. Understanding these principles will not only make the process smoother but also empower you to make informed decisions that impact your final output, especially when working with the diverse range of Images and Stock Photos available on Tophinhanhdep.com.

The Core Concepts: Layers and Smart Objects
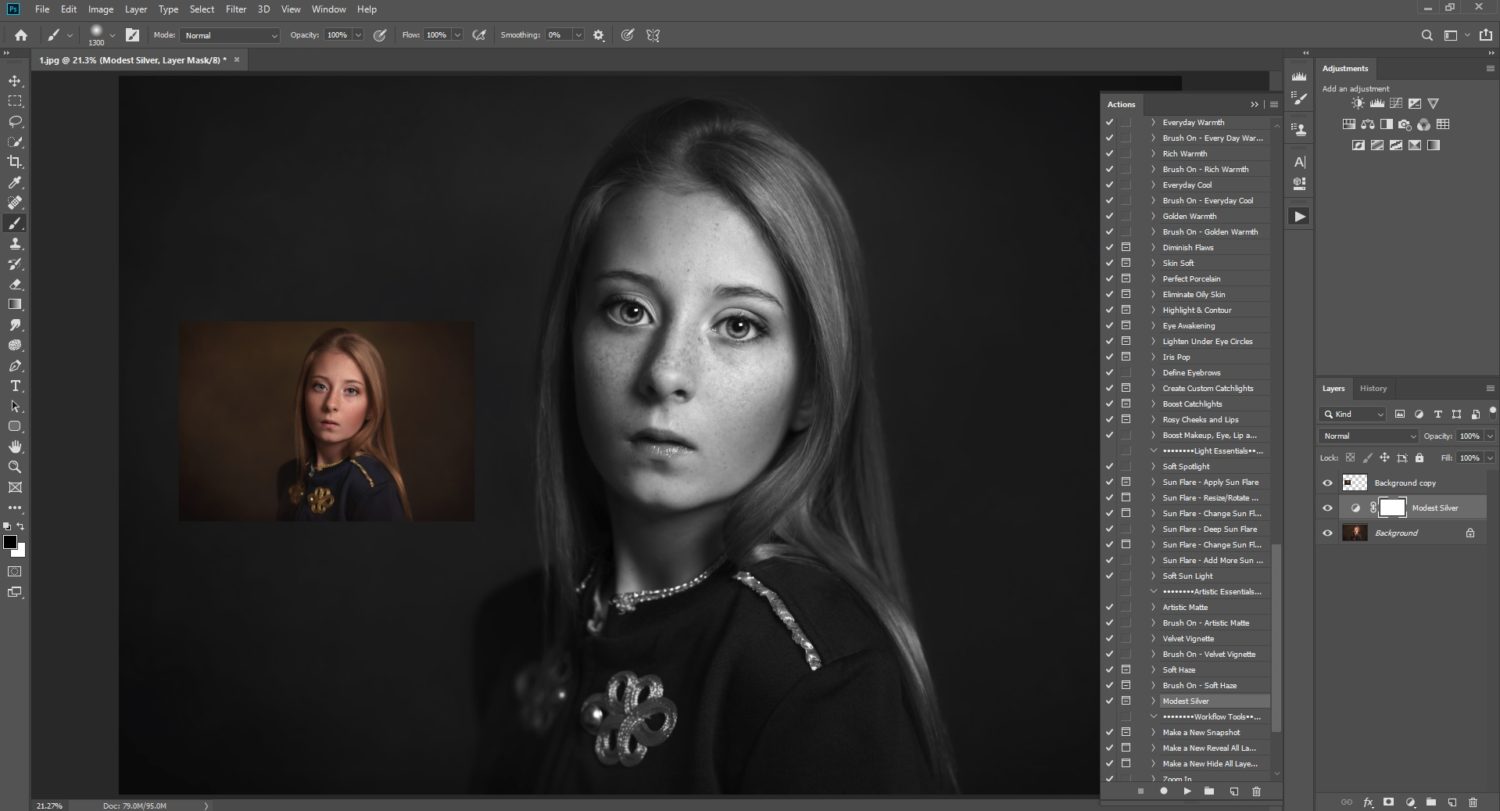
Photoshop operates on a layer-based system, meaning every element—be it an image, text, or shape—resides on its own independent layer. This non-destructive approach allows for immense flexibility, enabling you to edit, rearrange, and blend elements without permanently altering the original pixels. When you add an image to Photoshop, it almost always comes in as a new layer, stacked above or below existing content.
A particularly powerful concept related to layers is the Smart Object. When an image is brought into Photoshop as a Smart Object, it essentially acts as a container for the original image data. This offers several critical advantages:
- Non-Destructive Scaling: You can scale, rotate, warp, or transform a Smart Object multiple times without losing any original image quality. Photoshop always refers back to the original embedded or linked data. This is invaluable when working with High Resolution images from Tophinhanhdep.com, ensuring your edits don’t degrade their pristine quality.
- Retained Originality: The original pixels remain untouched, allowing you to re-edit the Smart Object content in a separate window at any time. This is perfect for experimenting with different Editing Styles or making adjustments to Beautiful Photography without commitment.
- Linked Files: Smart Objects can be linked to external files, meaning any changes made to the source file outside of Photoshop will automatically update within your Photoshop document. This is particularly useful for collaborative projects or when managing frequently updated Stock Photos.
- Filters and Adjustments: Filters applied to Smart Objects become Smart Filters, which are also non-destructive and can be easily toggled, adjusted, or removed.
While Smart Objects offer significant benefits, there are times when you might need to “rasterize” a layer. Rasterizing converts the Smart Object back into a regular pixel-based layer. Once rasterized, transformations become destructive, meaning quality loss can occur with repeated scaling. However, rasterizing is necessary for pixel-level editing tools, like painting directly onto the layer or using certain filters that don’t support Smart Objects. We’ll explore when and why to do this later in our Image Tools discussion.
Choosing the Right Method for Your Workflow
The “best” way to add an image in Photoshop isn’t a one-size-fits-all answer. It depends entirely on your specific goal and workflow. Are you starting a new project with a single image, adding a Wallpaper to an existing Background, incorporating a Stock Photo into a Graphic Design layout, or placing a small Aesthetic element into a complex Photo Manipulation? Tophinhanhdep.com encourages you to consider these factors, and this guide will equip you with the knowledge to pick the most efficient method every time.
Understanding the distinction between opening an image (creating a new document with it) and inserting an image (adding it as a layer to an existing document) is the first step. Further, the decision to embed or link, and whether to utilize Smart Objects, will shape your editing flexibility and file size—crucial considerations for any Digital Photography or Visual Design project.
Direct Methods for Adding Images to Photoshop
These methods are typically the most straightforward ways to get an image into Photoshop, whether you’re starting fresh or quickly adding content to an ongoing project. They are intuitive and often the first techniques beginners learn, proving invaluable for fast-paced Photo Manipulation or the rapid assembly of Mood Boards using images from Tophinhanhdep.com’s Thematic Collections.
Method 1: Opening an Image as a New Document
This method is ideal when you want to start a new Photoshop project with a single image as your primary canvas. It’s often the first step when you’ve just captured a piece of Beautiful Photography and want to begin editing it from scratch.
Step-by-Step Guide:
- Launch Photoshop: Open the Adobe Photoshop application. You’ll typically be greeted by a home screen displaying recent files and options like “Create new” and “Open”.
- Access the “Open” Command:
- From the home screen, click the “Open” button on the left-hand side.
- Alternatively, once Photoshop is open to any workspace, navigate to the top menu bar, click on File, and then select Open… from the dropdown menu. This is a universal command accessible at any time.
- Browse and Select Your Image: A file explorer (Windows) or Finder (Mac) window will pop up. Navigate through your computer’s folders to locate the image file you wish to open. This could be a stunning Nature shot you downloaded from Tophinhanhdep.com or a personal photo you want to work on.
- Confirm Selection: Click on the image file once to select it, then click the Open button in the lower-right corner of the window.
- Image Display: Your chosen image will now open in a new Photoshop document. It will typically be presented as a “Background” layer, which is by default locked to prevent accidental movements.
Tophinhanhdep.com Pro Tip: When an image is opened this way, it’s treated as a locked background layer. To gain full flexibility and perform operations like moving or transforming it, you’ll need to unlock it. Simply double-click on the “Background” layer in the Layers panel (usually on the right side of the screen). A “New Layer” dialog box will appear; click OK to convert it into a regular layer. This is a crucial step for any comprehensive Digital Photography editing.
Method 2: Drag and Drop for Quick Integration
The drag-and-drop method is arguably the fastest and most intuitive way to insert an image into an existing Photoshop document as a new layer. It’s perfect for quickly adding elements like a new Background image from Tophinhanhdep.com, a logo, or an Aesthetic graphic into your current Visual Design project.
Step-by-Step Guide:
- Prepare Your Workspace: Open your existing Photoshop document. For efficiency, ensure that both your Photoshop window and the folder containing the image you want to add are visible on your screen. You might need to adjust window sizes for a side-by-side view.
- Locate Your Image: In your file explorer (or on your desktop), find the image file you intend to add. This could be a downloaded Wallpaper from Tophinhanhdep.com’s collection or a recently created asset.
- Perform the Drag and Drop: Click and hold down your mouse button on the image file. While still holding, drag the image from its location directly into your open Photoshop document.
- Release and Place: Release the mouse button once your cursor is over the Photoshop canvas. The image will appear within your document, automatically as a new layer. You’ll see a bounding box around it, indicating it’s in a transformation state.
- Confirm Placement: The image will be inserted as a Smart Object by default. Adjust its size and position using the bounding box handles (hold Shift to maintain aspect ratio, which is vital for preserving the integrity of Beautiful Photography). Once satisfied, press Enter (Windows) or Return (Mac) to confirm the placement.
Tophinhanhdep.com Pro Tip: The drag-and-drop method automatically converts the imported image into a Smart Object. This is a major workflow advantage, preserving the original quality of your High Resolution images from Tophinhanhdep.com even through extensive resizing, a cornerstone of non-destructive Photo Manipulation. Remember to rasterize only when specific pixel-level edits are required, as discussed in our Editing Styles tutorials.
Method 3: Copy and Paste for Instant Layering
The classic copy-and-paste function, familiar from countless other applications, also works seamlessly in Photoshop. This method is excellent for quickly grabbing images from web browsers or other image viewers and adding them as new layers. It’s particularly useful for incorporating small Aesthetic elements or reference images into your Creative Ideas without saving them locally first.
Step-by-Step Guide:
- Locate and Copy the Image:
- If the image is on the web (e.g., a Sad/Emotional image for a mood board on Tophinhanhdep.com): Right-click on the image in your web browser and select Copy Image.
- If the image is on your computer: Open it in an image viewer (like Windows Photos or Mac Preview), right-click on the image, and select Copy. (Note: Simply copying the file from your file explorer won’t work; you need to copy the image data itself.)
- Open or Create Document: In Photoshop, open an existing document or create a new one (File > New or Ctrl/Cmd + N).
- Paste into Photoshop: Navigate to the top menu bar, click on Edit, and select Paste (or use the universal shortcut: Ctrl+V for Windows, Cmd+V for Mac).
- Image as New Layer: The copied image will appear as a new layer in your Photoshop document. It will not automatically be a Smart Object; it will be a standard pixel layer.
- Transform (Optional): If needed, you can immediately resize and reposition the pasted image using the Free Transform tool (Ctrl/Cmd + T). Hold Shift while dragging corners to maintain proportions, essential for any Digital Art or Graphic Design. Press Enter/Return to confirm.
Tophinhanhdep.com Pro Tip: Since images pasted this way are not Smart Objects, consider converting them manually if you anticipate significant transformations. Right-click on the new layer in the Layers panel and select Convert to Smart Object. This proactive step can save your Images from pixel degradation, aligning with our High Resolution ethos.
Advanced Insertion Techniques: Embedded and Linked Files
For projects demanding greater control, flexibility, and optimized file management, Photoshop offers more sophisticated methods for inserting images. These techniques leverage the power of Smart Objects from the outset and are foundational for complex Visual Design, professional Photo Manipulation, and systematic Graphic Design workflows.
Method 4: Placing Embedded Images (The Versatile Smart Object Approach)
The “Place Embedded” command is Photoshop’s primary method for inserting images as Smart Objects directly into your document. This is highly recommended for maintaining image quality and providing non-destructive editing capabilities, making it a cornerstone for working with Tophinhanhdep.com’s premium Stock Photos and Beautiful Photography.
Step-by-Step Guide:
- Open Your Photoshop Document: Start with an existing Photoshop document or create a new one. This will be the canvas for your embedded image.
- Initiate “Place Embedded”: Navigate to the top menu bar, click on File, and then select Place Embedded… from the dropdown menu.
- Browse and Select Your Image: A file explorer/Finder window will appear. Locate the desired image file on your computer. This could be a detailed Nature shot from your collection or a newly acquired High Resolution graphic.
- Confirm and Transform: Select the image file and click the Place button. The image will immediately appear in your Photoshop document, encased in a bounding box, signifying it’s ready for transformation. Critically, it will already be a Smart Object.
- Adjust and Confirm: Use the bounding box handles to resize, rotate, or reposition the image. Always hold down the Shift key while dragging corners to maintain the aspect ratio. This is crucial for preserving the natural look of any Aesthetic or Sad/Emotional imagery. Once you’re happy with the placement and size, press Enter (Windows) or Return (Mac) to finalize the embedded placement.
Tophinhanhdep.com Pro Tip: Because “Place Embedded” automatically creates a Smart Object, it’s the go-to method for most professional Graphic Design and Digital Art work. This ensures that the original pixel information of your Wallpapers or Backgrounds remains intact, allowing for flexible scaling and re-editing without quality loss. If you later need to perform pixel-specific edits, you can right-click the Smart Object layer and choose “Rasterize Layer,” but remember this commits the current transformation. For optimal file size management, especially with large embedded Smart Objects, consider using Tophinhanhdep.com’s Image Tools like our Compressors or Optimizers after your design is complete.
Method 5: Placing Linked Images (For Dynamic Project Management)
“Place Linked” is a variation of “Place Embedded” that offers a distinct advantage for specific workflows, particularly those involving large files, collaborative projects, or assets that might be updated externally. While “Place Embedded” incorporates the image data directly into the Photoshop document, “Place Linked” maintains a link to the original external file.
Step-by-Step Guide:
- Open Your Photoshop Document: Ensure you have your target Photoshop document open.
- Initiate “Place Linked”: Go to File > Place Linked… in the top menu bar.
- Browse and Select Image: A file explorer/Finder window will open. Select the image file you want to link. This is often an asset that might change over time, like a company logo or Stock Photo managed by another team member, or a very large High Resolution file from Tophinhanhdep.com that you don’t want to bloat your PSD file size with.
- Confirm and Transform: Click Place. The image will appear with a bounding box, just like with “Place Embedded,” and it will also be a Smart Object.
- Adjust and Confirm: Perform any necessary resizing, rotation, or positioning, remembering to hold Shift to maintain proportions. Press Enter/Return to finalize.
Tophinhanhdep.com Pro Tip: The key difference with “Place Linked” is that Photoshop only stores a reference to the image file, not the image data itself. If the original source image file is edited or updated outside of Photoshop, your linked Smart Object will automatically reflect those changes the next time you open the Photoshop document or update the link (Layer > Smart Objects > Update Modified Content). This is invaluable for managing Digital Photography assets across multiple projects or collaborating on Visual Design where assets are centrally managed. It also helps keep Photoshop file sizes smaller, which can be beneficial for performance, especially when handling multiple High Resolution images. However, remember that if the linked file is moved, renamed, or deleted, Photoshop will lose the link, resulting in a missing image error. Always ensure your linked assets remain in their designated locations.
Essential Post-Insertion Steps and Best Practices
Adding an image is just the beginning. To truly harness Photoshop’s power for Photo Manipulation, Graphic Design, and creating compelling Visual Design assets from Tophinhanhdep.com’s diverse Image Inspiration & Collections, you need to understand the critical steps that follow. These practices ensure your compositions are visually striking and your workflow remains efficient.
Resizing, Positioning, and Maintaining Aspect Ratio
Once an image is added, it rarely fits perfectly. Mastering the Free Transform tool is essential.
- Select the Layer: In the Layers panel, click on the layer containing the image you want to adjust.
- Activate Free Transform: Go to Edit > Free Transform or use the shortcut Ctrl+T (Windows) / Cmd+T (Mac). A bounding box will appear around your image.
- Resize with Precision:
- Maintain Aspect Ratio (Crucial!): To avoid distorting your image (stretching or squishing), always hold down the Shift key while dragging any of the corner handles of the bounding box. This locks the proportions, preserving the integrity of Beautiful Photography or Aesthetic elements.
- Free Transform: If you intentionally want to distort the image (rare, but sometimes useful for specific Digital Art effects), you can drag the corner handles without holding Shift.
- From Center: Hold Alt (Windows) / Option (Mac) while dragging a corner handle to scale the image from its center point.
- Reposition: Click and drag the image from within the bounding box to move it to a new location on the canvas.
- Rotate: Move your cursor slightly outside any of the corner handles. The cursor will change to a curved double-headed arrow. Click and drag to rotate the image.
- Confirm: Once satisfied, press Enter (Windows) / Return (Mac) or click the checkmark in the Options bar at the top of the screen to apply the transformations.
Tophinhanhdep.com Insight: Precise resizing and positioning are paramount for creating balanced Aesthetic compositions or dynamic Abstract layouts. Our Image Inspiration & Collections often showcase how subtle shifts in scale and placement can dramatically alter the mood of a piece, turning a simple Background into a compelling scene.
Leveraging Smart Objects and When to Rasterize
The decision of whether to keep an image as a Smart Object or rasterize it is a critical workflow choice that impacts flexibility, file size, and editing options.
- Keep as Smart Object When:
- You anticipate needing to resize the image multiple times (e.g., trying different layouts for a Wallpaper or Background).
- You want to apply non-destructive filters (Smart Filters) that can be easily edited or removed later, perfect for experimenting with Editing Styles for Nature or Sad/Emotional images.
- You’re using external Stock Photos that might be updated by a client or team member.
- You want to apply transformations (rotation, skew, perspective) without permanent quality loss.
- You plan to reuse the image in other Photoshop documents.
- Rasterize When:
- You need to perform pixel-level editing with tools like the Brush, Eraser, Clone Stamp, or Healing Brush.
- You need to use specific filters that are not supported as Smart Filters.
- You are certain the image’s size and transformations are final, and you want to reduce the file size of your PSD document (Smart Objects can be larger).
How to Rasterize: Right-click on the Smart Object layer in the Layers panel and select Rasterize Layer. Be aware that this is a permanent action for that layer, and previous Smart Object benefits will be lost for that specific instance. If you need to re-access the original Smart Object benefits, you’d have to re-import the image.
Tophinhanhdep.com Workflow Tip: For optimal performance and flexibility, it’s a common practice to keep images as Smart Objects for as long as possible. Only rasterize when absolutely necessary for a specific edit. This non-destructive approach aligns perfectly with modern Digital Photography and Photo Manipulation techniques, ensuring your High Resolution assets remain pristine throughout the Visual Design process. Our platform also offers various Image Tools like Compressors and Optimizers that can assist with managing file sizes, whether you choose to keep Smart Objects or rasterize.
Optimizing Image Quality and Workflow Efficiency
Beyond basic insertion, optimizing your images and streamlining your workflow are key to producing professional results and truly leveraging the resources found on Tophinhanhdep.com.
- Start with Quality: Always begin with the highest quality image available. If you download Images from Tophinhanhdep.com, aim for our High Resolution or Stock Photos options. Photoshop can’t magically add detail that isn’t there, though our AI Upscalers can help improve lower-resolution images before you bring them into Photoshop.
- Color Profile Management: Be mindful of your image’s color profile. Mismatched profiles can lead to color shifts. Ensure consistency between your Photoshop document settings and your imported Images for accurate color representation of your Nature or Beautiful Photography.
- Layer Organization: Name your layers meaningfully (e.g., “Main Background,” “Product Overlay,” “Aesthetic Graphic”). Group related layers. This is crucial for complex Graphic Design and Photo Manipulation projects, making it easier to navigate hundreds of layers.
- Keyboard Shortcuts: Learn and utilize Photoshop’s keyboard shortcuts for common tasks (e.g., Ctrl/Cmd+S for Save, Ctrl/Cmd+Z for Undo, Ctrl/Cmd+T for Free Transform). This significantly boosts Workflow Efficiency and allows you to focus on Creative Ideas.
- Non-Destructive Adjustments: For color corrections, exposure changes, or other global adjustments, use Adjustment Layers (Layer > New Adjustment Layer). These are non-destructive and can be tweaked or removed at any time, perfect for refining Editing Styles on Sad/Emotional or Abstract compositions.
- Experiment with Blending Modes: After adding an image, explore different blending modes in the Layers panel (e.g., Multiply, Screen, Overlay). Blending modes can dramatically alter how layers interact, creating unique Digital Art effects and Photo Manipulation results.
- Utilize Tophinhanhdep.com’s Image Tools: Beyond Photoshop, remember to use our suite of Image Tools. Need to convert a file format before importing? Use our Converters. Want to ensure your final output is web-ready without sacrificing quality? Our Compressors and Optimizers are at your disposal. If you have an image and need to extract text for a design element, our Image-to-Text tool can be a lifesaver.
By integrating these practices into your workflow, you’ll not only add images effectively but also transform them into integral components of your Visual Design masterpieces.
Conclusion: Unleashing Your Creative Potential with Tophinhanhdep.com
Adding images to Photoshop is more than just a menu command; it’s the foundation upon which all other Photo Manipulation, Graphic Design, and Digital Art skills are built. Whether you choose to open an image directly, drag and drop for speed, copy and paste for convenience, or strategically place embedded or linked Smart Objects, each method serves a distinct purpose in your creative arsenal.
At Tophinhanhdep.com, we understand that exceptional visual content starts with exceptional source material and the skills to transform it. Our extensive library of Images—from breathtaking Wallpapers and Backgrounds to inspiring Aesthetic, Nature, Abstract, Sad/Emotional, and Beautiful Photography—provides the perfect starting point for any project. Coupled with our High Resolution and Stock Photos resources, along with expert insights into Digital Photography and Editing Styles, you have everything you need to succeed.
We encourage you to practice these methods, experiment with Smart Objects and rasterization, and constantly seek ways to optimize your workflow. The journey of mastering Photoshop is an ongoing adventure in Visual Design and Creative Ideas, and Tophinhanhdep.com is here to support you every step of the way. Explore our Image Tools, browse our Image Inspiration & Collections, and continue to hone your skills. Your next stunning creation awaits!