Mastering Image DPI: A Comprehensive Guide for Stunning Visuals

In the vast and vibrant world of digital imagery, where every pixel contributes to the overall aesthetic and impact, understanding key technical concepts is paramount. Among these, Dots Per Inch (DPI) stands out as a frequently discussed, yet often misunderstood, term. Whether you’re a professional photographer aiming for gallery-quality prints, a graphic designer crafting intricate digital art, or simply someone who loves to personalize their devices with high-resolution wallpapers and backgrounds, grasping DPI is fundamental to achieving your desired visual outcomes.
At Tophinhanhdep.com, we are dedicated to helping you unlock the full potential of your images. Our platform is a hub for high-resolution photography, inspiring visual designs, and powerful image tools designed to elevate your creative projects. From curated collections of aesthetic and nature wallpapers to advanced AI upscalers and optimizers, we provide the resources to ensure your visuals are nothing short of spectacular. This guide delves deep into the concept of DPI, explaining what it is, why it matters, and how you can effectively adjust it to perfect your images for any purpose – be it breathtaking prints, crisp digital art, or stunning online displays.
We’ll navigate through the nuances of pixel density, explore practical methods for changing DPI using various software and Tophinhanhdep.com’s advanced tools, and equip you with the knowledge to make informed decisions about your image’s resolution. Say goodbye to blurry prints and pixelated designs; with a clear understanding of DPI, you’re on your way to creating and sharing visuals that truly stand out.
Understanding DPI: The Foundation of Image Quality
Before we dive into the “how-to,” it’s essential to build a solid understanding of what DPI actually means and how it influences the perceived quality of your images. The term DPI, while widely used, often causes confusion because it’s frequently interchanged with another related concept: PPI.
DPI vs. PPI: Demystifying the Terminology
Let’s clarify the distinction:
- DPI (Dots Per Inch): This term strictly refers to the physical output of a printer. It measures how many individual ink dots a printer places within one linear inch of an image on paper. A higher DPI in printer settings generally leads to a smoother, more detailed printed image, as more dots can be used to render colors and fine lines.
- PPI (Pixels Per Inch): This term relates to the digital image itself or its display on a screen. PPI indicates the density of pixels within one linear inch of a digital image. For instance, a screen might display at 72 PPI, meaning there are 72 pixels packed into every inch of the display. Similarly, a digital image intended for print might be prepared at 300 PPI, signifying 300 pixels for every inch of its intended print size.
While technically distinct, you’ll often find DPI and PPI used interchangeably in everyday conversation and even in some software interfaces (e.g., scanning software often uses “DPI” when it means “PPI” for the digital output). For simplicity, and aligning with common usage, we will often refer to “DPI” in this article to encompass both concepts when discussing the resolution of a digital image in relation to its physical dimensions or print quality. However, remember that the true measure of a digital image’s resolution, independent of print, is its total pixel dimensions (e.g., 1920x1080 pixels).
Why DPI Matters for Your Visual Projects
Understanding DPI is critical because it directly impacts how your images will look in various applications, especially in print.
- Print Quality: This is where DPI (or PPI, more accurately for the source file) plays its most significant role. When you send an image to a printer, the printer software uses the image’s pixel dimensions and the specified output DPI to determine the physical size and clarity of the print. A high DPI (e.g., 300 DPI for photographs) means more pixels are packed into each inch of paper, resulting in sharper details, smoother gradients, and a more professional finish. Conversely, a low DPI for a print job can lead to pixelation, blurriness, and a noticeable lack of detail, especially when viewed up close. This is crucial for anyone involved in professional photography, creating beautiful prints for home decor, or designing marketing materials like brochures and posters.
- Digital Display (Web, Screens, Wallpapers): For images viewed solely on screens (like wallpapers, backgrounds, or images on websites), the DPI value embedded in the file’s metadata is far less important than the total pixel dimensions. A screen’s resolution (e.g., 1920x1080 or 4K) dictates how many pixels it can display, not the DPI value of your image file. An image with high pixel dimensions will look sharp on a high-resolution screen, regardless of whether its metadata says 72 DPI or 300 DPI. For digital art and web graphics, focusing on pixel dimensions for optimal display size and responsive design is usually more beneficial than obsessing over the DPI metadata.
- Software Requirements: Some printing services, stock photo platforms, or graphic design tools might have specific DPI requirements for image uploads (e.g., “all images must be 300 DPI”). While this often refers to the metadata value rather than actual pixel density, meeting these requirements is essential for submission.
- Default Print Size: Changing the DPI setting can also influence the default print size an image will assume when opened in certain programs like word processors or desktop publishing software. For example, if you have a 1500-pixel wide photo and you want it to default to a 5-inch print dimension, setting its internal DPI to 300 DPI (1500 pixels / 5 inches) will achieve this.
In essence, DPI is a measure of density. For print, it’s about how much detail is physically rendered per inch. For digital images (when we refer to PPI), it’s about how many pixels are available to represent that detail per inch of the intended output.
The Crucial Role of Pixel Density: Beyond Just Changing a Number
Many users attempt to “change” an image’s DPI, thinking it’s a magic button for quality improvement. However, it’s vital to distinguish between merely altering a metadata tag and genuinely enhancing an image’s detail. The actual quality and scalability of your image are inextricably linked to its total pixel count, or resolution.
Pixel Resolution and Print Size: The Interplay
An image’s resolution, expressed as its width and height in pixels (e.g., 3000 x 2000 pixels), is the fundamental determinant of its detail. The DPI comes into play when you decide how large you want to print that image. The relationship is simple:
Print Size (inches) = Total Pixels / DPI
Or, inversely:
DPI = Total Pixels / Print Size (inches)
Consider an image with a resolution of 1000 x 800 pixels.
- If you print it at 10 x 8 inches, the effective DPI will be 1000/10 = 100 DPI.
- If you print the same image smaller, say 5 x 4 inches, the effective DPI will increase to 1000/5 = 200 DPI.
This illustrates a crucial point: simply changing the DPI value in an image’s metadata without altering the pixel dimensions will not add more detail or make your image sharper. It will only change the intended print size when interpreted by printing software. The total number of pixels available to describe the image remains unchanged. For a truly sharper, larger print, you need more pixels.
When to Increase Pixel Density: Enhancing for Print and Beyond
If you want to print a small, low-resolution image at a larger size without it appearing pixelated or blurry, you need to increase its actual pixel density (i.e., its total pixel count). This process is known as upscaling. Traditionally, upscaling in image editors involved “resampling,” where new pixels were interpolated from existing ones. While this could increase the file size, it often resulted in a soft, artificial, and less detailed image because the software was essentially guessing information.
However, advancements in AI-powered upscaling have revolutionized this process. Tools like Tophinhanhdep.com’s AI Upscaler can intelligently analyze an image, recognize patterns, and “invent” new, realistic pixel data, effectively increasing the image’s resolution (and thus its potential DPI for print) while preserving or even enhancing details. This is incredibly beneficial for:
- Large-format Printing: Turning a standard photo into a high-quality poster or canvas print for your home or art collection.
- Archival Photography: Restoring and enhancing older, low-resolution photographs from scanned film or digital cameras.
- Digital Art & Graphic Design: Preparing digital illustrations or graphic elements for projects requiring very high detail.
- Stock Photos: Meeting stringent resolution requirements for professional stock photography platforms, ensuring your images are truly high resolution.
- Aesthetic & Nature Wallpapers: Creating wallpapers and backgrounds that look stunning on large, high-resolution screens without any pixelation.
When using an AI upscaler, you’re not just changing a number; you’re adding genuine data (or a highly convincing simulation of it) to your image, enabling it to look crisp and detailed even when enlarged significantly. Our AI upscaler at Tophinhanhdep.com, for example, allows you to increase resolution up to 16x or 512 megapixels, ensuring your images are ready for even the most demanding applications.
Practical Methods to Adjust Image DPI
Now that we understand the distinction between changing DPI metadata and increasing pixel density, let’s explore the practical ways to adjust image DPI using various tools. Your choice of method will depend on whether you need to simply update a file’s metadata or genuinely enhance its resolution.
Changing DPI Metadata: A Quick Fix for Specific Requirements
Sometimes, you only need to change the DPI value embedded in an image’s metadata without altering its pixel dimensions or visual quality. This is useful for satisfying website upload requirements, print shop specifications, or for setting a default print size in document software. This process does not make your image sharper or allow for larger, higher-quality prints on its own.
Most image editing software allows you to modify this metadata:
1. Using Tophinhanhdep.com’s Image Tools (for metadata adjustment): While our AI Upscaler focuses on enhancing pixel density, Tophinhanhdep.com also offers quick tools like our Image Converters or Optimizers that can include options to simply override the DPI metadata without affecting image quality. This is ideal when you need to quickly meet a specific DPI requirement for online platforms or print services without undergoing a full upscaling process.
2. Adjusting DPI with Popular Image Editing Software:
-
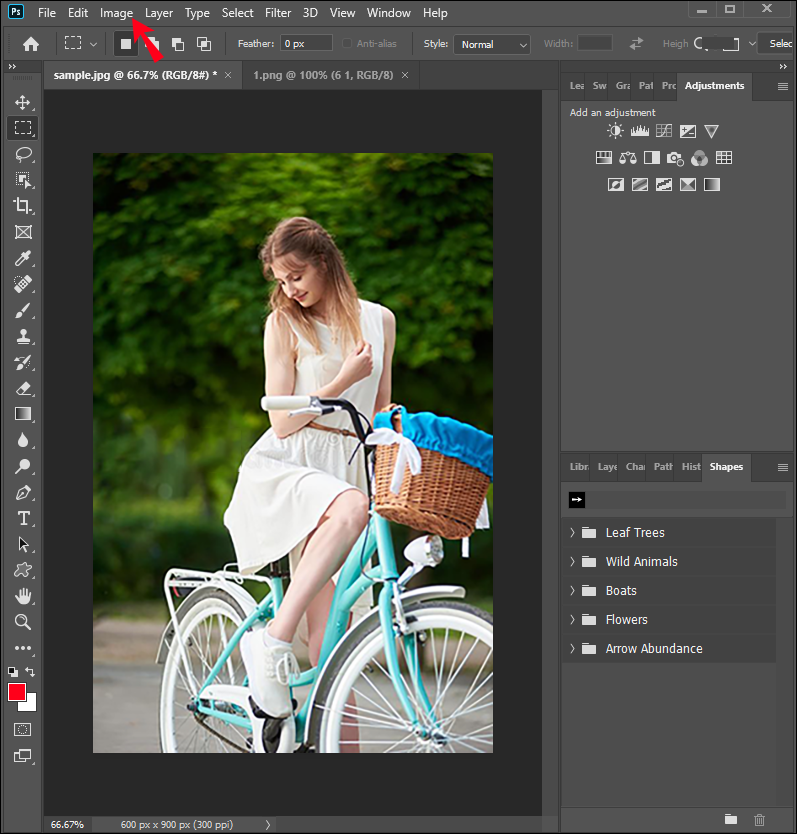
Adobe Photoshop (Paid, Windows/Mac):
- Open your image in Photoshop.
- Go to
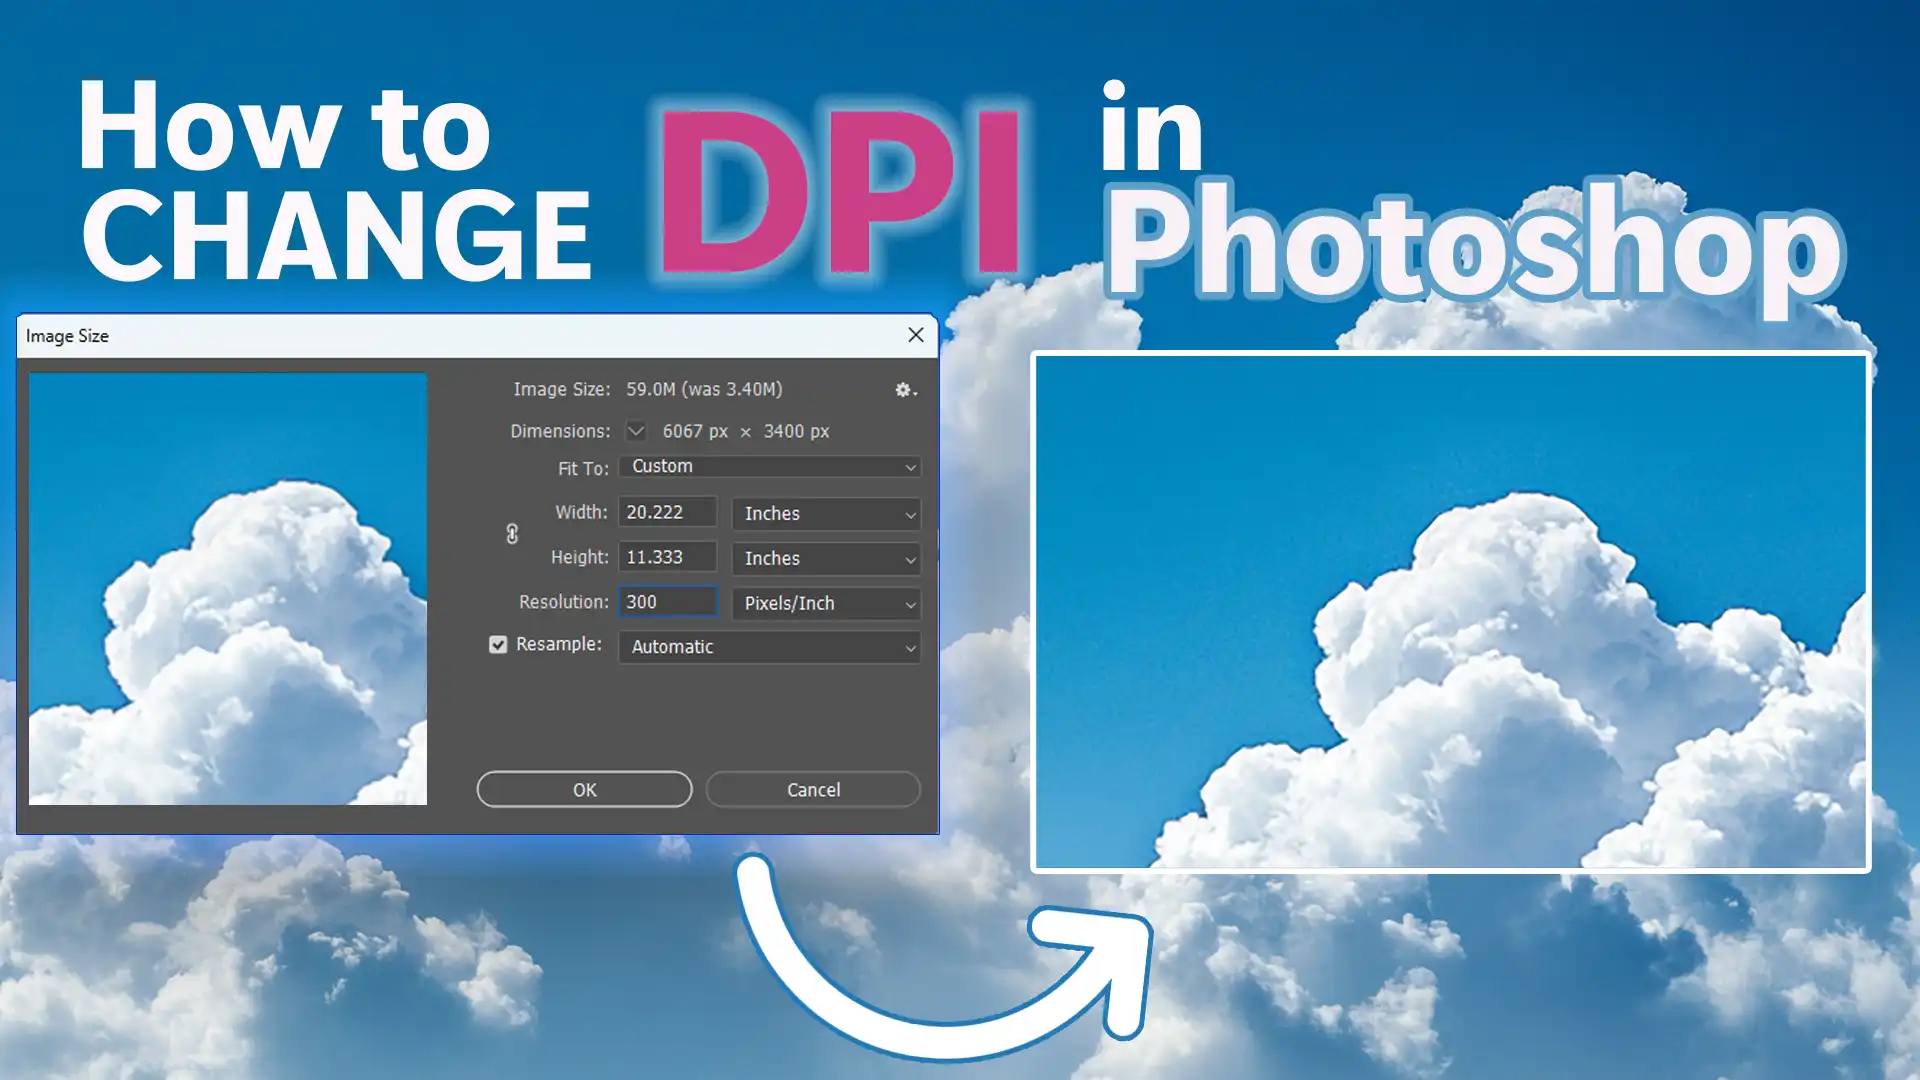
Image > Image Size. - In the dialog box, uncheck “Resample”. This is crucial as it prevents Photoshop from changing the pixel dimensions.
- In the “Resolution” field, enter your desired DPI (e.g., 300 pixels/inch).
- Click
OK. - Save your image (
File > Save As) to preserve the original file.
-
GIMP (Free, Windows/Mac/Linux):
- Open your image in GIMP.
- Go to
Image > Print Size. - Set your desired DPI value for “X resolution.” The “Y resolution” will typically adjust automatically if the chain icon is intact.
- Go to
File > SaveorSave Asto apply and store the changes.
-
Windows Photos App / Microsoft Paint (Built-in, Windows 10/11): While the Photos app and Paint in Windows 10/11 allow resizing images, directly changing the DPI metadata without resampling is often not straightforward or explicitly available in the same way as professional editors. Some guides suggest using print options to influence DPI, but this often relates to printer settings rather than the image file’s intrinsic metadata. For precise DPI metadata adjustment, dedicated image editors are more reliable. You can check DPI in Windows by right-clicking the image, selecting
Properties > Details. -
XnView (Free, Windows/Linux/Mac) & Irfanview (Free, Windows): These popular, lightweight image viewers and editors also offer simple DPI metadata changes:
- Open your image.
- Look for an “Image Size” or “Resize/Resample” option.
- Ensure “Resample Image” is unchecked (XnView) or directly input the DPI in a specific “DPI” data box without adjusting other parameters (Irfanview).
- Save the image (
Save As) with a new name.
3. Free Online Converters (Metadata only): Several websites offer quick, free DPI conversion services. These typically only override the DPI metadata without improving image quality.
- Search for “image DPI converter online.”
- Upload your image (JPEG, PNG, BMP, TIFF, ICO are commonly supported).
- Enter your desired DPI value.
- Download the new image file.
- Note: Use these for quick, non-critical adjustments, and always verify the output.
Leveraging AI for True Image Enhancement: Tophinhanhdep.com’s Approach
When you need to truly increase the resolution and pixel density of your image for larger, sharper prints or higher quality digital assets, Tophinhanhdep.com’s advanced AI upscaler is the ideal solution. It goes beyond simple metadata changes, adding genuine detail to your photos.
How to Enhance Image DPI for Sharper Prints with Tophinhanhdep.com:
- Log In to Tophinhanhdep.com: Access your account or quickly create a new one.
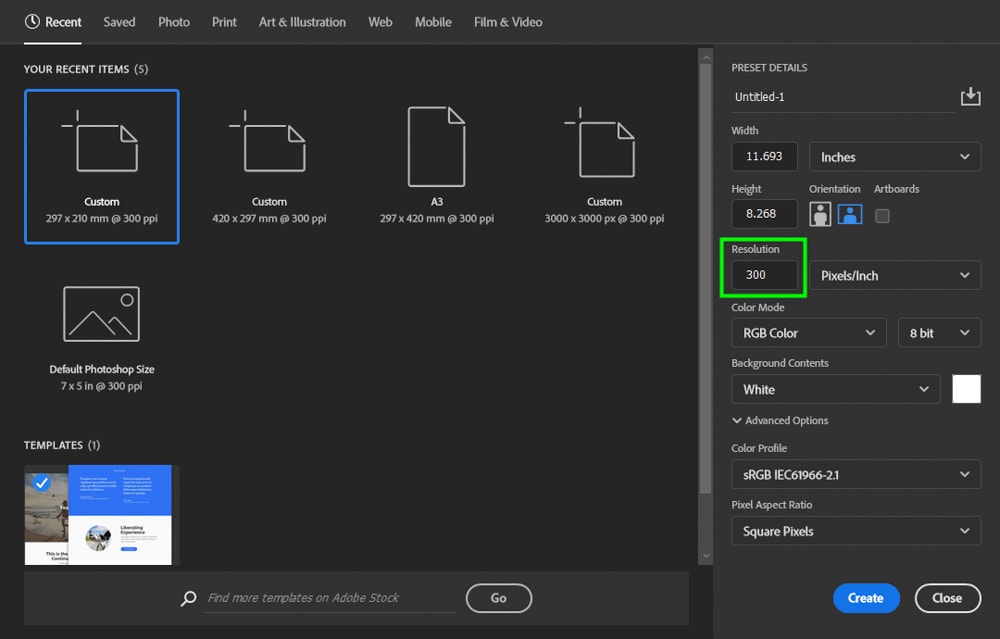
- Upload Your Images: Easily upload photos from your device, Google Drive, or by URL. You can even check the output DPI value below the resolution in the uploader. Our platform typically defaults to 300 DPI for all operations, but you can customize this.
- Set Desired Resolution and Enhance: Tophinhanhdep.com offers powerful AI upscalers, each tailored for different image types:
- Gentle: For subtle enhancements, ideal for text-heavy images.
- Balanced: Improves clarity in everyday photos (nature, architecture).
- Strong: Focuses on fixing blur and improving faces.
- Ultra: Our most transformative option, offering superior quality and detail.
- Digital Art: Perfect for illustrations and anime, preserving creative styles.
- Old Photo: Fixes damage, fading, and can colorize B&W photos. Select an upscaler and then customize the “Resolution” settings. Crucially, ensure you increase the image’s width & height (at least 2x) to genuinely add pixels. For example, if you start with an 1162 x 702 (0.9 MP) image, you might set the larger side’s resolution to 5250, allowing for a 15 x 9.06-inch print at 350 DPI after processing.
- Start Processing: Click the “Enhance” button and let our AI work its magic.
- Download Your Enhanced Image: Once ready, download your high-resolution, high-DPI image. Tophinhanhdep.com also stores your enhanced photos on the cloud for easy access.
Utilizing Printing Presets: To simplify the process, Tophinhanhdep.com also offers ready-made printing presets for popular standards like posters, photos, and international paper sizes (A5 to A0). Our app will automatically calculate and set the right resolution for your chosen preset at a default of 300 DPI, ensuring your image is perfectly sized and detailed for print.
Choosing the Right DPI for Your Needs
Determining the “best” DPI for an image isn’t a one-size-fits-all answer. It depends heavily on the image’s intended use, particularly for printing. While a general rule of thumb is “the higher the DPI, the better,” there are practical limits and considerations.
DPI Considerations for Printing: Viewing Distance, Subject, and Material
When preparing images for print, especially high-resolution photography or intricate digital art, consider these factors:
-
Viewing Distance: This is perhaps the most critical factor. The closer an image will be viewed, the higher the DPI (pixel density) it needs to appear sharp and detailed.
- 300-400 DPI: Ideal for materials viewed up close, such as photo books, brochures, flyers, magazines, standard photographs, and detailed graphic design pieces. This density ensures that fine details and text are crisp to the naked eye.
- 180-200 DPI: Often sufficient for posters or medium-sized prints viewed from a few feet away (e.g., 1 meter / 3.3 feet).
- 90-100 DPI: Can be acceptable for larger posters or placards viewed from a greater distance (e.g., 2 meters / 6.5 feet).
- Very Low DPI (e.g., 12-35 DPI): Perfectly fine for extremely large formats like billboards, which are designed to be viewed from tens or hundreds of meters away. At such distances, the human eye cannot discern individual “dots” or pixels, even at lower densities.
-
Subject Matter: The content of your image also influences DPI requirements.
- Detailed Subjects: Images with intricate patterns, fine textures (like architectural details or dense foliage), small text, or sharp edges will benefit significantly from higher DPI to retain their clarity.
- Simple Subjects: Images with broad strokes, large color blocks, or subjects without fine details (e.g., abstract backgrounds with soft gradients) might tolerate a slightly lower DPI without a noticeable loss of quality, especially at a distance.
-
Printing Material and Quality: The medium on which your image is printed affects how much detail it can physically hold.
- High-Quality Coated Paper: Glossy or semi-gloss papers with special coatings can hold ink more precisely, allowing you to fully utilize higher DPI values (300 DPI or more) for maximum detail and vibrancy.
- Uncoated or Absorbent Paper: These papers tend to absorb ink more, leading to a slight “spreading” of dots. In such cases, pushing the DPI too high (e.g., beyond 200-250 DPI) may not yield a discernible quality improvement and can even lead to muddying of details.
DPI for Web and Digital Displays: A Different Perspective
For images intended purely for digital display – whether as aesthetic wallpapers for your desktop, engaging backgrounds for a website, or shareable content on social media – the DPI value in the metadata is largely irrelevant. What truly matters are the pixel dimensions (width x height in pixels).
- Screen Resolution: Your monitor or device screen has a fixed pixel resolution (e.g., 1920x1080, 2560x1440, 3840x2160 for 4K). An image will display optimally if its pixel dimensions match or exceed the screen’s resolution. A 72 DPI image with dimensions of 3840x2160 pixels will look just as sharp on a 4K monitor as a 300 DPI image with the same pixel dimensions.
- File Size Optimization: For web images, pixel dimensions are important for visual quality, but keeping file sizes small is crucial for fast loading times. Often, images are compressed and optimized for web use, further reducing the significance of a high DPI metadata tag. Tophinhanhdep.com’s Image Optimizers can help you achieve the perfect balance between image quality and file size for web use.
- Responsiveness: Modern web design often requires images to be responsive, adapting to various screen sizes. This is achieved through CSS and HTML, which resize images based on viewport, rather than relying on an intrinsic DPI value.
In summary, for digital-only uses, prioritize optimizing pixel dimensions for screen compatibility and managing file size. The DPI metadata often serves as a legacy value (like the common 72 or 96 DPI defaults) and doesn’t directly impact screen clarity.
Frequently Asked Questions About Image DPI
Here are some common questions we encounter regarding image DPI, especially for those creating stunning visuals with Tophinhanhdep.com.
Q: What is the difference between DPI and PPI? A: DPI (Dots Per Inch) refers to the density of ink dots a printer places on paper. PPI (Pixels Per Inch) refers to the density of pixels in a digital image or on a screen display. Although technically distinct, they are often used interchangeably to describe the resolution or detail of a digital image intended for print. For simplicity, Tophinhanhdep.com uses “DPI” in the broader sense when discussing digital image resolution in relation to output quality.
Q: Is 72 DPI a high resolution? A: Not necessarily. 72 DPI is a legacy standard, often seen as a default for web images. For digital display, 72 DPI with large pixel dimensions (e.g., 1920x1080) can be high resolution. However, for print, 72 DPI is generally considered low resolution and would result in a pixelated print unless the image is very small or viewed from a significant distance. What truly matters is the total pixel resolution (megapixels) of the image.
Q: Can I convert a 72 DPI image to 300 DPI? A: Yes, you can change the DPI metadata from 72 to 300 using standard image editors or online tools. However, simply changing the number without increasing the actual pixel count will not add detail or improve print quality. To genuinely achieve a 300 DPI print from a low-resolution image, you need to use an upscaling technique, preferably an AI-powered one like Tophinhanhdep.com’s AI Upscaler, which adds actual pixel data intelligently.
Q: Does DPI matter for images on websites or digital wallpapers? A: Not directly. For web display, digital art, or wallpapers, the image’s pixel dimensions (e.g., 1920x1080, 4K) are far more important than its embedded DPI metadata. A high-pixel-dimension image will look sharp on a high-resolution screen regardless of its metadata DPI. Focus on pixel dimensions for optimal display and file size for fast loading on the web.
Q: How does increasing DPI affect file size? A: If you only change the DPI metadata without altering pixel dimensions, the file size will remain largely the same. However, if you increase the DPI by also increasing the image’s actual pixel resolution (upscaling), the file size will significantly increase because you are adding more data (more pixels) to the image. Tophinhanhdep.com’s Image Optimizers can help manage file sizes for enhanced images.
Q: What is the best DPI for a photo? A: For general-purpose printing, especially for photos, brochures, and materials viewed up close, 300 DPI is widely considered the optimal pixel density, offering a great balance of clarity and detail. For very large prints viewed from a distance, or for digital-only images, the optimal DPI (or pixel dimensions) can vary. Always check with your printing service for their specific minimal DPI requirements.
Q: Can Tophinhanhdep.com help me achieve the right DPI for my images? A: Absolutely! Tophinhanhdep.com is designed precisely for this. Our AI Upscaler allows you to not only increase the DPI to 300+ but also enhance the actual resolution and pixel density of your photos, ensuring crisp prints and stunning digital visuals of any size. For quick metadata adjustments, our various image tools can also assist.
Elevate Your Visuals with Tophinhanhdep.com
Understanding how to adjust DPI is an invaluable skill for anyone passionate about visual content. Whether you’re curating a collection of breathtaking nature photos, designing an abstract masterpiece, or simply looking for the perfect high-resolution background, the ability to control and enhance your image’s quality is paramount.
At Tophinhanhdep.com, we provide you with the resources and tools to transform your images into stunning visuals, regardless of their starting point. From powerful AI upscalers that breathe new life into low-resolution pictures to a vast repository of aesthetic wallpapers and inspiring photographic ideas, our platform is your ultimate partner in visual creation.
Remember, true image quality stems from pixel density. While changing DPI metadata has its uses, genuine enhancement comes from increasing your image’s resolution. With Tophinhanhdep.com’s advanced technology, you can confidently prepare your images for any purpose, ensuring they always look their absolute best. Explore our tools and collections today, and experience the difference that high-quality, perfectly optimized images can make!