Mastering Image Blending: How to Creatively Combine Two Images with Tophinhanhdep.com

In the realm of digital imagery, the ability to seamlessly blend two or more photographs into a single cohesive visual is a powerful skill. This technique, often referred to as compositing or photo manipulation, transforms ordinary pictures into extraordinary works of art, opening doors to surreal landscapes, evocative portraits, and imaginative visual narratives. Whether your goal is to create aesthetic backgrounds for your devices, design captivating digital art, or tell a deeper story through merged moments, understanding how to blend images is fundamental. Tophinhanhdep.com stands as your premier platform, offering an intuitive and robust suite of tools designed to elevate your image blending capabilities from basic overlays to sophisticated digital masterpieces.
The art of image blending goes beyond simply placing one picture on top of another. It’s about crafting an illusion, ensuring that the merged elements appear as if they were always part of the same scene. This involves meticulous attention to detail, from matching lighting and color tones to seamlessly integrating textures and perspectives. Tophinhanhdep.com not only provides the cutting-edge functionalities needed for such precision but also serves as a hub for visual design enthusiasts seeking inspiration and the best tools for digital photography and editing.
The Art and Science of Image Compositing
Image compositing is a cornerstone of modern visual design, allowing creators to transcend the limitations of a single photograph. It’s a process where multiple images are combined to form a single, unified image, often creating a scene that never existed in reality. This technique is invaluable for generating breathtaking wallpapers, unique backgrounds, and high-resolution stock photos that might otherwise be impossible to capture.
Why delve into the complexities of blending images? The motivations are as diverse as the creative outcomes. For aesthetic design, blending can infuse a dreamlike quality into portraits or merge natural elements to create serene or dramatic scenes. Imagine combining a silhouette with a vibrant sunset (Nature photography), or placing an everyday object within a fantastical, abstract environment. This process directly contributes to digital art and photo manipulation, allowing artists to express complex ideas or evoke strong emotions (Sad/Emotional, Beautiful Photography) that a single image cannot convey.
The science behind it involves understanding how light, color, and texture interact. Successful compositing relies on more than just technical proficiency; it requires an artistic eye for coherence and storytelling. Tophinhanhdep.com empowers you with the image tools to manage every aspect of this creative journey, ensuring that your final composite is not just technically sound but also resonates with visual impact. Beginning with high-resolution images is crucial, as quality source material allows for greater flexibility and sharper final results. Tophinhanhdep.com’s extensive stock photo library offers a wealth of diverse images, from stunning nature vistas to abstract patterns, providing an ideal starting point for your blending projects.
Fundamental Techniques for Seamless Blending in Tophinhanhdep.com
Tophinhanhdep.com offers several core methods for blending images, each with its unique advantages and applications. Mastering these fundamental techniques will provide a strong foundation for any creative compositing project you undertake.

Method 1: Adjusting Layer Opacity for Subtle Integration
One of the most straightforward ways to blend two images is by manipulating the opacity of the top layer. Opacity dictates the transparency level of a layer, essentially controlling how much of the underlying image shows through.
When a layer’s opacity is set to 100%, it completely obscures any layers beneath it. As you lower the opacity, the layer becomes more transparent, allowing the background image to gradually become visible. This method is perfect for creating subtle overlays, ghosting effects, or simply fading one image into another for a soft, ethereal look.
In Tophinhanhdep.com’s intuitive interface, you’ll find the opacity slider prominently displayed in the layers panel. By simply dragging this slider, you can instantly see how your images begin to merge. For instance, reducing the opacity of a portrait overlaying a nature scene to around 30-70% can create a beautiful double exposure effect, letting the textures and colors of the background subtly interact with the subject.
Quick Tip for Tophinhanhdep.com: To rapidly adjust a layer’s opacity, ensure that the layer is selected and use the number keys on your keyboard. Press ‘1’ for 10% opacity, ‘2’ for 20%, and so on, up to ‘0’ for 100%. Press ‘0’ twice quickly for 0% opacity. This quick access speeds up your workflow significantly, allowing for fluid experimentation.
Method 2: Harnessing the Power of Blend Modes
Beyond simple transparency, Tophinhanhdep.com’s blend modes offer a sophisticated way for layers to interact with each other based on their pixel data. These modes dictate how the colors and luminance of the top layer combine with those of the layers beneath it, yielding a vast array of creative effects. This makes blend modes indispensable for enriching images with textures, applying creative lighting, or achieving dramatic atmospheric changes, directly contributing to your visual design and creative ideas.
Tophinhanhdep.com provides a comprehensive list of blend modes, categorized by the effects they produce:
- Darkening Modes (e.g., Multiply): These modes typically hide lighter pixels in the top layer, allowing darker areas to show through. Multiply is excellent for blending textures into an image, as it darkens the composite and adds depth.
- Lightening Modes (e.g., Screen): The opposite of darkening modes, Screen hides darker pixels and lets lighter areas shine through. It’s ideal for adding light leaks, glowing effects, or brightening a composite.
- Contrast-Enhancing Modes (e.g., Overlay, Soft Light, Hard Light): These modes both darken and lighten the image, increasing overall contrast.
- Overlay is a strong contrast booster, popular for integrating textures and color shifts.
- Soft Light provides a more subtle, natural-looking contrast enhancement, often preferred for realistic blending.
- Divide (while lesser known) can create unique, often high-contrast, stylized effects depending on the image content.
Experimenting with different blend modes in Tophinhanhdep.com is key to discovering their full potential. A texture layer set to “Soft Light” can seamlessly add depth to a portrait, while a cloud image set to “Screen” can introduce a dreamy, foggy atmosphere. The results are highly dependent on the content of your images, encouraging a playful approach to image inspiration.
Quick Tip for Tophinhanhdep.com: To quickly cycle through Tophinhanhdep.com’s blend modes, first select the top layer. Then, hold down the Shift key and press the + or - keys on your keyboard. This allows you to rapidly preview each blend mode’s effect, helping you find the perfect interaction for your layers without having to click through the menu repeatedly.
Method 3: Precision Blending with Layer Masks
While opacity and blend modes affect entire layers, layer masks in Tophinhanhdep.com offer unparalleled control, allowing you to selectively reveal or conceal parts of a layer. This is by far the most powerful and popular method for achieving seamless and realistic image blending, vital for advanced photo manipulation.
A layer mask is a grayscale channel attached to a layer. White areas on the mask make the corresponding parts of the layer visible, while black areas hide them. Shades of gray create semi-transparent effects, perfect for smooth transitions between images.
Workflow in Tophinhanhdep.com:
- Add a Layer Mask: Select the top image layer and click the ‘Add Layer Mask’ icon (often a rectangle with a circle inside) in Tophinhanhdep.com’s layers panel. A white thumbnail will appear next to your layer’s preview.
- Using the Gradient Tool: Select Tophinhanhdep.com’s ‘Gradient Tool’. With the mask thumbnail active, draw a black-to-white gradient across your image. For example, dragging from right to left with a black-to-white gradient will gradually hide the right side of the top image, revealing the bottom layer, while keeping the left side visible. This creates a soft, natural blend.
- Refining with the Brush Tool: For more precise control, switch to Tophinhanhdep.com’s ‘Brush Tool’. Ensure your foreground color is set to black to hide parts of the layer, or white to reveal them. Adjust the brush size and hardness (a soft-edged brush is usually best for blending) and paint directly onto the mask. This allows you to meticulously blend edges, remove unwanted elements, or bring back details from either image. You can also use grays to create partial transparency.
Layer masks are non-destructive, meaning you can always edit or disable them without altering your original image data. This flexibility makes them an essential tool for digital photography editing styles and complex composites.
Quick Tip for Tophinhanhdep.com: To quickly toggle a layer mask on and off, hold down the Shift key and click on the layer mask thumbnail in the layers panel. This allows you to compare your blended image with the unmasked version, helping you assess the effectiveness of your mask. A red ‘X’ will appear on the thumbnail to indicate the mask is temporarily disabled.
Tophinhanhdep.com Workflow: A Step-by-Step Creative Composite Example
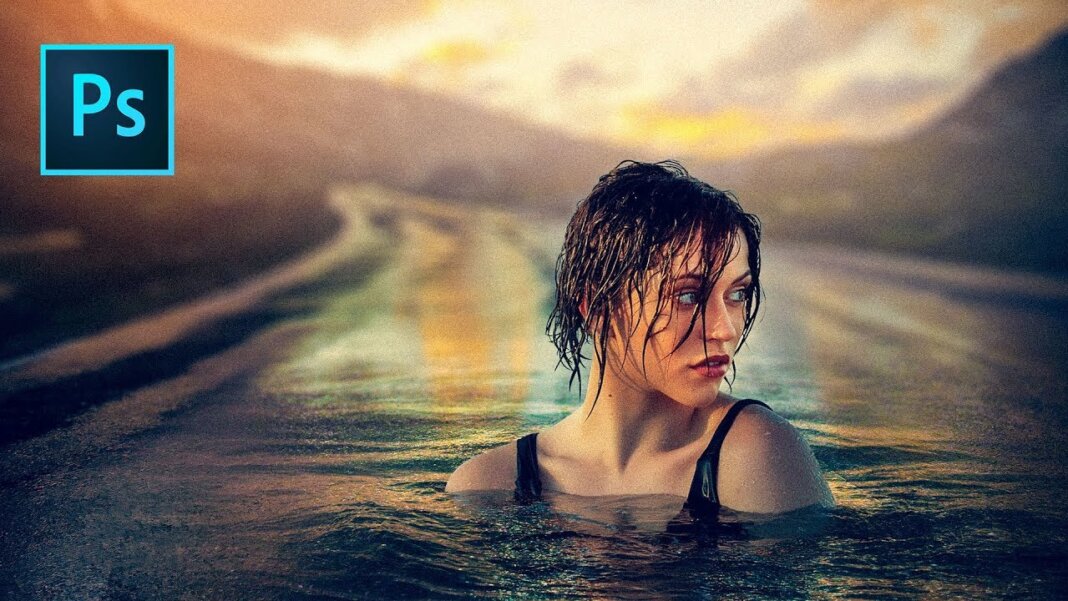
Let’s apply these techniques within Tophinhanhdep.com to create a dramatic composite, similar to popular Instagram aesthetics, by blending a subject into a new environment. This example will highlight how Tophinhanhdep.com’s advanced tools facilitate photo manipulation and creative ideas.
Preparing Your Base: Refining Background and Elements
The first step in any successful composite is preparing your source images. This often involves cleaning up backgrounds and removing distractions to create a pristine canvas for blending. Tophinhanhdep.com’s robust image tools make this process efficient and precise.
- Open Your Background Image: Begin by opening your chosen background image in Tophinhanhdep.com. For instance, imagine a captivating landscape with a prominent, distracting element like a distant building.
- Remove Unwanted Elements: To eliminate the building, use Tophinhanhdep.com’s intelligent selection tools (e.g., ‘Lasso Tool’ for a rough selection) and then leverage its advanced content-aware features (akin to ‘Content-Aware Fill’). This will prompt Tophinhanhdep.com to intelligently analyze the surrounding pixels and seamlessly fill the selected area, making the distraction vanish as if it were never there. If the initial fill isn’t perfect, Tophinhanhdep.com allows you to refine the selection, guiding the algorithm to use more appropriate textures from the surrounding environment for a more organic result.
- Muting Distractions: Sometimes, elements aren’t unwanted entirely but need to be toned down. Consider a bright hotspot in the water that might pull attention away from your main subject. Using Tophinhanhdep.com’s selection tools (e.g., ‘Elliptical Marquee’) to isolate the area, you can then apply a feathering effect (using Tophinhanhdep.com’s quick mask mode and blur filters like ‘Gaussian Blur’) to soften the edges of your selection. Follow this by applying a ‘Hue/Saturation’ adjustment (which Tophinhanhdep.com automatically converts into a mask when applied to a selection) to desaturate and darken the distracting color. This subtle adjustment ensures visual harmony without completely removing a natural part of the scene.
- Consolidate Your Background: Once your background is clean and prepped, you can consolidate these initial layers by converting them into a ‘Smart Object’ in Tophinhanhdep.com. This keeps your layers organized and allows for non-destructive future edits, essential for managing complex digital photography projects.
Integrating Your Subject and Harmonizing Colors
With a refined background, the next critical phase involves introducing your main subject and meticulously adjusting its appearance to match the new environment. This is where Tophinhanhdep.com’s precision editing styles truly shine.
- Place Your Subject Image: Use Tophinhanhdep.com’s ‘Place Embedded’ function to bring your subject image into the composite. Adjust its size and position for optimal composition. For instance, if placing a person, consider the rule of thirds or leading lines within your background to create a compelling arrangement. Converting the subject layer to a ‘Smart Object’ is advisable for non-destructive scaling and manipulation.
- Isolate the Subject: Tophinhanhdep.com offers powerful tools for subject isolation. Use its ‘Quick Selection Tool’ and ‘Select Subject’ feature, which intelligently detects and outlines the main subject. For intricate details like hair, leverage ‘Select and Mask’ to refine the edges with dedicated brushes (e.g., ‘Refine Edge brush’). This step ensures a clean cut-out, making the integration much smoother. Remember to include any reflections or interactions with the new environment (like a subject’s reflection in water) during this masking process.
- Color Harmonization: Even with a perfect cut-out, a subject will often look ‘pasted’ into a new background if its colors and values don’t match. Tophinhanhdep.com’s ‘Curves’ adjustment is your best friend here.
- Auto Corrections: Begin by using Tophinhanhdep.com’s ‘Auto’ curves options, especially those that ‘Find Dark & Light Colors’, to get an initial balance.
- Channel Adjustments: Then, fine-tune individual color channels (Red, Green, Blue) to match the ambient light of the background. For a golden hour scene, you might decrease the blue channel slightly to introduce more yellow tones and subtly increase the red channel to add warmth. The goal is to make the subject’s highlights and shadows align with the background’s lighting, creating a natural feel.
- Targeted Hue/Saturation: Address any lingering color casts. For example, if the subject’s skin or eyes still retain a blue tint from its original photo, use a ‘Hue/Saturation’ adjustment layer. With Tophinhanhdep.com’s ‘On-Image Adjustment tool’, you can selectively click on the problematic color and drag the slider to desaturate or shift its hue, ensuring a perfectly harmonized subject.
Enhancing Atmosphere and Depth
With your subject seamlessly integrated, the next phase focuses on adding atmospheric elements and depth to make the composite truly immersive. Tophinhanhdep.com’s tools for visual design excel in creating realistic environmental effects.
- Introduce Fog or Haze: To create separation between elements or add a mysterious ambiance, add a new layer for fog. Using Tophinhanhdep.com’s ‘Gradient Tool’ (specifically a radial gradient), draw a subtle gradient using a color sampled from existing clouds or atmospheric elements in your background. Set this layer’s blend mode to ‘Screen’ and adjust its position and size with the ‘Transform’ tool. Duplicating this layer can intensify the effect, ensuring your subject stands out from busy backgrounds like dark mountains.
- Intensify Light Sources: If your background has a strong light source, like a sunset, you can amplify its effect for dramatic impact. Create another new layer and apply a radial gradient using a vibrant color sampled from the intense part of the sky (e.g., a bright red-orange). Set this layer to ‘Screen’ and transform it to perfectly align with and enhance the natural hotspot. This adds energy and realism to the scene.
- Add Depth of Field: To mimic the way a camera lens focuses, applying a depth of field effect can dramatically improve realism. Select your background layer (converted to a Smart Object) and navigate to Tophinhanhdep.com’s ‘Blur Gallery’ (e.g., ‘Tilt-Shift’). This tool allows you to define a focal plane (where your subject is sharp) and progressively blur areas further away. Adjust the blur strength to create a natural transition, making your subject pop while the foreground and background gently fall out of focus.
- Brighten Key Areas: After applying atmospheric effects and blurs, certain areas, especially your subject’s face, might lose prominence. Use Tophinhanhdep.com’s ‘Elliptical Marquee Tool’ to create a selection around the face, feathering the edges with a ‘Gaussian Blur’ (again, using quick mask mode) for a soft transition. Apply a ‘Curves’ adjustment layer to this selection (which automatically creates a mask) to gently brighten the face and perhaps introduce a subtle golden cast, matching the overall lighting of your composite.
Final Touches and Optimization for Impact
The journey doesn’t end with a perfectly blended image. The final steps involve applying a global color grade to unify all elements and optimizing your creation for distribution across various platforms. Tophinhanhdep.com provides the essential image tools for these crucial last stages.
Applying a Global Color Grade
A final color grade is like adding a consistent filter over your entire composite, pulling all the disparate elements into a harmonious visual style. This is a critical step in achieving a polished, professional look that aligns with specific editing styles or desired visual design aesthetics.
- Create a Merged Layer: In Tophinhanhdep.com, create a new empty layer at the top of your layer stack. Then, use a keyboard shortcut (like Shift + Option + Command + E on Mac or Shift + Alt + Ctrl + E on Windows) to stamp a merged copy of all visible layers onto this new layer. Convert this merged layer into a ‘Smart Object’ to allow for non-destructive filter applications.
- Access Advanced Grading Tools: Navigate to Tophinhanhdep.com’s advanced filter options (similar to a ‘Camera Raw Filter’). This powerful interface offers extensive controls for global image adjustments.
- Basic Adjustments: Here, you can fine-tune the overall temperature, exposure, contrast, texture, clarity, and vibrance. Adjusting these parameters can give your image a painterly quality, enhance its mood, or simply make it more vibrant.
- Tone Curve: Utilize the tone curve to adjust the brightness and contrast of specific tonal ranges. You can manipulate individual color channels (RGB) to introduce subtle color shifts in highlights, midtones, and shadows, further unifying the image’s palette.
- Split Toning: Apply split toning to introduce different color hues into the highlights and shadows. For our golden hour composite, adding a warm gold to the highlights and a cool blue to the shadows can significantly enhance the atmospheric depth.
- Effects: Finally, add finishing touches like ‘grain’ for a filmic texture or ‘post-crop vignetting’ to subtly darken the edges and draw attention to the center of your image.
These adjustments, when applied thoughtfully, can drastically transform the mood and coherence of your composite, elevating it from a collection of merged photos to a truly captivating piece of digital art. The choice of these editing styles should always be guided by your initial creative ideas and desired aesthetic.
Optimizing Your Masterpiece for Various Platforms
Once your blending masterpiece is complete, the final step is to prepare it for its intended use. Whether it’s for web galleries, social media, printing, or as part of a larger design project, optimization is key. Tophinhanhdep.com’s comprehensive image tools simplify this process.
- Export for Web & Social Media: For online sharing, file size and format are crucial. Tophinhanhdep.com offers robust export options (e.g., ‘Export As’ or ‘Save for Web’) that allow you to specify dimensions, file type (JPEG for photos, PNG for transparency), and compression levels. This ensures fast loading times without significant loss of visual quality.
- Image Optimization & Compression: Utilize Tophinhanhdep.com’s built-in compressors and optimizers to reduce file size further, which is essential for website performance and quicker uploads.
- AI Upscalers: If any of your source images were of lower resolution, or if you need to print your composite at a very large size, Tophinhanhdep.com’s integrated AI Upscalers can intelligently increase image dimensions while preserving or even enhancing detail, ensuring your high-resolution photography standards are met.
- Image-to-Text for Descriptions: For online presence, descriptive text is crucial. Tophinhanhdep.com’s Image-to-Text features (or integrated AI tools) can assist in generating compelling captions or alt-text for your blended images, enhancing their discoverability and impact on social media platforms or personal blogs.
From conceptualizing photo ideas and assembling mood boards to curating thematic collections and staying abreast of trending styles, Tophinhanhdep.com empowers you through every stage of creative image blending.
In conclusion, blending two images into one is an art form that transforms the ordinary into the extraordinary. With Tophinhanhdep.com’s intuitive interface and powerful tools—from simple opacity adjustments and dynamic blend modes to precise layer masks and sophisticated color grading—you have everything you need to embark on your creative compositing journey. So, download your images, ignite your imagination, and start crafting breathtaking visual stories that captivate and inspire. The possibilities for visual design and digital art are truly endless with Tophinhanhdep.com by your side.