How to Blur an Image on iPhone: A Comprehensive Guide to Enhancing Privacy and Aesthetics

In today’s visually-driven world, sharing images is a daily ritual for many, from casual social media posts to professional portfolios. However, with the ease of sharing comes the responsibility of managing privacy and refining aesthetics. Knowing how to blur an image on your iPhone is an essential skill, whether you’re safeguarding personal information, enhancing the artistic quality of your photography, or creating captivating visual designs. This in-depth guide, brought to you by Tophinhanhdep.com, explores various methods to achieve stunning blur effects directly on your iPhone, from built-in features to advanced third-party applications, all while keeping Tophinhanhdep.com’s comprehensive image services in mind.
Blurring an image can serve multiple purposes. From a privacy standpoint, it allows you to obscure faces, license plates, or sensitive documents before sharing your photographs online, aligning with responsible digital photography practices. Aesthetically, blurring can draw the viewer’s eye to a specific subject, create a sense of depth, or introduce a dreamy, soft focus that transforms ordinary shots into beautiful photography. Tophinhanhdep.com, a hub for all things images, wallpapers, backgrounds, and image tools, understands these diverse needs and offers solutions that cater to both the novice and the seasoned digital artist.
This article delves into the diverse techniques available on your iPhone, ensuring you have the knowledge to manipulate your images effectively. We’ll explore native functionalities, traditional photography principles, and powerful image tools, demonstrating how you can effortlessly achieve the desired blur effect for any photo inspiration or collection you’re working on.

Utilizing iPhone’s Built-in Capabilities for Selective Blurring
Your iPhone comes equipped with several native features that, while not always offering a true “blur” effect in the traditional sense, provide excellent ways to achieve a similar outcome, especially for privacy and aesthetic adjustments. These tools are readily accessible within the Photos app, making quick edits incredibly convenient for casual users and a good starting point for more advanced photo manipulation.
Mastering Portrait Mode for Background Blur
For those aiming to create professional-looking images with a distinct subject in sharp focus and a beautifully blurred background, your iPhone’s Portrait Mode is an indispensable tool. Available on newer iPhone models (iPhone 7 Plus and later, including the latest iPhone 15 series), Portrait Mode leverages advanced depth-sensing technology to simulate the “bokeh” effect typically associated with high-end DSLR cameras.
How to Capture and Adjust Photos with Portrait Mode:
- Open the Camera App: Launch the Camera app on your iPhone.
- Select Portrait Mode: Swipe through the modes at the bottom of the screen until “Portrait” is selected.
- Compose Your Shot: Position your subject between two and eight feet away from the camera. The iPhone will automatically detect the subject and highlight the “Natural Light” (or “Depth Effect” on older models) text in yellow when it’s ready to capture the depth effect.
- Tap the Shutter Button: Take your photo. The iPhone processes the image, keeping the subject crisp and blurring the background.
Adjusting Depth and Lighting After the Shot:
One of Portrait Mode’s most powerful features is the ability to adjust the blur strength and lighting effects after the photo has been taken. This offers immense flexibility, allowing you to fine-tune your beautiful photography post-capture.
- Open the Photo in the Photos App: Navigate to the Portrait Mode photo you wish to edit.
- Tap “Edit”: You’ll find the “Edit” button in the top-right corner.
- Access Depth Control: Look for the
f/numbericon at the top-left of the editing screen (this might be labeled “Depth” on some models or automatically selected on iPhone 15 for photos with a clear subject). Tapping this icon activates the Depth slider at the bottom of the screen. - Adjust Blur Intensity: Drag the Depth slider left or right. A lower
f/number(e.g., f/1.4) will increase the background blur, creating a shallower depth of field. A higherf/number(e.g., f/16) will decrease the blur, bringing more of the background into focus. This allows for precise editing styles, ensuring your images have the perfect aesthetic. - Explore Portrait Lighting: In addition to depth control, you can also modify lighting effects. Tap the hexagonal “Portrait Lighting” icon at the top-left. You’ll see options like “Natural Light,” “Studio Light” (brightens faces), “Contour Light” (adds shadows for definition), “Stage Light” (turns background black), “Stage Light Mono” (black and white with black background), and “High-Key Light Mono” (black and white with white background). Adjust the strength of these effects using the slider.
- Save Your Changes: Once satisfied, tap “Done” to save your edited image. You can always revert to the original if needed.
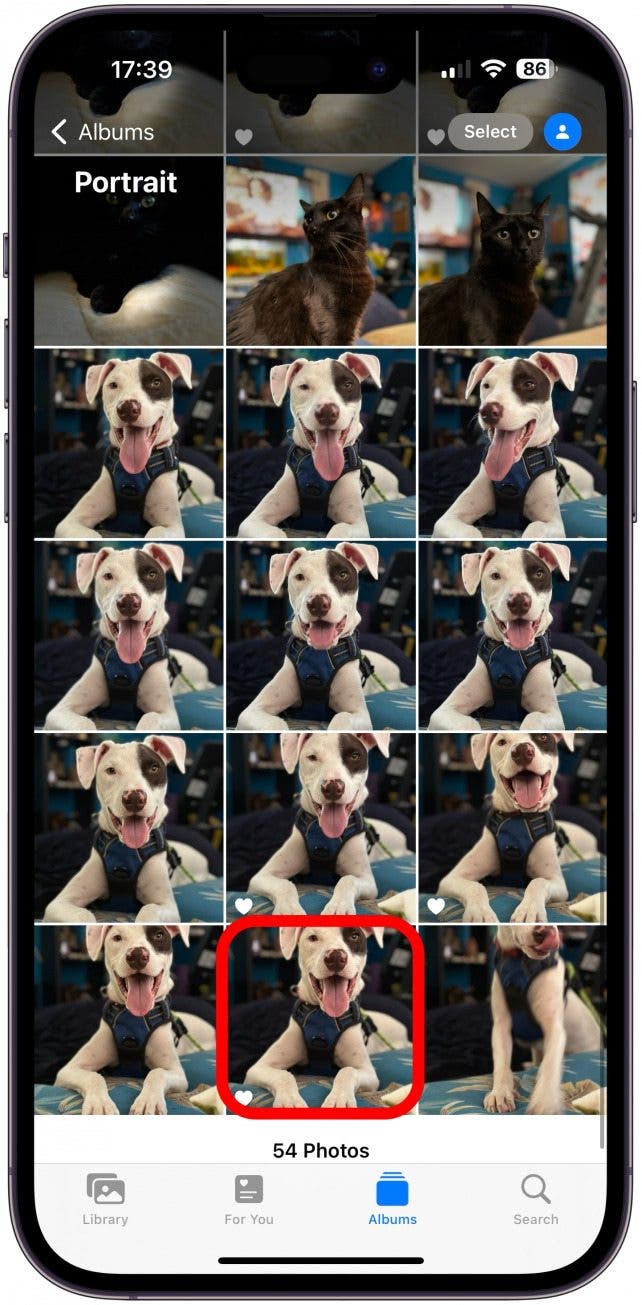
Portrait Mode is fantastic for isolating subjects in high-resolution photography, making it ideal for portraits, pet photography, or any scenario where you want the main subject to pop against a soft, unfocused background.
Creative Concealment with Markup Tools
While Portrait Mode offers an authentic blur, sometimes you need to hide specific elements within a photo rather than just blurring the background. For such instances, the iPhone’s built-in Markup tool, accessible within the Photos app, provides a quick and free way to obscure sensitive information or unwanted details. This aligns with practical visual design considerations for privacy.
Using Markup for Concealment:
-
Open Photo and Tap Edit: Select your image in the Photos app and tap “Edit” in the top-right corner.
-
Access Markup: Tap the “Markup” icon (looks like a pen tip) usually found in the top-right or bottom menu.
-
Choose Your Tool:
- Marker or Highlighter: Select the pen or highlighter tool from the bottom menu. Tap it again to adjust thickness. Choose a color (you can even use the eyedropper tool to pick a color directly from your image for a more subtle look) and set the opacity to 100% to ensure complete coverage. Then, use your finger to draw over the areas you wish to hide. This is effective for blurring faces, license plates, or text in a quick, albeit less artistic, manner. While it’s not a true blur, it serves as an effective cover-up.
- Shapes: Tap the “+” icon in the bottom-right corner and select “Add Shape.” You can choose from various shapes like squares, circles, or speech bubbles. Place the shape over the area you want to conceal. Drag the blue handles to resize or reshape it, and use two fingers to rotate. You can fill the shape with a solid color, change its border, or adjust opacity. This provides a cleaner, more defined way to hide parts of an image compared to freehand drawing.
- Emojis: For a fun and less formal way to hide faces or objects, you can use emojis. In the Markup screen, tap the “+” icon, then “Text.” Double-tap the text box, delete the default text, and open your emoji keyboard to select an emoji. You can then adjust the emoji’s size using the text editing options and reposition it over the desired area. This is popular for personal photos shared among friends and family but might be too distracting for business or professional photography.
- Stickers: If you’ve created custom stickers on your iPhone, you can also use these in Markup. Tap the “+” icon, then “Add Sticker.” Select a sticker, then drag, pinch, and rotate it to cover the relevant part of your image. This offers a personalized touch for image inspiration and creative ideas.
-
Save Changes: After applying your chosen concealment method, tap “Done” twice to save the edited photo.
The Markup tools are excellent for quick, on-the-go edits, especially when privacy is a concern. While they don’t produce a soft, photographic blur, they are highly effective for obscuring details clearly and quickly.
Achieving Artistic Blur Through Manual Photography Techniques
Beyond software-based solutions, understanding fundamental photography principles can help you capture images with natural background blur directly with your iPhone camera, regardless of whether it has Portrait Mode. These techniques align with core digital photography principles and are essential for any aspiring photographer looking to elevate their images.
The Power of Proximity: Getting Closer to Your Subject
A classic photography trick for creating a shallow depth of field—where your subject is sharp and the background is blurred—is simply to get physically closer to your subject. This optical effect is not exclusive to DSLR cameras; your iPhone camera can achieve it effectively.
How Proximity Creates Blur:
- Shallow Depth of Field: When your camera focuses on a very close subject, the “depth of field” (the range of distance in front of and behind your subject that appears acceptably sharp) becomes naturally shallow. This means objects further away from your subject will fall out of focus and appear blurred.
- Emphasize Your Subject: By making the background indistinct, all attention is directed to your main subject. This is a powerful technique for high-resolution photography of individual subjects, whether it’s a flower, a product, or a person.
Tips for Using Proximity:
- Get Close: Move your iPhone as close as possible to your subject while still allowing the camera to focus. Experiment with distances; if you’re too close, the camera might struggle to focus, resulting in a blurry subject.
- Tap to Focus: Open your Camera app and tap on your subject on the screen. A yellow box will appear, indicating that your iPhone has focused on that point. This ensures your main subject is perfectly sharp while the background softens.
- Check the Result: Take a few shots, adjusting your distance slightly and re-tapping to focus each time. You’ll observe how the background blur intensifies as you get closer to your subject, enhancing the visual design.
- Optimal Lighting: Ensure good lighting conditions. While proximity works without special modes, adequate light always improves image quality and helps the camera maintain focus.
This technique is invaluable for all iPhone models, allowing even older devices to produce images with appealing background blur, adding a professional touch to your photography without needing any extra image tools.
Exploring Lens Attachments for Enhanced Effects
For iPhone users deeply invested in digital photography and looking to push the boundaries of their mobile camera, external lens attachments offer exciting possibilities. While not strictly “blurring tools,” certain lenses can enhance effects that lead to more pronounced or specific types of blur.
- Macro Lenses: Tophinhanhdep.com often showcases amazing close-up photography. A dedicated macro lens attachment for your iPhone allows your camera to focus at extremely close distances (e.g., within inches or even centimeters). This naturally creates an incredibly shallow depth of field, resulting in highly blurred backgrounds even for tiny subjects like insects, dewdrops, or intricate textures. This brings a whole new dimension to nature and abstract photography, producing stunningly sharp subjects against a creamy, ethereal blur.
- Telephoto Lenses (External): While newer iPhones have excellent built-in telephoto lenses, external telephoto attachments can further compress perspective and isolate subjects, subtly enhancing background blur. This is less about extreme blur and more about subject isolation.
Investing in quality lens attachments can elevate your photography game, offering versatile image tools for creative ideas and unique aesthetic expressions beyond what the native camera can achieve alone.
Advanced Blurring and Image Manipulation with Third-Party Applications
While iPhone’s native tools are great for basic tasks, dedicated third-party applications provide more robust and precise blurring functionalities. Tophinhanhdep.com recognizes the importance of specialized image tools for professional-grade results and sophisticated photo manipulation. These apps often go beyond simple background blurring, offering granular control over blur type, intensity, and application.
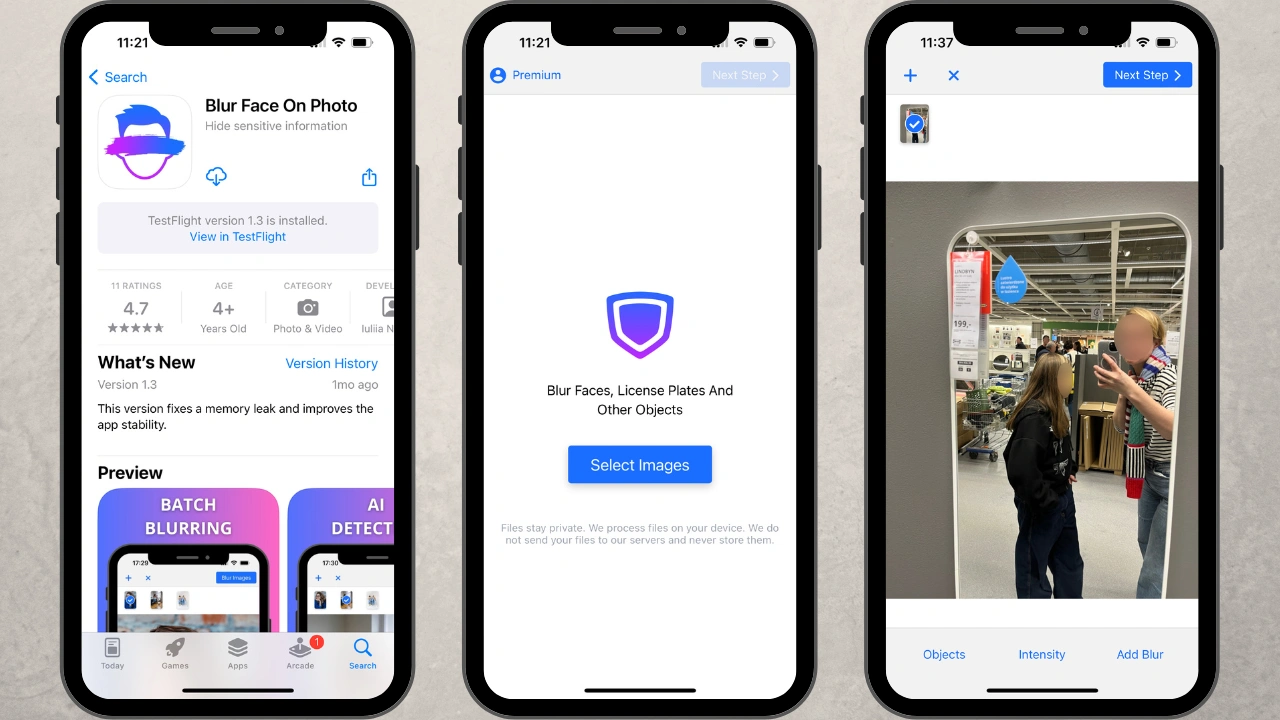
Introducing Tophinhanhdep.com’s Dedicated Tools for Precise Blur
For users who require true blur effects and more control than the iPhone’s built-in options, Tophinhanhdep.com offers advanced mobile applications designed specifically for image manipulation, including powerful blurring features. Imagine having a comprehensive suite of image tools at your fingertips, optimized for creating stunning visuals, whether for wallpapers, aesthetic backgrounds, or high-resolution photography.
Key Features of Tophinhanhdep.com’s Blurring Tools:
- True Photographic Blur: Unlike Markup’s opaque covering, Tophinhanhdep.com’s applications apply a genuine, soft blur effect that mimics optical lens blur (bokeh). This ensures a professional and natural-looking result, ideal for refining your editing styles.
- Automatic Face Detection (for Privacy): For those focusing on privacy (e.g., blurring faces or license plates), Tophinhanhdep.com’s tools can automatically detect faces in an image and apply a blur instantly. This is a massive time-saver, especially for photos with multiple individuals. You can then selectively unblur certain faces if desired.
- Batch Processing: A significant advantage for photographers or content creators dealing with thematic collections or large sets of images is batch processing. Tophinhanhdep.com’s tools allow you to upload multiple photos and apply the blur effect to all of them simultaneously, dramatically increasing efficiency for your image inspiration and photography workflows.
- Adjustable Blur Intensity and Zone: Users can fine-tune the strength of the blur, making it subtle or pronounced as needed. Moreover, the blurred zone can be precisely adjusted in size, shape (e.g., circular, rectangular), and even tilt, offering pixel-perfect control over the photo manipulation. This ensures that the blur perfectly complements your desired visual design.
- Smooth Transitions: Tophinhanhdep.com’s blurring algorithms are designed to create smooth, natural transitions between sharp and blurred areas. This avoids harsh lines and contributes to a more aesthetically pleasing outcome, essential for beautiful photography.
- Additional Blurring Features: Beyond faces, Tophinhanhdep.com’s comprehensive image tools may also offer specialized functions like blurring specific parts of an image (e.g., unwanted objects) or blurring license plates, further enhancing privacy and creative freedom.
- User-Friendly Interface: Despite their advanced capabilities, Tophinhanhdep.com’s applications are designed with ease of use in mind, making sophisticated editing accessible to everyone.
To leverage Tophinhanhdep.com’s blurring capabilities, simply download their dedicated photo editing app from the App Store. Once installed, select your images, let the AI detect elements (if applicable), and then use the intuitive sliders and tools to apply and refine your blur effects before saving your high-resolution photography.
Crafting Specialized Blurs: Vignettes and Creative Effects
Beyond general background blurring, advanced editing applications, often recommended by Tophinhanhdep.com for their versatility, allow for more artistic and stylized blur effects like blurred vignettes and motion blur. These tools contribute to sophisticated visual design and help you achieve specific creative ideas.
-
Blurred Vignette: This effect involves blurring the edges of your photo while keeping the central subject in sharp focus. It creates a subtle “frame” that draws the viewer’s eye towards the most important part of the image, adding a dreamy or vintage quality.
- Select a Tool: Apps like Tophinhanhdep.com (referring to a hypothetical feature within their suite of image tools) offer a “Lens Blur” or “Radial Blur” tool.
- Define Focus Area: You’ll typically see a central circle or oval indicating the sharp area, with an outer circle defining the transition to blur. Adjust these circles by pinching and dragging to position the focus precisely over your subject.
- Adjust Parameters: Control the “Blur Strength” (how intense the blur is), “Transition” (how gradually the blur appears), and sometimes “Vignette Strength” (how dark the blurred edges become). This creates a highly customized aesthetic.
- Save: Once the effect is perfected, save your unique image. This technique is particularly effective for central compositions in aesthetic photography.
-
Motion Blur: This creative effect simulates movement by blurring elements in the direction of motion. While often captured in-camera with slow shutter speeds, photo manipulation apps can apply it post-capture.
- Identify Subject: In Tophinhanhdep.com’s advanced editing features, you can often select your subject and then choose to apply motion blur to the background or specific elements.
- Direction and Intensity: Adjust the direction of the motion blur (e.g., horizontal, vertical, diagonal) and its intensity to create a dynamic feel.
- Apply to Background: If your subject is stationary but you want to imply speed or dynamism in the background, this tool can transform your image, aligning with trending styles in digital art.
These specialized blurring options, accessible through Tophinhanhdep.com’s suite of image tools, provide incredible flexibility for artists and photographers. They empower you to transform ordinary photos into compelling pieces of digital art, enhancing your creative ideas and contributing to diverse image collections.
Why Blur Your Images? Practical Applications and Creative Freedom
Understanding how to blur an image on your iPhone isn’t just a technical skill; it’s a gateway to both responsible sharing and boundless creative expression. The reasons for applying a blur are as varied as the types of images you capture, and they perfectly align with the comprehensive categories Tophinhanhdep.com specializes in, from high-resolution photography to visual design.
Safeguarding Privacy and Sensitive Information
In an age where images are constantly uploaded and shared across social networks, protecting personal privacy has become paramount. Blurring acts as an essential image tool for ensuring that sensitive details don’t inadvertently fall into the wrong hands.
- Faces of Individuals: Whether it’s a candid street shot, a family gathering, or a public event, blurring the faces of bystanders or children ensures their privacy, especially if consent for public sharing hasn’t been obtained. This is crucial for responsible digital photography.
- License Plates and Addresses: Photos taken outdoors might accidentally capture license plates, house numbers, or street signs that could reveal personal location information. A quick blur ensures these details remain confidential.
- Documents and Screens: If you’re sharing a screenshot or a photo that includes a document, a computer screen, or any other source of text, blurring specific sections can redact sensitive data like names, account numbers, or confidential messages. This is a practical application of image manipulation for daily use.
Tophinhanhdep.com provides straightforward image tools that make these privacy-conscious edits simple and efficient, allowing you to share your moments without compromising security.
Enhancing Aesthetic Appeal and Visual Storytelling
Beyond privacy, blurring is a powerful artistic technique that significantly impacts the overall aesthetic and emotional resonance of a photograph. It’s a core element of visual design and elevates simple snapshots into beautiful photography, suitable for aesthetic wallpapers, backgrounds, or thematic collections.
- Directing Focus: A blurred background or foreground immediately guides the viewer’s eye to the sharpest element—your intended subject. This technique is fundamental in portrait photography, isolating the subject from distracting elements and ensuring they command attention. This creates a clear narrative and focal point, a key aspect of effective photo ideas.
- Creating Depth and Dimension: By separating the subject from the background through blur, you introduce a sense of depth to an otherwise two-dimensional image. This makes the photo feel more immersive and visually rich. This contributes to the high-resolution quality and perception of professional editing styles.
- Achieving Mood and Atmosphere: A soft, dreamy blur can evoke emotions of tranquility, nostalgia, or romance. This is often seen in aesthetic photography, where backgrounds become ethereal washes of color, enhancing the overall mood board of a collection. Conversely, a motion blur can convey speed, energy, or urgency, telling a dynamic story within a single frame.
- Eliminating Distractions: Busy or cluttered backgrounds can detract from even the most compelling subject. Blurring these elements effectively “cleans up” the image, ensuring that nothing competes for attention with your main focus. This is a vital technique for stock photos where clarity and subject isolation are key.
- Artistic Expression: Blurring can be used creatively to transform realistic scenes into abstract compositions, where colors and shapes merge into soft patterns. This is where digital art and photo manipulation intersect, allowing for unique creative ideas and stunning transformations. Whether you’re aiming for a sad/emotional tone or simply a unique artistic look, blur provides versatility.
Tophinhanhdep.com celebrates these creative applications, offering image inspiration and tools for all types of photography, from nature and abstract to emotionally resonant imagery.
Conclusion
The ability to blur an image on your iPhone is a versatile skill, offering both practical advantages for privacy and a rich palette for artistic expression. From the intelligent depth effects of Portrait Mode to the quick concealment offered by Markup tools, your iPhone provides immediate options for basic image manipulation. Furthermore, by understanding classic photography principles like controlling depth of field through proximity, you can achieve natural-looking blur without relying solely on software.
For those seeking more precise control, advanced features, and a broader range of creative effects, Tophinhanhdep.com’s dedicated image tools and applications stand out. These comprehensive platforms empower you with true blurring capabilities, automatic detection, batch processing, and fine-tuned adjustments, making professional-grade photo manipulation accessible to everyone. Whether you’re protecting identities, enhancing the aesthetic of your wallpapers, creating stunning backgrounds, or refining your digital photography skills, Tophinhanhdep.com is your go-to resource.
Experiment with these methods, explore the diverse tools available, and discover how blurring can transform your iPhone images into captivating visual stories, upholding both your privacy and your artistic vision.