The Ultimate Guide to Achieving Beautifully Blurred Image Backgrounds

In the captivating world of digital photography and visual design, few techniques are as instantly transformative and aesthetically pleasing as blurring the background of an image. This simple yet profound adjustment has the power to elevate an ordinary photograph into a compelling work of art, drawing the viewer’s eye precisely where the creator intends. On Tophinhanhdep.com, where we celebrate everything from stunning Wallpapers and Backgrounds to cutting-edge Image Tools and Visual Design principles, understanding how to master background blur is an indispensable skill.
A blurred background, often referred to as “bokeh” (from the Japanese word boke, meaning “haze” or “blur”), creates a shallow depth of field, effectively separating the main subject from its surroundings. This technique is not just for professional photographers with high-end DSLR cameras; with advancements in digital photography and powerful Image Tools available on platforms like Tophinhanhdep.com, anyone can achieve breathtaking results. Whether you’re aiming for Beautiful Photography, crafting a specific Aesthetic, or simply want to emphasize a product in a Stock Photo, learning to blur backgrounds is a game-changer. This comprehensive guide will walk you through various methods, from in-camera techniques to advanced post-processing, ensuring your images stand out with professional finesse.

Understanding the Magic of Background Blur: Why It Matters
The allure of a blurred background lies in its ability to guide perception and evoke emotion. When executed correctly, it transforms a busy, distracting backdrop into a soft, ethereal canvas that complements, rather than competes with, your subject. This technique is fundamental to effective Visual Design and is a hallmark of many trending styles in photography.
The Power of Depth of Field
At its core, blurring the background is about manipulating depth of field. Depth of field refers to the range of distance in a photograph that appears acceptably sharp. A shallow depth of field means only a small portion of the image is in sharp focus, while the areas in front of and behind it are progressively blurred. Conversely, a large or deep depth of field keeps most of the image, from foreground to background, in sharp focus.
For portraits, product shots, or any image where a single subject needs to command attention, a shallow depth of field is highly desirable. It isolates the subject, creating an immediate sense of prominence and depth. Imagine a vibrant flower against a softly diffused garden, or a candid portrait where the bustling city melts into an abstract blend of colors. This emphasis is crucial for creating impactful images, whether for Image Inspiration, a Mood Board, or a commercial Graphic Design project.

Beyond mere emphasis, a blurred background can also:
- Eliminate distractions: Cluttered backgrounds can detract from even the most compelling subject. Blur tidies up the scene, ensuring nothing steals the spotlight.
- Add aesthetic appeal: The soft, creamy quality of a well-executed blur, especially with attractive bokeh (the quality of the blur in the out-of-focus areas), is inherently beautiful and sophisticated. It contributes significantly to the overall Aesthetic of an image.
- Create a sense of drama or mood: A blurred background can evoke a dreamlike quality, add a sense of movement (with motion blur), or create a more intimate atmosphere, contributing to Sad/Emotional or abstract imagery.
- Achieve a professional look: This technique is a staple in high-resolution photography, from fashion editorials to nature close-ups, lending an air of professionalism that distinguishes casual snapshots from carefully composed images.
Understanding this foundational concept is the first step towards mastering background blur, whether you’re working with your device’s camera or diving deep into Tophinhanhdep.com’s Image Tools for Photo Manipulation.
Achieving Background Blur Through In-Camera Techniques
While editing tools offer incredible flexibility, some of the most natural and stunning background blur effects are achieved directly in-camera. These techniques leverage the physical properties of light and lenses, or the computational power of modern devices, to create a beautiful separation between your subject and its environment.
Leveraging Specialized Camera Modes
Many contemporary devices, including popular smartphones, come equipped with specialized camera modes designed to simulate the shallow depth of field traditionally associated with DSLR cameras. These modes use advanced software and multiple lenses to detect depth and intelligently blur the background while keeping the subject sharp.
A common example is “Portrait mode,” a feature found on many modern cameras and smartphones. This mode employs depth-effect software to process the image as you capture it. Your subject remains in sharp focus, making it ideal for portraits and situations where distracting backgrounds need to be softened. Tophinhanhdep.com recognizes the value of such features in Digital Photography, making professional-looking results accessible to everyone.
To use such a mode (if available on your device):
- Open your camera app and select the specialized “Portrait” or “Depth Effect” mode.
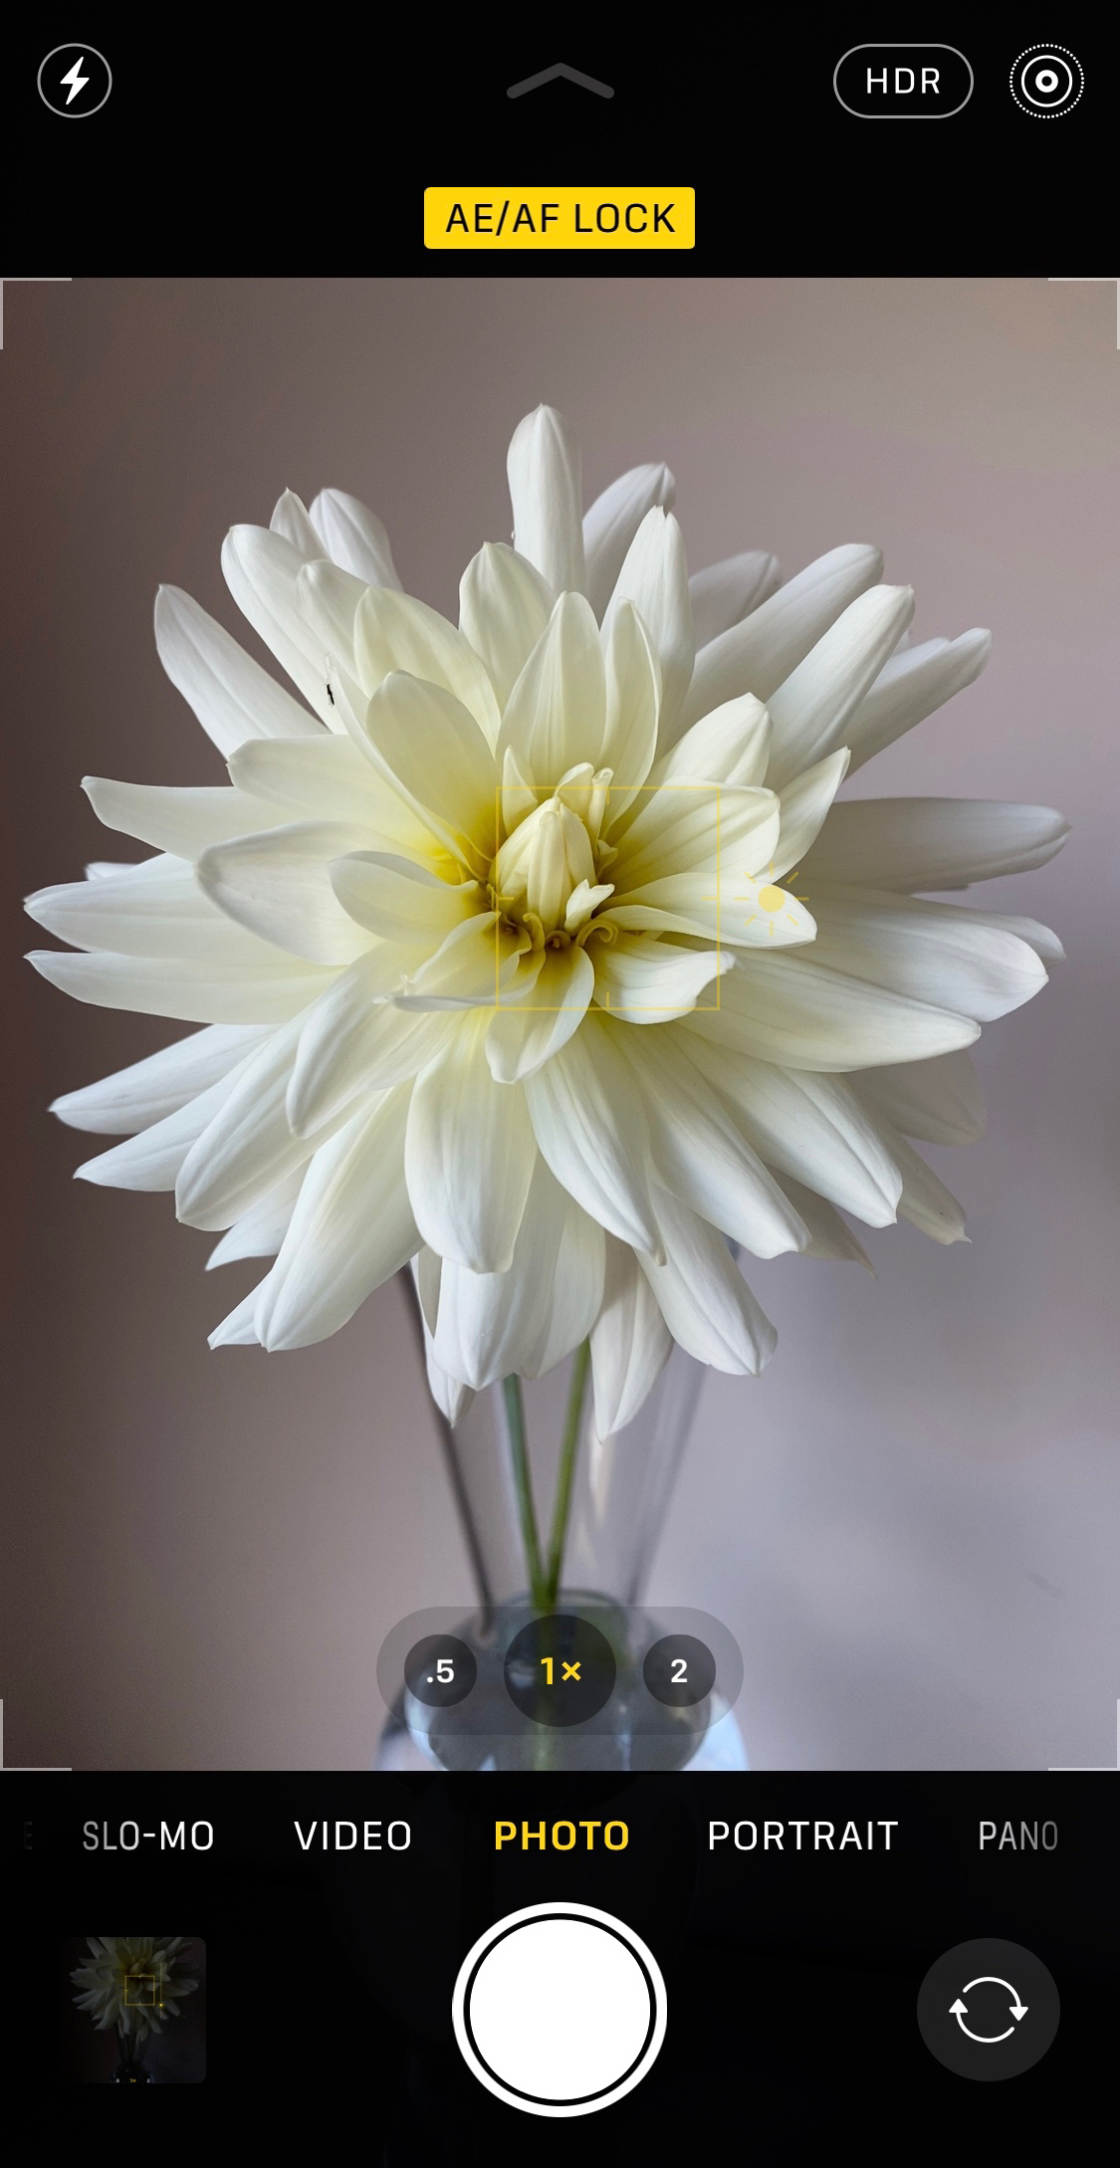
- Position your subject within the recommended distance range (e.g., typically between two and eight feet from the camera). Ensure there’s adequate lighting, as these modes sometimes struggle in low-light conditions.
- Compose your shot. Your device will usually indicate when it has successfully identified the subject and is ready to apply the background blur (often by highlighting the subject or displaying a message like “Depth Effect”).
- Capture the photo. The resulting image will feature your subject in sharp focus with a beautifully blurred background.
A significant advantage of these modes, especially on newer devices, is the ability to adjust the blur strength after the photo has been taken. Within your device’s photo editor or a Tophinhanhdep.com integrated editing feature, you might find a “Depth” slider or an f/number icon. A lower f/number typically indicates a stronger blur, while a higher f/number results in less blur and more background detail. This post-capture flexibility allows for fine-tuning the Aesthetic to your exact preference. Some advanced modes also offer “Portrait Lighting” effects, letting you add different studio-style lighting to your subject, further enhancing the Photo Manipulation possibilities.
Physical Proximity for Natural Blur
Even if your device doesn’t offer a specialized “Portrait mode,” you can still achieve impressive background blur using a fundamental photographic principle: get closer to your subject.
The closer your camera is to the subject, the shallower the depth of field becomes, resulting in a more pronounced background blur. This technique works with virtually any camera, from basic point-and-shoots to professional gear.
Here’s how to implement this simple yet effective trick:
- Move physically closer to your subject. The distance between your subject and the background also plays a role; a greater separation between the two will enhance the blur effect.
- Ensure your subject is in sharp focus. Tap on your screen (if using a smartphone) or adjust your camera’s focus point to lock onto your subject. If you get too close, the camera might struggle to focus, making both the subject and background blurry. Find the sweet spot where your subject is crisp, and the background starts to melt away.
- Experiment with angles. Sometimes, a slight change in angle can maximize the background blur by increasing the perceived distance between your subject and distracting elements.
For extreme close-up photos, often referred to as macro photography (perfect for capturing intricate details of Nature images), you might consider using an add-on macro lens. These lenses allow your device’s camera to focus at very short distances, creating incredibly shallow depth of field and exaggerated background blur, showcasing the subject with stunning clarity. This technique is a staple for capturing High Resolution details in the smallest subjects.
Mastering Background Blur with Digital Editing Tools on Tophinhanhdep.com
While in-camera techniques are excellent for capturing natural blur, the reality is that sometimes the perfect shot still needs a little post-processing magic. This is where Tophinhanhdep.com’s robust suite of Image Tools shines, offering powerful solutions to blur backgrounds in photos you’ve already taken. These tools range from AI-powered automation to precise manual control, catering to every skill level and creative need.
AI-Powered Background Blur on Tophinhanhdep.com
The evolution of artificial intelligence has revolutionized photo editing, making complex tasks like background blurring incredibly simple and efficient. Tophinhanhdep.com leverages AI-powered technology to provide users with unprecedented precision and speed.
Instead of painstakingly painting around your subject, Tophinhanhdep.com’s AI tools can automatically detect and isolate the main subject in your photo, applying the blur effect only to the background. This saves a tremendous amount of time and ensures consistent, professional results, even for beginners. This technology is particularly effective for portraits, product photography, pet photos, and any image where there’s a strong, identifiable main subject.
Here’s a general workflow for using AI-powered blur tools on Tophinhanhdep.com:
- Upload your photo to Tophinhanhdep.com’s Photo Editor.
- Navigate to the Blur section (which might be labeled “Blur,” “Lens Blur,” “Funky Focus,” or similar, depending on the specific tool).
- Select the “Isolate Subject” or “Background Blur” option. With a single click, Tophinhanhdep.com’s AI will analyze your image, identify the subject, and instantly apply a blur to the background.
- Adjust the blur intensity. Use a slider to increase or decrease the strength of the blur to achieve your desired Aesthetic.
- Refine (if necessary). While AI is highly accurate, some tools offer manual brushes to fine-tune the selection, ensuring perfect separation between subject and background.
- Apply and save. Once you’re satisfied, apply the changes and download your beautifully blurred image.
This one-click solution is perfect for creating depth of field, emphasizing your subject by removing distractions, and adding a touch of drama with bokeh effects, transforming your images into captivating visual stories, ready for any Thematic Collection or Mood Board.
Manual Selection for Precise Control
For situations where an AI might struggle (e.g., complex backgrounds, subjects with intricate edges, or when you want very specific areas blurred), Tophinhanhdep.com also offers robust manual selection tools, similar to those found in professional Graphic Design software. These tools allow you to precisely define the foreground (to keep in focus) and the background (to blur).
The process typically involves:
- Opening your image in Tophinhanhdep.com’s editing suite.
- Accessing a selection tool. This could be a “Smart Selection” brush that intelligently detects edges, or more traditional tools like “Lasso,” “Magic Wand,” or “Quick Mask.”
- Smart Selection: You draw a rough line over your subject, and the tool attempts to automatically select its edges.
- Magic Wand: Clicks on an area and selects all contiguous pixels of similar color/tone, useful for uniform backgrounds.
- Lasso/Polygonal Lasso: Allows for freeform or straight-edged selections, respectively, for drawing around complex subjects.
- Quick Mask: Lets you “paint” over the area you want to select, visually indicating the selection with a translucent overlay.
- Refining the selection. After an initial selection, you’ll often need to zoom in and use smaller brushes or eraser tools to perfect the edges. This is crucial for a realistic blur effect. Any part of the subject accidentally blurred, or part of the background left un-blurred, will break the illusion.
- Inverting the selection. Once your subject is perfectly selected, you often need to “invert” the selection so that the background is targeted for blurring.
- Applying the blur effect. With the background now selected, you can choose from various blur filters offered by Tophinhanhdep.com to achieve the desired effect.
Exploring Different Blur Styles: Lens, Motion, Gaussian
Tophinhanhdep.com provides a range of blur effects, each with its unique characteristics, allowing you to tailor the blur to the specific mood and purpose of your image. Understanding these different styles is key to effective Photo Manipulation and Creative Ideas.
Gaussian Blur
Gaussian blur is one of the most fundamental and widely used blur effects. It applies a uniform, smooth blur across the selected area by averaging the pixels within a specified radius.
- How it works: It spreads out pixel values according to a Gaussian (bell-shaped) function, creating a soft, hazy appearance.
- When to use it: Ideal for creating a general, even blur, softening harsh details, or preparing a background for text overlay in Graphic Design. It’s a versatile choice for a clean, undramatic background blur.
- On Tophinhanhdep.com: Access it via the “Blur” filters, where you can adjust the “Radius” or “Strength” slider to control the intensity.
Lens Blur
Lens blur is designed to mimic the optical blur produced by camera lenses, especially those with wide apertures. It often produces more realistic and aesthetically pleasing bokeh effects.
- How it works: It simulates the out-of-focus highlights and shapes that a real camera lens would produce, including subtle light orbs (bokeh).
- When to use it: Perfect for achieving a professional, natural-looking shallow depth of field, enhancing the dreamy quality of Aesthetic photos, and making light sources in night shots transform into intriguing bokeh. It’s particularly effective for portraits and scenes with distinct light points in the background.
- On Tophinhanhdep.com: Within Tophinhanhdep.com’s Lens Blur tools, you can often control aspects like “Blur Amount,” “Bokeh Intensity,” “Blade Curvature” (to adjust bokeh shape), and “Blade Count” (simulating aperture blades for softer or sharper bokeh).
Motion Blur
Motion blur creates the illusion of movement within an image by blurring pixels along a specific direction.
- How it works: Instead of a uniform blur, motion blur stretches pixels in a linear fashion, simulating the effect of a moving subject or camera.
- When to use it: Excellent for conveying speed and dynamism in action shots, such as a runner, a passing vehicle, or a whirlwind background. It can also be used creatively to suggest movement where there was none, adding dramatic flair.
- On Tophinhanhdep.com: You’ll typically find options to adjust the “Distance” (strength) of the blur and the “Angle” or “Direction” of the motion, allowing you to align it with the perceived movement in your image.
Advanced Blur Effects and Creative Applications
Beyond the standard blur types, Tophinhanhdep.com’s Visual Design and Photo Manipulation tools offer specialized effects that can dramatically alter the feel of your images, pushing the boundaries of your Creative Ideas.
Crafting Dreamy Vignettes and Tilt-Shift Effects
Two popular effects that utilize blur to unique advantage are the blurred vignette and the tilt-shift effect.
Blurred Vignette: A blurred vignette involves blurring the edges of a photo while keeping the central subject in sharp focus. This technique draws the viewer’s eye inwards, effectively framing the subject and adding a dreamy, ethereal quality.
- How it works: A radial or elliptical blur is applied, with the blur gradually increasing towards the edges of the frame.
- When to use it: Best for centrally composed subjects, where you want to add an artistic, soft frame. It’s a great way to enhance the Aesthetic of nature scenes or intimate portraits, giving them a timeless, almost painterly feel.
- On Tophinhanhdep.com: Tools like “Lens Blur” or “Funky Focus” may offer options to define a central in-focus area and then apply blur and even “Vignette Strength” (darkening the edges) around it. You can often adjust the “Transition” to control how gradually the focus shifts to blur.
Tilt-Shift Effect: The tilt-shift effect manipulates depth of field to make real-world scenes appear like miniature models. It’s a fascinating technique that plays with our perception of scale.
- How it works: It involves applying a very shallow depth of field, often with linear blur at the top and bottom of the image, while a central band remains in sharp focus. This mimics the effect of specialized tilt-shift lenses.
- When to use it: Ideal for aerial shots, landscapes with distant elements, or cityscapes where you want to create a whimsical, miniature world effect.
- On Tophinhanhdep.com: The “Funky Focus” tool, for instance, often provides “Linear” blur modes or other shapes (Radial, Square) that can be adjusted to create this illusion. You’ll set a narrow focal point and then blur everything else, emphasizing the illusion of distance.
Beyond the Basics: Enhancing Visual Design and Photography
The ability to expertly blur backgrounds extends far beyond simple aesthetic improvements. It is a powerful tool in Visual Design and Photo Manipulation for:
- Storytelling: Guiding the viewer’s eye to key narrative elements.
- Branding and Marketing: Making products pop in Stock Photos for e-commerce.
- Digital Art: Combining blurred elements with sharper ones to create surreal or abstract compositions.
- Mood Boards: Curating collections of images where a consistent blurred background style creates a cohesive visual narrative.
- Creative Ideas: Experimenting with different blur types to generate entirely new looks and styles for your images, from High Resolution landscapes to intricate Aesthetic compositions.
Tophinhanhdep.com’s comprehensive Image Tools, including Converters, Compressors, Optimizers, and AI Upscalers, complement these blurring capabilities, ensuring that your final blurred images are not only stunning but also perfectly optimized for any platform or purpose, from Wallpapers to social media posts.
Choosing the Right Blur Method for Your Vision
With so many methods available on Tophinhanhdep.com, deciding which way to blur the background of your image depends on several factors: the original photo, your desired effect, your device’s capabilities, and your comfort level with editing.
- For instant, natural-looking blur on modern devices: Start with your device’s specialized camera modes (like Portrait mode). This is often the quickest and most effective way to achieve a good base blur. Remember to adjust the “Depth” setting in post-capture for fine-tuning.
- For natural blur without special camera modes: Get closer to your subject when shooting. This fundamental photographic technique is universally effective.
- For quick, automatic background blur on existing photos: Leverage Tophinhanhdep.com’s AI-powered blur tools. These are incredibly user-friendly and deliver impressive results with minimal effort, perfect for when you need to transform a cluttered background into a clean canvas.
- For precise control and complex images: Dive into Tophinhanhdep.com’s manual selection and blur tools. While requiring a bit more patience, these methods offer the highest degree of customization for intricate Photo Manipulation.
- For specific artistic effects: Experiment with different blur types:
- Gaussian Blur: For a smooth, general softening.
- Lens Blur: For realistic, creamy bokeh and a professional look, especially with lights.
- Motion Blur: To convey speed and dynamism.
- Blurred Vignette: To frame your subject elegantly and add a dreamy feel.
- Tilt-Shift Effect: To create miniature worlds from real scenes.
Tophinhanhdep.com is your ultimate resource for mastering these techniques. Whether you’re a seasoned photographer looking to refine your Digital Photography skills, a Graphic Designer seeking new Creative Ideas for Visual Design, or someone simply wanting to make their Aesthetic photos pop, the tools and guidance available here empower you to achieve truly Beautiful Photography. Forget bulky equipment; with Tophinhanhdep.com’s accessible online and mobile Image Tools, stunning blurred backgrounds are now just a few clicks away. Visit Tophinhanhdep.com’s Photo Editor today and transform your images into captivating works of art!