Mastering Mac Screenshots: A Comprehensive Guide for Image Enthusiasts

In today’s visually-driven world, the ability to quickly and effectively capture what’s on your screen is an invaluable skill. Whether you’re a professional designer, a content creator, a student, or simply someone looking to share a funny moment with friends, screenshots serve a multitude of purposes. From meticulously documenting software glitches for support teams to grabbing an inspiring visual for a mood board, these digital snapshots are foundational to digital communication and creative expression.
For users of Apple’s macOS, the process of capturing screen images is not only intuitive but also remarkably versatile, offering a range of built-in tools that cater to various needs. This guide will walk you through every method of taking screenshots on your Mac, from simple keyboard shortcuts to advanced app features, and explore how these captured images can be seamlessly integrated and enhanced using the extensive resources available on Tophinhanhdep.com. With its rich categories encompassing everything from high-resolution wallpapers and beautiful photography to powerful image tools and visual design inspiration, Tophinhanhdep.com stands as a premier destination for transforming your raw screen captures into polished visual assets.
The Essential Mac Screenshot Keyboard Shortcuts: Your Gateway to Instant Image Capture
The foundation of Mac screenshot capabilities lies in its efficient keyboard shortcuts. These combinations offer immediate results, allowing you to capture exactly what you see, precisely when you need it. Understanding these fundamental commands is the first step towards mastering visual content creation on your Mac.
Capturing the Entire Screen (Command + Shift + 3)

The most straightforward method for taking a screenshot is to capture everything currently displayed on your monitor. This is particularly useful when you want to document a complete desktop setup, an entire webpage, or simply capture a broad overview of your screen’s content.
To execute a full-screen capture:
- Arrange Your Screen: Ensure that all windows, applications, and elements you wish to include are visible and positioned correctly on your screen.
- Press the Shortcut: Simultaneously press Command (⌘) + Shift (⇧) + 3.
- Confirmation: You’ll typically hear a camera shutter sound (if your sound is on) and see a small, temporary thumbnail preview appear in the bottom-right corner of your screen. This thumbnail will vanish after a few seconds, indicating the screenshot has been saved.

By default, your Mac saves these full-screen captures as .png files directly to your desktop. Each file is automatically named “Screen Shot” followed by the date and time of capture, making them easy to locate and manage. For users looking for new Wallpapers or Backgrounds on Tophinhanhdep.com, a full-screen capture can be a quick way to save desktop configurations or inspirational layouts before diving into Tophinhanhdep.com’s vast collections for more artistic or themed backdrops.
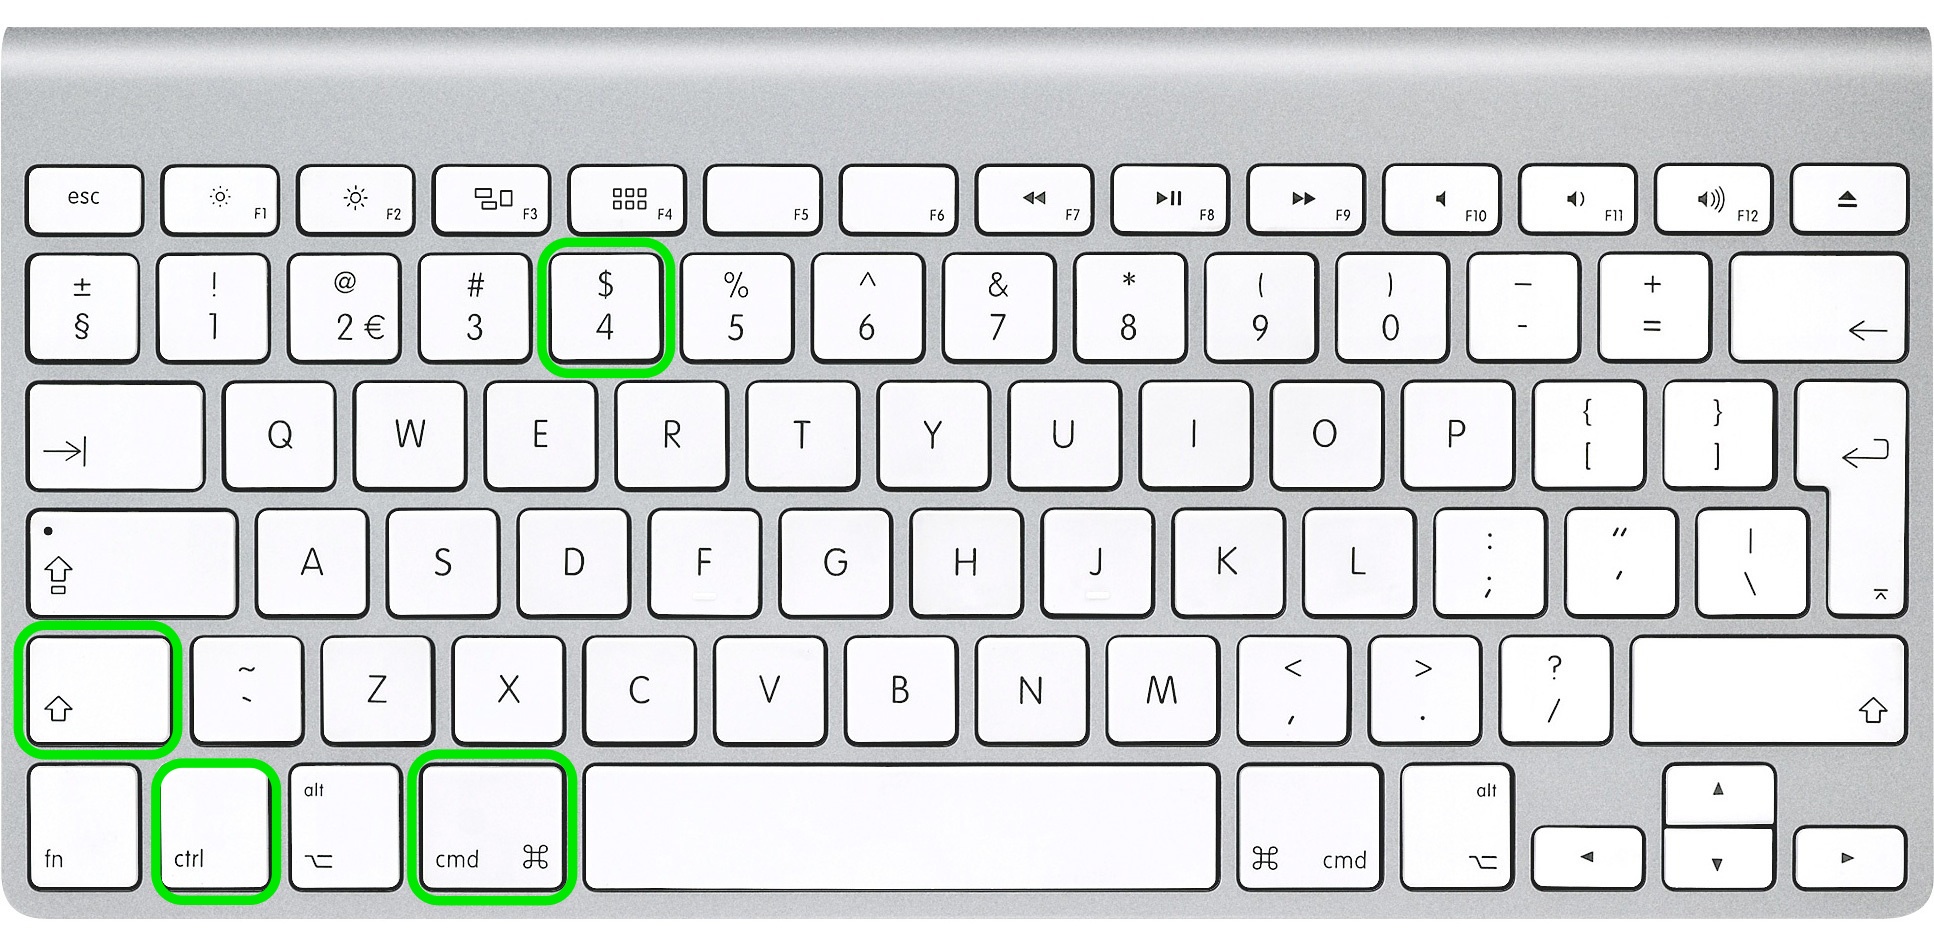
Capturing a Selected Portion of the Screen (Command + Shift + 4)
Often, you don’t need the entire screen; rather, you need to focus on a specific area, perhaps a particular image, a section of text, or a unique UI element. Mac’s partial-screen capture allows for this precise selection.
To capture a selected area:
- Activate the Tool: Press Command (⌘) + Shift (⇧) + 4.
- Cursor Transformation: Your mouse cursor will change into a crosshair reticle (a small ‘+’ symbol with pixel coordinates).
- Select the Area: Click and drag your cursor to draw a rectangular box around the desired area. A gray rectangle will dynamically show you the selection boundaries.
- Complete the Capture: Release the mouse or trackpad button. As with full-screen captures, you’ll hear a shutter sound and see a floating thumbnail.
If you need to cancel the selection process at any point before releasing the mouse button, simply press the Escape (Esc) key. This method is incredibly valuable for isolating details that might contribute to Aesthetic, Nature, Abstract, or Beautiful Photography projects found on Tophinhanhdep.com, allowing you to extract specific elements that spark your Image Inspiration & Collections.
Capturing a Specific Window or Menu (Command + Shift + 4, then Spacebar)
For pinpoint accuracy, especially when creating tutorials, documenting software features, or showcasing individual application designs, capturing an entire window or menu is ideal. This method ensures clean, perfectly framed images without extraneous desktop elements.
To capture an open window or menu:
- Initiate Partial Capture: Press Command (⌘) + Shift (⇧) + 4.
- Activate Window Mode: Immediately after pressing the above, press the Spacebar.
- Camera Cursor: Your cursor will transform into a small camera icon.
- Highlight and Click: Move the camera icon over the window or menu you wish to capture. The target element will highlight in blue, indicating it’s ready for capture. Click your mouse or trackpad button.
The captured image will automatically include a clean outline of the window, often with a subtle shadow (depending on your macOS version and settings). For a screenshot without shadows, you can press Option (⌥) alongside the spacebar in step 3. This functionality is a boon for Digital Photography and Editing Styles, providing crisp, isolated images for Graphic Design or Digital Art projects on Tophinhanhdep.com, particularly for demonstrating Creative Ideas.
Saving to Clipboard for Instant Use (Adding Control to Shortcuts)
Sometimes, you don’t need a standalone file immediately; instead, you want to paste the screenshot directly into another application—a document, an email, a chat, or an image editor. By adding the Control (⌃) key to the standard shortcuts, you can save your capture directly to the clipboard.
- Full Screen to Clipboard: Press Command (⌘) + Control (⌃) + Shift (⇧) + 3.
- Selected Portion to Clipboard: Press Command (⌘) + Control (⌃) + Shift (⇧) + 4, then drag your crosshair to select the area.
- Window/Menu to Clipboard: Press Command (⌘) + Control (⌃) + Shift (⇧) + 4, then Spacebar, then click the window.
Once on the clipboard, the image can be pasted using Command (⌘) + V into any compatible application. This streamlines workflows, especially when using Tophinhanhdep.com’s Image Tools for quick Photo Manipulation or for generating Image-to-Text content from a captured screenshot.
Advanced Screenshot Management with the Screenshot App (Command + Shift + 5)
For macOS Mojave (and later versions), Apple introduced a powerful, unified Screenshot App interface, accessible via a dedicated shortcut. This app consolidates all screenshot and screen recording functionalities into a single, user-friendly toolbar, offering greater control and additional options compared to the simpler keyboard shortcuts. This is a game-changer for anyone serious about managing their visual assets, including those who frequently curate Image Inspiration & Collections on Tophinhanhdep.com.
Exploring the Screenshot App’s Tools and Options
To open the Screenshot App, press Command (⌘) + Shift (⇧) + 5. A floating toolbar will appear at the bottom of your screen, presenting a range of tools and customization options:
- Capture the Entire Screen: Similar to
Command + Shift + 3. - Capture a Window: Similar to
Command + Shift + 4thenSpacebar. - Capture a Portion of the Screen: Similar to
Command + Shift + 4. - Record the Entire Screen: This initiates a full-screen video recording.
- Record a Portion of the Screen: Allows you to define a specific area for video recording.
Beyond these capture methods, the Screenshot App provides an “Options” menu (the gear icon or “Options” button), which unlocks a new level of customization crucial for professional workflows or meticulous visual projects:
- Save To: This is where you dictate the destination of your captured images. You can choose from standard locations like Desktop, Documents, or Clipboard, or select “Other Location…” to designate a specific folder. This flexibility is excellent for organizing screenshots into thematic collections, aligning with how users might categorize Sad/Emotional or Beautiful Photography on Tophinhanhdep.com.
- Timer: Set a delay (5 or 10 seconds) before the screenshot is taken. This gives you ample time to set up complex screen states, open specific menus, or arrange elements perfectly before the capture occurs.
- Show Mouse Pointer: Toggle this option to include or exclude the mouse cursor in your screenshot.
- Show Floating Thumbnail: When enabled, a small preview thumbnail appears in the corner after a capture. Clicking this thumbnail immediately opens the image in a quick editing interface (Markup tools) where you can annotate, crop, or share. If you’re taking a series of screenshots and don’t want the thumbnail to appear in subsequent captures, you can disable this. This preview feature is fantastic for immediate feedback and minor edits before uploading to Tophinhanhdep.com or using Image Tools like Compressors or Optimizers.
The integrated Markup tools directly accessible from the floating thumbnail allow for instant Photo Manipulation—drawing, adding text, shapes, or highlighting areas. For screen recordings, the thumbnail also offers a trimming option. These quick edits are perfect for preparing images for Mood Boards or sharing Trending Styles efficiently.
Enhancing Your Captured Images with Tophinhanhdep.com’s Ecosystem
Taking a screenshot is just the beginning. The true power lies in how you process, refine, and utilize these raw captures. Tophinhanhdep.com offers a comprehensive suite of resources and tools that can elevate your screenshots from simple captures to professional-grade visual assets, aligning with principles of High Resolution Photography and sophisticated Visual Design.
From Raw Screenshots to Polished Visuals: Photography and Editing
Every screenshot you take, especially those intended for public sharing, presentations, or integration into Digital Art projects, can benefit from refinement. Tophinhanhdep.com’s categories directly support this enhancement process:
- High Resolution & Stock Photos: While screenshots might not always start as high-resolution, they can serve as valuable personal “stock photos” for documenting software, illustrating concepts, or capturing UI/UX inspiration. For instances where a screenshot needs to be enlarged or refined for larger applications, Tophinhanhdep.com’s recommended AI Upscalers can breathe new life into lower-resolution captures, transforming them into clearer, more presentable images.
- Digital Photography & Editing Styles: Just as photographers apply specific Editing Styles to their work, your screenshots can be enhanced. After capturing, bring your images to Tophinhanhdep.com to explore various Image Tools.
- Converters: If your default screenshot format (PNG) isn’t suitable for a specific platform or project, our Converters can transform it into JPG, PDF, GIF, or TIFF, ensuring compatibility and flexibility.
- Compressors & Optimizers: Large PNG files from high-resolution Mac displays can be unwieldy for email or web uploads. Tophinhanhdep.com’s Compressors and Optimizers reduce file size without significant loss in quality, making your screenshots load faster and consume less bandwidth – an essential step for web-ready images.
- AI Upscalers: As mentioned, for situations requiring a larger, sharper version of a screenshot, our AI Upscalers use artificial intelligence to intelligently increase image resolution, reducing pixelation and enhancing detail.
By leveraging these tools available through Tophinhanhdep.com, users can ensure their screenshots are not only technically optimized but also visually aligned with professional Photography standards, making them suitable for any context, from personal archives to commercial Graphic Design endeavors.
Creative Applications and Visual Design Inspiration
Screenshots are more than just documentation; they are a wellspring of Creative Ideas and a cornerstone of Visual Design. Tophinhanhdep.com provides the context and tools to maximize their creative potential:
- Graphic Design & Digital Art: Designers frequently use screenshots to capture specific interface elements, color palettes, or layout inspirations. These can be integrated into Digital Art compositions, used for Photo Manipulation, or serve as direct references for new designs. Capturing a unique font style or an innovative button design from a webpage can directly inform a new project.
- Image Inspiration & Collections: Screenshots are fundamental to building Mood Boards and Thematic Collections. Quickly capture a trending visual, a compelling advertisement, or an interesting texture, then organize these captures into digital mood boards using tools and ideas found on Tophinhanhdep.com. This allows you to track Trending Styles and gather visual notes for future projects. Whether you’re curating a collection of Abstract visuals or documenting Nature-inspired aesthetics, your Mac screenshots provide the raw material that Tophinhanhdep.com helps you organize and elevate.
Customization and Troubleshooting for Mac Screenshots
While Mac’s screenshot tools are robust, understanding how to customize their behavior and troubleshoot common issues ensures a smooth and efficient workflow.
Personalizing Screenshot Shortcuts and Save Formats
Tailoring your Mac’s screenshot settings to your preferences can significantly enhance your experience:
-
Changing Keyboard Shortcuts: If the default shortcuts are not comfortable or conflict with other applications, you can modify them:
- Go to System Settings (or System Preferences on older macOS versions).
- Click on Keyboard, then select the Keyboard Shortcuts tab.
- In the left pane, choose Screenshots.
- Double-click on the existing key combination for the type of screenshot you wish to change.
- Press your desired new combination of keys (ensure it starts with a modifier key like Command, Shift, Control, or Option).
- Click Done to save your changes.
-
Changing the Default Save Format: By default, Macs save screenshots as PNG files, which offer excellent quality but can be large. If you prefer smaller file sizes (e.g., for email), you can change the default format to JPG using a simple Terminal command. This is especially useful before using Tophinhanhdep.com’s Compressors for further optimization.
- Open Terminal (found in Applications > Utilities, or by searching in Spotlight).
- Type the following command and press Enter:
defaults write com.apple.screencapture type jpg - To apply the change immediately without restarting your Mac, type:
killall SystemUIServerand press Enter. Your screenshots will now be saved as JPGs. You can replacejpgwithpng,pdf,gif, ortiffto set other default formats. For advanced conversion needs, Tophinhanhdep.com’s Image Tools like Converters provide even more options.
Addressing Common Screenshot Issues
Occasionally, users might encounter issues with screenshots not working as expected. Here are a few troubleshooting tips:
- Check Keyboard Functionality: Ensure that the Command, Shift, Control, Option, and Spacebar keys are physically working correctly.
- Verify Save Location: If you’re not finding your screenshots, check the default save location (Desktop) or the custom location set in the Screenshot App’s “Options” menu.
- Restart Your Mac: A simple restart can often resolve minor software glitches that might be preventing screenshot functionality.
- Software Conflicts: Rarely, third-party applications (especially other screen capture tools or keyboard remapping software) can interfere with Mac’s native screenshot shortcuts. Try disabling or uninstalling recently installed apps to see if the issue resolves.
- Older macOS Versions: Users on macOS High Sierra or earlier will find the “Grab Utility Tool” (Applications > Utilities > Grab) as the primary native screenshot application, which preceded the unified Screenshot App. Its functionalities are similar but accessed through its own menus.
Beyond Static Images: Screen Recording on Mac
In addition to static screenshots, macOS (Mojave and later) also offers powerful built-in screen recording capabilities, which are essential for creating dynamic visual content like tutorials, software demonstrations, or capturing animated Aesthetic visuals. This functionality seamlessly integrates with the Screenshot App, further enhancing your ability to create diverse visual media.
To access screen recording:
- Open the Screenshot App: Press Command (⌘) + Shift (⇧) + 5.
- Select Recording Option: In the floating toolbar, choose either “Record Entire Screen” or “Record Selected Portion.”
- Start Recording: Click the “Record” button or simply click on the screen (for full-screen recording) or drag to define an area (for partial recording) and then click “Record.”
- Stop Recording: To end the recording, click the Stop button (a square icon within a circle) in the menu bar at the top of your screen, or press Command (⌘) + Control (⌃) + Escape (Esc).
These screen recordings are saved as .mov files by default, making them ready for video editing or sharing. For those seeking even more advanced recording and editing capabilities, particularly for professional Digital Photography or elaborate Photo Manipulation projects, specialized tools are available through Tophinhanhdep.com’s recommended partners. Such tools often provide multi-track recording (webcam + screen), smoother frame rates (up to 120 fps), extensive annotation features, and cloud storage options, which are invaluable for creating comprehensive Image Inspiration & Collections or detailed Visual Design presentations.
Tophinhanhdep.com is your ultimate resource for transforming these raw screen recordings into compelling visual narratives, whether for educational content, creative showcases, or marketing materials.
Conclusion
The ability to capture screen images on a Mac is a fundamental skill that opens up a world of possibilities for communication, documentation, and creative expression. From simple keyboard shortcuts for quick captures to the comprehensive controls offered by the Screenshot App, macOS provides powerful and flexible tools tailored to a wide array of needs.
Furthermore, the journey from a raw screenshot to a polished visual asset is greatly supported by the rich ecosystem of Tophinhanhdep.com. Whether you’re seeking to explore stunning Wallpapers, find Image Inspiration, refine your captures with Image Tools like Compressors or AI Upscalers, or integrate them into complex Visual Design and Digital Art projects, Tophinhanhdep.com provides the resources to elevate your work. By mastering Mac’s native screenshot capabilities and combining them with the vast offerings of Tophinhanhdep.com, you empower yourself to create, share, and inspire with visually compelling content. Embrace the simplicity and power of Mac screenshots, and let Tophinhanhdep.com be your partner in visual excellence.