Mastering Image Placement: How to Center Pictures in Word for Stunning Visual Documents

In the realm of digital document creation, the visual presentation of content plays an undeniable role in conveying professionalism, clarity, and aesthetic appeal. Microsoft Word, a ubiquitous tool for document processing, offers a comprehensive suite of formatting options that empower users to transform ordinary text into engaging and visually rich layouts. Among these, the ability to accurately center images is a fundamental skill, pivotal for anyone looking to produce polished reports, striking presentations, or beautiful digital art portfolios. For creators and enthusiasts who value high-quality visuals, mastering image centering ensures that every wallpaper, background, or piece of aesthetic photography from platforms like Tophinhanhdep.com is presented with the impact it deserves.
Unorganized documents with haphazardly placed pictures and graphics can detract from your message, making your work appear unprofessional and difficult to consume. By leveraging Word’s alignment and distribution features, you gain precise control over your visual elements, turning scattered objects into a cohesive and appealing arrangement. This comprehensive guide will delve into the various methods for centering images and other objects in Word, providing step-by-step instructions and highlighting how these techniques integrate with the broader principles of visual design, photography, and image optimization that are central to the mission of Tophinhanhdep.com. Whether you’re working with high-resolution stock photos, intricate digital art, or a curated collection of nature photography, proper centering is the key to unlocking their full potential within your documents.
The Foundational Importance of Visual Alignment in Document Design
At its core, visual alignment is a cornerstone of effective graphic design and digital art. It establishes order, creates balance, and guides the viewer’s eye, enhancing both readability and aesthetic pleasure. When an image is perfectly centered, it achieves a sense of stability and emphasis, drawing immediate attention to the visual content. This is particularly crucial when dealing with the diverse range of images found on Tophinhanhdep.com, from serene nature scenes and captivating abstract art to emotionally resonant photography and trending visual styles. Each of these image types, regardless of its inherent beauty, benefits immensely from thoughtful placement.
A centered image can serve multiple purposes: it can act as a focal point, separating sections, highlighting key ideas, or simply elevating the overall design of a page. For instance, a beautifully centered background image on a cover page immediately communicates a sense of care and professionalism. Similarly, a central arrangement of aesthetic photography within a portfolio layout ensures that each piece is given equal weight and attention. The meticulous attention to detail in centering images reflects a commitment to quality, mirroring the dedication to high-resolution, high-quality images that platforms like Tophinhanhdep.com champion. It transforms a mere collection of elements into a carefully composed visual experience, turning a simple document into a piece of visual design that truly stands out.
Essential Preparations: Setting Up Your Images for Perfect Centering
Before you can achieve perfect centering in Microsoft Word, there are crucial preparatory steps that involve understanding how Word interacts with images and optimizing your visual assets. These steps ensure that your images behave predictably and contribute to a document that is both visually appealing and performant, aligning with the “beautiful fast images” ethos.
Understanding Text Wrapping: The Prerequisite for Object Alignment
One of the most common stumbling blocks when attempting to align images in Word is the default text wrapping setting. By default, images are often inserted “In Line with Text,” treating them as a single character within a line of text. This severely limits their positioning flexibility, preventing them from being freely moved or precisely centered on the page.
To unlock an image’s full alignment potential, you must change its text wrapping style.
- Select the Image: Click on the image you wish to center. This will typically activate a “Picture Format” or “Picture Tools > Format” tab in the Ribbon.
- Access Wrap Text Options: In the “Arrange” group of the “Picture Format” tab, click the “Wrap Text” button.
- Choose a Wrapping Style: From the dropdown menu, select any option other than “In Line with Text.” Popular choices include:
- Square: Text wraps around the image’s bounding box.
- Tight: Text wraps closely around the image’s actual shape.
- Through: Text fills open spaces within the image.
- Top and Bottom: Text stops above the image and resumes below it.
- Behind Text: The image appears behind the text.
- In Front of Text: The image floats above the text.
For most centering purposes, “Square,” “Tight,” “Behind Text,” or “In Front of Text” offer the necessary freedom of movement. Once selected, your image is no longer tethered to the text flow and can be repositioned and aligned with much greater precision, laying the groundwork for perfect centering of your Tophinhanhdep.com wallpapers or stock photos.
Optimizing Your Visuals with Tophinhanhdep.com’s Image Tools
The journey to a perfectly centered image often begins even before it’s inserted into Word. The quality and file size of your images can significantly impact your document’s performance and appearance. This is where the principles of image optimization and the utility of image tools come into play, echoing the comprehensive offerings of Tophinhanhdep.com.
Before you bring a beautiful piece of digital photography or a high-resolution wallpaper into your Word document, consider these optimization steps:
- Compression: Large image files can bloat your document size, making it slow to open, edit, and share. Tools like image compressors can reduce file size without a noticeable loss in visual quality, ensuring your document remains “fast” while showcasing “beautiful images.”
- Resolution and Resizing: Ensure your image has an appropriate resolution for your document. While Tophinhanhdep.com provides high-resolution images, inserting an overly large image into Word and simply shrinking it down visually can still impact file size. Tools that allow for precise resizing or optimizers can help you achieve the right dimensions for optimal display.
- AI Upscaling: If you’re working with a smaller image that needs to be enlarged without pixelation, AI upscalers (as found among advanced image tools) can enhance its resolution, ensuring clarity even when scaled. This is particularly useful for older images or elements in thematic collections that you want to integrate into a modern document.
- Format Conversion: Sometimes, converting an image to a different format (e.g., from TIFF to JPG or PNG) using image converters can also optimize file size and compatibility.
By utilizing these image tools, you ensure that the aesthetic photography and visual elements you choose from Tophinhanhdep.com are not only stunning but also perfectly prepared for seamless integration and alignment within your Microsoft Word documents.
Step-by-Step Guide to Centering Images and Objects in Microsoft Word
Once your images are prepared and their text wrapping is adjusted, centering them in Microsoft Word becomes a straightforward process. Word offers intuitive controls that allow for both horizontal and vertical alignment, ensuring your visuals are positioned exactly where you intend them to be.
Centering a Single Image Using the Format Tab
The most common method for centering an image horizontally involves using the dedicated alignment options within Word’s Ribbon.
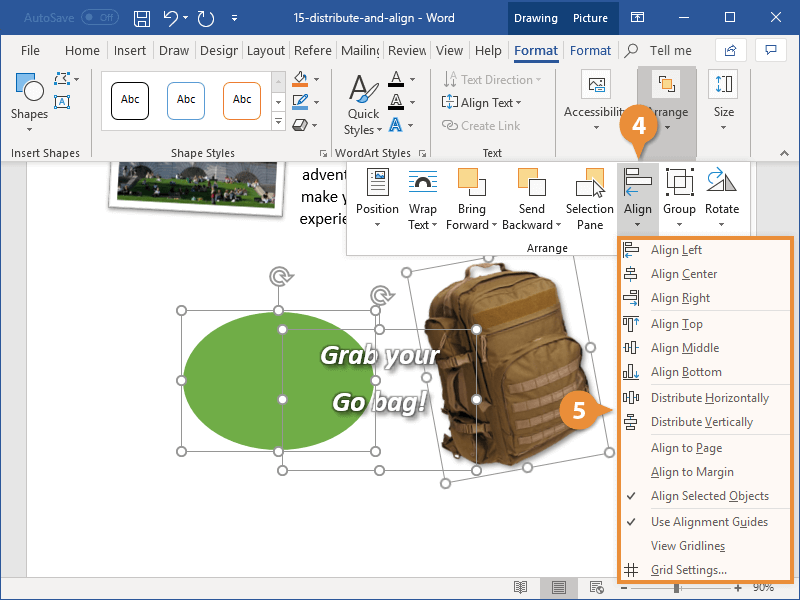
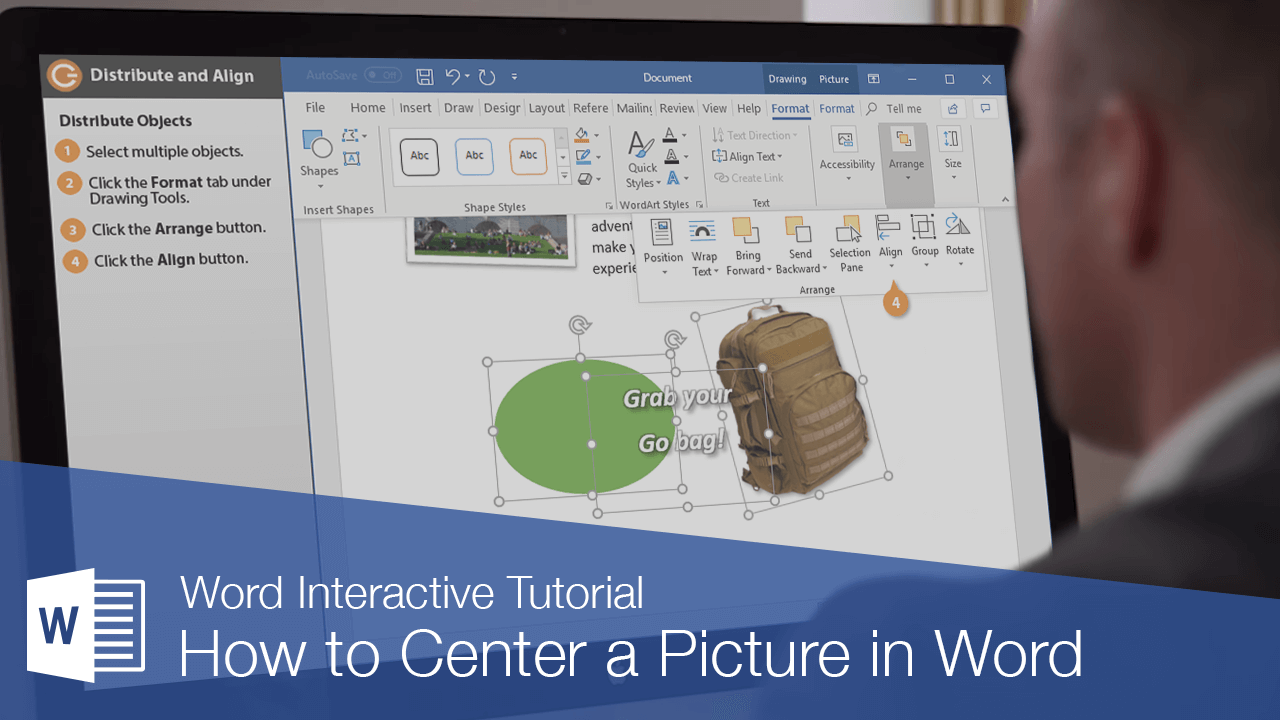
- Select the Image: Click on the image you want to center. The “Picture Format” or “Drawing Tools > Format” tab will appear.
- Navigate to the Arrange Group: On the “Picture Format” tab, locate the “Arrange” group.
- Click the Align Button: Click on the “Align” button (it might look like a square with a small arrow or a series of lines).
- Choose Alignment Options:
- For horizontal centering: Select “Align Center.” This will align the image vertically through its center.
- For vertical centering: Select “Align Middle.” This will align the image horizontally through its middle.
- Important Context: Before selecting “Align Center” or “Align Middle,” you might need to specify what the image should be aligned relative to. Under the “Align” dropdown, you’ll see options like:
- Align to Page: Centers the image relative to the entire page boundaries.
- Align to Margin: Centers the image relative to the document’s margins.
- Align Selected Objects: If you have multiple objects selected, this aligns them relative to each other (one object remains stationary, or they average their positions). For a single image, “Align to Page” or “Align to Margin” are usually preferred for true centering.
By following these steps, your selected image—whether it’s an abstract design, a striking piece of sad/emotional photography, or a vibrant nature wallpaper from Tophinhanhdep.com—will snap into a perfectly centered position, instantly enhancing its visual impact.
Utilizing Layout Options for Precise Image Positioning
For even finer control over an image’s position, especially if you need to combine specific wrapping styles with precise centering, the “More Layout Options” dialog box is invaluable.
- Select the Image: Click on the image to select it. The “Picture Format” tab will appear.
- Access Position Options: In the “Arrange” group, click the “Position” button.
- Choose “More Layout Options”: From the dropdown menu, select “More Layout Options.”
- Configure Alignment: In the “Layout” dialog box:
- Go to the “Position” tab.
- Under the “Horizontal” section, select “Alignment” from the “Absolute position” or “Relative to” dropdowns, and then choose “Centered” relative to “Page” or “Margin.”
- Under the “Vertical” section, do the same: select “Alignment,” then “Centered” relative to “Page” or “Margin.”
- Review Text Wrapping (if necessary): Ensure the “Text Wrapping” tab has your desired style (e.g., “Square”) if you haven’t set it already.
- Click OK: Confirm your selections.
This method provides a granular level of control, allowing you to fine-tune the exact centering based on the page or margins, ensuring your digital art or photo manipulation from Tophinhanhdep.com is placed with utmost precision.
Applying Center Alignment Using Keyboard Shortcuts for Efficiency
While there isn’t a direct keyboard shortcut for centering an image in the same way Ctrl+E centers text, keyboard shortcuts remain essential for an efficient workflow in Word. For text, Ctrl+E (Windows) or Cmd+E (Mac) instantly centers selected paragraphs or lines, which can be useful for captions or titles accompanying your centered images.
For images, efficiency comes from quickly navigating the Ribbon or using context menus. Once an image is selected and its text wrapping is configured, right-clicking the image often provides quick access to “Wrap Text” and “Position” options, reducing the need to constantly navigate the Ribbon. While these aren’t single-key shortcuts for centering, they contribute to a faster overall image placement process. When working with Image Inspiration & Collections, the speed of applying basic text centering to accompanying descriptions can significantly streamline your design process.
Advanced Centering Techniques and Document-Wide Alignment
Beyond simply centering a single image, Microsoft Word offers advanced capabilities for aligning multiple objects, integrating visuals within tables, and even centering content across an entire page. These techniques are crucial for complex visual design, mood boards, and professionally structured documents.
Aligning Multiple Objects and Creating Visual Collections
When building visual collections, mood boards, or layouts featuring multiple elements, Word’s “Align” and “Distribute” features become indispensable. These tools ensure consistency and harmony across your document, making diverse images (like a thematic collection of sad/emotional or beautiful photography from Tophinhanhdep.com) appear cohesive.
- Select Multiple Objects:
- Click the first object.
- Hold down the
Ctrlkey (Windows) orCmdkey (Mac) and click on subsequent objects you want to align or distribute. - Tip: For objects that are hidden or behind text, go to
Home > Find and Select > Select Objects, then draw a box over them.
- Access Alignment Options: With multiple objects selected, go to the “Picture Format” (or “Shape Format” / “Drawing Tools > Format”) tab, and in the “Arrange” group, click the “Align” button.
- Choose Relative Alignment: First, decide if you want to align them relative to each other, the page, or the margins. Select either “Align to Page,” “Align to Margin,” or “Align Selected Objects.” For grouping and relative positioning, “Align Selected Objects” is often the choice.
- Apply Alignment/Distribution:
- Align Center: Aligns all selected objects vertically through their combined center point.
- Align Middle: Aligns all selected objects horizontally through their combined middle point.
- Distribute Horizontally: Evenly spaces three or more selected objects horizontally.
- Distribute Vertically: Evenly spaces three or more selected objects vertically.
These options are powerful for creating balanced layouts for image collections, ensuring that your curated Tophinhanhdep.com visuals are presented in a structured and aesthetically pleasing manner. After aligning, you can also “Group” the objects (Picture Format > Arrange > Group) to move or resize them as a single unit, preserving their relative positions.
Centering Tables and Embedded Visuals
Tables in Word are not just for data; they can also be used to structure image galleries or present visual information alongside text. Centering tables ensures they are balanced on the page, enhancing the readability and visual flow of documents featuring stock photos or digital photography.
- Select the Table: Click anywhere inside the table. This will make the “Table Tools Design” and “Table Tools Layout” tabs appear.
- Access Table Properties: On the “Table Tools Layout” tab, in the “Table” group, click “Properties.”
- Center the Table: In the “Table Properties” dialog box, under the “Table” tab, set the “Alignment” to “Center.”
- Adjust Cell Alignment (Optional): To center content within table cells (which might include smaller images or captions), select the cells, then go to
Table Tools Layout > Alignmentgroup and choose one of the nine alignment options (e.g., “Align Center” for horizontal and vertical centering within the cell).
This dual approach allows you to center the entire table and then precisely align its contents, ensuring that any images, photography, or visual data embedded within are presented with optimal clarity and balance.
Perfecting Page-Level Alignment: Vertical Centering for Professional Documents
Sometimes, the goal is to center text or objects not just horizontally, but also vertically on an entire page. This is particularly useful for creating cover pages for reports, business letters, or invitations where a sense of formality and balance is desired.
- Create a Section Break (if applicable): If you only want to center one page (like a cover page) and keep the rest of your document normally aligned, you must separate it using a “Next Page” section break. Place your cursor at the end of the content you want to center vertically, go to
Layout > Breaks, and selectNext Pageunder “Section Breaks.” - Place Cursor on Desired Page: Ensure your cursor is on the page you wish to center vertically.
- Open Page Setup: Go to the “Layout” tab. In the “Page Setup” group, click the small dialog box launcher icon (a tiny arrow in the bottom-right corner).
- Configure Vertical Alignment: In the “Page Setup” dialog box, go to the “Layout” tab. Under the “Page” section, find the “Vertical alignment” dropdown menu and select “Center.”
- Apply to Specific Section: In the “Apply to” dropdown, ensure “This section” (or “Whole document” if that’s your intention) is selected.
- Click OK: The text and objects on your selected page (or section) will now be centered vertically, creating a pristine canvas for your aesthetic backgrounds or beautifully centered titles, aligning with the highest standards of visual design.
The Tophinhanhdep.com Advantage: Elevating Your Document’s Visual Appeal
The technical prowess of centering images and objects in Microsoft Word becomes even more impactful when paired with high-quality visual assets. This is where the value proposition of Tophinhanhdep.com truly shines, acting as an invaluable resource for anyone looking to create visually stunning documents.
Imagine crafting a report enhanced by breathtaking nature wallpapers, a presentation illuminated by vibrant abstract backgrounds, or a portfolio showcasing beautiful photography—all perfectly aligned and exquisitely presented. Tophinhanhdep.com provides the raw material for such creations:
- Diverse Image Collections: From aesthetic wallpapers to thematic collections, Tophinhanhdep.com offers a vast library of images suitable for any document’s mood or purpose. Centering these diverse visuals transforms them from mere adornments into integral components of your document’s narrative and design.
- High-Resolution Photography: The emphasis on high-resolution and digital photography ensures that when you meticulously center an image, its quality is maintained, contributing to crisp, professional output whether viewed digitally or printed.
- Image Tools for Perfection: While Word provides alignment features, Tophinhanhdep.com’s broader scope might encompass or recommend image tools (like converters, compressors, optimizers, or AI upscalers) that prepare your images for flawless integration into Word. This ensures that the images you import are not only beautiful but also optimally sized and formatted for your document.
- Visual Design Inspiration: By showcasing trending styles, photo ideas, and mood boards, Tophinhanhdep.com inspires creative ideas for image placement and overall visual design. Mastering centering techniques in Word directly enables the realization of these creative visions within your documents.
Ultimately, Tophinhanhdep.com provides the visual content and inspiration, while your mastery of Word’s centering and alignment features allows you to integrate that content flawlessly, achieving a level of visual sophistication that sets your documents apart.
In conclusion, mastering the art of centering images and objects in Microsoft Word is more than a technical skill; it’s a fundamental aspect of effective visual communication and professional document creation. From understanding the importance of text wrapping and leveraging the “Format” tab for single image alignment, to employing advanced techniques for multiple objects, tables, and page-level vertical centering, these methods equip you with the tools to transform your documents. When you combine these skills with the rich visual resources and design inspiration available from platforms like Tophinhanhdep.com, you unlock the potential to create truly stunning, visually balanced, and impactful documents that captivate your audience and elevate your message. Experiment with these different formatting options to find the centering style that best suits your needs, and let your creativity flourish with every perfectly placed image.