How to Master Image Dimension Changes: A Comprehensive Guide for Stunning Visuals on Tophinhanhdep.com

In our increasingly visual world, the ability to effectively manipulate images is no longer just a specialized skill for graphic designers; it’s a fundamental necessity for everyone, from casual photographers sharing their latest shots to digital artists crafting intricate visuals. On Tophinhanhdep.com, where we celebrate everything from breathtaking wallpapers and aesthetic backgrounds to high-resolution photography and innovative digital art, mastering image dimensions is crucial. Whether you’re preparing a stunning nature photo for a website, optimizing a beautiful background for a mobile device, or ensuring your abstract art meets specific print requirements, knowing how to change an image’s dimensions efficiently and without sacrificing quality is paramount.
Image resizing is a task we all encounter at some point. It could be for uploading a profile picture, fitting an image into a presentation, preparing stock photos for a client, or creating a custom wallpaper. Incorrect dimensions can lead to distorted, pixelated, or excessively large files that slow down websites and consume unnecessary storage. Fortunately, regardless of your operating system—be it Windows, macOS, or ChromeOS—or your preferred online tools, there are straightforward methods to scale images up and down. This comprehensive guide will delve into the nuances of image dimension changes, equipping you with the knowledge and tools to achieve perfect visuals every time, perfectly aligning with Tophinhanhdep.com’s focus on quality visual content.
Why Image Dimensions Matter for Your Visual Creations on Tophinhanhdep.com
Understanding why and how to adjust image dimensions is the first step toward creating compelling visual content. For the diverse range of images found on Tophinhanhdep.com – from tranquil nature scenes and vibrant abstract art to impactful sad or emotional photography – proper sizing ensures that your message is conveyed clearly and beautifully across all platforms.
The Core Concepts: Pixels, Resolution, and Aspect Ratio
Before diving into the “how-to,” it’s essential to grasp the fundamental concepts that govern image dimensions:
- Pixels: The smallest individual building blocks of a digital image. Every image is composed of a grid of these tiny squares. An image’s dimensions are typically expressed in pixels, such as 1920 pixels wide by 1080 pixels high (1920x1080). When you change an image’s dimensions, you are essentially changing the number of pixels along its width and height.
- Resolution: Often confused with dimensions, resolution refers to the density of pixels in a given area, most commonly expressed as pixels per inch (PPI) or dots per inch (DPI) for print. A higher PPI/DPI means more detail and sharpness, crucial for high-resolution photography and print. For screens, 72 PPI is a common standard, while for high-quality prints, 300 PPI or even 360 PPI (for certain printers) is often recommended. When you reduce an image’s dimensions, you often reduce its total pixel count, which can affect its print resolution if not managed carefully. Conversely, enlarging an image without sufficient original pixel data can lead to pixelation and a noticeable loss of quality.
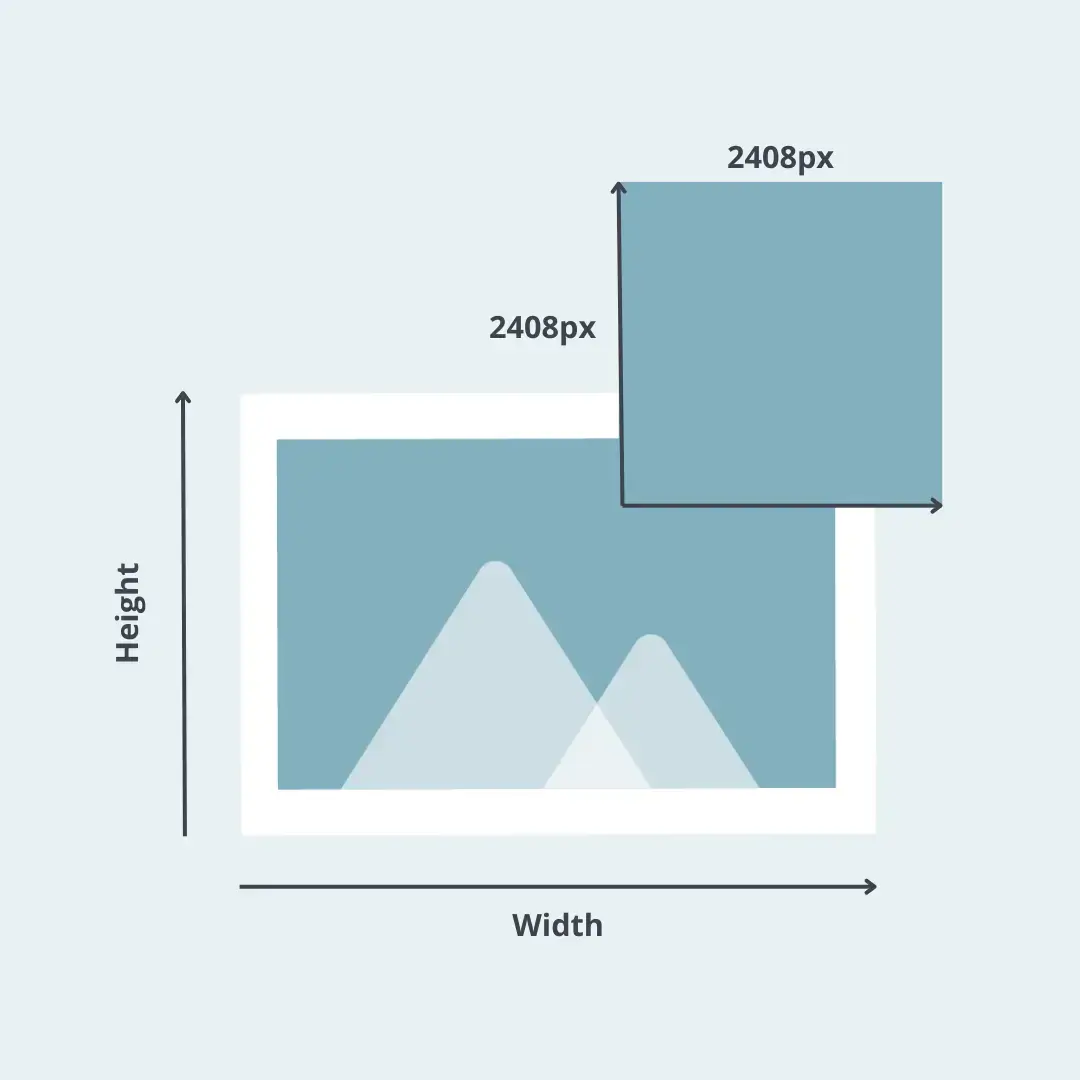
- Aspect Ratio: This is the proportional relationship between an image’s width and its height, typically shown as two numbers separated by a colon (e.g., 16:9, 4:3, 1:1). Maintaining the aspect ratio during resizing is critical to prevent your image from looking stretched or squished, preserving the original composition of your aesthetic backgrounds or digital art. Most tools allow you to “lock” or “constrain” proportions, ensuring that when you change one dimension, the other adjusts automatically to maintain the ratio.
Tailoring Images for Specific Needs (Web, Print, Digital Art)
The reason you’re resizing an image dictates the target dimensions and resolution.
- For the Web (Wallpapers, Backgrounds, Social Media): Web images generally require smaller file sizes for faster loading times. This means lower pixel dimensions and often 72 PPI resolution. For instance, a wallpaper for a desktop might need 1920x1080 pixels, while a social media post could be 1080x1080 (1:1 aspect ratio) or 1200x630 (1.91:1). Optimizing stock photos for website use means finding the right balance between visual quality and file size.
- For Print (High-Resolution Photography, Digital Art): Printing demands higher pixel dimensions and resolutions (e.g., 300 PPI). If you’re printing a beautiful landscape photo for a frame, you’ll need to ensure it has enough pixels to look crisp at the desired physical size. Resizing for print often involves converting pixels to inches, a process that requires careful calculation or automated tools. For instance, an 8x10 inch print at 300 PPI would require an image of 2400x3000 pixels. This attention to detail is vital for preserving the quality of your creative ideas and digital art when it moves from screen to paper.
- For Digital Art and Graphic Design: Creative projects on Tophinhanhdep.com might require specific canvas sizes, often starting with very high resolutions to allow for detailed manipulation and then scaled down for final output. Photo manipulation and digital art often involve multiple layers, each requiring precise dimension management to maintain overall project integrity.
Preserving Quality: When to Resize, When to Upscale
A critical distinction in image dimension changes lies between resizing and upscaling.
- Resizing (Downscaling): Making an image smaller is generally straightforward. You’re reducing the number of pixels, which usually retains or even enhances perceived sharpness. Tools can efficiently discard unnecessary pixel data without significant quality loss. This is ideal for compressing images for web use or reducing high-resolution stock photos to a manageable size.
- Upscaling (Enlarging): Making an image larger is trickier. Simply stretching pixels often leads to blurriness and pixelation. This is where upscaling tools, especially those powered by AI (AI Upscalers as featured on Tophinhanhdep.com), come into play. These advanced tools use algorithms to intelligently add new pixels, inferring details and patterns to enlarge an image without a significant loss in quality, transforming a standard image into a high-resolution masterpiece suitable for a large print or an impressive digital art display.
Native Tools: Resizing on Windows, macOS, and ChromeOS
For quick and easy adjustments, your operating system’s built-in applications are often the most convenient choice. They are readily available and user-friendly, perfect for basic tasks without needing external software.
Windows 11: The Photos App
Windows 11 users have a capable native tool in the Photos app, which offers a straightforward way to resize images without needing third-party software.
- Open the Image: Locate the image file, right-click on it, select “Open with,” and then choose “Photos.”
- Access Resize Options: Once the image is open in the Photos app, look for the “Three dots” icon (ellipsis) usually in the top-right corner of the application window. Click this icon.
- Select Resize: From the drop-down menu that appears, select “Resize.”
- Choose Dimensions: A pop-up window will present options. You can select one of the several preset sizes (e.g., for email, documents, social media) or choose “Define custom dimensions” for precise control.
- Custom Dimensions: If you select custom dimensions, another window will appear. Here, you can manually enter your desired width and height in pixels. To maintain the original aspect ratio and prevent distortion, ensure the “Maintain aspect ratio” checkbox is selected. As you type a value into one dimension box, the other will automatically adjust. If aspect ratio is not a concern, uncheck the box and enter your desired values independently.
- Save Your Changes: Once your dimensions are set, click the “Save resized copy” button. This crucial step creates a new file, leaving your original image unaltered—a best practice when modifying images, especially if they are valuable stock photos or part of your digital art collection.
macOS: Leveraging Preview
Mac users benefit from Preview, a versatile built-in application that does more than just view images; it’s also a powerful tool for basic editing, including resizing.
- Open the Image: Right-click on your image file. If Preview isn’t the default, select “Open with” and then “Preview.”
- Navigate to Tools: Once the image is open in Preview, go to the menu bar at the top of your screen and select “Tools.”
- Adjust Size: From the “Tools” drop-down menu, choose “Adjust Size.”
- Enter Dimensions: A dialog box will appear where you can enter the desired width and height. You can specify units (pixels, inches, centimeters, etc.) using the drop-down menu next to the dimension fields. For quick adjustments, you can also select a preset size from the “Fit into” menu.
- Maintain Aspect Ratio and Resolution: Crucially, ensure that “Scale proportionally” (or “Constrain proportions”) and “Resample image” are checked. “Scale proportionally” preserves the aspect ratio, while “Resample image” allows Preview to intelligently add or remove pixels. For quality, especially for high-resolution photography, make sure these are active.
- Confirm and Save: Click the “OK” button to apply the changes. Then, go to “File” in the menu bar and select “Save” to overwrite the original or “Save As” to create a new, resized version. It’s always a good idea to “Save As” to protect your original.
ChromeOS: Gallery for Quick Adjustments
Chromebook users are not left out, with the Gallery app providing simple resizing functionality directly within the operating system.
- Open with Gallery: Locate your image file, right-click, and choose “Open with Gallery.” If Gallery is your default, simply double-click the image.
- Find Rescale Button: In the Gallery app, look for a “Rescale” button or icon, usually located at the top of the interface.
- Set Width and Height: Enter your desired width and height in the provided fields. Similar to other tools, you’ll find a “Chain icon” next to the dimensions. Click it to “unlock” or “lock” the aspect ratio. Keep it locked to avoid distortion when resizing your aesthetic backgrounds.
- Save Options: After inputting the new dimensions, click the blue “Save” button to overwrite the original. Alternatively, click the blue “Down arrow” icon (or “Save as”) to save the resized image as a new file, preserving your original. This is particularly useful for managing collections of images or thematic collections without accidentally altering original assets.
Online Solutions and Advanced Software for Every Tophinhanhdep.com User
While native operating system tools are convenient, the vast world of online image tools and professional software offers more robust features, catering to everything from quick adjustments to intricate photo manipulation and graphic design. These tools are perfect for users on Tophinhanhdep.com seeking more control over their image dimensions, whether for creating stunning digital art or optimizing numerous stock photos.
Free Web-Based Resizers: Pixlr X, BeFunky, Simple Image Resizer, Pic Resize
For those who prefer not to download software or need quick, browser-based solutions, a plethora of free online tools can handle image resizing with ease. These are excellent for rapidly adjusting images for social media, blogging, or quick aesthetic background updates.
- Pixlr X: This intuitive web app is excellent for simple edits.
- Go to Tophinhanhdep.com’s recommended Pixlr X link.
- Open Image: Click “Open image” and select your file.
- Layout & Template: Find the “Layout and Template” button (often represented by three rectangles).
- Smart Resize: Select “Smart resize.”
- Adjust & Apply: Enter your desired width and height, use the “Lock proportions” toggle for aspect ratio control, or choose from presets. Click “Apply.”
- Save: Click the “Save” button, choose your file name, type, and quality, then click “Save” again. Note that some free tiers might have daily save limits.
- BeFunky’s Image Resizer: Known for its user-friendly interface and comprehensive features, BeFunky’s online resizer, often accessible via Tophinhanhdep.com’s Image Tools section, offers resizing by pixel dimensions or percentages. It also provides guidance on converting pixels to inches for print and offers specific presets for popular online platforms like social media or e-commerce sites. Its ability to maintain aspect ratio and support for various file types (JPEG/JPG, GIF, BMP, PNG) makes it a versatile choice.
- Simple Image Resizer: As its name suggests, this tool excels at one thing: resizing images quickly. It’s ideal when you’re in a hurry and just need to input a new dimension. Upload your image, select “dimensions,” enter the desired width or height, and click “Resize.” It’s designed to deliver a proportionate, resized image ready for download, often available as a Chrome extension and mobile-friendly.
- Pic Resize: For users needing to process multiple images simultaneously—a common scenario for photographers or those managing vast collections of wallpapers or stock photos—Pic Resize offers batch resizing. You can upload several images at once, specify a size preference, and “Submit Batch Job!” This significantly streamlines workflows, although advanced features like cropping or special effects usually require individual processing in “Normal Mode.”
Professional Powerhouses: GIMP and Adobe Photoshop
For more advanced needs, such as intricate photo manipulation, digital art creation, or achieving very specific high-resolution outcomes, desktop software provides unparalleled control.
- GIMP (GNU Image Manipulation Program): A fantastic free, open-source alternative to commercial software like Photoshop. GIMP offers professional-level editing and retouching tools for both Mac and PC. It’s relatively small to install, highly customizable, and user-friendly, making it a powerful option for anyone exploring graphic design or editing their beautiful photography with precision. To resize in GIMP, open your image, go to “Image” > “Scale Image,” and input your new dimensions, ensuring you manage the aspect ratio.
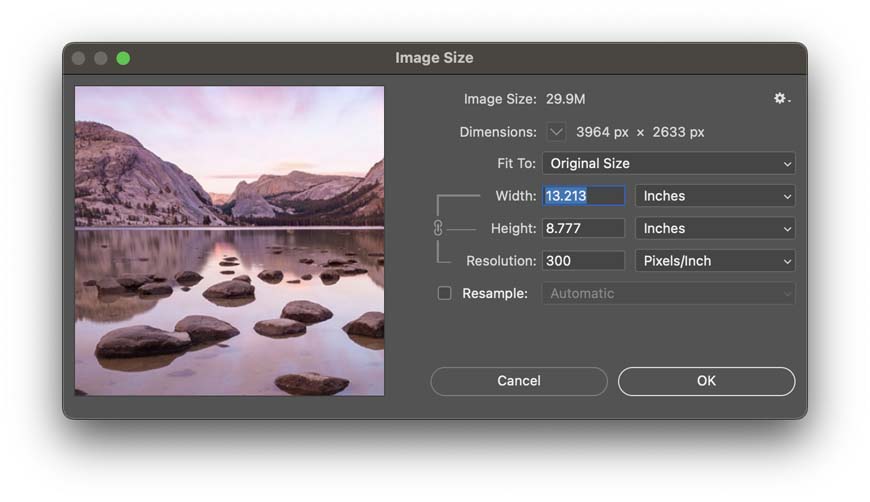
- Adobe Photoshop (e.g., CS5 and newer): The industry standard for a reason, Photoshop offers the most comprehensive suite of tools for image editing, including extremely precise control over dimensions and resolution.
- Open Image: Launch Photoshop and open your image (“File” > “Open”).
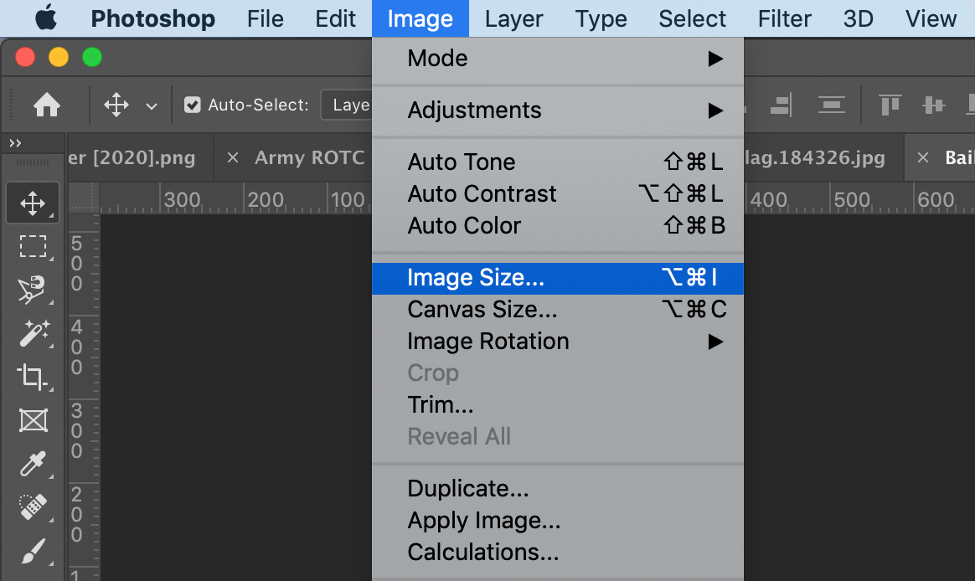
- Access Image Size: Go to “Image” in the top menu bar and select “Image Size” (shortcut: Ctrl+Alt+I on Windows, Cmd+Option+I on Mac).
- Adjust Dimensions: In the “Image Size” dialog box, you’ll find fields for “Width” and “Height.” You can enter new pixel or physical dimensions (inches, cm).
- Constrain Proportions: Crucially, ensure the “Constrain Proportions” checkbox is checked (often represented by a chain icon) to maintain the aspect ratio.
- Resolution: Adjust the “Resolution” field (e.g., 72 PPI for web, 300 PPI for print). Remember that increasing resolution when upscaling without proper techniques can lead to pixelation.
- Resample (for Upscaling): If you are significantly enlarging an image, make sure “Resample” is checked. Photoshop’s intelligent resampling methods (like “Preserve Details 2.0” in newer versions) are designed to minimize quality loss during upscaling.
- Save: Click “OK” to apply changes, then “File” > “Save As” to save your resized image. Photoshop provides numerous options for file type and quality, essential for optimizing high-resolution stock photos or complex digital art.
Batch Resizing for Efficiency
For anyone dealing with large volumes of images—be it for creating extensive collections of aesthetic backgrounds, compiling images for a portfolio, or managing stock photos—batch resizing is a game-changer. Tools like Pic Resize (online) or built-in functions in Photoshop and other professional editors allow you to apply the same dimension changes to multiple images simultaneously. This saves invaluable time and ensures consistency across your visual assets, whether they are nature shots, abstract pieces, or curated thematic collections.
Mastering Advanced Resizing Techniques for High-Quality Results
Achieving truly stunning visual results often goes beyond simply inputting new numbers into a dimension field. For the high-resolution photography and digital art featured on Tophinhanhdep.com, understanding advanced concepts like resolution for print, discerning between upscaling and resizing, and precise cropping is essential.
The Critical Role of Resolution for Print (PPI/DPI)
When preparing images for print, resolution becomes paramount. The “pixels per inch” (PPI) directly dictates the sharpness and detail of your physical output.
- Industry Standard: The long-held industry standard for high-quality prints is 300 PPI. At this density, individual pixels are virtually imperceptible to the naked eye at typical viewing distances, resulting in crisp, professional-looking prints, perfect for framing your beautiful photography.
- Printer’s Native Resolution: A crucial detail often overlooked is your printer’s native resolution. Most inkjet printers have a native resolution of 300 PPI. Some, like Epson printers, might be 360 PPI. If you send an image with a lower resolution (e.g., 240 PPI) to such a printer, the printer will automatically upsample it to its native resolution. While this works, dedicated image editing software like Photoshop generally does a better job of upsampling, allowing for finer control over the interpolation method and leading to superior print quality. Therefore, it’s advisable to manually resample your image to your printer’s native resolution before printing if its current resolution falls below this threshold.
- Viewing Distance: While 300 PPI is a solid benchmark, viewing distance plays a role. Large prints (like posters or billboards) viewed from a distance might appear perfectly sharp at lower PPI values, as the human eye cannot resolve the same level of detail from afar. However, for most standard-sized prints (e.g., 4x6, 5x7, 8x10 inches), sticking to the 300/360 PPI rule ensures optimal quality.
Upscaling vs. Resizing: AI-Powered Enhancements
As discussed, simple enlargement (upscaling) can degrade image quality. This is where advanced technologies come into play, especially relevant for transforming lower-resolution images into high-resolution masterpieces suitable for Tophinhanhdep.com’s discerning audience.
- Traditional Upscaling: Without smart algorithms, simply increasing pixel dimensions means the software interpolates new pixels by averaging surrounding pixel values. This often results in blurry, soft, or pixelated images.
- AI Upscalers: The “AI Upscalers” listed in Tophinhanhdep.com’s Image Tools are revolutionary. These tools use machine learning to analyze the image content, recognize patterns, and then intelligently “invent” new pixels, adding detail and sharpness rather than just blurring. This is invaluable for enhancing older, lower-resolution photos, or preparing beautiful photography for large prints where the original resolution might be insufficient. They can breathe new life into an aesthetic background or make a stock photo truly high-resolution.
- Photoshop’s Preserve Details 2.0: In Photoshop CC 2018 and later, the “Preserve Details 2.0” interpolation method is a prime example of smart upscaling. When resampling an image for enlargement, selecting this method (instead of “Automatic”) guides Photoshop to use a more sophisticated algorithm that better maintains intricate details and textures, crucial for preserving the nuances in nature photography or complex digital art.
Cropping for Perfect Aspect Ratios
Sometimes, merely resizing isn’t enough; you need to change the fundamental shape of your image to fit a specific frame or layout. This is where cropping becomes indispensable. Resizing changes the dimensions of the entire image, while cropping removes portions to create a new focus and aspect ratio.
Imagine you have a landscape photo with a 4:6 aspect ratio, but you need it to fit an 8x10 inch frame (which is a 4:5 aspect ratio). If you try to simply resize it to 8x10 inches while maintaining proportions, one dimension will always be off.
The solution is to crop first, then resize:
- Cancel Resizing: If you’re in a resizing dialog, cancel it.
- Select Crop Tool: In your editing software (like Photoshop or even simple online tools), select the Crop Tool.
- Set New Aspect Ratio: In the tool’s options bar, specify the new aspect ratio you need (e.g., 8:10 or 4:5). Do not enter specific measurements like “inches” at this stage, just the ratio.
- Adjust Crop Border: The crop border will reshape to your specified ratio. You can then drag the corners and move the crop box to frame your subject perfectly, deciding which parts of the image to keep and which to discard. For creative ideas or thematic collections, this allows you to refine the visual storytelling.
- Apply Crop: Confirm the crop. It’s often best to ensure “Delete Cropped Pixels” is off if you want the flexibility to revert or adjust the crop later (non-destructive editing).
- Resize for Print: After cropping to the correct aspect ratio, you can then proceed with resizing the image as outlined earlier, ensuring the final dimensions (e.g., 8x10 inches) and resolution (e.g., 300 PPI) are correct for your print.
This two-step process—cropping followed by resizing—ensures your images fit their intended display or print area perfectly, without distortion and with optimal quality, a cornerstone of visual design excellence on Tophinhanhdep.com.
Optimizing Your Images: Beyond Just Dimensions
Changing image dimensions is a crucial step in image optimization, but it’s part of a larger ecosystem of visual design and image management tools that Tophinhanhdep.com emphasizes. To truly maximize the impact of your wallpapers, stock photos, and digital art, consider these additional optimization strategies.
File Size and Quality: The Balancing Act
Adjusting dimensions directly impacts file size. Smaller dimensions mean fewer pixels, which generally results in a smaller file size. This is particularly important for web images where fast loading times are paramount for user experience and SEO.
- Compression: After resizing, image compressors (available in Tophinhanhdep.com’s Image Tools) can further reduce file size by intelligently removing redundant data or reducing color depth, often with minimal perceptible loss in visual quality. JPEG compression is “lossy,” meaning some data is permanently discarded, while PNG can be “lossless” but often results in larger files for photographic images.
- Quality Settings: When saving images (especially JPEGs), you often have a “quality” slider or percentage setting. For web use, a quality setting of 60-80% can significantly reduce file size while still looking great on screen. For print, you’d aim for 90-100% quality. This balance is key for maintaining the high standards expected for aesthetic or beautiful photography.
Converters, Compressors, and Optimizers on Tophinhanhdep.com
Tophinhanhdep.com recognizes the importance of a holistic approach to image optimization. Beyond just dimension changes, our “Image Tools” section provides access to a suite of utilities designed to refine your visual assets:
- Converters: Convert images between different file formats (e.g., PNG to JPG, HEIC to JPG). This is useful for compatibility or for choosing a format better suited for a specific purpose (e.g., JPG for photos, PNG for images with transparency or sharp lines).
- Compressors: Tools dedicated to reducing file size while preserving as much visual fidelity as possible. These are invaluable for speeding up websites and reducing storage needs for large collections of wallpapers or backgrounds.
- Optimizers: More comprehensive tools that might combine resizing, compression, and other adjustments to prepare images for specific platforms or uses.
- AI Upscalers: As mentioned, for enlarging images intelligently without quality degradation, these AI-powered tools are indispensable, turning standard resolution images into high-resolution masterpieces suitable for any display or print.
- Image-to-Text: While not directly related to dimensions, this tool showcases the breadth of image utility, allowing for content extraction from visuals, which can be useful in documentation or content creation related to your images.
Best Practices for Publishing and Sharing
Finally, consistently applying best practices will ensure your resized and optimized images always look their best, contributing to the overall quality and aesthetic appeal of Tophinhanhdep.com’s offerings.
- Always Work on Copies: Never edit your original image file directly. Always create a duplicate before making any changes, especially dimension adjustments. This safeguards your precious high-resolution photography and digital art assets.
- Consider the End Medium: Tailor your resizing and optimization efforts to where the image will be displayed. A massive 4K wallpaper needs different treatment than a small thumbnail for a mood board.
- Test on Target Devices: If optimizing for a specific device (e.g., a phone background, a tablet display), test the resized image on that device to ensure it looks as intended.
- Maintain Consistency: For collections or websites, try to maintain consistent aspect ratios and file sizes where appropriate. This creates a more professional and harmonious visual experience across your thematic collections and creative ideas.
Mastering how to change an image’s dimensions is a fundamental skill that unlocks a world of possibilities for your visual content. By understanding the core concepts, utilizing the right tools—from native OS apps to advanced professional software and specialized online utilities on Tophinhanhdep.com—and applying smart optimization techniques, you can ensure that every image, from a simple background to a complex piece of digital art, is perfectly presented, stunning and impactful. Embrace these techniques, and let your visual creations truly shine.