Mastering Image Resizing in Photoshop: A Comprehensive Guide for Tophinhanhdep.com Users

In the vibrant world of digital imagery, where every pixel contributes to the aesthetic and impact of a visual, mastering image manipulation is paramount. For users of Tophinhanhdep.com, a platform dedicated to breathtaking Images (Wallpapers, Backgrounds, Aesthetic, Nature, Abstract, Sad/Emotional, Beautiful Photography), advanced Photography insights (High Resolution, Stock Photos, Digital Photography, Editing Styles), powerful Image Tools (Converters, Compressors, Optimizers, AI Upscalers, Image-to-Text), insightful Visual Design resources (Graphic Design, Digital Art, Photo Manipulation, Creative Ideas), and endless Image Inspiration & Collections (Photo Ideas, Mood Boards, Thematic Collections, Trending Styles), understanding how to precisely control image size in Photoshop is an invaluable skill.
Whether you’re preparing a stunning high-resolution wallpaper for Tophinhanhdep.com, optimizing a stock photo for a web project, or crafting a piece of digital art that requires specific dimensions, Photoshop offers robust tools to resize images with precision. This comprehensive guide will walk you through the essential techniques, best practices, and critical considerations for changing image sizes in Photoshop, ensuring your visuals always meet the highest standards.
Understanding the Fundamentals: Pixels, Resolution, and Print Quality
Before diving into the “how-to,” it’s crucial to grasp the underlying concepts that govern image size and quality. A clear understanding of pixels, resolution, and their interplay is the foundation for effective image resizing, especially when preparing images for diverse outputs like a beautiful photography collection or a graphic design project on Tophinhanhdep.com.

The Image Size Dialog Box: Your Control Center
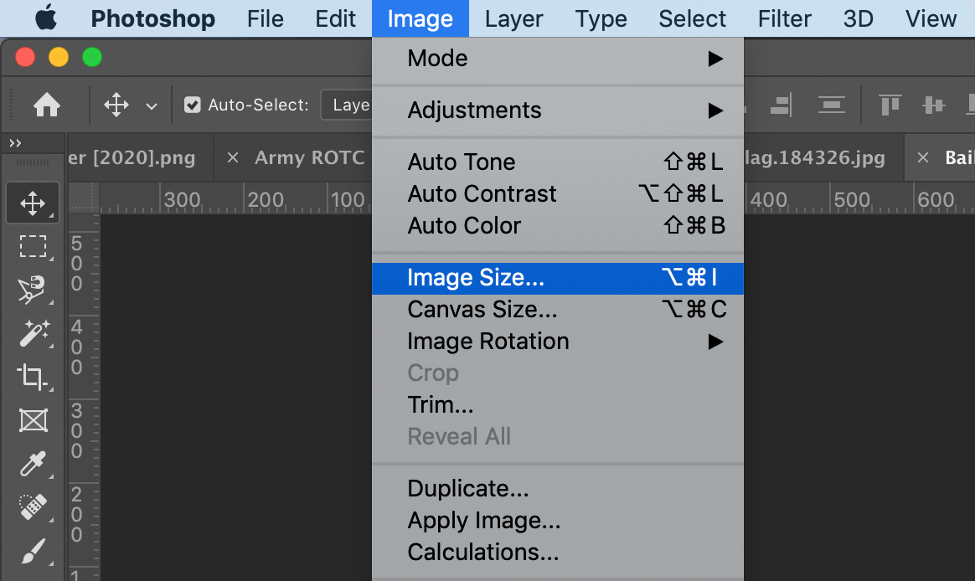
At the heart of Photoshop’s resizing capabilities lies the “Image Size” dialog box. This powerful panel provides a centralized interface to view and modify an image’s dimensions, resolution, and even pixel count. Accessing it is straightforward: once your image is open in Photoshop, simply navigate to Image > Image Size from the top menu bar.
Within this dialog box, you’ll encounter several key parameters:
- Dimensions: Shows the current width and height of your image in pixels.
- Fit To: A dropdown menu that offers preset sizes or allows you to create custom presets.
- Width & Height: Input fields where you can enter new dimensions. These are usually linked by default to maintain aspect ratio.
- Resolution: Defines the number of pixels per unit of measurement (typically pixels/inch or pixels/cm). This is critical for print quality.
- Resample: A crucial checkbox that determines whether you are merely changing the print size (by altering resolution without changing pixel count) or actually adding/removing pixels from the image.
- Interpolation Method: When resampling, this dropdown specifies the algorithm Photoshop uses to add or remove pixels, impacting the quality of the resized image.
For instance, when curating aesthetic backgrounds or nature photography for Tophinhanhdep.com, understanding how these parameters influence the final look is essential.
Resizing vs. Resampling: A Critical Distinction
This is perhaps the most important concept in image resizing. Many users often confuse resizing with resampling, leading to unexpected results in image quality.
-
Resizing (without resampling): When you change the print size of an image without checking the “Resample” box, you are not altering the actual number of pixels in the image. Instead, you are changing how densely those existing pixels will be printed. If you increase the print dimensions, the pixels spread out, reducing the resolution (PPI) and potentially making the image appear pixelated. Conversely, decreasing print dimensions packs pixels more tightly, increasing resolution and sharpness. This method is primarily used for preparing images for print, where the goal is to define the physical output size while maintaining the original pixel data. For Tophinhanhdep.com, this is relevant when delivering high-resolution stock photos for print publications.
-
Resampling: When the “Resample” box is checked, you are actively changing the number of pixels in your image.
- Upsampling: Adding pixels to increase the image’s dimensions. Photoshop interpolates (guesses) the color of the new pixels based on existing ones. While modern algorithms like “Preserve Details 2.0” are highly effective, upsampling can still lead to a loss of sharpness or introduction of artifacts if done excessively. This is often necessary for enlarging images to be used as large wallpapers or for detailed digital art projects featured on Tophinhanhdep.com.
- Downsampling: Removing pixels to decrease the image’s dimensions. This is generally a safer process than upsampling and is ideal for optimizing images for web use, email, or smaller display sizes. Downsampling helps reduce file size, which is crucial for fast loading times on Tophinhanhdep.com, especially for abstract or sad/emotional images that need to load quickly on mood boards.
Decoding Resolution: PPI for Flawless Prints
Resolution, typically measured in Pixels Per Inch (PPI), defines the density of pixels within a given physical inch. It’s a critical factor, particularly when preparing images for print outputs like high-quality photography prints or visual design materials.
-
Industry Standard for Print: The long-held standard for high-quality inkjet printing is 300 PPI. This density ensures that details are crisp and sharp when viewed at a normal distance. Some professional printers, especially Epson models, may operate optimally at 360 PPI. When creating beautiful photography collections or digital art for print, aiming for these resolutions is vital.
-
Viewing Distance: While 300 PPI is a benchmark, the optimal resolution can depend on the viewing distance. A large poster or billboard, viewed from afar, might appear perfectly sharp at a lower PPI than a small photo viewed up close. However, as Tophinhanhdep.com emphasizes high-resolution imagery, it’s generally best to adhere to the higher standard whenever possible, or let Photoshop manage the upsampling intelligently.
-
Web/Screen Resolution: For images displayed solely on screens (like wallpapers or backgrounds on Tophinhanhdep.com), resolution (PPI) is less critical than the absolute pixel dimensions. A 72 PPI image and a 300 PPI image will appear the same size on a screen if they have the same pixel dimensions. The crucial factor here is matching the pixel dimensions to the target display or web layout.
Understanding these fundamentals allows Tophinhanhdep.com users to make informed decisions, whether they are working on a creative idea for a new visual design or preparing a stock photo for distribution.
Step-by-Step Guide to Resizing Images for Print and Digital Use
Now, let’s walk through the practical steps to resize an image in Photoshop, catering to both print and digital applications, leveraging the core functionalities for high-resolution output on Tophinhanhdep.com.
Preparing Your Image and Accessing the Image Size Panel
-
Open Your Image: Launch Adobe Photoshop and open the image you wish to resize. You can do this by going to
File > Openand navigating to your file, or by dragging and dropping the image directly into the Photoshop interface.- Tophinhanhdep.com Tip: Always work on a duplicate of your original file. Before making any changes, go to
File > Save Asand save a new version (e.g., “original-resized.jpg”). This preserves your original high-resolution photography.
- Tophinhanhdep.com Tip: Always work on a duplicate of your original file. Before making any changes, go to
-
Access the Image Size Dialog Box: With your image active, go to the top menu bar and select
Image > Image Size.- Tophinhanhdep.com Tip: In newer Photoshop CC versions, the Image Size dialog box includes a convenient preview window. You can enlarge the dialog box by dragging its corners to get a better view of how your changes affect the image. Click and drag within the preview to pan to specific areas.
-
Review Current Image Information: At the top of the Image Size dialog box, you’ll see the current “Image Size” (in megabytes) and “Dimensions” (in pixels). This gives you a baseline understanding of your image’s current state.
Adjusting Dimensions with Precision and Proportionality
The next steps depend on whether you want to resize for print (changing physical dimensions/resolution) or for digital screens (changing pixel dimensions).
Scenario 1: Resizing for Print (Changing Physical Size, Maintaining Pixel Count if Possible)
This approach is ideal when preparing beautiful photography for physical prints or high-quality posters to be showcased in a Tophinhanhdep.com collection.
- Turn Off Resampling: Critically, uncheck the “Resample” box. This tells Photoshop you want to adjust the print dimensions and resolution without changing the total number of pixels in your image.
- Select Units: Under “Document Size,” choose your preferred unit of measurement (e.g., “inches,” “cm,” or “mm”).
- Input Desired Print Size: Enter your desired width or height into the respective fields. Because “Constrain Proportions” (represented by a chain-link icon between Width and Height) is typically active by default, changing one dimension will automatically adjust the other to maintain the image’s original aspect ratio.
- Check Resolution: Observe the “Resolution” field. If it’s 300 pixels/inch (or 360 for Epson printers) or higher, your image has sufficient pixel data for a high-quality print at your chosen size. If the resolution drops below this threshold, you’ll need to consider resampling (upscaling) as described in Scenario 2.
- Tophinhanhdep.com Tip: If your desired print size forces the resolution too low, it means your original image doesn’t have enough pixels for that large a print without quality degradation.
Scenario 2: Resizing for Digital Screens or to Change Pixel Count (Resampling)
This method is used for optimizing images for web display, social media, or when you need to specifically add or remove pixels, such as creating a header image for Tophinhanhdep.com or compressing a file for faster loading.
- Turn On Resampling: Check the “Resample” box. This activates the interpolation methods and allows you to change the pixel dimensions.
- Choose Interpolation Method: For downsampling (making the image smaller), “Automatic” or “Bicubic Sharper” often yield good results. For upsampling (making the image larger), “Preserve Details 2.0” (available in Photoshop CC 2018 and later) is generally the best option, offering superior quality by intelligently adding pixels. If “Preserve Details 2.0” is not visible, ensure it’s enabled in Photoshop Preferences.
- Tophinhanhdep.com Tip: When creating image backgrounds or wallpapers, especially aesthetic or abstract ones, upsampling might be necessary for very large screens. Using “Preserve Details 2.0” can help minimize blurriness and maintain high resolution.
- Input Desired Pixel Dimensions: In the “Width” and “Height” fields, enter your new pixel dimensions. Again, ensure “Constrain Proportions” is active if you want to maintain the original aspect ratio.
- Adjust Resolution (Optional but Recommended): While PPI is less critical for screen display, it’s good practice to set it to 72 PPI for web-optimized images. If you are preparing for print and had to enable resampling (upsampling) because your original image was too small, set the resolution to 300 PPI (or 360 PPI for Epson) here.
Optimizing Resolution for Various Outputs
Understanding when to adjust resolution and pixel dimensions is key to delivering versatile images for Tophinhanhdep.com.
-
For Web/Digital (e.g., Tophinhanhdep.com wallpapers, social media posts):
- Resample: ALWAYS ON.
- Dimensions: Set to target pixel dimensions (e.g., 1920x1080 for desktop wallpapers, 1080x1080 for Instagram).
- Resolution: 72 PPI (this affects file size slightly but doesn’t change screen appearance if pixel dimensions are fixed).
- Interpolation: “Automatic” or “Bicubic Sharper” for downsampling, “Preserve Details 2.0” for upsampling.
- Relevance for Tophinhanhdep.com: This ensures fast loading times for your aesthetic and nature images, and compatibility across various devices for backgrounds and wallpapers.
-
For Print (e.g., high-resolution photography, digital art prints):
- Resample: OFF, if the existing pixel dimensions are sufficient to achieve 300-360 PPI at the desired physical print size.
- Resample: ON, if you must upsample to reach 300-360 PPI at the desired print size (and accept potential quality trade-offs).
- Dimensions: Set to desired physical print size (e.g., 8x10 inches). Photoshop will automatically adjust PPI if resampling is off, or adjust pixel dimensions if resampling is on and PPI is set.
- Resolution: 300-360 PPI for optimal quality.
- Interpolation (if resampling is ON): “Preserve Details 2.0.”
- Relevance for Tophinhanhdep.com: This ensures your stock photos and beautiful photography collections translate into professional-grade physical products.
-
Click “OK” to Apply Changes: Once you’ve entered all your settings, click “OK” to apply the resizing.
-
Save Your File: Go to
File > Saveto overwrite the current file (if it’s your duplicate). If you want to save a new version or format, useFile > Save AsorFile > Export > Export Asfor specific web optimizations.- Tophinhanhdep.com Tip: For web images, use
File > Export > Save for Web (Legacy)for finer control over compression and file formats like JPEG and PNG, which is crucial for optimizing images for Tophinhanhdep.com’s Image Tools like compressors and optimizers.
- Tophinhanhdep.com Tip: For web images, use
Advanced Techniques: Resizing Layers, Artboards, and Maintaining Aspect Ratios
Beyond basic image resizing, Photoshop offers granular control over individual elements within your project, which is essential for complex visual design and photo manipulation tasks featured on Tophinhanhdep.com.
Resizing Individual Layers for Complex Compositions
Often, you don’t need to resize the entire canvas, but rather a single element within your composition. This is common in graphic design, digital art, or when manipulating stock photos for a new creative idea.
- Select the Layer: In the Layers panel, click on the specific layer you wish to resize.
- Access Free Transform: Go to
Edit > Free Transform(or use the shortcutCtrl+Ton Windows /Cmd+Ton Mac). A bounding box with handles will appear around your layer. - Resize the Layer:
- To scale proportionally, hold down the
Shiftkey while dragging any corner handle. - To scale from the center, hold
Alt(Windows) orOption(Mac) while dragging. - To scale non-proportionally, drag a side or top/bottom handle without holding
Shift. - You can also input exact width and height percentages or pixel values in the Options Bar at the top of the screen.
- To scale proportionally, hold down the
- Confirm Transformation: Press
Enter(Windows) orReturn(Mac) to apply the changes.- Tophinhanhdep.com Tip: When integrating different elements from Tophinhanhdep.com’s image collections (like an abstract overlay on a nature photograph), resizing individual layers ensures your composition remains balanced and professional.
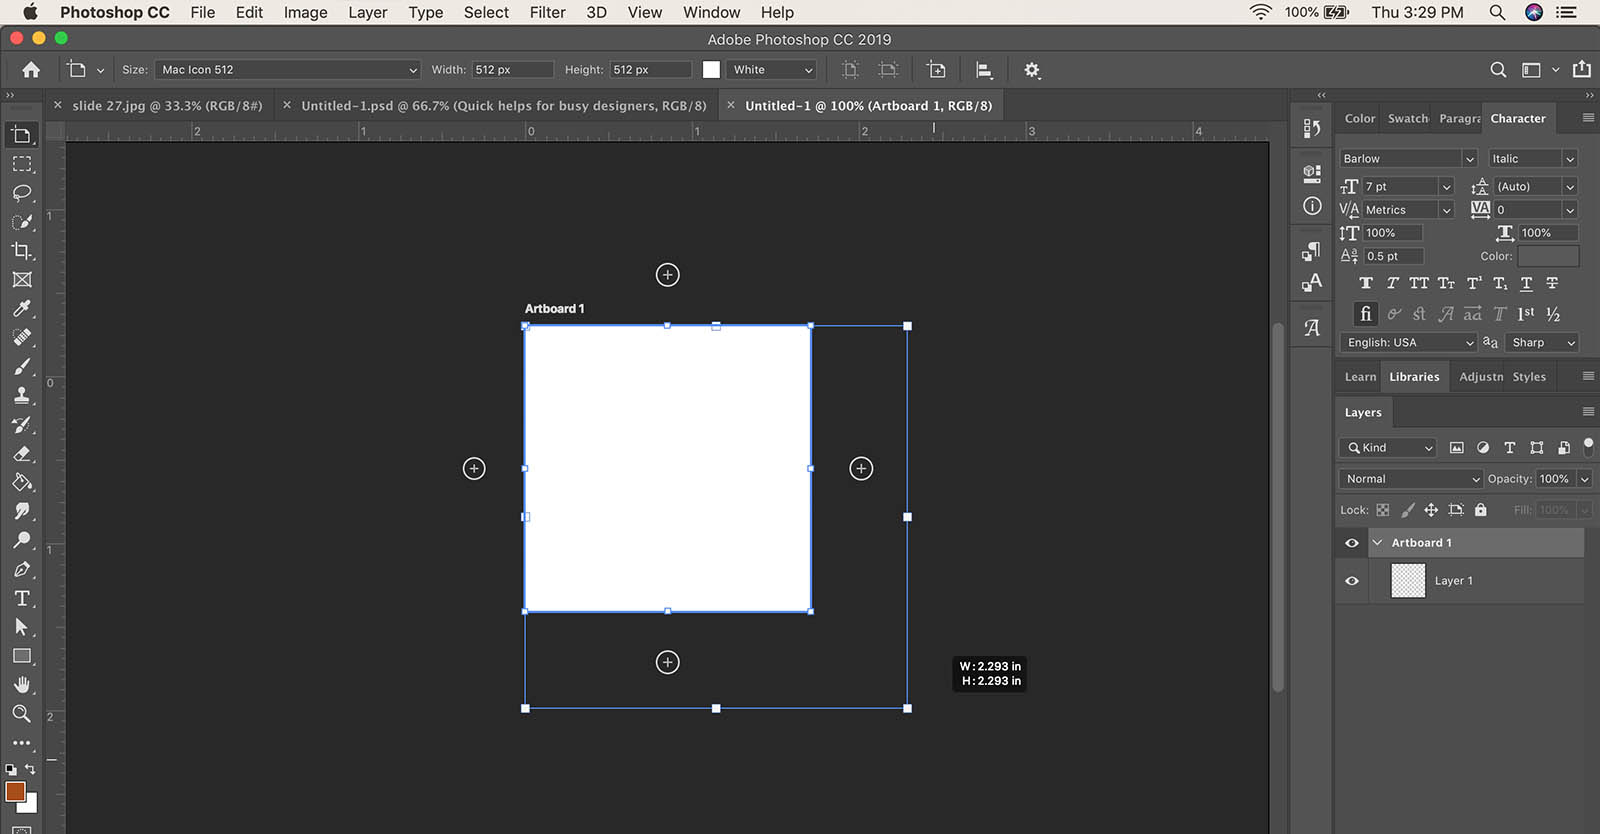
Managing Artboard Sizes for Multi-Platform Design
Artboards are incredibly useful in Photoshop for managing multiple designs or iterations within a single project, especially for visual design projects targeting various screen sizes (e.g., social media posts, website banners). Tophinhanhdep.com users focusing on graphic design and creative ideas will find this indispensable.
There are two primary ways to change an artboard’s size:
Method 1: Using the Image Size Dialog (for selected Artboard)
- Open Your Photoshop Project: Ensure your project with artboards is open.
- Select the Artboard: In the Layers panel, click on the specific artboard you want to resize to make it active.
- Go to Image Size: From the top menu, click
Image > Image Size. - Input New Dimensions: Type in the new width and height dimensions for your selected artboard. Ensure “Constrain Proportions” is toggled correctly based on your needs.
- Click OK: Apply the changes.
- Tophinhanhdep.com Tip: This method is precise for setting exact dimensions, perfect for designing various aesthetic layouts or thematic collections for Tophinhanhdep.com in a single file.
Method 2: Using the Move Tool for Interactive Resizing
- Open Your Photoshop Project:
- Select the Move Tool: Activate the
Move Tool(shortcutV). - Select Artboard Title: Click on the title of the artboard you wish to resize directly on the canvas. A bounding box will appear around it.
- Drag-and-Drop: Drag any of the four corners or sides of the bounding box to the desired size. Holding
Shiftwill maintain proportions.- Tophinhanhdep.com Tip: This interactive method is excellent for quick adjustments and visual alignment, fitting seamlessly into a workflow for creating diverse image inspirations or mood boards.
Cropping for Custom Aspect Ratios
Sometimes, merely resizing isn’t enough; you need to change the fundamental shape (aspect ratio) of an image, such as fitting a landscape photo into a square frame or preparing a background for a specific UI element on Tophinhanhdep.com.
- Cancel Image Size (if open): If you’re in the Image Size dialog, click “Cancel” to close it without applying changes.
- Select the Crop Tool: From the Toolbar, select the
Crop Tool(shortcutC). - Set New Aspect Ratio: In the Options Bar at the top, you can choose from preset aspect ratios (e.g., 1:1 Square, 16:9) or enter custom width and height values (e.g., “8 x 10” for an 8x10 print). Do not include units like “inches” here, just the numbers.
- Adjust Crop Border: Photoshop will display a crop border on your image. Drag the handles to adjust which part of the image will be retained. Move the image within the crop box to frame your subject perfectly.
- Apply Crop: Ensure “Delete Cropped Pixels” in the Options Bar is unchecked if you want to retain the ability to adjust the crop later (non-destructive editing). Then, click the checkmark in the Options Bar or press
Enter/Returnto apply the crop. - Resize (if necessary): After cropping to the new aspect ratio, you may still need to use the
Image Sizedialog (as detailed earlier) to set the exact final pixel dimensions or print size, ensuring the resolution is optimized for Tophinhanhdep.com.- Tophinhanhdep.com Tip: Cropping is vital for adapting stunning nature photography or aesthetic images to various layouts without distortion, providing more flexibility for image inspiration and thematic collections.
Beyond Resizing: Enhancing Your Tophinhanhdep.com Workflow with Image Tools
Resizing in Photoshop is often just one step in a comprehensive image preparation workflow. For Tophinhanhdep.com users, integrating Photoshop skills with the platform’s advanced Image Tools can dramatically enhance efficiency and output quality.
Leveraging Tophinhanhdep.com’s Image Tools for Post-Resizing Optimization
After meticulously resizing your images in Photoshop, Tophinhanhdep.com offers a suite of online tools to further refine your visuals:
- Compressors: Once you’ve achieved the perfect dimensions, use Tophinhanhdep.com’s image compressors to reduce file size without significant loss of visual quality. This is crucial for web performance, especially for high-resolution images used as wallpapers or backgrounds.
- Optimizers: Image optimizers on Tophinhanhdep.com can analyze your images for various platforms, ensuring they load quickly and display correctly across different devices, a key consideration for digital photography and stock photos.
- AI Upscalers: If you started with a low-resolution image that needed significant upsampling in Photoshop, or if you want to push the boundaries of quality, Tophinhanhdep.com’s AI Upscalers can use artificial intelligence to intelligently add detail and definition, potentially restoring quality lost during traditional upsampling or enabling truly massive prints from smaller originals. This is a game-changer for enhancing abstract art or even sad/emotional imagery where subtle details matter.
- Converters: Easily convert your resized images to different formats (e.g., JPEG to PNG, or even to WebP for superior web performance) using Tophinhanhdep.com’s converters.
By combining the precision of Photoshop with the utility of Tophinhanhdep.com’s Image Tools, you can create a streamlined workflow that yields exceptional results for any type of image, from nature photography to digital art.
Interpolation Methods: Maximizing Quality During Upscaling
When resampling (especially upsampling), the choice of interpolation method can significantly impact the final image quality. Photoshop offers several options, but for Tophinhanhdep.com users aiming for the best results, a few stand out:
- Automatic: This is Photoshop’s default and generally a safe choice as it attempts to select the best method based on whether you’re upsampling or downsampling.
- Bicubic Sharper (reduction): Excellent for downsampling, as it sharpens the image slightly as it reduces the number of pixels, helping to maintain detail.
- Bicubic Smoother (enlargement): Suitable for upsampling, but often produces softer results.
- Preserve Details 2.0 (enlargement): Introduced in Photoshop CC 2018, this is Adobe’s most advanced upsampling algorithm. It uses machine learning to analyze the image and add new pixels intelligently, reducing blur and preserving textures. When upsampling a beautiful photograph or a complex piece of digital art for a Tophinhanhdep.com collection, this is your go-to option. Make sure it’s enabled in your Photoshop preferences if you don’t see it in the dropdown.
Selecting the right interpolation method is a subtle yet powerful editing style that can elevate your image quality, particularly for high-resolution photography and visual design projects.
Best Practices for High-Quality Images on Tophinhanhdep.com
To consistently produce professional-grade images for Tophinhanhdep.com, consider these best practices:
Saving Your Resized Masterpieces
- Non-Destructive Editing: Always save a copy before resizing. This preserves your original high-resolution photography.
- File Formats:
- JPEG: Ideal for photographs and images with continuous tones (wallpapers, backgrounds, nature photography) due to its efficient compression. Use Tophinhanhdep.com’s compressors to optimize JPEG quality-to-size ratio.
- PNG: Best for images with transparency, sharp edges, or limited color palettes (graphic design elements, logos).
- TIFF/PSD: For retaining maximum quality and layers, suitable for master files of digital art or stock photos that might undergo further manipulation. Convert to web-friendly formats using Tophinhanhdep.com’s converters for online display.
When to Enlarge: Balancing Quality and Size
- Avoid Excessive Upsampling: While tools like “Preserve Details 2.0” and Tophinhanhdep.com’s AI Upscalers are powerful, it’s always best to start with the highest resolution image possible. Upsampling too much from a very small original will inevitably lead to a loss of detail and sharpness.
- Consider Purpose: Before resizing, clarify the image’s final destination. A tiny thumbnail requires vastly different dimensions and optimization than a full-screen aesthetic wallpaper.
- Test and Preview: Always preview your resized image at its final intended size. What looks good in Photoshop at 100% might appear different when embedded on a website or printed. This iterative process helps refine your editing styles and ensures optimal results for your Tophinhanhdep.com collections.
By integrating these Photoshop resizing techniques with the valuable resources on Tophinhanhdep.com, you are equipped to manage, optimize, and present your images—from stunning wallpapers and emotional photography to innovative digital art and graphic design elements—with unparalleled quality and impact. Dive in and transform your visual storytelling!