How to Change an Image to JPG: The Essential Guide for Digital Photography and Visual Design

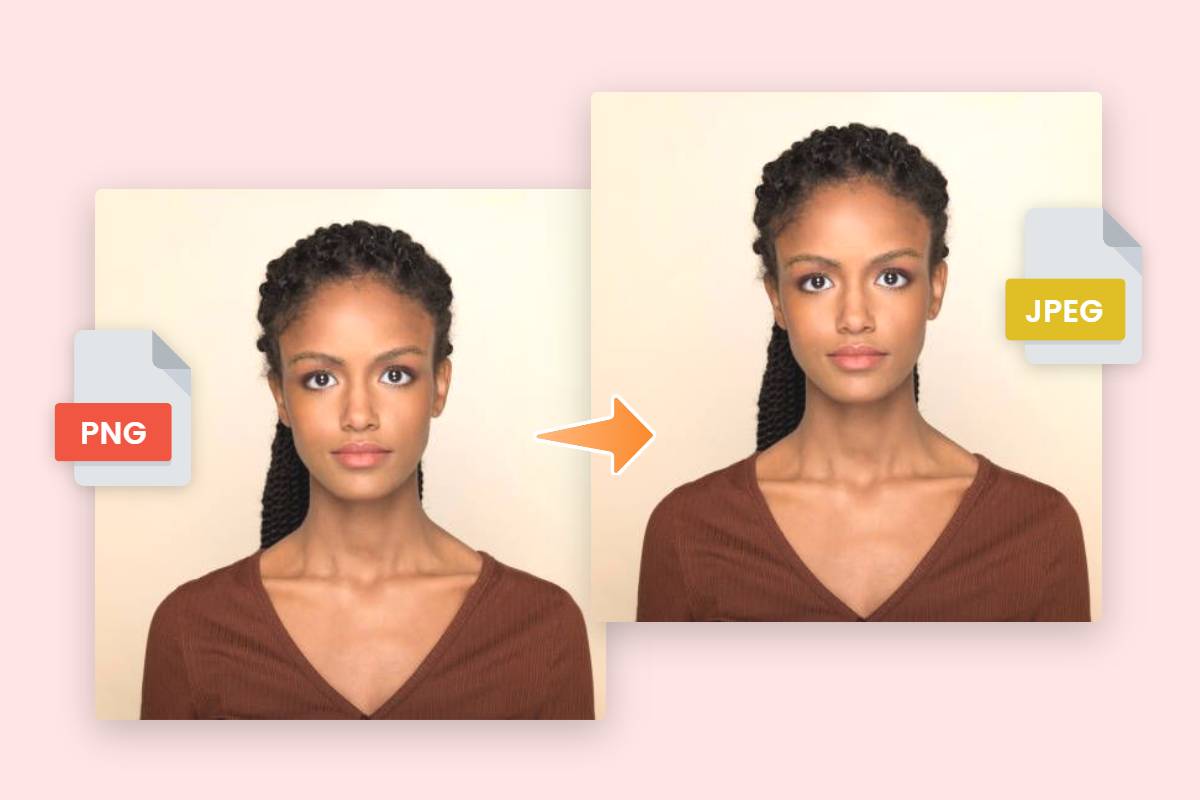
In the dynamic world of digital imagery, the ability to seamlessly manage and convert image formats is a fundamental skill for photographers, designers, and everyday users alike. Among the myriad of image file types, JPEG (Joint Photographic Experts Group), often abbreviated as JPG, stands out as a universally recognized and highly versatile standard. Many websites, applications, and digital platforms impose strict requirements, often demanding that images be uploaded in the .JPG format. This can be a source of considerable frustration when your precious photos are stored as .GIF, .TIFF, .PNG, .HEIC, or other less common extensions.

While converting an image to JPEG might sometimes involve a slight trade-off in absolute crispness, particularly for images with sharp lines or transparency, the format is lauded for its remarkable efficiency: it offers the best possible quality within the smallest feasible file size. This characteristic makes it an indispensable choice for everything from stunning “Wallpapers” and “Backgrounds” to “High Resolution” “Stock Photos” and personal “Digital Photography” shared across the web.
At Tophinhanhdep.com, we understand the critical role image flexibility plays in your creative and professional endeavors. Whether you’re curating “Aesthetic” collections, preparing “Nature” shots for print, dabbling in “Digital Art,” or simply looking to share “Beautiful Photography” with ease, mastering image conversion is key. This comprehensive guide will equip you with the knowledge and “Image Tools” necessary to effortlessly transform your pictures into JPG files, ensuring compatibility, optimizing performance, and enhancing your overall “Visual Design” workflow.
Understanding the JPEG Format: A Cornerstone of Digital Imaging
Before diving into the practical steps of conversion, it’s crucial to grasp what JPEG entails and why it has become the ubiquitous standard it is today. Understanding its characteristics will not only demystify the conversion process but also inform your decisions regarding image quality and application, especially when working with “High Resolution” or “Beautiful Photography” that you want to preserve or share effectively.
What is JPEG (and JPG)?
JPEG, or JPG, is a popular image file format named after the Joint Photographic Experts Group, the committee that created the standard in 1992. It is primarily used for storing digital images, particularly photographs, and is distinguished by its use of a “lossy” compression algorithm. This means that when an image is saved as a JPEG, certain redundant or less visually significant data is permanently discarded. The magic of JPEG lies in its ability to achieve substantial file size reductions while minimizing the perceptible loss of image quality to the human eye, especially for complex photographic images with smooth color gradients and subtle tonal variations.
This efficient compression ratio, often up to 10:1 or even higher without noticeable degradation (depending on the compression settings), is a primary reason why JPEG swiftly became the de facto image standard across the internet and in consumer digital cameras. From the very first digital cameras to today’s advanced “Digital Photography” equipment, JPEG has been the default output format, making it incredibly prevalent. When you capture “Beautiful Photography” or download “Stock Photos” for your projects, they are most likely in JPEG format, striking a balance between detailed visuals and manageable file sizes.
The interchangeable use of .JPG and .JPEG as file extensions often causes confusion, but they refer to the exact same format. The shorter .JPG extension originated from early versions of Windows operating systems, which mandated a three-letter file extension. macOS and Linux systems did not have this limitation, but the .JPG convention stuck and remains widely used today. Regardless of whether you see .JPG or .JPEG, you are dealing with the same underlying image standard.
Why JPEG Remains Indispensable for Your Visual Content
The enduring popularity of the JPEG format is not accidental; it’s a testament to its practical advantages in a world saturated with digital visuals. For content creators, photographers, and anyone managing “Images” for the web, JPEG offers a compelling set of benefits that make it truly indispensable.
One of its most significant advantages is universal compatibility. Virtually every device, operating system (Windows, macOS, Linux, Android, iOS), web browser, and software application can open, display, and process JPEG files. This unparalleled interoperability ensures that your “Wallpapers,” “Backgrounds,” “Aesthetic” images, or “Nature” shots can be viewed by anyone, anywhere, without needing specialized software. This is critical for sharing “Digital Photography” and for “Image Inspiration & Collections” that need to reach a broad audience.
Another core strength is efficient file size management. JPEG’s lossy compression significantly reduces file sizes, which is paramount for web performance and storage. Smaller files mean faster website loading times, improving user experience and SEO for pages featuring numerous “Beautiful Photography” examples or extensive “Image Collections.” It also translates to quicker upload and download times for cloud storage, emails, and social media platforms. For mobile users, this can save on data usage and phone storage, making it ideal for sharing spontaneous shots or “Sad/Emotional” moments without delay. While formats like PNG excel at retaining sharp edges and transparency, and RAW offers uncompressed sensor data for maximum “Editing Styles” flexibility, JPEG provides the optimal balance for most common scenarios.
Furthermore, JPEG excels at retaining color information effectively. It supports 24-bit color, allowing for millions of colors to be represented, which is more than sufficient for high-quality photographic reproductions. This makes it an excellent choice for preserving the subtle nuances and vibrant hues found in “Nature” photography or intricate “Abstract” art pieces, even after compression.
At Tophinhanhdep.com, we leverage the advantages of JPEG across our platform. Many of our “High Resolution” offerings are optimized as JPEGs to ensure quick access, and our “Image Tools” are designed to help you prepare your images for web, print, or personal use with minimal fuss. Understanding when and why to use JPEG is a fundamental aspect of effective “Visual Design” and digital content creation.
Mastering Image Conversion: Practical Methods Across Devices
Converting an image to JPEG doesn’t require advanced technical skills, but it does necessitate knowing the right “Image Tools” and techniques. Whether you’re on the go with a mobile device or settled at your desktop, there’s a method for you. Tophinhanhdep.com provides and advocates for a range of solutions, ensuring you can manage your “Images” effectively, regardless of their original format or your device.
Online Converters: Your Go-To for Quick and Universal Access
For many users, particularly those who don’t want to download specialized software or who work across multiple devices, online image converters are the most convenient and accessible solution. These web-based “Image Tools” allow you to transform virtually any image format into JPEG directly through your browser, making them perfect for mobile users on Android, iPhone, or iPad, as well as desktop users on Mac, Windows, or Linux.
Benefits of Online Converters:
- Device Agnostic: Works on any device with a web browser and internet connection.
- No Software Installation: Saves local storage and avoids compatibility issues with operating systems.
- User-Friendly: Most interfaces are intuitive, requiring only a few clicks.
- Versatility: Many support a wide array of input and output formats, making them comprehensive “Converters.”
How to Use an Online Converter:
- Choose a Web Converter: A simple search on Tophinhanhdep.com for “convert XXX to jpg online” (where “XXX” is your current file type, e.g., PNG, TIFF, WEBP) will lead you to reliable options. Websites dedicated to “Image Tools” like Tophinhanhdep.com often feature their own free and easy-to-use online converters. Ensure the chosen site can handle your specific image type; some, like very large .RAW files from “Digital Photography,” might be harder for certain online tools to process due to size constraints.
- Upload Your Image: Locate the “Choose File” or “Upload Image” button on the converter’s page. Click it to browse your device’s storage and select the image you wish to convert. Some advanced converters even allow you to drag and drop files directly onto the page, or input a URL if the image is already hosted online, which is great for “Stock Photos” or “Wallpapers” found on other sites.
- Verify Conversion Settings: Most converters will either default to JPEG/JPG or offer a dropdown menu or button to select it as the target format. This is also often where you can adjust critical parameters like “quality” and “resolution.” For “High Resolution” images, you might want to maintain a higher quality setting, but be mindful that this will result in a larger file size. For web-optimized “Backgrounds” or “Aesthetic” images, a slightly lower quality might be acceptable to achieve faster loading times.
- Convert and Download: Once your settings are chosen, click the “Convert” or “Save” button. The conversion process may take a few moments, especially for larger files or slower internet connections. It’s recommended to use Wi-Fi on mobile devices to avoid consuming cellular data plans, particularly for substantial “Image Collections.” After conversion, the JPEG file will typically download automatically to your default downloads folder, or you’ll be prompted to choose a saving location.
Considerations for Online Converters:
- File Size Limits: Free online tools often have maximum file size or daily conversion limits. For extensive “Photo Manipulation” or very large “Digital Photography” files, premium versions or desktop software might be necessary.
- Privacy: For highly sensitive or private “Beautiful Photography,” consider the privacy policy of the online converter. While reputable sites like Tophinhanhdep.com prioritize user privacy, direct desktop conversion might be preferred for ultimate control.
- Internet Connection: A stable and reasonably fast internet connection is essential for a smooth experience.
Online converters are fantastic “Image Tools” for quickly preparing images for social media, email, or updating your “Image Inspiration & Collections” with easily shareable JPGs.
Desktop Software Solutions for Windows and macOS
For those who prefer working offline, frequently process multiple images, or require more granular control over the conversion process, desktop software offers robust solutions. Both Windows and macOS come with built-in tools that can convert images to JPEG, and powerful third-party options like GIMP provide even more extensive capabilities for “Photo Manipulation” and “Editing Styles.”
Paint (Windows): A Native Conversion Utility
Microsoft Paint is a simple, pre-installed graphic editor available on all Windows PCs, including Windows 10 and 11. While not a professional “Digital Art” tool, it’s incredibly effective for basic image tasks, including converting various image formats to JPEG.
Steps to Convert with Paint:
- Open Paint: Press
⊞ Win + Sto open the search bar, type “paint,” and click on the “Paint” application in the search results. - Open Your Image: Ensure the image you wish to convert is saved on your computer. In Paint, click the “File” menu (top-left corner) and select “Open.” Navigate to your image file, select it, and click “Open.”
- Save as JPEG: Once your image is open, click “File” again, then hover over “Save As.” A sub-menu will appear displaying various image types.
- Select JPEG Picture: Click “JPEG picture.” This action will open a “Save As” dialog box.
- Configure and Save: In this new box, choose a destination folder where you want to save your converted file. You can also rename the file if desired. Crucially, ensure that “JPEG” is selected as the “Save as type” (it should be by default after choosing “JPEG picture”). Finally, click “Save.” Your image is now converted to JPEG format.
Paint is an excellent, straightforward “Image Tool” for quick conversions and minor edits, making it accessible even for those new to “Photo Manipulation.”
Preview (macOS): Beyond Just Viewing Images
On a Mac, Preview is more than just an image viewer; it’s a versatile utility pre-installed on every macOS system. It can open a wide range of image types and offers powerful built-in functionalities for basic “Editing Styles,” including cropping, resizing, and—most importantly—converting images to different formats like JPEG.
Steps to Convert with Preview:
- Open Image with Preview: Locate the image file on your Mac.
Ctrl + click(or right-click) the image, select “Open With,” and then choose “Preview.” The image must be stored locally on your computer for this method to work.- Tip: If you encounter a rare image type that Preview struggles with, an online converter on Tophinhanhdep.com might offer a quick solution.
- Access Export Options: With the image open in Preview, click on the “File” menu in the top menu bar, then select “Export.” A dialog box with various export settings will appear.
- Set Format to JPEG: In the export dialog, find the “Format” dropdown menu. Click it and select “JPEG.” You’ll also typically see sliders for “Quality” and “Resolution.”
- Adjust Quality/Resolution: Drag the “Quality” slider to balance file size and visual fidelity. Higher quality means a larger file but better preservation of “High Resolution” details from your “Beautiful Photography.” “Resolution” can be adjusted if you need to downscale the image for specific purposes, such as web “Wallpapers” or “Backgrounds.”
- Rename and Save: Optionally, rename your file, ensuring it ends with “.jpg” (case-insensitive). Choose a destination folder that’s easy to remember. Click “Save” to complete the conversion.
Preview is an intuitive “Image Tool” that integrates seamlessly into the macOS environment, providing Mac users with a simple yet powerful option for managing their “Digital Photography” and “Digital Art” files.
GIMP (PC, Mac, or Linux): The Free and Powerful Alternative
GIMP (GNU Image Manipulation Program) is a free, open-source cross-platform image editor available for Windows, macOS, and Linux. It’s often touted as a powerful alternative to professional software and offers an extensive suite of tools for “Graphic Design,” “Digital Art,” and advanced “Photo Manipulation.” For converting images, especially those with complex “Editing Styles” or unusual formats not supported by simpler tools, GIMP is an excellent choice.
Steps to Convert with GIMP:
- Get GIMP: If you don’t already have it, download and install GIMP from its official website. Its robust features make it a valuable addition to any digital artist or photographer’s toolkit.
- Open the Image: Launch GIMP. Click “File” from the menu bar, then “Open.” Navigate to your image file, select it, and click “Open” again.
- Export as JPEG: Unlike Paint or Preview, GIMP uses an “Export As” function for format conversions. Click “File,” then select “Export As…” (or press
Ctrl + Shift + Eon Windows/Linux,Cmd + Shift + Eon Mac). - Choose JPEG File Type: In the “Export Image” dialog box, you’ll see a field for the filename. At the bottom, click “Select File Type (By Extension)” and scroll through the list to find and select “JPEG image.”
- Modify JPEG Options: A new dialog box, “Export Image as JPEG,” will appear. This is where you can fine-tune your JPEG’s characteristics.
- Quality Slider: Adjust the “Quality” slider. For best results, it’s often helpful to check the “Show preview in image window” option to see the immediate effect of your quality adjustments on the image. This allows you to find the optimal balance between “High Resolution” retention and file size.
- Export and Save: Once satisfied with the quality, click “Export.” Another dialog box will prompt you to choose a file name (the
.jpgextension will be automatically appended) and a destination folder. Click “Save” to finalize the conversion.
GIMP is a fantastic “Image Tool” for users who need more control and flexibility than basic built-in applications, making it ideal for aspiring professionals in “Digital Photography” and “Visual Design.”
Specialized Conversion for HEIC Files on iPhone/iPad
Apple’s High-Efficiency Image File (HEIC) format has been the default for iPhone and iPad cameras since iOS 11 (2017). HEIC is praised for its superior compression, allowing for significantly smaller file sizes while maintaining high image quality compared to JPEG. However, its major drawback is limited compatibility with older software, non-Apple devices (especially Windows PCs), and various online platforms that still primarily expect JPEG. This necessitates specific conversion methods for iPhone users.
Tophinhanhdep.com recognizes the prevalence of mobile photography and provides solutions to bridge this compatibility gap, ensuring your stunning mobile “Beautiful Photography” is always accessible.
Methods to Convert HEIC to JPG on iPhone/iPad:
-
Using the Mail App (Email to Self):
- This is one of the simplest and quickest ways to convert a single HEIC image.
- Steps:
- Open the “Photos” app on your iPhone/iPad.
- Select the HEIC photo you wish to convert.
- Tap the “Share” button (the square with an arrow pointing up).
- Choose “Mail” from the sharing options.
- Enter your own email address as the recipient and send the email.
- Open the email you just sent on any device (your iPhone, iPad, Mac, or PC).
- Download the attached photo. It will automatically be converted to JPEG format upon download by the Mail app.
- This method is perfect for quick, one-off conversions for sharing or for immediate use as “Aesthetic” social media content.
-
Using the Files App (Copy & Paste):
- This method is a fast way to convert one or multiple HEIC images directly on your iPhone without external tools or internet.
- Steps:
- Open the “Photos” app.
- Select one or more HEIC images you want to convert.
- Tap the “Share” button in the bottom-left corner.
- Select “Copy Photos” from the options.
- Open the “Files” app (pre-installed on your iPhone).
- Navigate to “On My iPhone” (or another desired local storage location within Files).
- Tap the “More” icon (three dots in a circle) and choose “New Folder” if you want to organize them.
- Long-press on an empty area within the folder and tap “Paste.”
- The copied images will now be pasted as JPG files. You can then access them from the Files app and share them as needed.
-
Adjusting Camera Settings (Permanent Solution):
- If you consistently find yourself converting HEIC files, you can configure your iPhone’s camera to permanently shoot in JPEG.
- Steps:
- Go to the “Settings” app on your iPhone.
- Scroll down and tap “Camera.”
- Tap “Formats.”
- Select “Most Compatible” (which defaults to JPEG) instead of “High Efficiency” (HEIC).
- Additionally, go back to “Settings” > “Photos.”
- Under the “Transfer to Mac or PC” section, select “Automatic.” This ensures that even if you take HEIC photos (e.g., if you temporarily switch back), they will be automatically converted to JPEG when transferred to a computer.
- Note: While convenient, choosing “Most Compatible” will result in larger file sizes, meaning your phone’s storage will fill up faster. The photos previously taken in HEIC format will remain HEIC unless converted by one of the methods above.
-
Third-Party Converter Apps:
- The App Store offers numerous dedicated HEIC to JPG converter apps. Tophinhanhdep.com often reviews and recommends such “Image Tools” that provide batch conversion capabilities and additional “Editing Styles” or “Optimizers.” Apps like “HEIC to JPEG Image Converter” simplify the process, often allowing conversions directly within the app and easy sharing via AirDrop or other platforms. These can be particularly useful for managing large “Image Collections” or preparing “Beautiful Photography” for specialized use.
By utilizing these methods, iPhone users can ensure their “High Resolution” mobile captures are readily compatible across all digital environments, seamlessly integrating into any “Visual Design” project or shared collection.
Advanced Considerations and Tophinhanhdep.com’s Comprehensive Image Solutions
Converting an image to JPEG is often just the first step in a broader “Photography” or “Visual Design” workflow. Understanding the nuances of image optimization, file types, and how to integrate these processes into your creative routine is essential for maximizing the impact of your “Images.” Tophinhanhdep.com is designed to be your all-in-one resource, offering “Image Tools,” “Inspiration & Collections,” and expert guidance for every stage of your visual journey.
Optimizing Your Images: Beyond Basic Conversion
While converting to JPEG addresses compatibility, true mastery of digital images involves optimization. This means finding the perfect balance between image quality and file size – a critical consideration for “Wallpapers,” “Backgrounds,” “Aesthetic” online content, and “High Resolution” “Stock Photos.”
Quality vs. File Size Trade-offs: JPEG is a lossy format, meaning each time you save an edited JPEG, there’s a slight loss of data. When converting, you’ll almost always encounter a “quality” setting.
- High Quality (e.g., 80-90%): Retains most visual fidelity, ideal for “Beautiful Photography” where detail is paramount. Files will be larger.
- Medium Quality (e.g., 60-70%): A good compromise for web use, often imperceptible to the average viewer, providing significantly smaller files.
- Low Quality (e.g., below 50%): Suitable for thumbnails or specific “Graphic Design” elements where file size is critical and minor artifacts are acceptable.
Tophinhanhdep.com’s “Image Tools” include powerful “Compressors” and “Optimizers” that go beyond basic conversion. These tools can intelligently reduce file size without drastic visual quality loss, using advanced algorithms that analyze image content. This is invaluable for ensuring your website pages load quickly, preventing bounce rates, and enhancing user experience, especially for image-heavy “Image Collections” or portfolios of “Digital Photography.”
For those working with lower-resolution source images, Tophinhanhdep.com also features “AI Upscalers.” These cutting-edge tools use artificial intelligence to enhance the resolution and detail of images, transforming smaller photos into larger, “High Resolution” versions suitable for print or expansive “Wallpapers” after conversion to JPEG. This is a game-changer for revitalizing old photos or making “Digital Art” suitable for larger displays.
Understanding lossy versus lossless compression is fundamental here. JPEG is lossy; once data is discarded, it cannot be recovered. Formats like PNG and TIFF are lossless, meaning they retain all original image data, making them ideal for graphics with sharp lines, text, or transparency, but resulting in much larger files. Deciding on the appropriate format and compression level is a key aspect of “Visual Design” strategy.
File Extension vs. Actual Conversion: A Crucial Distinction
A common misconception, especially among new users, is that simply renaming a file’s extension will convert its format. For example, changing image.png to image.jpg in your file explorer. This is a critical error that Tophinhanhdep.com aims to clarify.
Why Renaming Fails:
Changing a file’s extension only alters its label, not its underlying data structure. The operating system uses the file extension to determine how to open and interpret the file. If you rename image.png to image.jpg, your computer will still try to read it as a PNG file, but with the expectation of a JPEG structure. This mismatch almost invariably “breaks” the file, making it unreadable or corrupted. The image will likely fail to open, display incorrectly, or generate an error message.
The Importance of Proper Conversion: Genuine image conversion, as described in the methods above, involves a software process that reads the original image data and then rewrites it into the new target format, applying the appropriate compression and structural changes. This ensures that the newly created JPEG file conforms to the JPEG standard and can be correctly interpreted by other software and devices.
Always use a dedicated “Converter” tool—whether online, built into your operating system, or a third-party application—to truly change an image’s format. This understanding is paramount for maintaining data integrity and ensuring the functionality of your “Digital Photography” and “Visual Design” assets. It underscores the value of reliable “Image Tools” provided by platforms like Tophinhanhdep.com.
Integrating JPG into Your Creative Workflow with Tophinhanhdep.com
The versatility of the JPEG format makes it a cornerstone in various creative workflows. At Tophinhanhdep.com, we emphasize how converting and optimizing your images can seamlessly integrate into your “Visual Design” and “Photography” projects.
- Graphic Design and Digital Art: JPEG images often serve as foundational elements. They can be used as textures, background elements, or reference photos in “Digital Art” projects. Efficiently converting various sources into a unified JPG format simplifies asset management for “Graphic Design” layouts, ensuring compatibility and manageable file sizes within design software.
- Image Inspiration & Collections: When building “Mood Boards” or curating “Thematic Collections,” you often gather images from diverse sources. Converting them all to JPG creates a consistent, easily shareable collection. This simplifies the process of organizing “Photo Ideas” and keeping up with “Trending Styles” by ensuring all visual assets are readily accessible and compatible.
- Sharing Beautiful Photography: Photographers, both amateur and professional, rely on JPEG for sharing their “Beautiful Photography” and “Nature” shots online. Whether it’s uploading to a portfolio, posting on social media, or sending to clients, JPG ensures that the image retains good quality while being efficiently transmitted and displayed. The “Editing Styles” you apply to your “Digital Photography” can be preserved in a high-quality JPEG for distribution, while you might keep the original RAW files for archiving and future edits.
- Optimized Web Content: For websites featuring “Wallpapers,” “Backgrounds,” or extensive galleries, using properly converted and optimized JPEGs is vital. It contributes to faster page loads, which is essential for user engagement and search engine ranking. Tophinhanhdep.com’s “Optimizers” help ensure that your images look stunning without burdening your site’s performance.
Tophinhanhdep.com stands as a comprehensive hub for all your image-related needs. From intuitive “Converters” and “Compressors” to advanced “AI Upscalers” and features supporting diverse “Editing Styles,” our platform empowers you to enhance, manage, and transform your visuals. We don’t just offer “Image Tools”; we provide “Creative Ideas” and foster a community around “Image Inspiration & Collections,” making the complexities of digital imagery accessible and enjoyable.
Conclusion
Converting an image to JPEG is far more than a technical formality; it’s a fundamental skill that unlocks universal compatibility, optimizes file sizes, and streamlines your digital workflow. From ensuring your cherished “Beautiful Photography” can be shared effortlessly, to preparing “High Resolution” “Wallpapers” for web use, the JPEG format is an indispensable tool in your digital arsenal.
We’ve explored a variety of practical methods, from convenient online “Converters” on Tophinhanhdep.com that cater to every device, to native desktop applications like Paint and Preview, and robust alternatives like GIMP. Understanding the nuances of HEIC conversion for iPhone users and the crucial distinction between renaming and true format conversion further empowers you to confidently manage your visual assets.
As the world of digital visuals continues to evolve, the demand for efficient “Image Tools” and informed “Photography” practices will only grow. Tophinhanhdep.com is committed to being your ultimate resource, providing not only the “Image Tools” necessary for conversion, compression, and enhancement, but also a wellspring of “Image Inspiration & Collections” and insights into “Visual Design.” Mastering the art of changing an image to JPG is an essential step towards maximizing your creative potential and ensuring your digital imagery always looks its best, performs efficiently, and reaches its widest audience. Explore Tophinhanhdep.com today and transform your approach to digital imaging.