Mastering Image Background Color Changes: A Comprehensive Guide

In the dynamic world of digital imagery, the background of a photograph is far more than just a backdrop; it’s an integral component that can make or break the visual impact of your main subject. A poorly chosen or distracting background can diminish the beauty of an otherwise perfect shot, while a thoughtfully altered one can elevate an image to new heights, guiding the viewer’s eye, setting a mood, and reinforcing a specific message. Whether you’re a professional photographer, a graphic designer, an avid social media content creator, or simply someone looking to enhance their personal photos, the ability to deftly change the background color of an image is an indispensable skill.
At Tophinhanhdep.com, we understand the power of visual transformation. Our mission is to provide you with the insights and tools to create stunning, high-resolution images, curate aesthetic collections, and unlock your full creative potential. This comprehensive guide will delve into various methods for changing an image’s background color, from precision-based software techniques to lightning-fast AI-powered solutions, ensuring your images always achieve the desired aesthetic and emotional resonance.
The Art and Science of Background Transformation
The simple act of changing a background color is a powerful form of photo manipulation that bridges the gap between raw photography and polished visual design. It’s an essential technique for anyone looking to control the narrative, mood, and focus of their images, aligning perfectly with the principles of digital photography and creative visual design championed by Tophinhanhdep.com.
Why Change an Image Background?
The motivations behind altering an image’s background are as diverse as the images themselves. Understanding these reasons highlights the fundamental role this technique plays in creating compelling visuals:
- Enhancing Professionalism: For official identification photos like passports or driver’s licenses, specific background colors (often white or blue) are mandatory. For product photography, a clean, uniform background (white, black, or a soft gray) minimizes distractions, highlights product details, and creates a professional, e-commerce-ready appearance. This directly elevates image quality for stock photos and high-resolution collections.
- Boosting Creative Expression and Aesthetic: In portraiture, a vibrant or serene background color can dramatically alter the mood and personality conveyed by the subject. Digital artists and graphic designers frequently change backgrounds to integrate subjects into entirely new scenes, supporting creative ideas and contributing to unique digital art pieces. This allows for the creation of abstract backgrounds or the adaptation of existing images into a particular aesthetic.
- Improving Focus and Subject Prominence: A busy or cluttered background can detract from the main subject. By changing it to a solid, contrasting, or complementary color, you effectively eliminate distractions, ensuring the viewer’s attention is immediately drawn to where it matters most. This is crucial for images intended for mood boards or thematic collections where a clear visual hierarchy is paramount.
- Achieving Thematic Consistency: When building a collection of images for a website, portfolio, or social media feed, maintaining a consistent visual style is key. Changing backgrounds allows you to unify disparate images under a common color scheme, contributing to a cohesive brand identity or a well-curated thematic collection, whether it’s for nature photography, abstract art, or even sad/emotional imagery where a calming or stark background might be desired.
Choosing Your Tool: Advanced Software vs. Online AI Solutions
The method you choose to change your image background will largely depend on your desired level of precision, your technical proficiency, and the complexity of the image itself. Both advanced image editing software and modern online AI tools offer distinct advantages.
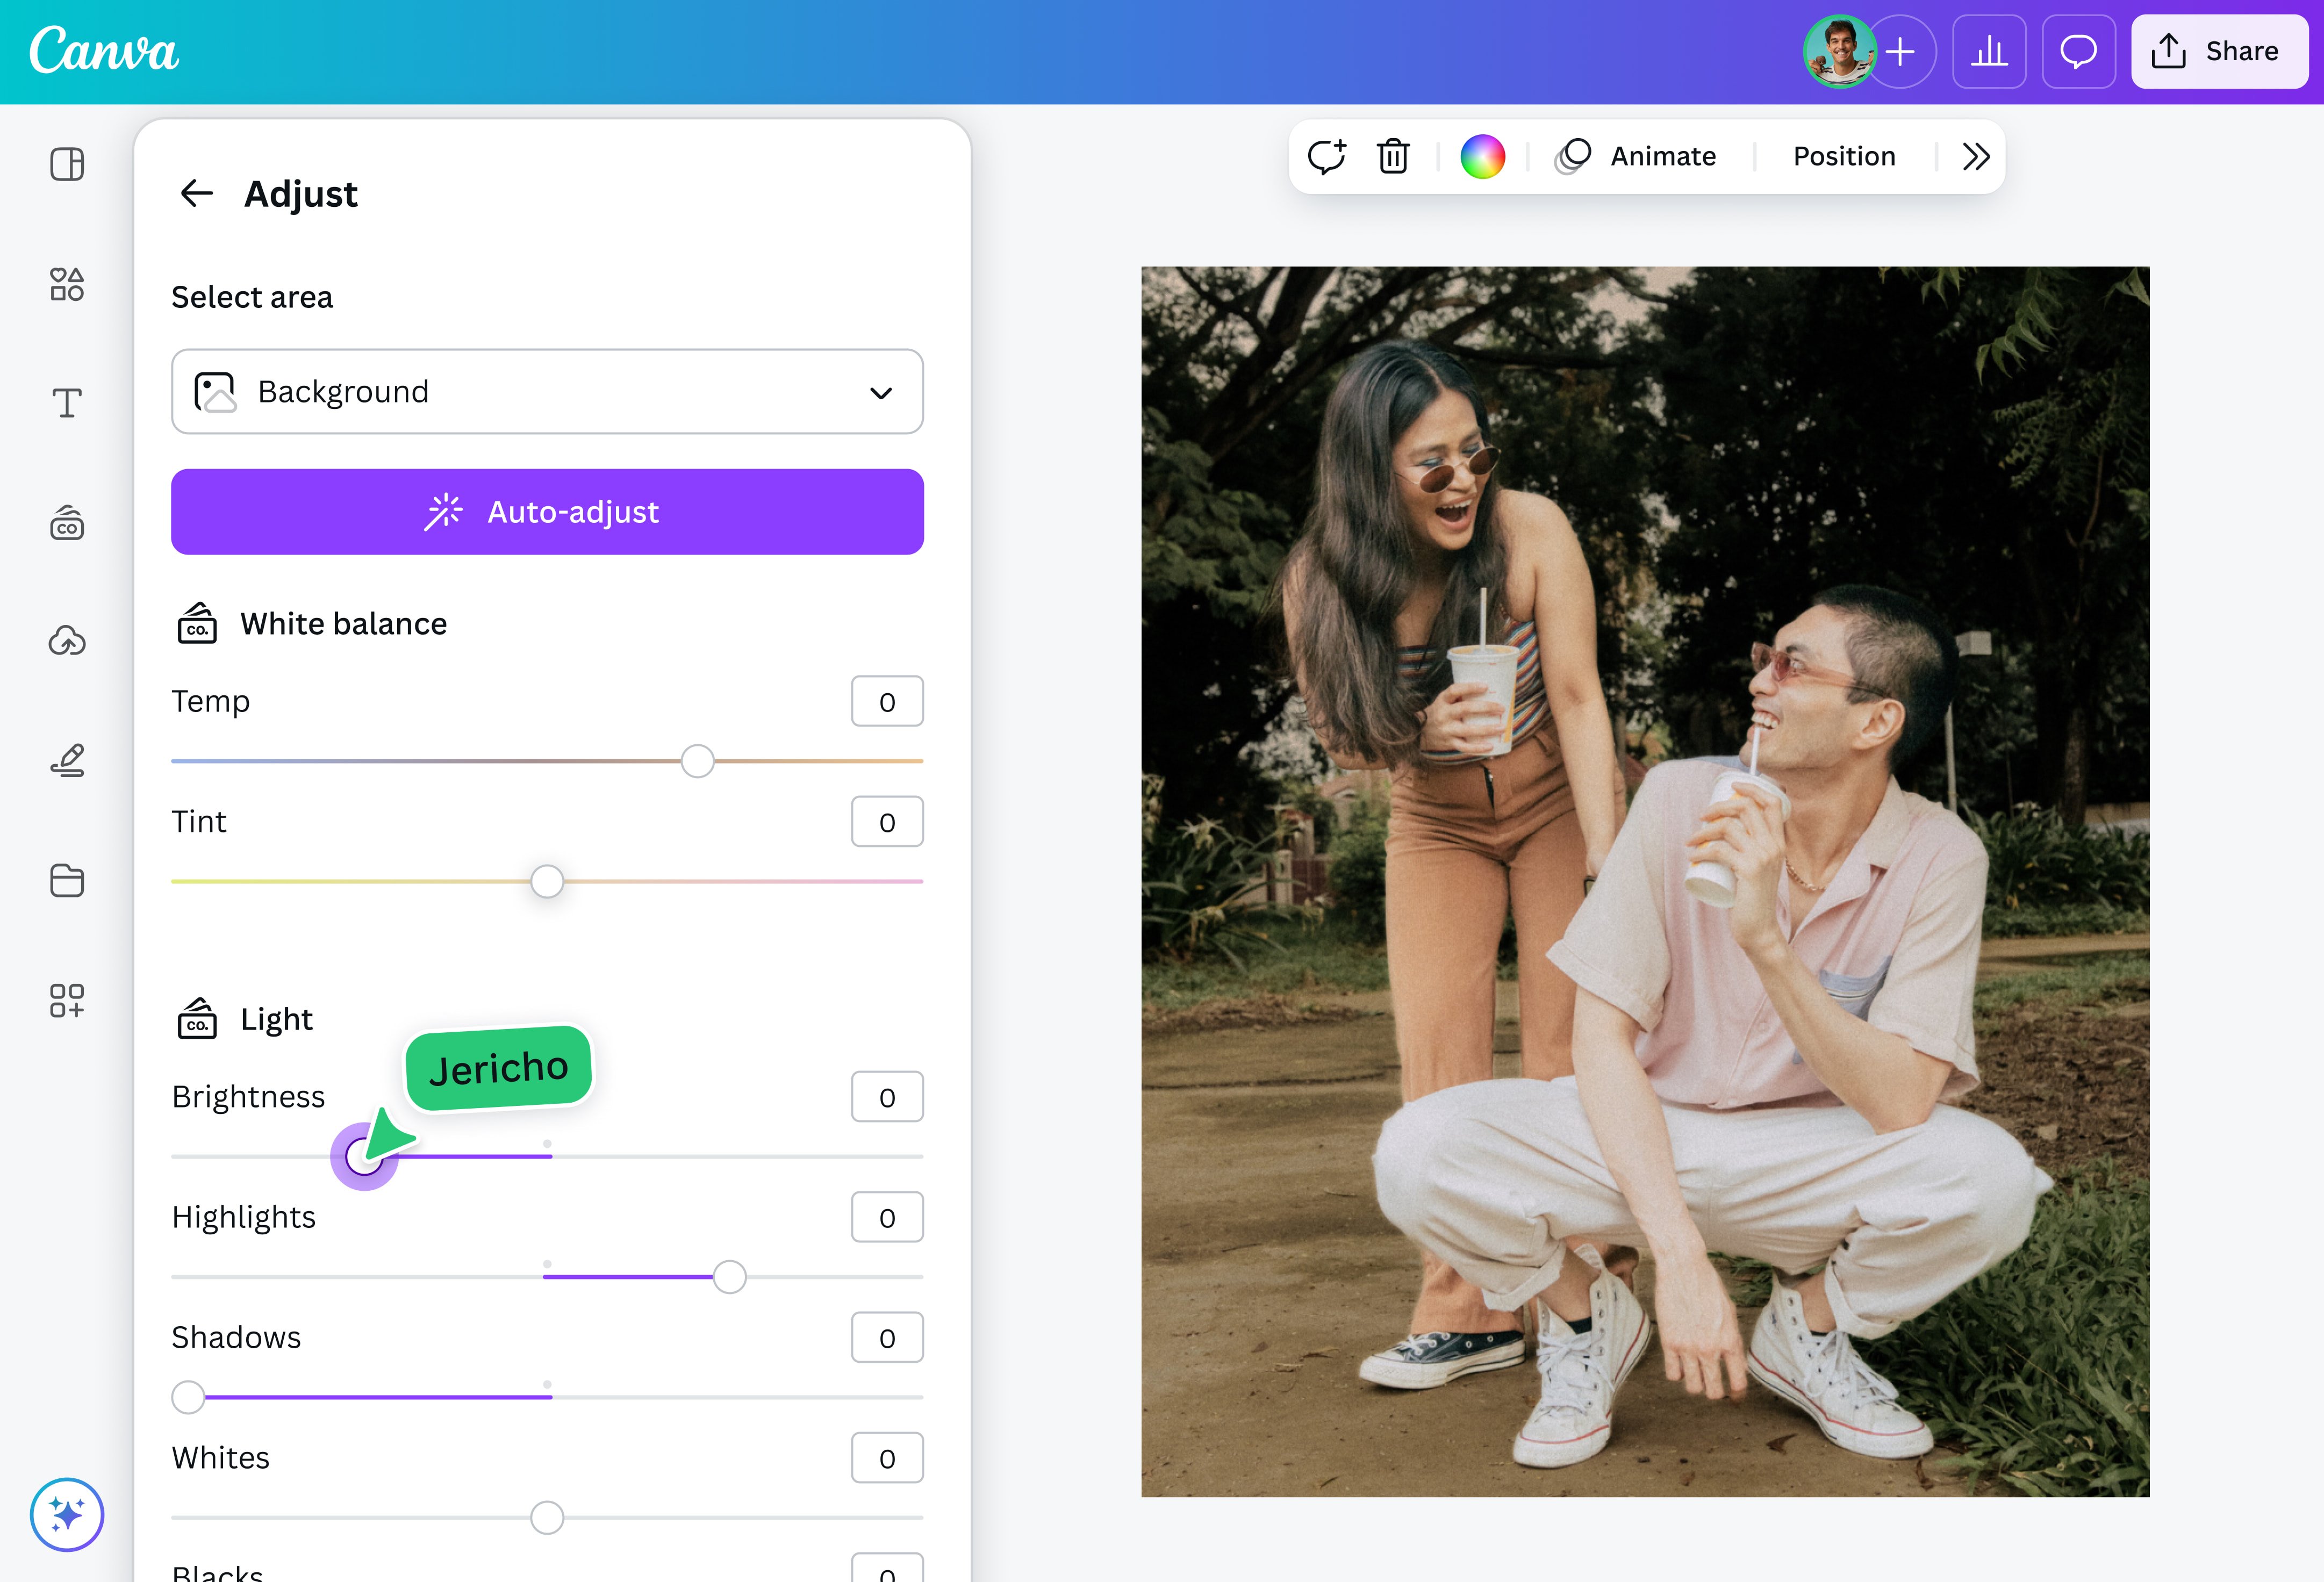
Advanced Image Editing Software (e.g., Photoshop): Offers unparalleled control, precision, and a vast array of tools for complex selections, intricate edge refinement, and nuanced background depth creation. It’s ideal for professional-grade photo manipulation, digital art, and when working with high-resolution images that demand meticulous attention to detail. The learning curve is steeper, but the creative possibilities are virtually limitless. Tophinhanhdep.com provides in-depth tutorials for mastering such advanced techniques.
Online AI Background Changers (e.g., those found on Tophinhanhdep.com or similar platforms): These tools leverage artificial intelligence to automate the background removal and replacement process, offering speed, simplicity, and accessibility. They are perfect for quick edits, users without extensive technical skills, and situations where immediate results are needed. While they may sometimes lack the fine-grained control of professional software, their efficiency for tasks like product visuals or profile pictures is unmatched, making image optimization incredibly fast.
Step-by-Step Guide: Changing Background Color with Advanced Software
For those who crave precision and a professional finish, mastering the techniques within advanced image editing software like Photoshop is invaluable. This non-destructive workflow ensures flexibility and high-quality results, crucial for high-resolution photography and digital art.
Phase 1: Precise Subject Selection
The foundation of any successful background change lies in accurately separating your subject from its original surroundings. This often involves a combination of intelligent tools and manual refinement.
-
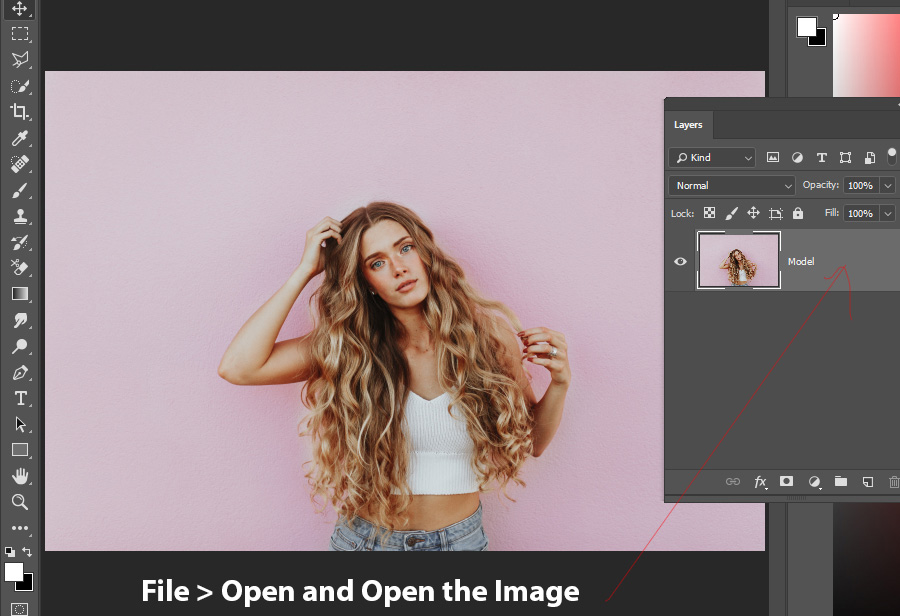
Open Your Image: Begin by opening your desired image in Tophinhanhdep.com’s recommended advanced editing software. Images with relatively simpler or solid backgrounds are easiest to start with, but these techniques can be adapted for more complex scenes.
-
Initial Subject Selection:
- Magic Wand Tool (W): For backgrounds with large areas of similar color, the Magic Wand tool is a quick starting point. Click on different sections of the background while holding the Shift key to add to your selection.
- Quick Selection Tool (W): Drag this brush-like tool over your subject. The software intelligently detects edges, making a rapid initial selection. You can switch to the “Subtract from Selection” mode in the options bar to refine areas that were over-selected.
- Select Subject (AI-powered): Many modern software versions include AI-powered tools like “Select Subject.” This feature, often powered by technologies like Adobe Sensei, analyzes your image and attempts to instantly select the main subject with remarkable accuracy. While a huge time-saver, it’s rarely 100% perfect.
-
Refine the Selection with Quick Mask or Select and Mask:
- Quick Mask Mode (Q): After your initial selection, press ‘Q’ to enter Quick Mask mode. This will overlay a translucent red color over the unselected areas. This visual aid makes it much easier to spot imperfections. Use the Brush tool (B) with black (to add to the selected area/hide more of the mask) or white (to subtract from the selected area/reveal more of the mask) to paint over edges, ensuring a clean separation. This step is particularly vital for intricate details like hair, fur, or complex outlines.
- Select and Mask Workspace: For more advanced refinement, especially around tricky edges like hair, go to
Select > Select and Mask(orRefine Edgein older versions). This dedicated workspace offers powerful tools:- View Modes: Experiment with different view modes (On Layers, On Black, On White, Overlay) to find the best contrast for your image, making it easier to see stray pixels or missed areas.
- Refine Edge Brush Tool: Paint along the edges of your subject, particularly where hair or soft textures meet the background. The software will intelligently identify and refine these edges, separating fine details.
- Global Refinements: Adjust sliders like
Smooth,Feather,Contrast, andShift Edgeto fine-tune the overall selection.Featheris especially useful for creating a softer transition between subject and background, preventing a harsh, cut-out look.
- Output to Layer Mask: Once satisfied, choose “Layer Mask” from the “Output To” dropdown and click OK. This creates a non-destructive mask on your image layer, effectively hiding the background without permanently deleting it.
Phase 2: Introducing the New Background Color
With your subject cleanly masked, adding a new solid color background is straightforward and, thanks to non-destructive editing, easily reversible or adjustable.
-
Add a Solid Color Fill Layer: In the Layers panel, click the “New Adjustment Layer” icon (a half-filled circle) and select
Solid Color.- Pro Tip: Ensure your subject’s layer mask is active (the marching ants are visible) before adding the solid color layer. This way, the solid color will automatically fill the unselected area (the background). If it fills your subject, simply select the Solid Color layer’s mask and press
Ctrl/Cmd + Ito invert it.
- Pro Tip: Ensure your subject’s layer mask is active (the marching ants are visible) before adding the solid color layer. This way, the solid color will automatically fill the unselected area (the background). If it fills your subject, simply select the Solid Color layer’s mask and press
-
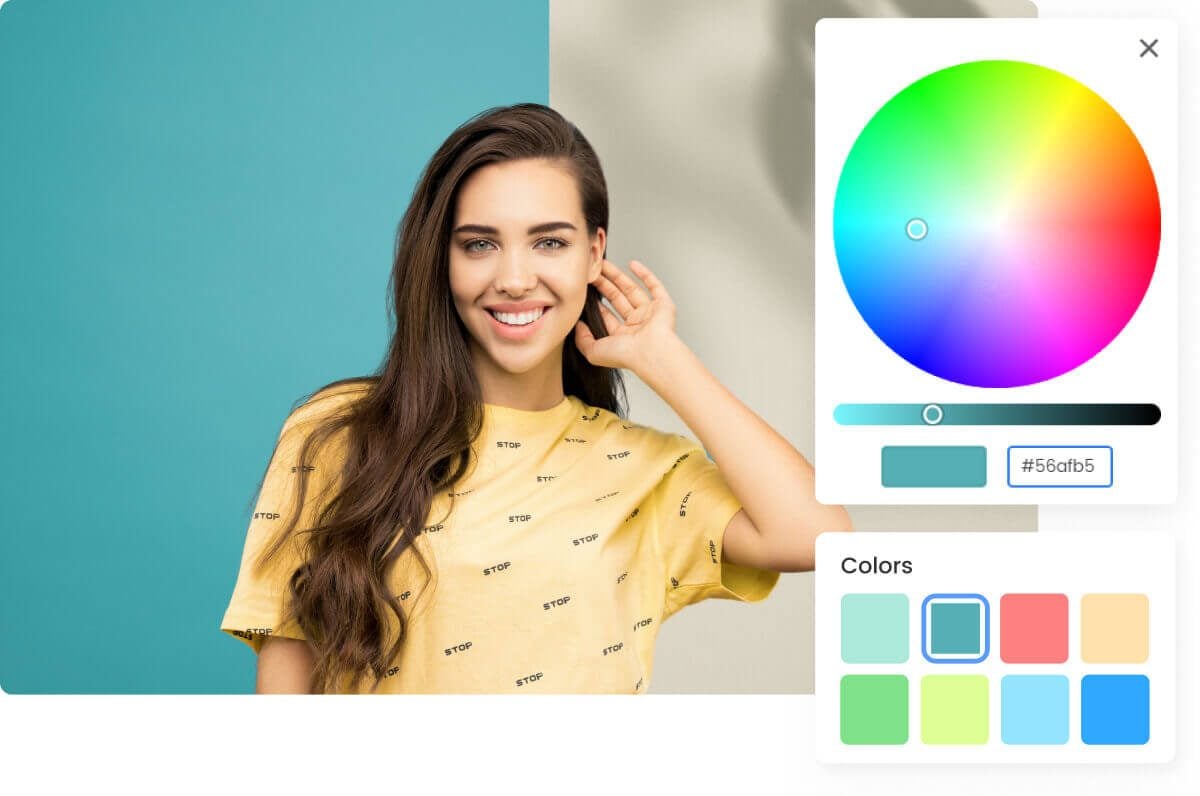
Choose Your Color: A
Color Pickerwindow will appear. You can select any color you desire. For precise color matching, use the Dropper tool within the Color Picker to sample colors directly from your image (e.g., matching a color from your subject’s attire). After choosing, click OK. -
Arrange Layers: Drag your newly created
Solid Colorlayer below your main image layer in the Layers panel. This ensures your subject is visible on top of the new background.
Phase 3: Adding Depth and Realism to Your New Background
A flat, solid background can sometimes look artificial. Adding subtle variations in light and shadow can make the new background appear more natural and integrate better with your subject, reflecting real-world studio lighting.
-
Simulate Gradient Lighting:
- Elliptical Marquee Tool (M): Select this tool. Draw an elliptical selection in the center of your image, slightly off-center or higher, to mimic a light source.
- Feather the Selection: Right-click on your elliptical selection, choose
Feather, and set a high pixel value (e.g., 200-300 pixels, depending on image resolution). This prevents a harsh edge. - Levels Adjustment Layer for Highlights: Go to
Layer > New Adjustment Layer > Levels. In thePropertiespanel, drag the middle (gamma) slider to the left to brighten the midtones. This creates the illusion of a soft highlight in the center of your background.
-
Darken the Edges (Vignette Effect):
- Create Another Elliptical Selection: Draw another elliptical marquee, similar to the previous step.
- Invert Selection: Right-click on this new selection and choose
Select Inverse. This will select everything outside your ellipse, focusing on the background edges. - Levels Adjustment Layer for Shadows: Create another
Levelsadjustment layer. This time, drag the middle (gamma) slider to the right to darken the midtones, creating a subtle vignette effect around the edges. - Refine: You can double-click on any
Levelslayer thumbnail in theLayerspanel to reopen its properties and tweak the brightness and contrast until you achieve a smooth, natural-looking gradient.
Dynamic Backgrounds: Multi-Color and Gradients
Beyond solid colors, advanced software allows for creating visually striking multi-color or gradient backgrounds, offering even more creative ideas for your digital art and visual design projects.
-
Creating a Multi-Color Background:
- Add a new
Solid Coloradjustment layer above your existing one. - Clip the Layer: Right-click on this new
Solid Colorlayer and chooseCreate Clipping Mask(or pressCtrl/Cmd + Alt/Option + G). This clips the new color to the layer below, meaning it will only be visible where the bottom layer is visible (i.e., on the background, not your subject). - Apply a Shape/Selection: Create a selection (e.g., with the
Polygonal Lasso Tool (L)orRectangular Marquee Tool (M)) on the layer mask of this newSolid Colorlayer. - Fill the Mask: Fill the selection with black (press
Dto reset colors, thenAlt/Option + Backspace). This will reveal the new color only within that selection, creating a multi-color effect. You can invert the mask (Ctrl/Cmd + I) to swap visible areas.
- Add a new
-
Smoothing Edges for Multi-Color Backgrounds: For multi-color backgrounds created with sharp selections, you’ll want to soften the transitions.
- Right-click on the layer mask of the
Solid Colorlayer you want to smooth. - Choose
Select & Mask. - In the
Global Refinementssection, increase theFeathervalue until the hard edges become soft and blended, creating a more organic or artistic look.
- Right-click on the layer mask of the
Non-Destructive Editing: The Power to Revisit
One of the most significant advantages of using Solid Color fill layers and Adjustment Layers with masks is their non-destructive nature. At any point, you can:
- Change Colors: Double-click the
Solid Colorlayer thumbnail to reopen theColor Pickerand choose a completely different hue, experimenting with various aesthetic styles without redoing your selections. - Adjust Depth: Double-click
Levelsadjustment layer thumbnails to fine-tune the brightness and contrast of your background gradient. - Modify Selections: Refine your main image layer’s mask to perfect edges or correct errors, all without impacting the integrity of your original photo.
This flexibility is paramount for graphic designers and photographers who frequently iterate on creative ideas and adapt images for diverse thematic collections.
Instant Background Color Changes with AI Tools
For speed and simplicity, especially when dealing with product visuals, social media content, or routine official photos, online AI background changers are a game-changer. Tophinhanhdep.com offers or recommends tools that can streamline this process significantly.
The “One-Click” Advantage
Platforms like Tophinhanhdep.com provide an effortless solution for background changes. Instead of complex selections, you get:
- Automatic Background Removal: Upload your image, and the AI will automatically detect the subject and precisely remove the background. This often takes only a single click, saving immense time compared to manual selection processes.
- Instant Color Replacement: Once the background is removed, you can select from a palette of preset colors (e.g., white, blue, red, black) or even input a custom color code. Some tools also offer gradient options, allowing for impressive background color variations.
- Quick Download: After selecting your preferred new background color, you can instantly download your transformed image in high-resolution formats like PNG or JPG, ready for immediate use.
Applications of AI Background Changers
These tools are particularly effective for specific use cases:
- Elevating Product Photography and E-commerce: Quickly generate clean white or black backgrounds for product images, ensuring consistency and enhancing contrast. This boosts visual appeal and helps products stand out in online stores, directly contributing to high-resolution stock photos.
- Perfecting Official Identification Photos: Effortlessly change photo backgrounds to the required white or blue for passport photos or driver’s licenses, ensuring precision and qualification without manual effort.
- Personalizing Portraits and Profile Pictures: Experiment with vibrant or calming colors to match your personality or mood, making your profile pictures and digital portraits more engaging. Gradient colors can add a unique touch, allowing for diverse aesthetic expressions.
- Rapid Content Creation: For social media managers or content creators, the ability to quickly adapt images with new background colors supports trending styles and maintains a consistent brand aesthetic across various platforms.
Expanding Your Creative Horizon with Background Changes
The ability to manipulate an image’s background color transcends mere technical skill; it unlocks a vast realm of creative possibilities, influencing everything from graphic design projects to curating thematic image collections. At Tophinhanhdep.com, we encourage you to explore these expanded applications.
Elevating Product Photography and E-commerce
Beyond simple professionalism, a well-chosen background color can actively market your product. A clean white background signifies purity and clarity, making it ideal for high-resolution product photography. A deep black background can evoke luxury and sophistication. The capacity to switch between these, or even to a brand-specific hue, allows for dynamic marketing visuals that resonate with aesthetic and digital photography trends. This is invaluable for creating compelling stock photos and building impressive image collections.
Personalizing Portraits and Profile Pictures
For individual images, changing the background color is a powerful tool for self-expression and visual storytelling. Whether you aim for the vibrant energy of a bright pink, the serene calmness of a cool blue, or a gradient that subtly shifts through your favorite hues, the background becomes an extension of the subject’s personality. This technique is central to creating captivating profile pictures and artistic portraits that truly stand out, offering immense scope for creative ideas and digital art.
Crafting Visual Narratives and Mood Boards
Visual designers often rely on background colors to establish a consistent theme across a series of images or within a mood board. Imagine a collection of nature photography, each shot with a different background, unified by changing their backdrops to a complementary pastel palette. Or, creating a thematic collection of sad/emotional images where a muted, somber background enhances the central feeling. This technique allows you to transform disparate images into a cohesive visual narrative, supporting creative ideas and building powerful, trending visual styles.
Beyond Solid Colors: Patterns, Textures, and Digital Art
While this guide focuses on solid color changes, the principles of subject isolation and layer manipulation open doors to even more intricate background designs. Once your subject is cleanly cut out, you’re not limited to flat colors. You can easily replace the background with:
- Patterns: Geometric, floral, or abstract patterns can add visual interest and align with specific graphic design aesthetics.
- Textures: Concrete, wood, fabric, or glitter textures can give your image a tactile quality and depth, perfect for digital art.
- Other Photos: Seamlessly composite your subject into an entirely different high-resolution scene, creating fantastical digital art or realistic photo manipulations.
The core skill of precise selection and non-destructive layering is the gateway to these advanced techniques, allowing for limitless creative ideas.
Unleash Your Image’s Potential with Tophinhanhdep.com
Changing the background color of an image is more than just a technical tweak; it’s an act of creative empowerment. Whether you choose the meticulous precision of advanced editing software or the lightning-fast efficiency of AI-powered tools, mastering this skill allows you to reshape your visual content, refine your aesthetics, and convey your message with greater impact.
At Tophinhanhdep.com, we believe that every image holds untapped potential. By understanding and applying these background manipulation techniques, you gain unparalleled control over your photography, graphic design projects, and visual storytelling. We encourage you to experiment, explore, and let your creativity soar. Dive into your image collections, breathe new life into your high-resolution photos, and transform ordinary backgrounds into extraordinary statements. The canvas is yours – what will you create next?