Mastering Image DPI: Your Comprehensive Guide to Achieving Perfect Print and Digital Quality

In the vast and vibrant world of digital imagery, where every pixel counts and visual aesthetics reign supreme, understanding the nuances of image resolution is paramount. Whether you’re a professional photographer preparing stunning prints, a graphic designer crafting intricate visual masterpieces, or simply someone looking to optimize their favorite wallpapers for a crisp display, one term frequently surfaces: DPI, or Dots Per Inch. Often misunderstood and mistakenly interchanged with PPI (Pixels Per Inch), DPI holds a critical, albeit specific, role in determining the quality and intended output of your images.
At Tophinhanhdep.com, we believe that every image tells a story, and its quality should never be compromised. From captivating Nature photography and Abstract art to essential Image Tools like AI Upscalers and Compressors, our mission is to empower you with the knowledge and resources to achieve visual excellence. This comprehensive guide will demystify the concept of DPI, clarify its relationship with digital image resolution, and provide you with practical, step-by-step methods to change and optimize your image DPI, ensuring your visuals consistently meet the highest standards, whether for a beautiful print or a high-resolution digital display.
We’ll delve into various scenarios, from adjusting metadata for specific submission requirements to enhancing actual pixel density for large-format prints. You’ll learn how to use popular software like Adobe Photoshop, discover free alternatives, and explore advanced AI-powered solutions, all while ensuring your images retain their integrity and stunning visual appeal. By the end of this guide, you’ll be equipped with the expertise to confidently manage your image DPI, transforming your creative ideas into impeccable visual realities.
Demystifying DPI and PPI: Understanding Image Resolution
Before we dive into the “how-to,” it’s essential to grasp the fundamental concepts of DPI, PPI, and overall image resolution. These terms are often used interchangeably, leading to widespread confusion, but understanding their distinct roles is key to truly mastering your image quality.
What is DPI (Dots Per Inch)?
DPI, an acronym for “Dots Per Inch,” is a measurement primarily associated with physical output devices, specifically printers. It refers to the number of individual ink dots a printer can place within a one-inch line segment when rendering an image onto paper. The higher the DPI value, the more ink dots are laid down per inch, which generally translates to a finer, more detailed, and higher-quality print.
For example, a printer set to 600 DPI will place 600 dots of ink in a one-inch span. This physical density of ink dots directly impacts how smooth gradients appear, how sharp edges are, and how much fine detail is visible in a printed photograph. While crucial for print quality, it’s important to remember that DPI is a characteristic of the printer and the printing process, not an inherent property that directly defines the quality or resolution of a digital image file itself.

The “myth of DPI” arises because many people (and unfortunately, some print shops and graphic designers) still incorrectly believe that a digital image file has a fixed “DPI” that dictates its quality. In reality, a digital image file doesn’t have “dots” until it’s sent to a printer. What it does have is pixels.
What is PPI (Pixels Per Inch)?
PPI, or “Pixels Per Inch,” is the true measure of density for digital images and displays. It quantifies the number of pixels packed into every inch of a digital image when displayed on a screen or when referenced against a specific physical print size.
Unlike DPI, which refers to physical ink dots, PPI relates to the digital building blocks of your image. A digital photograph’s quality is inherently defined by its total pixel dimensions (e.g., 1920x1080 pixels) and its pixel density, or PPI, when viewed at a certain size.

For instance, if you have a digital image that is 3000 pixels wide and 2000 pixels high, and you decide to print it at 10 inches wide, the resulting PPI for that printed image would be 300 pixels per inch (3000 pixels / 10 inches = 300 PPI). If you printed the same image at 20 inches wide, the PPI would drop to 150 PPI. Notice that the digital image file itself didn’t change – only the size at which it was printed, which in turn altered its effective PPI for that print.
This distinction is vital: while DPI affects the print quality on paper, PPI is what truly describes the detail and sharpness of your digital image on a screen or when considering its potential print size. For Tophinhanhdep.com, focusing on high-resolution photography means ensuring our images have sufficient pixel density (PPI) to look stunning on any display and hold up to high-quality printing.
Image Resolution: The True Measure
Beyond DPI and PPI, the most fundamental characteristic of a digital image’s quality is its total image resolution, typically expressed as its width and height in pixels (e.g., 3000 x 2000 pixels). This total pixel count dictates the sheer amount of detail an image can hold. The more pixels an image contains, the more information it has, allowing for greater detail, sharper rendering, and the ability to be enlarged or cropped without significant loss of quality.
Think of it this way: a small image with 72 PPI (like an old web image) might have only 500 x 300 pixels. A high-resolution image, on the other hand, might have 6000 x 4000 pixels, equating to 24 megapixels. Even if both images’ metadata claims 300 DPI, the one with 24 megapixels will inherently contain far more detail and can be printed much larger and sharper because it has a vastly greater number of actual pixels.
When print shops or online submission forms ask for a “300 DPI image,” what they really mean is that they want an image with enough pixel resolution to achieve an effective PPI of 300 when printed at their desired size. If you want to print an 8x10 inch photo at 300 PPI, you need an image that is at least 2400 pixels wide (8 inches * 300 PPI) by 3000 pixels high (10 inches * 300 PPI). The internal DPI metadata setting in the file is merely a tag that suggests an intended print density; it doesn’t add or subtract pixels.
Understanding this relationship is crucial for anyone engaging with digital photography, graphic design, or visual art. At Tophinhanhdep.com, we emphasize high-resolution images because they offer the flexibility and quality needed for a myriad of uses, from stunning wallpapers to professional stock photos.
When and Why You Need to Change Image DPI
Despite DPI being primarily a printer characteristic, there are compelling reasons why you might need to adjust an image’s DPI setting. These reasons often stem from practical requirements in print production, digital publishing, and software compatibility, rather than directly altering the inherent quality of the digital image itself.
Preparing Images for Print: Meeting Professional Standards
One of the most common scenarios for changing image DPI is when preparing images for professional printing, such as for magazines, brochures, large-format posters, or high-quality photographic prints. Many print houses and publishers still adhere to industry standards that dictate images must have an “internal” DPI setting, typically 300 DPI.
The Practicality Over Technicality: As discussed, the digital image file’s quality is determined by its pixel dimensions, not its DPI metadata. However, these entities often prefer or even require a 300 DPI setting in the image’s metadata for a few reasons:
- Workflow Simplification: It serves as a quick visual indicator that the image should have enough pixel data for a high-quality print.
- Software Defaults: Many desktop publishing programs will load an image at its embedded DPI setting, which then dictates its default physical size on the page. A 300 DPI setting means it will appear at its “intended” print size without requiring manual resizing.
- Legacy Systems: Some older systems or workflows may genuinely rely on this metadata tag for processing, even if it’s not the most accurate representation of digital resolution.
When a print service, like those Tophinhanhdep.com might partner with for physical art prints, requests 300 DPI, they are essentially asking for two things:
- Sufficient Pixel Dimensions: The image must have enough pixels to achieve 300 PPI at the desired final print size. For example, an 8x10 inch print at 300 DPI requires 2400x3000 pixels.
- Correct Metadata Tag: The internal DPI value embedded in the file should be set to 300 to match their specification.
Optimal DPI for Different Print Types: The ideal DPI (or effective PPI) for printing varies significantly based on the intended viewing distance, the subject matter, and even the type of paper used.
- Close-Up Viewing (e.g., photo books, flyers, fine art prints): For materials viewed at arm’s length or closer, 300-400 DPI is generally recommended to ensure maximum detail and sharpness. Our Beautiful Photography and Aesthetic collections are perfect for these applications, demanding high fidelity.
- Medium Viewing Distance (e.g., posters, smaller wall art): If viewers will be a few feet away (0.6m / 2ft), 180-300 DPI might suffice. For larger posters viewed from 1-2 meters (3-6 feet), 90-180 DPI can be acceptable without noticeable pixelation.
- Distant Viewing (e.g., billboards, large outdoor signage): For images viewed from significant distances (5 meters/16ft or more), a much lower DPI (e.g., 35 DPI for 5m, 12 DPI for 15m) can be perfectly adequate. The human eye cannot discern individual dots from afar, so using excessively high DPI would be wasteful of file size and processing power.
Subject Matter and Paper Coating:
- Detail-Rich Subjects: Images with intricate details, like detailed architecture or complex nature scenes, benefit from higher DPI settings to preserve fine lines and textures. Abstract or minimalistic images might be more forgiving.
- Paper Quality: High-quality, coated glossy paper can hold ink dots more precisely, allowing you to effectively utilize higher DPI settings (300+ DPI). Uncoated paper, which absorbs ink more readily, may not show a significant improvement beyond 200-250 DPI.
Tophinhanhdep.com’s focus on High Resolution and Digital Photography ensures that our source images are typically ready for these diverse print demands, requiring only the correct DPI metadata adjustment.
Optimizing Images for Digital Use and Web Display
While DPI is paramount for print, its importance diminishes significantly for digital display. When an image is viewed on a screen (monitor, tablet, smartphone), the relevant metric is its pixel dimensions (e.g., 1920x1080) and how those pixels align with the screen’s own pixel density (its native PPI).
- DPI for Screens is Obsolete: The values of 72 DPI or 96 DPI often found in image metadata for web images are largely legacy numbers from older display technologies. A screen simply displays the pixels it receives. How many “dots per inch” a file claims to have doesn’t change how many pixels are actually displayed. A 1000-pixel wide image will always be 1000 pixels wide on a screen, regardless of whether its metadata says 72 DPI or 300 DPI. The browser or operating system simply ignores the DPI value and renders the image based on its actual pixel dimensions.
- Focus on Pixel Dimensions: For web optimization, the primary concern is the image’s pixel dimensions. For instance, a background image for a typical desktop monitor might need to be 1920 pixels wide, while a thumbnail might only need 150 pixels.
- File Size and Load Times: For websites, image file size is critical for fast page load times. Increasing the actual pixel density (upscaling) will drastically increase file size. Therefore, for web use, you typically want images to be optimized for their display size, often using compression tools (like Tophinhanhdep.com’s Image Compressors and Optimizers) to reduce file size without visibly compromising quality.
- Specific Platform Requirements: While most platforms don’t care about DPI, some online submission forms or content management systems might still have outdated requirements for a minimum DPI (e.g., “all images must be 300 DPI”). In such cases, you would simply change the DPI metadata without resampling to satisfy the technicality, knowing it won’t affect the image’s visual quality on screen but will allow the submission to proceed. This is where Tophinhanhdep.com’s Image Tools prove invaluable.
Achieving Desired Default Print Dimensions in Software
Beyond professional print shops, changing the DPI can also be useful for personal workflows, particularly when working with word processors or desktop publishing (DTP) programs.
If you insert a photo into a document, many programs will initially display it at a size determined by its pixel dimensions and embedded DPI metadata. For example, a 1500-pixel wide photo with an internal setting of 72 DPI would default to a print dimension of approximately 20.8 inches wide (1500 pixels / 72 DPI). This might be much larger than you intend.
By changing the DPI metadata of that same 1500-pixel wide image to, say, 375 DPI (1500 pixels / 4 inches = 375 PPI), the image will default to a much more manageable 4-inch print dimension when inserted into your document. This saves you the step of manually resizing it every time and ensures a consistent starting point for your layouts, aligning with Tophinhanhdep.com’s focus on efficient Visual Design and Creative Ideas.
Practical Methods: Changing Image DPI Without Resampling (Retaining Pixel Resolution)
The most common request for DPI adjustment involves changing the internal DPI metadata without altering the image’s actual pixel dimensions. This is crucial when you already have an image with sufficient resolution but need to meet a specific DPI requirement (e.g., 300 DPI for a printer) or set a default print size in a document. The key principle here is to ensure that any “resample image” or “resize” option that would add or subtract pixels is unchecked.
Using Adobe Photoshop (and Photoshop Elements)
Adobe Photoshop is the industry standard for image manipulation, and changing DPI metadata is a straightforward process:
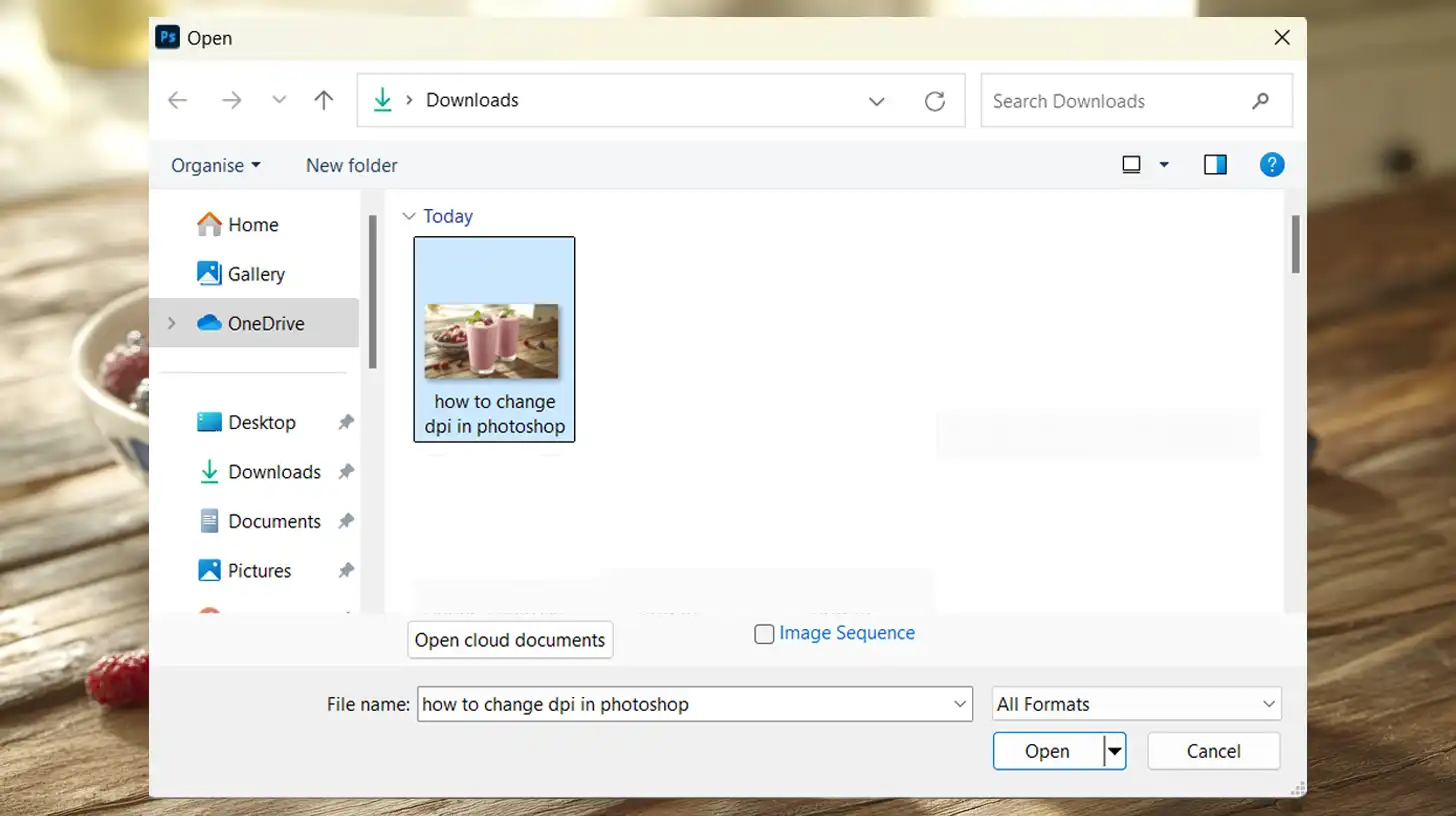
- Open Your Image: Launch Adobe Photoshop (or Photoshop Elements) and open the image you wish to modify.
- Access Image Size: Navigate to the top menu bar and select Image > Image Size. (In Photoshop Elements, it might be Image > Resize > Image Size).
- Deselect Resample Image: In the “Image Size” dialog window that appears, locate the “Resample Image” checkbox. Crucially, make sure this box is UNCHECKED. This prevents Photoshop from altering the pixel dimensions (and thus the actual resolution) of your image.
- Set Desired Resolution (DPI): In the “Resolution” field (often labeled in Pixels/Inch), type in your desired DPI value, for example, 300.
- Confirm Changes: Click the “OK” button. You will notice that the Width and Height values (in physical units like inches or cm) will change, reflecting the new implied print size, but the pixel dimensions (e.g., 2400 x 3000 pixels) will remain exactly the same.
- Save Your Image: Go to File > Save As… to save the modified image. It’s highly recommended to save it with a new name, perhaps adding a “-300dpi” extender (e.g., “myphoto-300dpi.jpg”) to easily identify this version. When saving to JPEG, ensure the quality setting is high (e.g., “Quality 10” or “12” for Photoshop, or equivalent 95%+). This procedure allows Tophinhanhdep.com users to adapt their high-quality stock photos for specific print guidelines without losing their original digital integrity.
Leveraging Free Software: XnView and Irfanview
For those who don’t have access to Adobe Photoshop, excellent free alternatives like XnView (Windows, Linux & Mac) and Irfanview (Windows) offer similar functionality. Tophinhanhdep.com advocates for accessible image tools, making these popular choices.
XnView Method:
- Open Image: Launch XnView, navigate to your image, and open it for full view.
- Access Resize Option: Select the “Image > Resize” menu option (note: not the “set DPI” option if present, as it might behave differently).
- Deselect Resample Image: In the “Image Size” dialog window, ensure the “Resample Image” checkbox is UNCHECKED.
- Set Resolution: In the “Resolution” box, type in your desired DPI (e.g., 300).
- Apply Changes: Click the “OK” button.
- Save Image: Use File > Save As… to save the photo with a new name, for example, “picture-300dpi.jpg.” When saving as JPEG, click the “Options” button and move the slider towards “Best” to about 95 for optimal quality.
Irfanview Method:
- Load Image: Open your image in Irfanview.
- Access Resize/Resample: Select the “Image > Resize/Resample” option.
- Enter DPI: In the dialog window, you’ll find a specific “DPI” data box. Simply enter your desired DPI (e.g., 300) here without adjusting any other settings.
- Apply Changes: Click the “OK” button.
- Save Image: Use “Save As” to save the photo with a new identifier (e.g., “photo-300dpi.jpg”). For JPEG saving, locate the JPEG options dialog box and set the quality slider to 95 or higher for best results.
Online DPI Converters (Metadata Only)
For quick, hassle-free adjustments, especially for online submissions that require a specific DPI minimum but don’t care about actual pixel density, several free online DPI converters are available. These tools are perfect for Tophinhanhdep.com users needing swift Image Converters.
- Visit a Converter Website: Search for “online image DPI converter” (e.g., convert.town/image-dpi).
- Choose DPI: Select or enter your desired DPI value (e.g., 300).
- Upload Image: Click the “Choose Image” or similar button and select the image file from your device. Most support common formats like JPEG, PNG, BMP, and TIFF.
- Download: The website will process the image and automatically download a new version with the updated DPI metadata.
Important Note: These online tools typically only override the DPI metadata. They do not add pixels or improve the image’s actual quality. They are suitable for satisfying metadata requirements without affecting file size or true resolution.
Other Programs and Verification
The core principle for changing DPI without resampling applies across most image editing software. Look for an “Image Size,” “Resize,” or “Print Size” option, and critically, always ensure that the “Resample Image” or equivalent checkbox (which would change the pixel dimensions) is UNCHECKED.
After saving your image, a good verification step is to compare the file size (in kilobytes or megabytes) of your new file with the original. They should be very close. A significant discrepancy often indicates that the image was accidentally resampled (pixel dimensions changed) or saved with dramatically different compression settings, which is a common pitfall Tophinhanhdep.com users should be aware of in digital photography.
Enhancing Image DPI for Sharper Prints and Larger Sizes (Increasing Pixel Density)
While changing DPI metadata without resampling is useful for compliance and default print sizes, it doesn’t actually improve an image’s quality or allow for larger, sharper prints if the original pixel count is low. To achieve truly higher DPI for a physical print (meaning more pixels per inch at a given print size), you must increase the image’s actual pixel density. This process is known as upscaling.
Historically, upscaling images using traditional software algorithms often led to blurry, pixelated, or “soft” results, as the software merely interpolated new pixels based on existing ones, often creating artifacts and losing detail. However, with advancements in Artificial Intelligence, this limitation has been largely overcome. Tophinhanhdep.com leads the way in offering sophisticated AI Upscalers to tackle this challenge.
The Need for Upscaling: Beyond Metadata Adjustment
Consider a scenario where you have a beautiful photograph, perhaps from your phone, that’s 1000 x 800 pixels. If you try to print this as a 10 x 8-inch photo, it will yield an effective PPI of only 100 (1000 pixels / 10 inches). For close-up viewing, this will likely appear soft or pixelated. To print that same 10 x 8-inch photo at a crisp 300 PPI, you would need an image with 3000 x 2400 pixels. Simply changing the DPI metadata from 100 to 300 wouldn’t add those missing pixels; it would only make the image appear much smaller in a layout program, still lacking the necessary detail.
This is where true upscaling comes into play – adding more pixels to the image to genuinely increase its resolution. For Tophinhanhdep.com’s High Resolution and Stock Photos, this means ensuring they can be scaled to fit any creative idea or print requirement.
Using Tophinhanhdep.com’s AI Upscaler
Tophinhanhdep.com’s AI Upscaler offers a powerful, intelligent solution for increasing your image’s DPI by boosting its actual pixel count. Our advanced algorithms analyze your image’s content and intelligently generate new pixels, preserving and often enhancing details that traditional methods would blur. This makes it an ideal tool for transforming lower-resolution images, such as old photos or smaller digital art pieces, into print-ready, high-resolution masterpieces.
Here’s a step-by-step guide to achieving sharper, larger prints with Tophinhanhdep.com’s AI Upscaler:
- Access Tophinhanhdep.com’s AI Upscaler: Log in to your Tophinhanhdep.com account or create a new one to access our Image Tools suite.
- Upload Your Images: Upload the photos you want to enhance. You can typically do this by dragging and dropping files, selecting them from your device, or even importing them from cloud storage or via URL. Our platform can display the current output DPI value below the resolution in the uploader, giving you an immediate quality assessment.
- Set Desired Resolution and DPI: When using Tophinhanhdep.com’s upscaler, you can set both the desired DPI metadata value and the actual output resolution. Our default DPI is often 300 for all operations, but you have full control.
- Choose an Upscaler Type: Tophinhanhdep.com offers various upscaler algorithms, each optimized for specific image types and enhancement needs, supporting resolution increases up to 16x or 512 megapixels:
- Gentle: For subtle enhancements on text-heavy images like product labels or maps.
- Balanced: Improves clarity and detail in everyday photos (nature, architecture, food).
- Strong: Focuses on fixing blur and improving faces, especially for small portraits.
- Ultra: Our most transformative option, offering superior quality and detail enhancement for a wide range of images.
- Digital Art: Ideal for illustrations and anime, preserving or reimagining based on creativity settings. This is perfect for enhancing our Abstract and Aesthetic collections.
- Old Photo: Specifically designed to fix scratches, fading, and damage, and even add realistic color to black & white photos.
- Customize Resolution: Crucially, to genuinely increase DPI for printing, you need to increase the image’s pixel dimensions. Go to the “Width & Height” tab on the Size sidebar and set your desired output resolution. For example, if you have an 1162 x 702 pixel image that would print at 3.87 x 2.34 inches at 300 DPI, you could set the larger side’s resolution to 5250 pixels. Our system will proportionally increase the other side, allowing you to print a 15 x 9.06-inch photo at 350 DPI—a significant improvement.
- Choose an Upscaler Type: Tophinhanhdep.com offers various upscaler algorithms, each optimized for specific image types and enhancement needs, supporting resolution increases up to 16x or 512 megapixels:
- Start Processing: Click the “Enhance” or “Process” button and allow our AI to work its magic.
- Download Your Enhanced Image: Once processing is complete, your image thumbnail will clear up, and a download button will appear. Save the new, high-resolution file to your device. Tophinhanhdep.com also stores your enhanced photos in the cloud for a period, making them easily accessible for future use.
Printing Presets: For added convenience, Tophinhanhdep.com offers various ready-made printing presets for popular standards like posters, photos, and international paper sizes (A5 to A0). Simply choose a preset, and our AI will automatically calculate and set the right resolution for that preset at 300 DPI, streamlining your workflow for any Visual Design project.
Advanced Upscaling in Photoshop (Super Resolution)
Adobe Photoshop has also introduced its own advanced upscaling feature called “Super Resolution” (found in Adobe Camera Raw). While it represents a significant improvement over traditional Photoshop upscaling methods, AI-powered dedicated upscalers like Tophinhanhdep.com’s often provide more nuanced and detailed enhancements, especially for highly intricate images or those requiring substantial resolution increases. Our AI Upscalers are continually trained on vast datasets, leading to superior artifact reduction and detail generation, making them a preferred choice for professional digital photography and visual design needs.
Best Practices and Troubleshooting for Image DPI
Mastering DPI and image resolution involves more than just knowing how to change settings; it’s also about understanding when and why, and how to troubleshoot common issues. At Tophinhanhdep.com, we want to equip you with the full spectrum of knowledge for impeccable image management.
Optimal DPI Settings for Various Uses
A quick reference for choosing the right DPI (or effective PPI) for your images:
- For High-Quality Prints (Close-up Viewing):
- Recommendation: 300-400 DPI (or pixels per inch at print size).
- Use Cases: Photo books, magazines, brochures, fine art prints, detailed photographs, graphic design projects.
- Considerations: Higher DPI is especially important for detailed subjects (e.g., intricate landscapes, portraits) and when printing on high-quality, coated paper.
- For Posters and Wall Art (Medium Viewing Distance):
- Recommendation: 100-200 DPI.
- Use Cases: Large posters, wall art viewed from a few feet away.
- Considerations: Balance visual quality with manageable file sizes. Uncoated paper might not benefit from DPI beyond 200-250.
- For Billboards and Large Signage (Distant Viewing):
- Recommendation: As low as 4-35 DPI, depending on viewing distance.
- Use Cases: Outdoor advertising, banners seen from afar.
- Considerations: Don’t over-specify DPI; it wastes resources. Focus on overall impact, not minute detail.
- For Web and Digital Displays:
- Recommendation: Pixel dimensions are paramount; DPI metadata is largely irrelevant.
- Use Cases: Websites, social media, digital backgrounds, wallpapers (like those on Tophinhanhdep.com), presentations.
- Considerations: Optimize pixel dimensions for the intended display size. Use Image Compressors to reduce file size for faster load times.
Managing File Size and Quality
A crucial aspect of image optimization is balancing quality with file size, especially when dealing with high-resolution images or those that have been upscaled.
- Upscaling and File Size: When you significantly increase an image’s pixel density using tools like Tophinhanhdep.com’s AI Upscaler, the file size will increase dramatically because you are adding a substantial amount of new data (pixels) to the image. Be prepared for larger files (often in the tens or hundreds of megabytes) when dealing with truly high-resolution images.
- JPEG Compression: When saving images, particularly in JPEG format, proper compression settings are vital. JPEG is a “lossy” format, meaning it discards some image data to reduce file size.
- Recommended Setting: Always aim for a high-quality setting, typically around 95-100 (Adobe Quality 10-12) for print-ready images or master copies. This minimizes data loss and preserves visual fidelity.
- Avoid Over-Compression: While lower quality settings reduce file size further, they can introduce noticeable artifacts, blockiness, and blur, especially in areas with smooth gradients or fine details. This compromises the Beautiful Photography we strive for.
- Verify File Size: After saving, always check the new file’s size against the original. A drastic reduction in size could indicate excessive compression or unintended resampling.
Common Pitfalls and Verifications
Navigating image DPI can have its challenges. Being aware of common mistakes can save you time and frustration.
- Accidental Resampling: The most frequent error when attempting to change only DPI metadata is forgetting to UNCHECK the “Resample Image” box in your editing software. If this box is checked, the software will either add or remove pixels, changing your image’s actual resolution, which might be unintended and lead to blurry or pixelated results if you were only trying to adjust the metadata tag.
- Blurring from Drastic Upscaling: When manually upscaling (e.g., using older Photoshop methods without AI), increasing DPI drastically in one go (e.g., from 72 DPI to 300 DPI) can introduce noticeable blurring. If using non-AI methods, try incremental changes (e.g., 30-50 DPI at a time) and check the image quality after each step to mitigate blur. Tophinhanhdep.com’s AI Upscaler largely bypasses this issue by intelligently generating pixels.
- Misinterpreting “High Resolution”: Just because a file’s metadata says “300 DPI” doesn’t automatically mean it’s high resolution. Always check the actual pixel dimensions (e.g., 2000 x 3000 pixels) to confirm the image has enough data for your intended use.
- Asking the Printer: When in doubt about print requirements, always ask your printing service for their specific minimal DPI and pixel dimension guidelines. Tophinhanhdep.com encourages this proactive approach for all your Visual Design projects.
- Final Verification: After any DPI adjustment or upscaling, take a moment to:
- Check Pixel Dimensions: Confirm they are as intended (unchanged for metadata-only, increased for upscaling).
- Inspect Image Quality: Zoom in to 100% or 200% to look for any unexpected blur, pixelation, or artifacts.
- Compare File Sizes: Ensure the file size is reasonable and aligns with the changes made (or not made).
Conclusion
The journey through the intricate world of image DPI and resolution reveals that while “Dots Per Inch” is a critical measurement for physical printing, “Pixels Per Inch” and the total pixel dimensions are the true indicators of a digital image’s quality and detail. Understanding this distinction empowers you to correctly prepare your images for any purpose, whether for breathtaking prints, optimized web content, or precise visual designs.
At Tophinhanhdep.com, we are committed to providing you with the ultimate resources for all your image needs. From inspiring collections of Wallpapers, Backgrounds, and Aesthetic visuals to powerful Image Tools like Converters, Compressors, Optimizers, and cutting-edge AI Upscalers, we ensure that you have everything required to bring your creative visions to life.
By following the practical methods outlined in this guide—whether you’re simply adjusting DPI metadata in Photoshop or using Tophinhanhdep.com’s advanced AI to truly enhance pixel density—you gain complete control over your image output. No longer will you be confused by print shop requirements or limited by low-resolution source files. You now possess the knowledge to confidently manage your images, ensuring they always look their absolute best, reflecting the high standards of Digital Photography and Visual Design that Tophinhanhdep.com champions. Embrace these techniques, experiment with your images, and continue to create stunning visual experiences with unparalleled quality.