Mastering Image Aspect Ratio: A Comprehensive Guide for Windows, Photoshop, and Tophinhanhdep.com Tools

In the dynamic world of digital imagery, where visuals dominate everything from desktop wallpapers to professional photography portfolios and intricate graphic designs, understanding and correctly manipulating image aspect ratios is paramount. An image’s aspect ratio defines the proportional relationship between its width and height, expressed as a ratio like 16:9 or 4:3. This seemingly simple concept holds immense power, dictating how your content appears on various screens, in print, or across digital platforms. Neglecting it can lead to frustrating black bars, stretched visuals, or unintended cropping, detracting from the aesthetic and impact of your carefully crafted images.
At Tophinhanhdep.com, we understand the critical role aspect ratio plays in creating stunning visuals. Whether you’re curating beautiful photography for high-resolution displays, designing compelling digital art, or simply optimizing your favorite nature backgrounds, getting the aspect ratio right is the foundation. This extensive guide will demystify the process, offering detailed instructions on how to change image aspect ratios across popular operating systems like Windows 10 and 11, professional editing software such as Photoshop, and even within presentation tools like PowerPoint. Furthermore, we’ll highlight how Tophinhanhdep.com’s comprehensive suite of image tools can simplify this task, ensuring your visual content always looks its best.
Understanding Aspect Ratio: The Foundation of Visual Harmony
Before diving into the “how-to,” it’s essential to grasp the fundamental concept of aspect ratio and why it’s so critical for every visual enthusiast and professional.
What is Aspect Ratio?
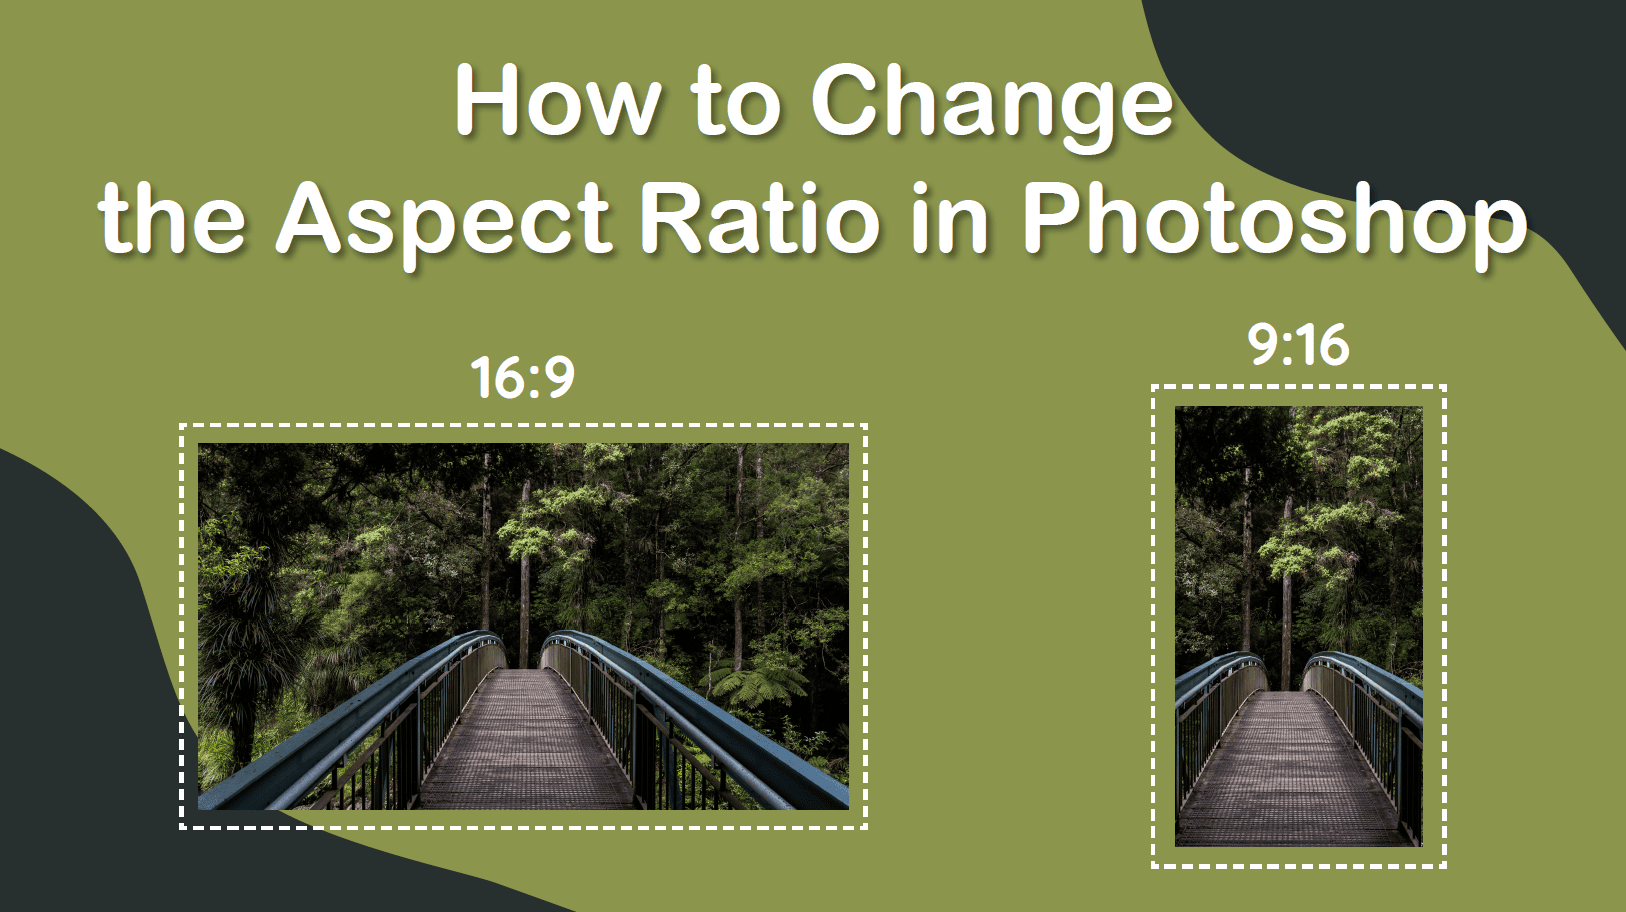
At its core, an aspect ratio is a mathematical expression of an image’s dimensions. It’s typically written as two numbers separated by a colon (width:height), such as 16:9 (widescreen), 4:3 (standard definition TV), or 1:1 (square). For instance, a 16:9 ratio means that for every 16 units of width, there are 9 corresponding units of height. This proportion dictates the overall shape of your image or display, fundamentally affecting how content is framed and presented.
Consider the diverse range of visual content available on Tophinhanhdep.com – from stunning aesthetic wallpapers and abstract backgrounds to sad/emotional imagery and breathtaking photography. Each type of content often thrives in a particular aspect ratio to convey its intended mood or detail. A panoramic nature shot might look best in an ultra-wide ratio, while a striking portrait could benefit from a traditional 3:2 or even a square 1:1. The choice of aspect ratio directly influences the composition and visual balance, key elements in graphic design and digital art.
Why is Aspect Ratio Crucial for Your Visual Content?
The importance of aspect ratio extends far beyond mere technical specifications; it directly impacts user experience and content effectiveness across numerous applications:
- Display Compatibility: Different screens (monitors, TVs, smartphones) and platforms (websites, social media, projection systems) are designed for specific aspect ratios. Forcing an incompatible image can result in black bars (letterboxing or pillarboxing), stretching, or unwanted cropping, diminishing the visual quality and professionalism. For wallpapers and backgrounds from Tophinhanhdep.com, matching the display’s native aspect ratio ensures a seamless, full-screen experience.
- Printing and Framing: When preparing beautiful photography for print, knowing the target frame size (e.g., 8x10, 5x7) is crucial. These physical dimensions translate directly to aspect ratios (e.g., 4:5, 5:7). Adjusting your image’s aspect ratio beforehand ensures it fits perfectly without awkward cropping or empty spaces.
- Web and Social Media Design: Online platforms often have strict guidelines for image dimensions and aspect ratios to optimize loading times and display consistency. Forcing an incorrect ratio can lead to automatic, often unflattering, resizing by the platform. For stock photos or visual content used in graphic design, adhering to recommended ratios (e.g., 1.91:1 for Facebook link posts, 9:16 for Instagram Stories) is vital for engagement and impact.
- Creative Control: Beyond mere technical fitting, changing the aspect ratio allows for creative cropping and photo manipulation. It lets you eliminate distracting elements, reframe the subject, or emphasize a particular focal point, enhancing the overall composition of your digital art or high-resolution photography. This level of control empowers you to tell your visual story precisely how you envision it, aligning with the principles of effective visual design.
By understanding these fundamentals, you’re better equipped to leverage aspect ratio changes as a powerful tool in your visual content creation arsenal, whether you’re working with images, photography, or complex visual designs.
Changing Aspect Ratio in Windows 10 & 11: Tailoring Your Display Experience
For many users, the most common interaction with aspect ratio involves adjusting their display settings to ensure optimal viewing on their Windows devices. Whether you’re tired of black bars during video playback or your desktop wallpaper doesn’t fit quite right, Windows 10 and 11 offer straightforward solutions.
Method 1: Adjusting Display Settings
This is the simplest and most accessible method for most users to modify their screen’s aspect ratio.
For Windows 11:
- Right-click on an empty area of your desktop.
- Select “Display settings” from the context menu.
- In the Display settings window, scroll down to the “Scale and layout” section.
- Under the “Display resolution” dropdown menu, you will see a list of available resolutions. Each resolution implicitly corresponds to a certain aspect ratio (e.g., 1920x1080 is 16:9, 1280x960 is 4:3).
- Select the desired resolution that matches the aspect ratio you want. Windows 11 will often recommend a “native” resolution, which typically corresponds to your monitor’s native aspect ratio.
- Click “Keep changes” if you’re satisfied with the new look.
For Windows 10:
- Right-click on an empty area of your desktop.
- Select “Display settings” from the context menu.
- In the Display settings window, scroll down to the “Scale & Layout” section.
- Under the “Resolution” dropdown menu, select the desired resolution.
- Click “Apply” to save the changes, then “Keep changes” to confirm.
Pros of this method: It’s quick, easy, and built directly into the operating system. It’s perfect for ensuring your Tophinhanhdep.com wallpapers and backgrounds fit your screen perfectly. Cons of this method: The available options are often limited to predefined resolutions supported by your monitor and graphics card. If you need a custom aspect ratio not listed, you’ll need alternative methods.
Understanding Native Aspect Ratio: It’s crucial to understand your display’s “native aspect ratio.” This is the ratio for which your monitor’s pixels are physically designed. Using a non-native aspect ratio can lead to content appearing stretched, compressed, or blurry, even if it eliminates black bars. For the best clarity of high-resolution stock photos or beautiful photography, always try to match the native aspect ratio.
Method 2: Leveraging Graphics Card Settings
If Windows’ display settings don’t offer the specific aspect ratio you need, or if you desire more granular control, your graphics card’s control panel is the next place to look. NVIDIA, AMD, and Intel all provide their own software for managing display settings.
General Steps (may vary slightly by manufacturer):
- Right-click on your desktop.
- Select “NVIDIA Control Panel,” “AMD Radeon Settings,” or “Intel Graphics Settings” (the name will depend on your graphics card).
- Once the control panel opens, navigate to the “Display” or “Resolution” section.
- Look for options related to “Aspect Ratio,” “Scaling,” “Custom Resolutions,” or “GPU Scaling.”
- Here, you often have more flexibility to choose from additional aspect ratios or even create custom resolutions to achieve a specific width-to-height proportion.
- Apply and save your changes.
Pros of this method: Offers more customization and a wider range of aspect ratio options, including the ability to create custom ones. This is particularly useful for niche applications or older displays. Cons of this method: Requires a basic understanding of your graphics card software, and the exact steps can vary significantly between manufacturers and driver versions. Tip: Always ensure your graphics drivers are up to date. Outdated drivers can restrict available settings and introduce compatibility issues. Visiting your graphics card manufacturer’s website for the latest drivers is recommended.
Method 3: Advanced & Third-Party Solutions
For the most advanced users seeking highly specific or unsupported aspect ratio configurations, there are more intricate approaches, though they come with higher risks.
- Using Third-Party Software: Tools like PowerStrip or Custom Resolution Utility (CRU) allow users to create and manage custom resolutions and refresh rates, effectively enabling the use of aspect ratios not natively supported by your system or graphics drivers. These tools are powerful but demand technical expertise and caution.
- Modifying the System Registry (Windows 11 example): The provided example describes how to change aspect ratio by modifying specific DWORD values (“PrimSurf_Size.cx” and “PrimSurf_Size.cy”) within the Windows Registry. This method is highly risky and should only be attempted by advanced users with a thorough understanding of the Windows Registry. Incorrect modifications can lead to system instability or even render your device inoperable. Always create a system restore point or backup your registry before attempting such changes.
While these advanced methods offer unparalleled control, Tophinhanhdep.com advocates for simpler, safer solutions where possible. For image-specific aspect ratio changes, our “Image Tools” section offers user-friendly converters and optimizers that negate the need for complex system-level adjustments.
Precision Aspect Ratio Adjustment in Image Editing Software (Photoshop Example)
When it comes to fine-tuning individual images, particularly high-resolution photography, digital art, or graphic design elements, dedicated image editing software like Adobe Photoshop is indispensable. Unlike system-wide display changes, Photoshop allows you to modify an image’s aspect ratio without affecting your screen’s settings, providing precise control over composition.
The Power of the Crop Tool in Photoshop
The Crop Tool (C) in Photoshop is your primary weapon for aspect ratio manipulation. It allows you to redefine the boundaries of your image, either conforming to standard ratios or setting custom proportions.
Step-by-Step to Changing Aspect Ratio with the Crop Tool:
- Open the Image: Launch Photoshop and open the image you wish to modify.
- Activate the Crop Tool: Select the Crop Tool from the left-hand toolbar, or simply press C on your keyboard.
- Choose or Set Your Aspect Ratio:
- Predefined Ratios: In the options bar at the top, click the dropdown menu next to the Crop Tool icon. Here, you’ll find common aspect ratios like 16:9, 4:3, 1:1, etc. Select the one that fits your needs.
- Custom Ratio: If your desired ratio isn’t listed, select “Ratio” from the dropdown, then manually type your desired width and height values (e.g., “3” in the first box and “2” in the second for a 3:2 ratio) into the adjacent input fields.
- Width & Height Dimensions: If you know the exact pixel dimensions (e.g., 1920px by 1080px), you can also input these values directly, and Photoshop will automatically calculate the corresponding ratio.
- Adjust the Crop Box: Once an aspect ratio is selected, a crop box will appear on your image, constrained to that ratio. You can:
- Resize the box: Drag the corner or side handles to make the crop area larger or smaller. The aspect ratio will be maintained.
- Reposition the box: Click and drag inside the crop box to move it around, ensuring your subject is framed perfectly. The faded areas outside the box indicate what will be cropped. This is where your creative judgment for composition comes into play, a key aspect of photo manipulation and visual design.
- Confirm the Crop: When you’re satisfied with the framing, click the checkmark in the options bar or press Enter on your keyboard to apply the crop.
Saving Custom Presets: For frequently used custom aspect ratios (e.g., specific social media dimensions or unique print sizes), you can save them as a preset. After setting your custom ratio, click the dropdown menu again and select “New Crop Preset.” Give it a descriptive name, and it will appear in your list for quick access in the future, enhancing your workflow for graphic design and photography editing styles.
Changing Aspect Ratio Without Cropping (Photoshop)
While cropping is the most common way to change an image’s aspect ratio, there are scenarios where you want to avoid losing image content. This usually involves either stretching the image or adding to the canvas.
Method 1: Stretching the Image (with caution)
- Follow steps 1-3 from the Crop Tool section to set your desired aspect ratio.
- Crucially, uncheck the “Delete Cropped Pixels” box in the options bar before confirming the crop.
- Confirm the crop. You’ll now have a canvas at the new aspect ratio, but your image might not fill it, or it might be slightly cropped.
- Go to Image > Canvas Size (or press Ctrl + Alt + C / Cmd + Option + C). Note the new dimensions.
- Go to Edit > Free Transform (Ctrl + T / Cmd + T).
- Drag the image handles to stretch it to fill the new canvas dimensions. Be aware that this will distort your image. This method is generally not recommended for high-resolution images where fidelity is crucial, as it can severely compromise image quality and aesthetic appeal. However, for abstract backgrounds or minor adjustments where distortion is less noticeable, it might be an option.
Method 2: Adding to the Canvas (creating a background)
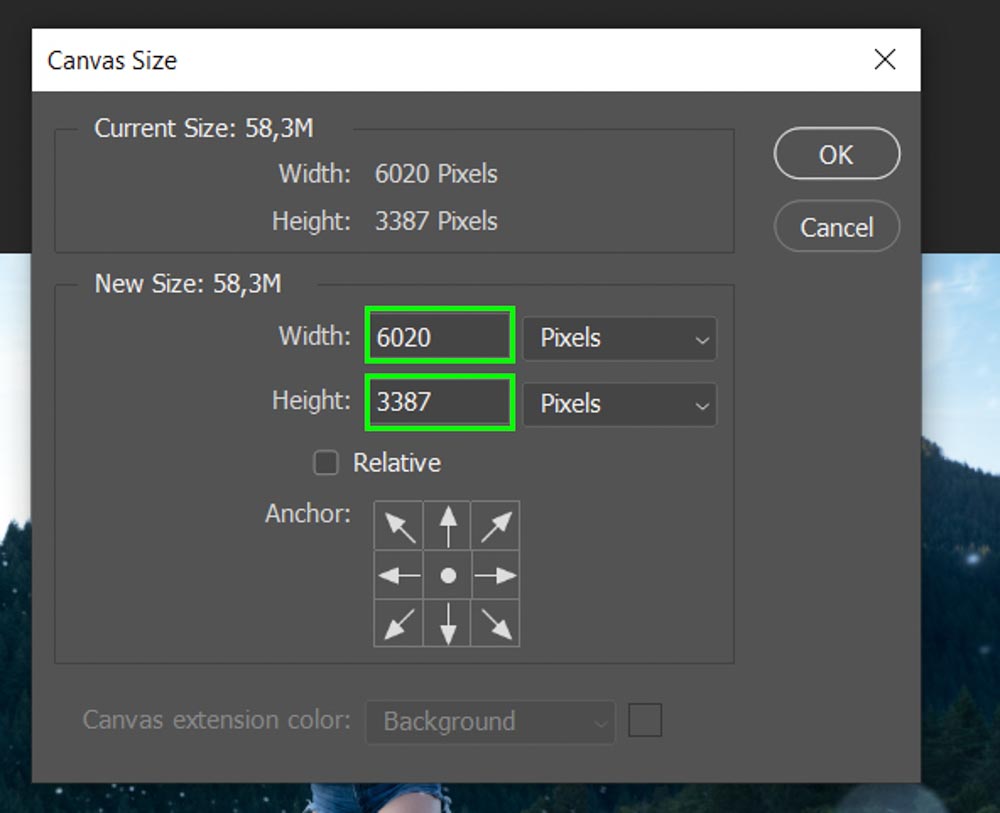
- Instead of cropping, go directly to Image > Canvas Size.
- Change the “Width” and “Height” to new dimensions that match your desired aspect ratio. For example, if your image is 3:2 and you want 16:9, you might increase the width to maintain the height, or vice versa, adding blank canvas space.
- Choose your Canvas extension color (e.g., white, black, or a custom color).
- Click OK.
- Your image will now be centered on a larger canvas with the new aspect ratio, with blank space around it. You can then fill this space with a solid color, a gradient, or use Photoshop’s content-aware fill tools (if appropriate) to extend the image, turning a simple photo into a more elaborate piece of digital art or a unique wallpaper.
This method is ideal for creating images for specific frames or online banners where a consistent aspect ratio is required, and you’re comfortable with adding background elements. For inspiration on “Creative Ideas” and different “Editing Styles,” Tophinhanhdep.com offers a wealth of resources that can guide your choices.
Aspect Ratio Considerations for Presentations and Online Tools
Beyond individual images and desktop displays, aspect ratio is a critical factor in presentations and for quick, online image adjustments.
Optimizing PowerPoint Presentations
PowerPoint presentations are a common area where aspect ratio issues can arise, particularly when transitioning between older and newer equipment or designs.
-
Understanding PowerPoint Defaults: Older PowerPoint versions (2010 and earlier) defaulted to a 4:3 aspect ratio, while modern versions (2013 onwards) use a 16:9 widescreen format.
-
Changing Slide Aspect Ratio:
- Go to the “Design” tab on the ribbon.
- Click “Slide Size” on the far right.
- Choose either “Standard (4:3)” or “Widescreen (16:9).”
- PowerPoint will ask if you want to “Maximize” (crop content to fill) or “Ensure Fit” (scale content down to fit). Choose based on your preference, but “Ensure Fit” is often safer to avoid unintended cropping of important text or graphics.
-
Dealing with Distorted Images: A common problem arises when copying slides or content from a 4:3 presentation into a 16:9 one (or vice versa). Images might stretch awkwardly to fill the new slide dimensions.
- Method 1: Copy-Pasting Individual Contents: Instead of copying entire slides, copy and paste individual text boxes, images, and shapes one by one. This preserves their original aspect ratios, allowing you to manually arrange them on the new slide.
- Method 2: Fixing Distorted Images: If you’ve already pasted the entire slide and images are distorted:
- Right-click on the distorted image and select “Format Picture.”
- In the Format Picture pane that appears on the right, click the “Size & Properties” icon (the small square with arrows).
- Under “Scale,” ensure “Lock aspect ratio” is checked.
- Set “Scale Height” and “Scale Width” to 100%. This will revert the image to its original proportions, albeit potentially leaving empty space on the slide that you can then fill creatively.
Always ascertain the aspect ratio of the projection equipment at your presentation venue beforehand. Matching your PowerPoint slides to the projector’s native aspect ratio ensures your “Creative Ideas” and “Visual Design” efforts translate perfectly to the big screen.
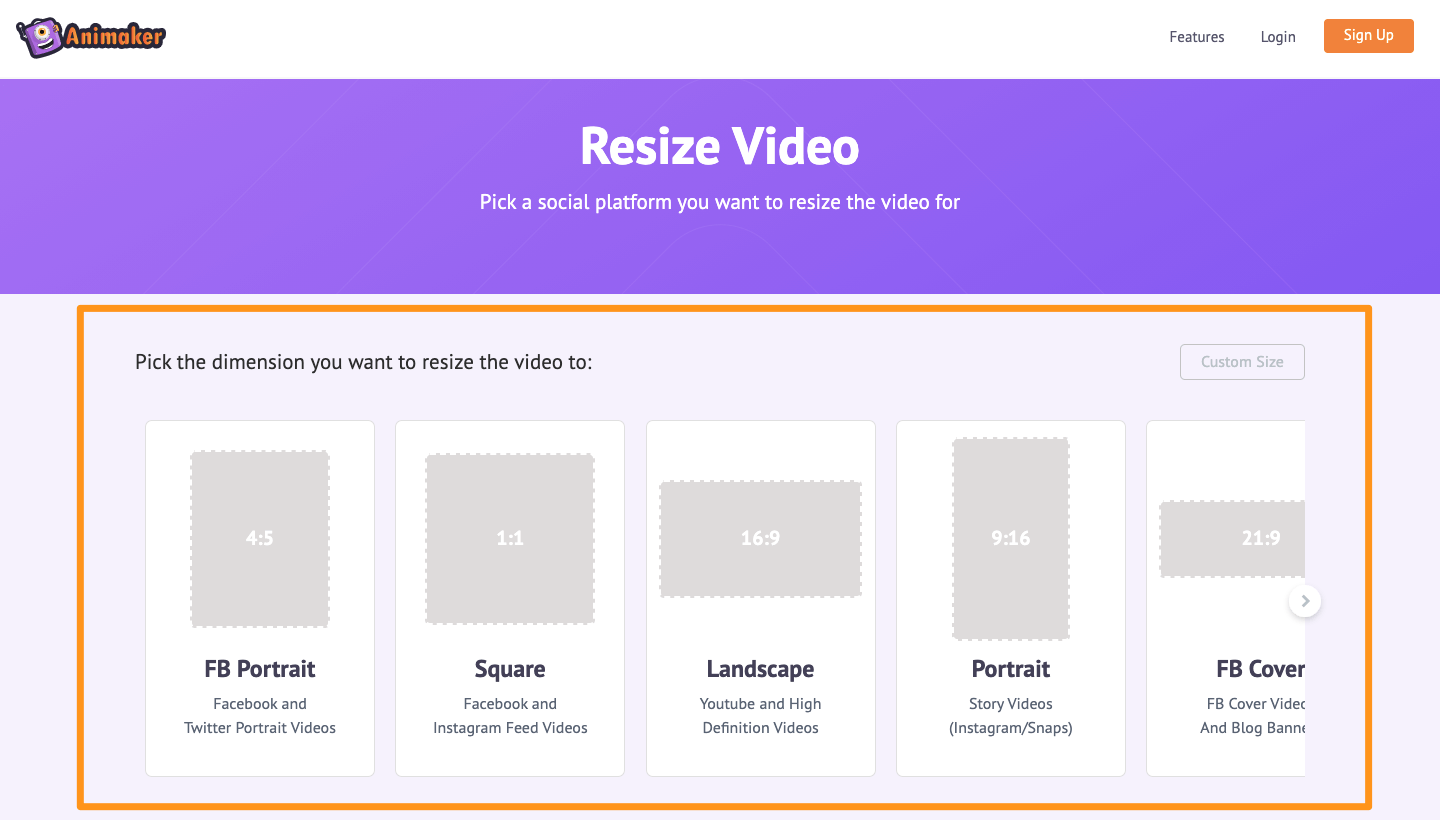
Streamlined Aspect Ratio Adjustment with Online Tools
For those who need a quick aspect ratio change without the complexities of professional software or system settings, online image tools are a lifesaver. Tophinhanhdep.com proudly offers its own free online Aspect Ratio Changer, providing a user-friendly solution for a variety of image types.
How to Use Tophinhanhdep.com’s Aspect Ratio Changer:
- Upload Your File: Visit the Image Tools section on Tophinhanhdep.com and locate the Aspect Ratio Changer. Upload your PNG, JPG, or GIF file directly into the designated upload box.
- Define Your Ratio: Once uploaded, you’ll see a preview and settings on the right-hand side. Select the “Aspect ratio” option under “Define by.”
- Choose or Set Custom Ratio: Use the dropdown menu to select from common predefined ratios, or enter your desired custom width and height values into the provided boxes.
- Apply and Preview: Click “Apply” to see an instant preview of your image with the new aspect ratio. You can adjust the crop box or settings as needed to perfect the composition.
- Download Your Image: Once satisfied, click “Download” to save your newly proportioned image directly to your device.
Benefits of Tophinhanhdep.com’s online tool:
- Accessibility: No software installation or subscription required. Access it from any device with an internet connection.
- Speed and Simplicity: Designed for quick, efficient changes, making it ideal for optimizing stock photos, web images, or social media graphics on the fly.
- Convenience: Integrates seamlessly with Tophinhanhdep.com’s other “Image Tools” like Converters, Compressors, and Optimizers, providing a one-stop shop for all your image processing needs.
Enhancing Your Visuals with Tophinhanhdep.com’s Resources
Mastering the art of changing image aspect ratios is just one step in your journey to creating compelling visual content. At Tophinhanhdep.com, we offer a vast ecosystem designed to empower you with everything you need for images, photography, and visual design.
Beyond Aspect Ratio: A World of Visual Possibilities
Once your images are perfectly proportioned, dive deeper into the wealth of resources available on Tophinhanhdep.com:
- Images: Explore our extensive collections of high-resolution wallpapers, backgrounds, aesthetic visuals, breathtaking nature scenes, thought-provoking abstract art, and moving sad/emotional imagery. Find the perfect visual to complement your newly optimized aspect ratio.
- Photography: Discover tips for capturing high-resolution stock photos, explore various digital photography techniques, and learn about different editing styles to elevate your shots. Our platform serves as an inspiration hub for “Photo Ideas” and “Thematic Collections.”
- Image Tools: Beyond the Aspect Ratio Changer, leverage our array of image converters, compressors, and optimizers to prepare your images for any platform. Explore innovative solutions like our AI Upscalers to enhance image resolution without pixelation, or our Image-to-Text tools for unique applications.
- Visual Design: Unleash your creativity with resources on graphic design, digital art, and advanced photo manipulation techniques. Learn how aspect ratio fits into broader visual compositions and creative workflows.
- Image Inspiration & Collections: Stay ahead of “Trending Styles” with our curated “Mood Boards” and diverse “Photo Ideas,” ensuring your visuals are always fresh and impactful.
Key Takeaways for Image Aspect Ratio Mastery
- Aspect ratio is fundamental: It dictates the shape of your images and displays, profoundly affecting presentation.
- Context matters: The ideal aspect ratio depends on where your image will be used—desktop wallpaper, social media, print, or presentation.
- Windows offers built-in tools: Display settings and graphics card control panels allow system-wide adjustments.
- Photoshop provides granular control: The Crop Tool is essential for precise, image-specific ratio changes and creative framing.
- Online tools simplify the process: Tophinhanhdep.com’s free Aspect Ratio Changer offers a quick and easy solution for everyday needs.
- Beware of distortion: Avoid unnecessary stretching or low-resolution choices that can degrade image quality. Prioritize native resolutions and careful cropping.
In conclusion, understanding and skillfully changing image aspect ratios is an indispensable skill for anyone working with digital visuals. Whether you’re a casual user seeking perfect desktop backgrounds or a professional demanding pixel-perfect graphic designs, the methods and tools outlined in this guide will empower you. And remember, for every aspect of your visual content creation journey—from finding stunning images to optimizing them with powerful tools—Tophinhanhdep.com is your ultimate resource. Explore our site today and unlock the full potential of your visual creativity.