Mastering Image Conversion: How to Change Any Image File to JPG for Optimal Web Use and Visual Impact

In today’s visually-driven digital world, images are everywhere. From stunning high-resolution wallpapers and captivating backgrounds to professional stock photos and evocative beautiful photography, visual content forms the backbone of online communication and personal expression. Whether you’re a professional photographer showcasing your latest digital photography, a graphic designer crafting intricate visual designs, or simply someone sharing aesthetic moments, understanding how to manage and optimize your image files is crucial. One of the most common and versatile image formats you’ll encounter is JPEG (Joint Photographic Experts Group), often abbreviated as JPG.
Many websites, social media platforms, and applications have strict requirements regarding the file type and size of uploaded images. This often means converting your photos to JPG. If your cherished images are currently in formats like GIF, TIFF, PNG, HEIC, WEBP, or RAW, you might find yourself in a frustrating situation, unable to upload or share them. While converting an image to JPG might occasionally result in a slightly less crisp picture compared to a lossless format like PNG, the JPG format is universally celebrated for its exceptional ability to maintain impressive quality within the smallest possible file size. This makes it the de facto standard for web images, ensuring fast loading times without significant visual compromise.
At Tophinhanhdep.com, we understand the importance of efficient image management, which is why we offer a suite of image tools, including powerful converters, compressors, and AI upscalers, designed to help you enhance your digital photography and visual design projects. This comprehensive guide will walk you through various methods to convert any image file to JPG, whether you’re using a desktop computer, a laptop, or a mobile device. Mastering these “tricks of the trade” will empower you to seamlessly integrate your images into any digital environment, from sharing thematic collections to building stunning mood boards that inspire creative ideas.
The Indispensable Role of JPG in Digital Imagery and Visual Design
The digital landscape thrives on efficiency and visual appeal. For every wallpaper, background, or piece of abstract art shared online, there’s a delicate balance between visual quality and file size. This is where the JPG format truly shines, making it an indispensable part of image tools for everyone from casual users to digital photography experts and graphic design professionals.
Understanding JPEG: Efficiency, Quality, and Web Dominance
JPEG, or JPG, stands for Joint Photographic Experts Group, the committee that developed this standard in 1992. It’s a “lossy” compression format, meaning that some data is discarded during the compression process to achieve a significantly smaller file size. However, this loss is often imperceptible to the human eye, especially when the image is viewed at typical web resolutions. The beauty of JPG lies in its adjustable compression level, allowing users to strike a balance between file size and image quality. This flexibility is a key reason why JPG has become the most widely used image format on the internet.
Compared to other formats:
- PNG (Portable Network Graphics): A “lossless” format that retains all original data, making it ideal for images with sharp lines, text, or transparent backgrounds (like logos or digital art elements). However, PNG files are typically much larger than JPGs, which can impact website loading speeds.
- GIF (Graphics Interchange Format): Best known for animation and simple graphics with limited color palettes. Not suitable for high-resolution photography due to its 256-color limit.
- TIFF (Tagged Image File Format): A high-quality, lossless format often used in professional printing and archiving. TIFF files are significantly larger and less compatible with web browsers.
- RAW: These are unprocessed images directly from a camera’s sensor, offering maximum flexibility for digital photography editing but requiring specialized software and conversion before general use.
- HEIC (High-Efficiency Image Container): A newer format, primarily used by Apple devices, offering good compression but sometimes requiring conversion for compatibility with non-Apple systems.
- WEBP: A modern format offering superior lossless and lossy compression for images on the web. While gaining traction, it’s not as universally supported as JPG yet.
Why Converting to JPG is Essential for Your Digital Assets
The widespread adoption of JPG isn’t just a matter of tradition; it’s driven by practical advantages that benefit both content creators and consumers. For anyone engaged in visual design, curating image collections, or simply sharing photos, converting to JPG is often a necessary step for several key reasons:
- Universal Compatibility: Almost every digital device, operating system, and web browser natively supports JPG files. This ensures your images, whether they’re aesthetic landscapes or sad/emotional portraits, are viewable by the broadest possible audience without special software.
- Optimized for the Web: Smaller file sizes mean faster website loading times, which is crucial for user experience and search engine optimization. For websites featuring extensive beautiful photography or thematic collections, JPGs prevent your site from feeling sluggish.
- Efficient Storage and Sharing: Reduced file sizes conserve disk space on your devices and cloud storage. They also make it much quicker to attach images to emails or send them via messaging apps, ideal for sharing photo ideas or trending styles with collaborators or friends.
- Balance of Quality and Size: While lossy, the compression algorithm is designed to be highly effective for photographic images. You can achieve excellent visual quality for most display purposes while keeping file sizes manageable, perfect for both wallpapers and stock photos.
Understanding these benefits reinforces why JPG conversion remains a fundamental skill in the digital age, enabling creators to effectively manage and disseminate their images and photography across various platforms.
Versatile Approaches to Image Conversion: Tools for Every User
Whether you’re looking for a quick fix on the go or a precise conversion on your desktop, there’s a method for every need. The goal is always to transform your images into the ubiquitous JPG format while retaining the best possible quality.
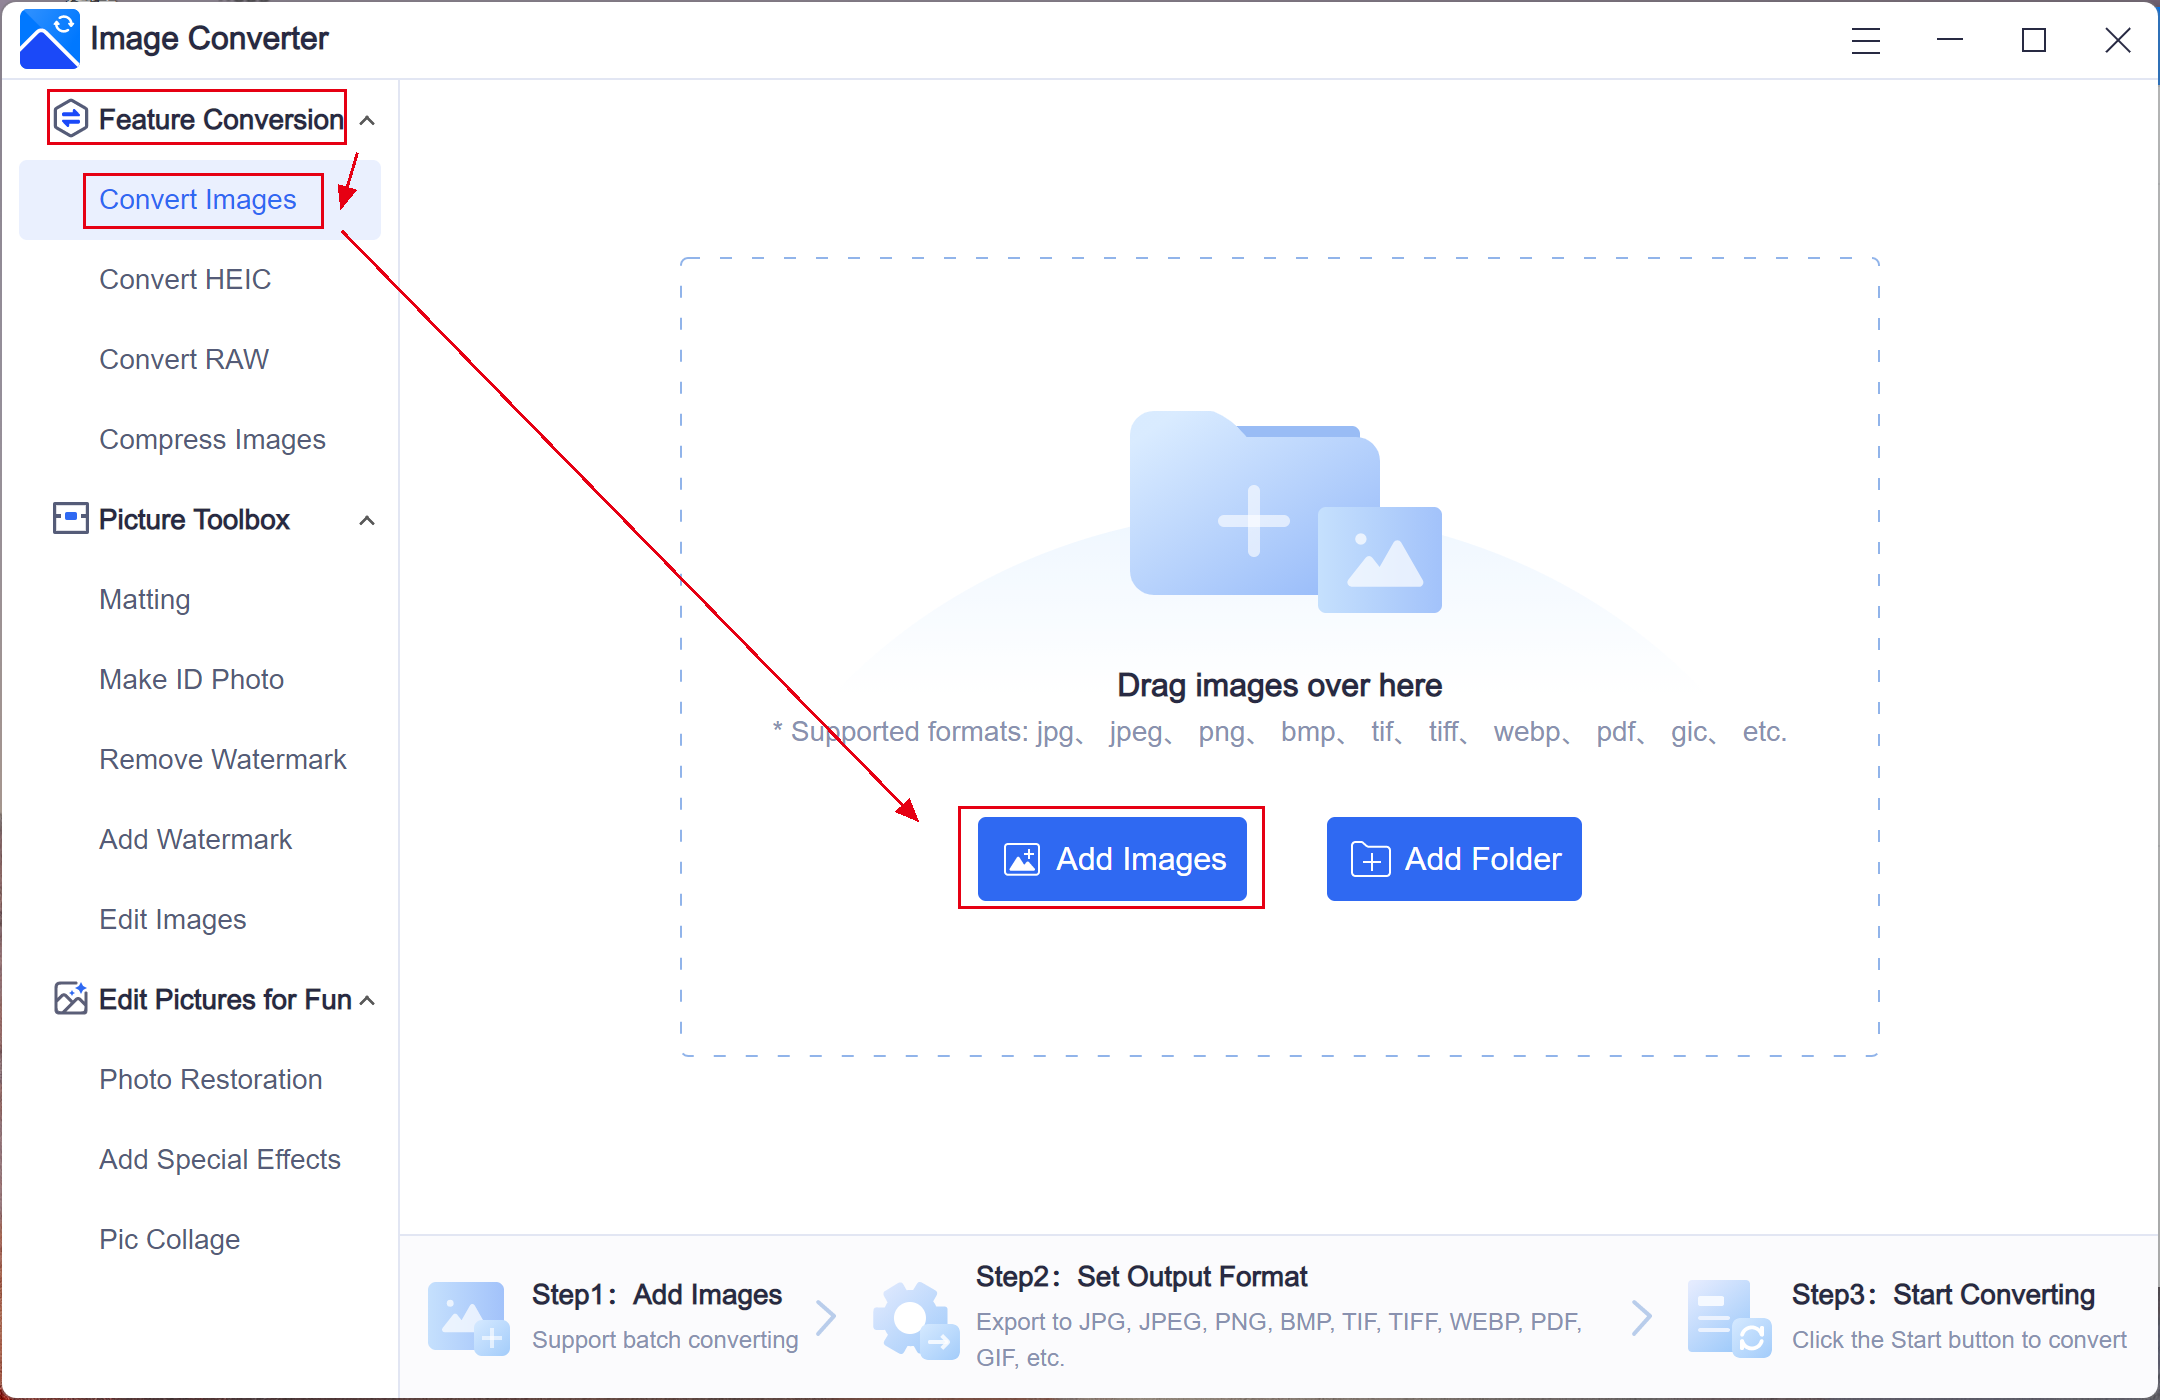
Effortless Online Conversion with Tophinhanhdep.com’s Image Tools
Online converters are arguably the most accessible method for changing image files to JPG. They require no software installation, work across all devices (Android, iPhone, iPad, Windows, Mac, Linux), and often support a wide array of input formats, from PNG and GIF to HEIC and even some RAW files. Tophinhanhdep.com offers a highly user-friendly and efficient online conversion tool.
How to Convert Images Online with Tophinhanhdep.com:
- Choose Your Converter: Navigate to Tophinhanhdep.com’s dedicated “Convert to JPG” section under our Image Tools. Our platform is designed to handle various image types, providing a seamless conversion experience.
- Upload Your Image(s): Click on the “Select Images” or “Choose File” button. You can browse your computer or mobile device to locate the image(s) you wish to convert. Tophinhanhdep.com supports batch processing, allowing you to upload and convert multiple files at once, which is incredibly efficient for managing thematic collections or a series of stock photos. You might also have the option to drag and drop files directly onto the page or even paste a URL if your image is already online.
- Verify Settings: Most online converters, including ours, will automatically default to converting to JPEG. However, Tophinhanhdep.com also provides options to fine-tune your output. You can often adjust the image quality (e.g., standard, maximum, or a custom percentage) and sometimes even resize the image directly on this screen. Choosing “maximum quality” ensures the best visual fidelity, while lower quality settings can further reduce file size, which is useful for web optimization.
- Initiate Conversion: Click the “Convert” or “Save” button to start the process. This may take a few moments, depending on your internet speed and the file size.
- Download Your JPG: Once the conversion is complete, your new JPG image(s) will typically download automatically to your device’s default download location, or you’ll be prompted to choose a saving destination.
Tips for Online Conversion:
- Data Usage: When using a mobile device, connect to Wi-Fi. Image files can be substantial, and conversions might consume significant mobile data.
- File Size Limits: Be aware that some online converters have maximum file size limits. Tophinhanhdep.com strives to offer generous limits to accommodate high-resolution digital photography.
- Privacy: Always review the terms of service or privacy policy of any online tool, although Tophinhanhdep.com prioritizes user privacy and security.
Online conversion tools from Tophinhanhdep.com are ideal for quickly preparing images for social media, updating wallpapers, or optimizing elements for visual design projects, offering convenience and efficiency that fits seamlessly into your workflow for managing image collections and trending styles.
Native Conversion on Windows: Utilizing Microsoft Paint
For Windows users, one of the simplest and most accessible methods to convert images to JPG is through Microsoft Paint, a basic image editor that comes pre-installed on your PC. It’s a straightforward image tool that doesn’t require any downloads or complex steps, perfect for quick edits and conversions of your backgrounds or personal photos.
Steps to Convert an Image to JPG Using Paint:
- Open Paint: Press the Windows key + S to open the search bar, type
paint, and select “Paint” from the search results. - Open Your Image: In Paint, click on the “File” menu in the top-left corner, then select “Open.” Navigate to the location of your image file on your computer, select it, and click “Open.” Paint can handle various formats like PNG, BMP, GIF, and even WEBP, allowing you to convert them.
- Save As JPEG: Click “File” again, then hover over “Save As.” A submenu will appear with various image formats. Select “JPEG picture.”
- Choose Location and Save: A “Save As” dialog box will open. Here, you can choose a folder to save your new JPG file, rename the file if you wish, and confirm that “JPEG” is selected as the “Save as type.”
- Click “Save”: Your image will now be converted and saved as a JPG file in the specified location.
This method is perfect for basic, everyday image conversion, making it easy to prepare images for sharing or for use in simple visual design projects.
Streamlined JPG Export on Mac: Harnessing Preview
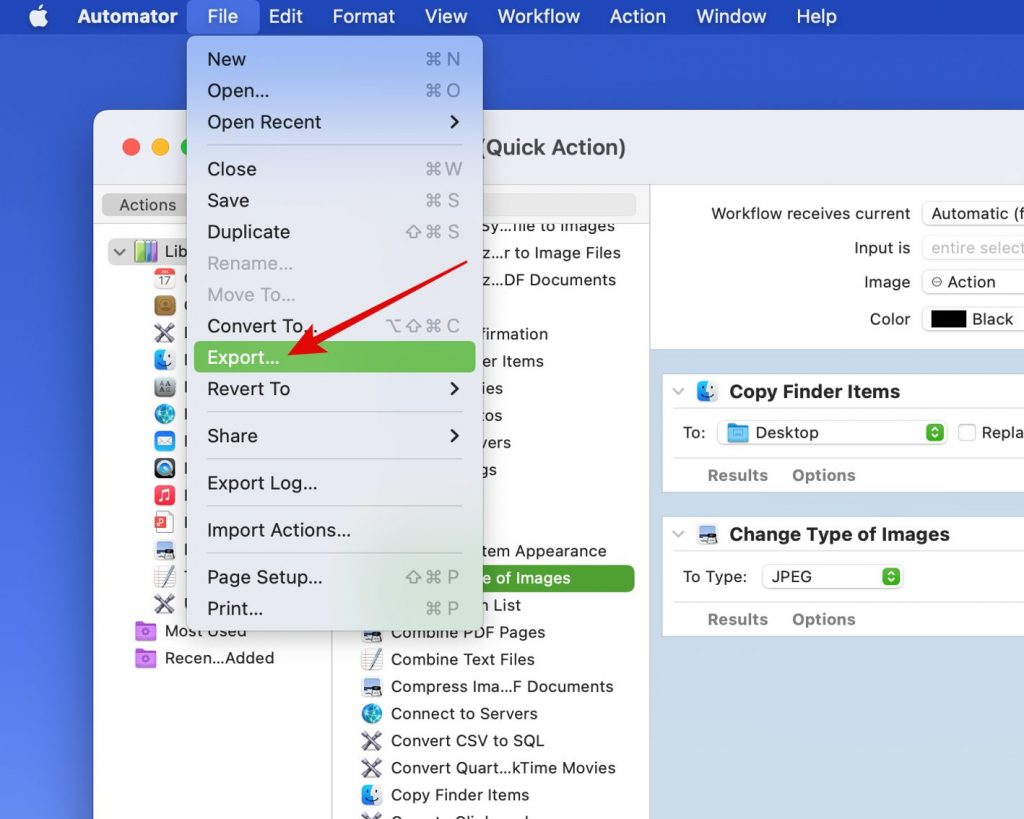
Mac users have an equally convenient built-in image tool for converting files to JPG: Preview. This versatile application, which comes pre-installed on macOS, is primarily an image viewer but also offers robust editing and conversion capabilities, making it ideal for managing digital photography and aesthetic images.
Steps to Convert an Image to JPG Using Preview:
- Open Image with Preview: Locate your image file in Finder. Right-click (or Ctrl-click) the image, select “Open With,” and then choose “Preview.” Preview can open most common image formats, including PNG, TIFF, and HEIC.
- Access Export Options: Once the image is open in Preview, click on the “File” menu in the top menu bar, then select “Export.”
- Select JPEG Format: In the export dialog box, click on the “Format” dropdown menu and choose “JPEG.”
- Adjust Quality and Resolution (Optional): Preview allows you to adjust the “Quality” using a slider. Moving the slider towards “Best” will result in a larger file size but higher quality, while moving it towards “Least” will yield a smaller file size with more compression. You can also change the “Resolution” if needed. This control is useful for optimizing images for specific uses, such as wallpapers or detailed beautiful photography.
- Rename and Save: Enter a new name for your file if desired, ensuring it ends with “.jpg” (case does not matter), and choose a location to save your converted image.
- Click “Save”: Your image will now be converted and saved as a JPG file.
Preview is an excellent tool for Mac users who want to quickly convert images for personal use, professional portfolios of high-resolution photos, or for incorporating into creative ideas on their desktop.
Advanced Techniques and Considerations for Professional-Grade Conversions
While built-in tools offer convenience, advanced users, especially those involved in digital photography, graphic design, or photo manipulation, often require more control over the conversion process. This is where professional-grade software and a deeper understanding of file management come into play.
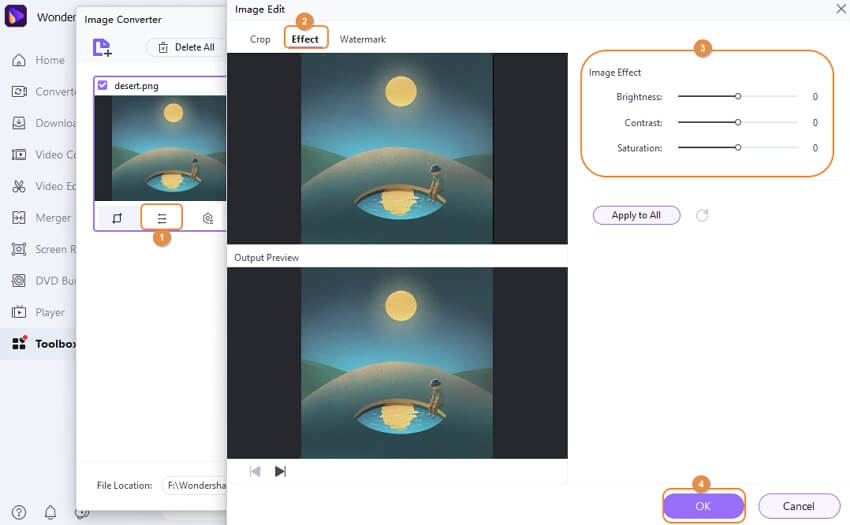
Leveraging Powerful Editing Software: Tophinhanhdep.com’s Recommended Alternatives
For intricate visual design projects or when dealing with high-resolution stock photos or RAW files, dedicated image editing software provides unparalleled flexibility. While Tophinhanhdep.com offers powerful online image tools, for offline desktop use, we often recommend software like GIMP, and professional suites like those available from leading photo editing brands, due to their comprehensive features.
Using GIMP (GNU Image Manipulation Program): GIMP is a free, open-source image editor available for Windows, Mac, and Linux. It’s a robust alternative to commercial software and excels in handling various image formats and providing detailed control over exports.
- Open Image in GIMP: Launch GIMP, then go to “File” > “Open.” Navigate to your image, select it, and click “Open.”
- Export As JPEG: Click “File” > “Export As.” In the “Export Image” dialog box, select “JPEG image” from the “Select File Type (By Extension)” list, or simply ensure the file name ends with
.jpg. - Adjust JPEG Options: A “Export Image as JPEG” dialog will appear. Here, you can adjust the “Quality” slider (typically from 0-100). Crucially, GIMP allows you to enable “Show preview in image window” to see the effect of compression in real-time. You can also control advanced settings like “Subsampling” (which affects color information) for specific editing styles.
- Click “Export”: Choose your saving location and file name, then click “Export” to complete the conversion.
Using Professional Photo Editing Suites: Leading photo editing software provides the most comprehensive control, especially for digital photography captured in RAW format. These tools allow photographers to process RAW files into high-quality JPGs with precise control over color, exposure, and sharpening, maintaining the integrity of beautiful photography.
- Open RAW or Other Image: Open your image file (e.g., a
.CR2,.NEF, or.ARWRAW file, or a high-quality TIFF/PNG) in the photo editing software. - Make Adjustments: Perform any necessary edits, such as color correction, cropping, or sharpening, to achieve your desired aesthetic or editing styles.
- Export/Save As JPEG: Go to “File” > “Export” or “File” > “Save As.”
- Select JPEG and Quality: Choose JPEG as the output format. You’ll typically be presented with a quality slider (e.g., 0-100 or 1-12) and options for color space (sRGB for web, Adobe RGB for print). Select a high quality for high-resolution images or photo manipulation.
- Specify Output Settings: Define the file name, saving location, and potentially resize the image if needed for web display or mood boards.
- Export: Click the export/save button.
These advanced methods are crucial for professionals who require precise control over their images and photography, ensuring that every detail, whether in a nature shot or an abstract composition, is perfectly preserved during conversion.
Understanding File Extensions: Renaming vs. True Conversion
It’s vital to distinguish between genuinely converting an image file and merely changing its file extension. While some methods allow you to rename a file’s extension, this is not a true conversion and can often lead to unusable or corrupted files if the underlying data structure doesn’t match the new extension.
- True Conversion: Involves re-encoding the image data from one format (e.g., PNG’s lossless compression) to another (e.g., JPG’s lossy compression). This process fundamentally alters the file’s internal structure to conform to the new format’s specifications. This is what Tophinhanhdep.com’s converters and image editors do.
- Changing the File Extension: This is simply renaming the file, like changing
image.pngtoimage.jpg. Ifimage.pngwas never actually a JPG file, changing its extension won’t magically make it one. The computer will still try to interpret it as a PNG, or worse, fail to open it entirely because the extension doesn’t match the internal data.
When Renaming is Acceptable:
This method is only useful in very specific scenarios, primarily if you have an existing JPEG file that has been accidentally mislabeled with the wrong extension (e.g., image.jgp instead of image.jpg, or image.jpeg needs to be image.jpg for a particular system). Since .jpeg and .jpg are functionally the same, renaming image.jpeg to image.jpg is usually safe.
Steps to Change a File Extension (with caution): Before attempting this, always make a backup of your original file.
- Windows:
- Open File Explorer and navigate to your file.
- If you don’t see file extensions (like
.pngor.gif), go to the “View” tab in File Explorer and check the box for “File name extensions.” - Right-click the file and select “Rename.”
- Carefully delete the current extension (e.g.,
.png) and type.jpg. - Press Enter. A warning will appear about changing the file type; click “Yes” if you are certain the original file was indeed a JPG.
- Mac:
- Locate your file in Finder.
- If extensions are hidden, go to Finder > Preferences > Advanced and tick “Show all filename extensions.”
- Click once on the file, then press
Return(Enter). - Carefully delete the current extension and type
.jpg. - Press
Return. A warning will appear; click “Use .jpg” if you are confident.
For any actual conversion from one image format to JPG, always use a dedicated image tool like Tophinhanhdep.com’s online converter or a software program. This ensures the file’s integrity and proper functionality.
On-the-Go Conversion: Smartphone Apps for Mobile Photography
With smartphones becoming primary tools for capturing digital photography, especially nature and aesthetic shots, the need for on-device image conversion has grown. Many mobile apps are available for both Android and iOS that allow you to convert images to JPG without transferring them to a computer.
How to Convert Images Using a Smartphone App:
- Download an App: Search the App Store (iOS) or Google Play Store (Android) for “image converter” or “photo to JPG.” Many free and paid options exist, such as “The Image Converter” or “Image Converter.”
- Select Your Image: Open the app and grant it permission to access your photo library. Select the image (or multiple images, as many apps support batch processing) you wish to convert. This is perfect for converting HEIC photos taken on an iPhone to JPG.
- Choose Output Format: Select “JPEG” or “JPG” as the desired output format. Some apps might offer options to adjust quality or resolution.
- Convert and Save: Tap the “Convert” or “Save” button. The app will process the image and then prompt you to save the new JPG file back to your device’s photo gallery or a specific folder.
These apps are excellent image tools for quickly preparing mobile backgrounds, sharing aesthetic images on social media, or compiling mood boards directly from your phone.
Beyond Conversion: Enhancing Your JPGs with Tophinhanhdep.com’s Optimization Tools
Converting an image to JPG is often just the first step in preparing it for optimal digital use. To truly make your images shine and perform efficiently, especially for high-resolution displays or bandwidth-sensitive platforms, further optimization is key. Tophinhanhdep.com is not just a converter; it’s a comprehensive hub for image tools that empower you to elevate your digital photography and visual design.
Compressing and Resizing for Peak Performance
Even after converting to JPG, an image might still be larger than necessary for its intended purpose. This is where Tophinhanhdep.com’s compressors and resizing tools become invaluable.
- Image Compression: While JPG itself is a compressed format, Tophinhanhdep.com’s specialized compressors can further reduce file sizes without noticeable degradation. By intelligently removing redundant data or slightly lowering quality (often imperceptibly), these tools ensure your images load faster on websites, consume less storage, and are quicker to share. This is crucial for web performance, especially for websites rich in beautiful photography or extensive image collections. Our tools allow you to choose different compression levels (e.g., high, medium, low, or custom) to achieve the perfect balance for your needs.
- Image Resizing: Often, an image might have a much higher resolution than required for its display area (e.g., a 4000px wide photo displayed in a 800px wide blog post). Tophinhanhdep.com’s resizing functionality allows you to easily adjust the pixel dimensions of your JPGs. You can input exact width/height, scale by percentage, or choose predefined dimensions suitable for common uses like wallpapers, social media banners, or backgrounds. Resizing a large image to its display size significantly reduces its file size, improving loading times without affecting visual quality in its intended context. This is a fundamental step in optimizing stock photos and all forms of digital photography for web use.
By combining JPG conversion with Tophinhanhdep.com’s compression and resizing image tools, you can achieve truly optimized images that offer excellent visual quality and fast performance across all digital platforms, perfect for showcasing aesthetic or nature photography.
Elevating Image Quality with AI Upscaling
Sometimes, you might find yourself with a JPG image that is too small or low-resolution for your needs. Perhaps it’s an older photo, a small web graphic, or an image intended for a larger print or display where resolution matters. Traditional resizing often results in pixelation and blurry visuals. However, Tophinhanhdep.com’s AI Upscalers offer a revolutionary solution.
- AI Upscaling Technology: Our AI Upscalers leverage advanced artificial intelligence algorithms to intelligently increase the resolution of your JPG images. Unlike traditional resizing, which merely stretches pixels, AI upscaling analyzes the image content and “invents” new pixels, adding detail and sharpness. This can effectively transform a low-resolution image into a high-resolution masterpiece.
- Applications: This image tool is particularly beneficial for:
- Enlarging small stock photos for larger visual design projects.
- Reviving older, low-res beautiful photography for modern displays or prints.
- Enhancing elements for graphic design or digital art when only smaller source images are available.
- Creating stunning wallpapers or backgrounds from images that were originally too small.
By utilizing Tophinhanhdep.com’s AI Upscalers, you can overcome the limitations of original image resolution, unlocking new possibilities for your image inspiration & collections and ensuring your visuals always make a striking impact.
Conclusion: Seamlessly Integrating JPGs into Your Creative Workflow
In the dynamic world of digital content, the ability to efficiently convert images to JPG is more than just a technical skill—it’s a gateway to broader visibility, faster performance, and enhanced creative freedom. From the casual photographer sharing aesthetic snapshots to the seasoned professional managing high-resolution digital photography for graphic design, understanding the various methods of JPG conversion is essential.
We’ve explored a range of approaches, from the simplicity of online image tools like those found on Tophinhanhdep.com to the built-in functionalities of Windows Paint and Mac Preview, and the advanced capabilities of professional editing software. We’ve also highlighted the critical distinction between true conversion and mere file extension renaming, emphasizing the importance of proper techniques to preserve your image integrity.
Beyond basic conversion, Tophinhanhdep.com offers a comprehensive suite of image tools—including compressors, optimizers, and AI upscalers—that empower you to further refine your JPGs. These tools are designed to ensure your wallpapers, backgrounds, stock photos, and beautiful photography are not only universally compatible but also perfectly optimized for speed, clarity, and visual impact. Whether you’re curating mood boards, developing thematic collections, or experimenting with creative ideas and editing styles, our platform supports every step of your visual journey.
Embrace the versatility of the JPG format and leverage the powerful image tools available at Tophinhanhdep.com. By mastering these techniques, you’ll ensure that your images and photography consistently achieve their full potential, captivating your audience and enhancing every digital experience. Explore Tophinhanhdep.com today to transform your digital assets and elevate your creative workflow.