How to Change Image Size

In our increasingly visual world, mastering the art of image resizing is no longer a niche skill but a fundamental necessity for anyone engaging with digital content. Whether you’re a professional photographer curating a high-resolution portfolio, a graphic designer crafting compelling visuals, a blogger optimizing images for web speed, or simply someone looking to fit a favorite wallpaper onto a new device, the ability to accurately and efficiently change image dimensions is paramount. At Tophinhanhdep.com, we understand the diverse needs of our users, from exploring stunning wallpapers and aesthetic backgrounds to delving into digital photography, visual design, and leveraging powerful image tools. This comprehensive guide will walk you through everything you need to know about resizing images, ensuring your visual content always looks its best, performs optimally, and meets every requirement.

Why Image Resizing is Essential for Your Visual Content
The digital landscape is a demanding one, with different platforms and purposes requiring specific image dimensions and file sizes. Failing to resize images appropriately can lead to a host of problems: slow loading times on websites, pixelated or distorted visuals, missed opportunities for professional submissions, or simply an unappealing aesthetic. For Tophinhanhdep.com users, whose interests span High Resolution photography, beautiful wallpapers, and intricate digital art, understanding the “why” behind resizing is as crucial as knowing the “how.”
Optimizing for Web and Social Media
When images are too large in file size, they can significantly slow down website loading times, frustrating visitors and negatively impacting search engine rankings. For social media, platforms often have strict guidelines for image dimensions to ensure optimal display across various devices and feeds. An improperly sized image might be cropped awkwardly, compressed poorly, or simply appear unprofessional.
Consider the vibrant “Nature” or “Abstract” wallpapers you might find on Tophinhanhdep.com. While perfect for a high-resolution display, they need careful resizing and compression before being shared on Instagram, Facebook, or a personal blog. Tophinhanhdep.com’s Image Tools such as Compressors and Optimizers are specifically designed to address these needs, allowing you to maintain visual quality while drastically reducing file size for faster web performance. Our Visual Design section often emphasizes the importance of optimized images for online portfolios and digital marketing.

Preparing for Print
The requirements for print are entirely different from those for the web. Printing an image too small in resolution will result in a pixelated, blurry output, no matter how sharp it looked on screen. Whether you’re turning a “Beautiful Photography” shot into a framed print, creating a custom t-shirt design, or preparing an artwork submission for a competition (like the specific requirements seen in art portfolio platforms), precise control over print dimensions and resolution (DPI/PPI) is non-negotiable. Our Photography section, which focuses on high-resolution images, is deeply intertwined with the need for proper print resizing to achieve gallery-quality results.
Meeting Specific Platform and Portfolio Requirements
Many online platforms, especially those for professional artists and photographers, have exact specifications for image submissions. These can include minimum pixel dimensions on the longest side, specific resolutions (e.g., 72 ppi for web portfolios), and maximum file sizes. Ignoring these rules can lead to rejected submissions or poor presentation of your work. Tophinhanhdep.com’s focus on “Image Inspiration & Collections” helps users understand trending styles and the technical demands of showcasing their visual work effectively. Proper resizing ensures your “Digital Art” or “Stock Photos” are presented perfectly, whether for client review or public display.
Core Concepts of Image Resizing
Before diving into the practical steps, it’s essential to grasp the fundamental concepts that govern image size manipulation. Understanding these terms will empower you to make informed decisions and achieve the desired outcome without sacrificing the quality of your cherished “Wallpapers” or “Beautiful Photography.”
Understanding Pixels, Dimensions, and Aspect Ratio
At its most basic, a digital image is composed of a grid of tiny squares called pixels. The dimensions of an image refer to its width and height, typically measured in pixels (e.g., 1920 pixels wide by 1080 pixels high).
The aspect ratio is the proportional relationship between an image’s width and its height. It’s usually expressed as two numbers separated by a colon, like 16:9 (widescreen), 4:3 (traditional), or 1:1 (square). When resizing, maintaining the aspect ratio is crucial to prevent your image from looking stretched or squashed. If you change one dimension (e.g., width) without proportionally adjusting the other (height), your image will be distorted. Most resizing tools offer an option to “maintain aspect ratio” or “constrain proportions” to safeguard against this. This is particularly important when working with “Aesthetic” or “Sad/Emotional” images where composition is key.
Resizing vs. Resampling: Preserving Image Quality
These two terms are often used interchangeably but have distinct meanings with significant implications for image quality:
-
Resizing (without resampling): This process changes the physical print size of an image and its resolution (PPI/DPI) but does not change the actual number of pixels in the image. When you resize without resampling, you’re essentially telling the printer to pack the existing pixels more densely (for a smaller print) or spread them out more sparsely (for a larger print). This is ideal for adjusting print dimensions while maintaining pixel integrity.
-
Resampling: This process changes the number of pixels in an image.
- Downsampling (reducing pixels): When you make an image smaller in pixel dimensions, the software discards pixels. This generally results in a smaller file size and a sharper appearance for web use, as long as it’s done correctly.
- Upsampling (adding pixels): When you make an image larger in pixel dimensions, the software has to create new pixels based on the surrounding ones. This is a more challenging process and can lead to a loss of clarity and sharpness, often resulting in a “blurry” or “pixelated” look, especially if overdone. This is where advanced Image Tools like AI Upscalers (available on Tophinhanhdep.com) become invaluable, as they use intelligent algorithms to generate new pixels more effectively, preserving or even enhancing detail.
Understanding this distinction is key to preserving the high-resolution quality of your “Digital Photography” or “Abstract” art pieces.
Image Resolution (PPI/DPI) for Web and Print
Resolution refers to the detail an image holds. For digital images, it’s typically measured in PPI (Pixels Per Inch), indicating how many pixels are packed into one linear inch of the image. For printed images, DPI (Dots Per Inch) refers to the number of ink dots a printer can place per inch on paper. While technically different, PPI and DPI are often used interchangeably in general discussions about image resolution.
-
Web Resolution (72 ppi): For images displayed on screens (websites, social media, digital portfolios), 72 ppi has long been the standard. While modern displays have much higher pixel densities, 72 ppi is still generally accepted for web-bound images because more pixels per inch don’t necessarily translate to a visually sharper image on a screen that has its own fixed pixel density. More importantly, keeping the PPI lower for web images minimizes file size, ensuring faster loading times – a critical factor for any “Visual Design” project or “Photo Ideas” blog post on Tophinhanhdep.com.
-
Print Resolution (300 ppi or higher): For high-quality prints, a much higher resolution is required. The industry standard is typically 300 ppi. This density ensures that individual pixels are small enough that they are not visible to the naked eye when printed, resulting in crisp, detailed output for your “Beautiful Photography” or “Nature” prints. Some professional printers, especially Epson, may have a native resolution of 360 ppi, which is even more ideal for their specific technologies.
It’s important to remember that if you send a printer an image with a lower resolution than its native resolution (e.g., 240 ppi to a 300 ppi printer), the printer will attempt to “upsample” it automatically. However, dedicated image editing software, or Tophinhanhdep.com’s advanced Image Tools, can typically do a much better job of upsampling, providing superior results compared to the printer’s on-the-fly processing.
Step-by-Step Guides: Resizing Images on Your Operating System
Most modern operating systems come equipped with native tools that allow for basic image resizing, perfect for quick adjustments without the need for specialized software. These are accessible and user-friendly, catering to the immediate needs of most Tophinhanhdep.com users.
Windows 11: Using the Native Photos App (and Paint)
For Windows 11 PCs, the built-in Photos app is a convenient tool for resizing images. It’s straightforward and effective for most common needs.
Using the Photos App:
- Open the Image: Locate your image file, right-click on it, select Open with, and then choose Photos.
- Access Resizing Options: Once the image is open in the Photos app, click on the Three dots icon (represented as
...) located in the app’s top-right corner. - Select Resize: From the drop-down menu that appears, select Resize.
- Choose Dimensions: A pop-up window will present several options:
- You can select one of the three preset sizes (e.g., for email, best for viewing).
- Alternatively, choose Define custom dimensions for specific control. A new pop-up will appear.
- Set Custom Dimensions: In the custom dimensions window:
- To maintain the image’s proportions, ensure the box next to Maintain aspect ratio is checked. As you enter a number into either the width or height box, the other box will automatically adjust proportionally.
- If the aspect ratio doesn’t matter (though this can cause distortion), uncheck the box and enter your desired numbers for both width and height.
- Save Your Image: Click the purple Save resized copy button. This creates a new file, leaving your original image untouched – a best practice for any image manipulation, especially for your valuable “Stock Photos” or “Digital Photography.”
Using Paint (for simpler needs):
Windows’ classic Paint program also offers basic resizing. Open the image in Paint, click “Resize” in the Home tab, then choose to resize by pixels or percentage, and select “Maintain aspect ratio.” While less feature-rich than Photos, it’s a quick solution for very simple adjustments. Paint.NET, a more robust, free alternative, can also be downloaded for advanced features.
macOS: Harnessing the Power of Preview
Mac users have an excellent, pre-installed utility for image editing and resizing: Preview. It’s powerful, quick, and integrates seamlessly with the macOS environment.
- Open the Image: Right-click on your image. If Preview is your default viewer, simply select Open. Otherwise, choose Open with, then select Preview.
- Access Adjust Size: From the menu bar at the top of your screen, click Tools, then select Adjust Size from the drop-down menu.
- Enter Dimensions and Resolution: A window will appear where you can enter the desired width and height.
- You might need to switch the unit of measurement (e.g., from inches to pixels) using the drop-down menus next to the width and height fields.
- For quick adjustments, you can also select a preset size by clicking the arrows next to Fit into.
- Crucially, ensure Scale proportionally and Resample image are checked to maintain proportions and control pixel density, especially when preparing “Wallpapers” or “Backgrounds.”
- Confirm New Size: Click the blue OK button to apply the changes.
- Save the Image: To save your resized image, go to File on the menu bar and select Save. If you want to keep the original, choose “Save As” and rename the file.
ChromeOS: Quick Resizing with the Gallery App
Chromebook users can easily resize images using the native Gallery image viewer app, making it simple to manage images for school, work, or personal projects like creating “Mood Boards.”
- Open with Gallery: Right-click on your image. Select Open with Gallery from the pop-up menu. If it’s not the default, select Open with, then Gallery.
- Locate Rescale Button: In the Gallery app, look for the Rescale button at the top of the interface. Click it.
- Enter Dimensions: Input your desired width and height.
- To unlock the aspect ratio and change width and height independently (be cautious of distortion), click the Chain icon. Otherwise, the aspect ratio will be maintained.
- Save Your Work: Click the blue Save button to overwrite the original, or click the blue Down arrow next to it and choose Save as if you prefer to save a new copy and preserve the original. This is particularly useful for iterative “Creative Ideas” where you might experiment with different sizes.
Advanced Resizing and Optimization with Tophinhanhdep.com’s Tools
While native operating system tools are excellent for basic resizing, more complex needs—such as achieving professional-grade print quality, precisely cropping for specific aspect ratios, batch processing, or intelligently enlarging images without quality loss—demand more sophisticated solutions. This is where Tophinhanhdep.com’s comprehensive suite of Image Tools and features, inspired by industry best practices and powerful software, truly shines.
Professional Control with Software like Adobe Photoshop
For professionals in “Digital Photography,” “Graphic Design,” and “Photo Manipulation,” software like Adobe Photoshop offers unparalleled control over image resizing. Tophinhanhdep.com provides insights and resources on advanced techniques akin to those found in Photoshop, ensuring users can achieve the highest quality results.
Resizing an Image in Photoshop (or similar advanced software):
- Open Image and Access Image Size: Open your image. Go to Image (in the top menu bar) and select Image Size.
- Enlarge the Preview (Optional): Drag the dialog box’s corner to expand it for a larger preview window, then drag within the preview to center your subject. This aids in visual assessment, especially for “High Resolution” images.
- Understand Current Size: The top of the dialog box shows the image size in megabytes and pixel dimensions.
- Resizing for Print (Without Resampling):
- Turn Resample Off: Crucially, start by turning the “Resample” option off. This means you’re not changing the pixel count.
- Set Print Dimensions: In the Width and Height fields, enter your desired print size (e.g., 8 inches by 10 inches).
- Check Resolution: Observe the Resolution value. If it’s 300 ppi (or 360 ppi for Epson printers) or higher, you’re good. If lower, you’ll need to upsample.
- Upsampling (Adding Pixels for Enlargement):
- Turn Resample On: If your print resolution drops below the desired 300/360 ppi, turn the “Resample” option on.
- Set Target Resolution: Enter your target resolution (e.g., 300 pixels/inch) into the Resolution field. This will increase the pixel dimensions and file size.
- Choose Interpolation Method: The “Interpolation” method determines how new pixels are added.
- Automatic is generally a safe default.
- For the best results when upsampling, advanced users might select methods like Preserve Details 2.0 (if available in their software version), which uses AI-driven algorithms to intelligently add pixels and enhance details, minimizing quality loss – a feature akin to Tophinhanhdep.com’s own AI Upscalers.
- Maintain Proportions: Ensure the “Constrain Proportions” or “chain link” icon is active between width and height if you want to maintain the aspect ratio.
- Save Safely: Always use File > Save As to create a new file, safeguarding your original image.
Cropping to Change Aspect Ratio (Pre-Resizing):
What if your image has a 4x6 aspect ratio but you need an 8x10 print? You can’t just type in 8x10 directly if the aspect ratio is locked; you’ll get distortion or incorrect dimensions. The solution is to crop the image to the new aspect ratio first, before resizing for print.
- Cancel Image Size: Close the Image Size dialog box without making changes.
- Select Crop Tool: Find the Crop Tool (often in the toolbar).
- Set New Aspect Ratio: In the Options Bar (usually at the top), enter your desired aspect ratio (e.g., “8” and “10” for an 8x10, without specifying inches). The crop border will reshape.
- Adjust Crop Area: Drag the corners of the crop border to select the area you want to keep.
- Crop the Image: Confirm the crop (usually by clicking a checkmark or pressing Enter). Ensure “Delete Cropped Pixels” is off if you want to retain the ability to revert the crop later.
- Resize After Cropping: Now, with the new aspect ratio applied, go back to the Image Size dialog box and follow the steps for resizing/upsampling outlined above to get your precise 8x10 print. This meticulous approach is vital for “Visual Design” projects.
Online and AI-Powered Solutions from Tophinhanhdep.com
For users who need powerful resizing capabilities without the steep learning curve or expense of professional software, Tophinhanhdep.com offers a suite of intuitive, web-based Image Tools. These tools are designed for accessibility and efficiency, perfect for optimizing “Images” for various uses, from social media “Backgrounds” to “Trending Styles” in visual content.
Simple & Fast Resizing
Tophinhanhdep.com provides a free, online image resizer that mirrors the ease of tools like Simple Image Resizer. It does one thing exceptionally well: resizing.
- Access the Tool: Head to the Tophinhanhdep.com Image Resizer page.
- Upload Your Image: Click the “Open image” or “Upload Your Photo Now!” button and select the image you wish to edit.
- Specify Dimensions: Find the “Smart resize” or “Layout menu” option. Here, you can enter your desired width and height measurements.
- Lock Proportions: Use the “Lock proportions” toggle (or a chain icon) to maintain the aspect ratio and prevent distortion.
- Utilize Presets: Many online tools, including ours, offer a variety of size presets for common platforms (e.g., Facebook cover photo, YouTube thumbnail, standard print sizes).
- Apply and Save: Click “Apply” to preview changes, then select the “Save” button. You can often choose your preferred file type (JPEG, PNG, GIF, BMP) and adjust quality settings before downloading the resized image to your Downloads folder. (Note: Some free services might have daily save limits, but Tophinhanhdep.com aims to provide ample access.)
Batch Processing for Efficiency
If you have multiple “Stock Photos” or a “Thematic Collection” of images that need the same resizing treatment, individually editing them can be incredibly time-consuming. Tophinhanhdep.com offers batch resizing features, similar to Pic Resize, to streamline your workflow.
- Upload Multiple Images: On our batch resizer tool, upload several images at once.
- Set Universal Preferences: Define your desired size preference (e.g., specific pixel dimensions or a percentage reduction) that will apply to all uploaded images.
- Process and Download: Click “Submit Batch Job!” or a similar button. The tool will process all images, and you can then download them, often as a single ZIP archive.
- Note: Batch resize modes typically focus solely on dimension changes. For individual cropping or special effects, you may need to use our “Normal Mode” or single-image editor.
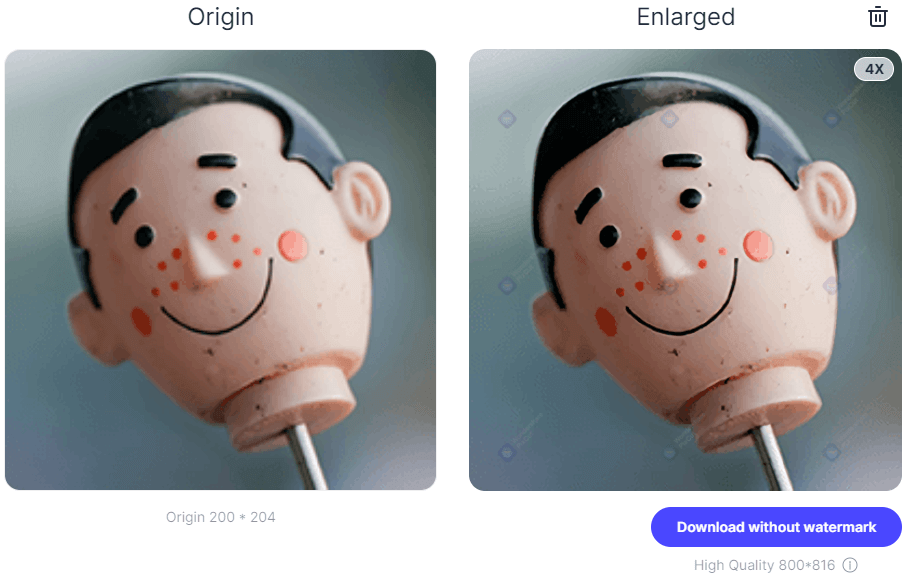
AI Upscaling for Superior Enlargement
One of the biggest challenges in image resizing is enlarging an image without significant quality degradation. Traditional upsampling often leads to pixelation and blurriness. Tophinhanhdep.com’s AI Upscalers leverage advanced artificial intelligence to overcome this limitation.
- How it Works: Instead of simply interpolating existing pixels, our AI Upscaler analyzes the image content and intelligently generates new pixels, adding detail and enhancing clarity as it enlarges the image. This is a game-changer for breathing new life into lower-resolution “Sad/Emotional” images or old “Beautiful Photography” shots, making them suitable for larger prints or higher-resolution displays.
- When to Use: If you need to significantly enlarge an image (e.g., double its dimensions) and maintain or improve its quality, especially for “High Resolution” demands, an AI Upscaler is the tool of choice. It stands in contrast to the basic “Resize” tool, which is best suited for reducing image resolution or minor enlargements where slight quality loss is acceptable. Tophinhanhdep.com’s AI Upscaler helps transform your small “Photo Ideas” into large-scale “Creative Ideas” without compromise.
Tophinhanhdep.com: Your Ultimate Hub for Image Management and Visual Design
At Tophinhanhdep.com, we are committed to being your go-to resource for all things visual. Beyond just resizing, our platform supports your journey through the vast world of images, photography, and design.
Best Practices for Image Resizing:
- Always Work on Copies: Before making any permanent changes, always save your original image and work on a duplicate. This ensures you can revert to the pristine source file if needed. Tophinhanhdep.com’s tools often offer “Save As” options for this reason.
- Know Your Target: Understand the specific requirements (dimensions, aspect ratio, file size, resolution) of where your image will be used – whether it’s a social media platform, a website, or a print shop. Our “Visual Design” and “Image Inspiration” sections offer guidance on these specifications.
- Prioritize Aspect Ratio: Unless a specific artistic effect is desired, always maintain the aspect ratio to prevent distortion. Crop before resizing if a different ratio is needed.
- Resolution Matters (Contextually): Use 72 ppi for web and 300/360 ppi for print to ensure optimal display and print quality.
- Leverage AI for Enlargement: When enlarging images, especially significantly, choose Tophinhanhdep.com’s AI Upscalers for superior results that minimize quality loss.
- Compress and Optimize: After resizing for web, use Tophinhanhdep.com’s Compressors and Optimizers to further reduce file size without visible quality degradation, ensuring fast loading times for your “Aesthetic” galleries or “Digital Photography” portfolios.
- Explore and Learn: Tophinhanhdep.com offers a wealth of “Photo Ideas,” “Mood Boards,” and “Thematic Collections” that demonstrate effective image use and optimization.
From breathtaking “Wallpapers” and “Backgrounds” to professional “Stock Photos” and intricate “Digital Art,” Tophinhanhdep.com provides the tools and knowledge you need to master image resizing. Whether you’re making simple adjustments with native OS tools or diving into advanced pixel manipulation with our online editors and AI-powered solutions, we ensure your visual content always makes the perfect impression. Start optimizing your images today and unlock their full potential with Tophinhanhdep.com!