Mastering Image Resizing in Photoshop: A Comprehensive Guide for Digital Artists and Photographers

In the dynamic world of digital imagery, where visuals dominate everything from social media feeds to professional portfolios, the ability to manipulate image size with precision is a fundamental skill. Adobe Photoshop stands as the industry standard for such tasks, offering unparalleled control over every pixel. Whether you’re preparing a stunning high-resolution wallpaper, optimizing a background for a website, or fine-tuning a beautiful photograph for print, understanding how to effectively resize images in Photoshop is crucial. This guide, brought to you by Tophinhanhdep.com, delves into the intricacies of Photoshop’s resizing capabilities, ensuring your visual content always meets the highest standards for quality, clarity, and purpose. We’ll explore the core concepts, step-by-step processes for different scenarios, and even touch upon how Tophinhanhdep.com’s complementary image tools can further enhance your workflow, transforming your raw captures and digital art into perfectly tailored visual assets. From optimizing abstract designs to ensuring every detail of nature photography shines, mastering image resizing is your gateway to limitless creative possibilities and flawless presentation.
Understanding the Fundamentals of Image Size and Resolution
Before diving into the practical steps of resizing, it’s essential to grasp the underlying concepts of image size and resolution. These two factors dictate not only how large your image appears but also its quality and clarity, especially when viewed on different screens or printed on paper. For enthusiasts and professionals seeking high-resolution photography, stunning wallpapers, or intricate digital art, this foundational knowledge is indispensable.
At its core, a digital image is composed of a grid of tiny squares called pixels. The “dimensions” of an image refer to the total number of pixels along its width and height (e.g., 1920 pixels wide x 1080 pixels high). This pixel count directly influences the “Image Size” displayed in Photoshop, which is often measured in megabytes (MB) and represents the file’s storage footprint. A higher pixel count generally means a larger file size and potentially more detail, which is critical for maintaining quality in high-resolution images found on Tophinhanhdep.com.

However, simply having many pixels isn’t enough. “Resolution” comes into play, primarily for print applications. Resolution is measured in pixels per inch (PPI) or dots per inch (DPI) and defines how many of those pixels are packed into a single linear inch of physical space when printed. The more pixels per inch, the sharper and more detailed the print will appear. For instance, a print intended for a canvas might require a different resolution than a small photograph for a magazine.
The distinction between “resizing” and “resampling” is pivotal here. “Resizing” an image without “resampling” means you’re simply changing the print size by adjusting the resolution, without altering the actual number of pixels. This is ideal when you want to make an image print larger or smaller while retaining its original pixel data. For example, if you have a high-resolution photograph and want to print it at a smaller size, you can increase its PPI without adding or removing pixels, making the existing pixels denser.
“Resampling,” on the other hand, involves changing the actual number of pixels in an image. “Upsampling” means adding new pixels, which Photoshop generates through interpolation, effectively “enlarging” the image beyond its original pixel dimensions. This can be necessary if you need to print an image at a size much larger than its original resolution allows. Conversely, “downsampling” means removing pixels, which is common when preparing images for the web or email to reduce file size and loading times. While downsampling generally preserves quality well, upsampling can lead to a loss of sharpness or detail if not done carefully, making the choice of interpolation method (which we will discuss) crucial.
Understanding these concepts empowers you to make informed decisions when adjusting your images, ensuring that your beautiful photography, aesthetic backgrounds, or meticulously crafted digital art always look their best, whether they are destined for a vast display, a crisp print, or efficient online sharing.
Step-by-Step Guide: Resizing Images in Photoshop
Adobe Photoshop offers a powerful and flexible environment for resizing images, whether for simple adjustments or complex print preparations. This section, presented by Tophinhanhdep.com, will guide you through the various methods and considerations, from basic adjustments to handling print-specific requirements and manipulating elements within your design.
Basic Image Resizing for General Use
For everyday resizing needs, such as preparing images for social media, presentations, or general screen viewing, Photoshop provides a straightforward process. This method focuses on changing the image’s pixel dimensions without necessarily delving into print resolution complexities.
-
Open Your Image in Photoshop:
- Launch Adobe Photoshop.
- Go to
File > Openand navigate to the image you wish to resize, then clickOpen. Alternatively, you can right-click the image file on your computer, selectOpen with, and chooseAdobe Photoshop.
-
Create a Backup (Recommended):
- Before making any irreversible changes, it’s a good practice to save a duplicate of your original file. Go to
File > Save As. - Give your new file a distinct name (e.g.,
original-filename_resized.jpg) to avoid overwriting your original. This ensures you always have the pristine version of your aesthetic or nature photography.
- Before making any irreversible changes, it’s a good practice to save a duplicate of your original file. Go to
-
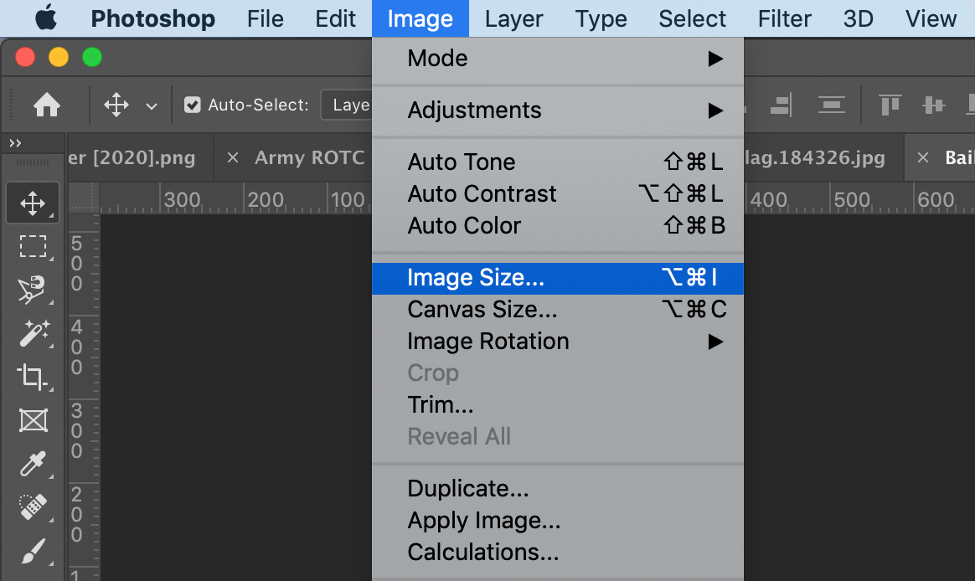
Access the Image Size Dialog Box:
- From the top menu bar, click on
Image. - Select
Image Size.... A new dialog box will appear, displaying your image’s current dimensions and other relevant information. In Photoshop CC versions, this dialog box features a convenient preview window on the left. You can drag the corners of the dialog box to enlarge it and get a better preview of your changes.
- From the top menu bar, click on
-
Understand and Utilize “Constrain Proportions”:
- In the “Image Size” dialog box, you’ll see
WidthandHeightfields. By default, a small “link” icon or a checkbox labeledConstrain Proportions(depending on your Photoshop version) is active. - Keep Proportions Linked: This is almost always recommended. When enabled, changing either the width or the height will automatically adjust the other dimension to maintain the image’s original aspect ratio. This prevents your images from becoming stretched or squashed, preserving the integrity of your beautiful photography or abstract art.
- Unlink Proportions: If you specifically need to distort an image (e.g., for a special effect or a very specific layout requirement), you can click the link icon to unlink the dimensions. However, proceed with caution, as this can severely affect image quality and aesthetic appeal.
- In the “Image Size” dialog box, you’ll see
-
Input New Dimensions:
- Under
Document Size(or simplyWidthandHeightin newer versions), you can enter your desired measurements. - Units of Measurement: The default unit is usually
pixels. However, you can change this using the dropdown menu next toWidthorHeighttoinches,centimeters,percent, or other units.- Pixels: Ideal for web, screen display, and precise digital output.
- Inches/Centimeters: Primarily used when preparing images for print.
- Percent: Useful if you want to scale the image up or down by a relative factor (e.g., 50% smaller or 200% larger).
- Type your new
WidthorHeightvalue. IfConstrain Proportionsis active, the other dimension will update automatically. - Scale Styles (for layered images): If your image contains layers with applied styles (e.g., drop shadows, strokes), click the gear icon (top-right of the Image Size window) and select
Scale Stylesto ensure these effects scale proportionally with your image.
- Under
-
Click “OK” and Save:
- Once you’re satisfied with the new dimensions, click
OK. Photoshop will resize your image. - Finally, go to
File > Saveto save the changes to your resized backup file.
- Once you’re satisfied with the new dimensions, click
This basic method is quick and effective for most digital uses, helping you optimize images for various platforms while maintaining their visual appeal.
Advanced Resizing for Print: Maintaining Quality and Aspect Ratios
Printing an image introduces a new set of considerations, primarily revolving around resolution and aspect ratio, to achieve high-quality results. For photographers and digital artists whose work culminates in physical prints, mastering these nuances is key. Tophinhanhdep.com emphasizes that attention to detail in this stage differentiates a good print from an exceptional one.
The Critical Role of Resolution (PPI) for Print
As discussed, Resolution (pixels per inch, PPI) directly impacts print clarity. The industry standard for high-quality inkjet printing is typically 300 pixels/inch. This ensures that the human eye perceives sharp details when viewing a print at a normal distance. Some professional printers, particularly Epson models, use a native resolution of 360 pixels/inch.
-
Open Image and Access Image Size Dialog: Follow steps 1-3 from the basic resizing guide.
-
Turn Off “Resample” to Check Print Size:
- In the
Image Sizedialog box, locate theResamplecheckbox (usually below theResolutionfield). - Crucially, uncheck
Resamplefirst. This tells Photoshop not to add or remove pixels from your image. Instead, it will show you how large your current image’s pixels will print at the specified resolution. - Set the unit of measurement to
inches(orcm) underDocument Size. - Observe the
Width,Height, andResolutionvalues. If yourResolutionis already 300 ppi (or higher, like 360 ppi for Epson printers) and theWidthandHeightare close to your desired print size, you likely don’t need to upsample. Photoshop will automatically adjust theWidthandHeightas you change theResolution(and vice-versa) whileResampleis unchecked, demonstrating the relationship between these values without altering pixel data.
- In the
-
When to “Resample” (Upsampling) for Larger Prints:
- If, after turning
Resampleoff, your printResolutiondrops significantly below 300 ppi (e.g., to 150 ppi) when you input your desired large printWidthandHeight, it means your image doesn’t have enough original pixels for a high-quality print at that size. In this case, you’ll need toupsample(add pixels). - Re-check
Resample: Now, re-enable theResamplecheckbox. - Input Desired Resolution: Enter
300pixels/inch (or360for Epson) into theResolutionfield. - Choose Interpolation Method: Photoshop uses interpolation algorithms to generate new pixels.
- Automatic (Default): Photoshop attempts to pick the best method for you.
- Preserve Details 2.0 (for CC 2018+): For upsampling, this is often the superior choice, as it uses advanced algorithms to minimize artifacts and retain sharpness. If not visible, you may need to enable it in Photoshop’s Preferences.
- Adjust Print Dimensions: With
Resamplechecked and your targetResolutionset, you can now input your desiredWidthandHeight(keepingConstrain Proportionslinked). Photoshop will add the necessary pixels to achieve that print size at the desired resolution. Note how theImage Size(in MB and pixels) increases significantly.
- If, after turning
Handling Different Aspect Ratios: Cropping Before Resizing
Often, your image’s original aspect ratio (e.g., 4x6) won’t match your desired print frame (e.g., 8x10). Directly forcing an unmatched aspect ratio in the Image Size dialog with Constrain Proportions off will distort your image. The correct approach is to crop first.
- Cancel Image Size: If you’re in the
Image Sizedialog, clickCancelto close it. - Select the Crop Tool: In Photoshop’s
Toolbar(usually on the left), select theCrop Tool(hotkeyC). - Set New Aspect Ratio: In the
Options Barat the top, choose a preset aspect ratio or enter your customWidthandHeightvalues (e.g.,8in the width field and10in the height field for an 8x10 portrait print). Do not specify units like “inches” here; just the ratio numbers. - Adjust Crop Border and Position: Photoshop will display a crop border on your image with the new aspect ratio. Drag the handles to adjust the area you want to keep. Drag inside the border to reposition your subject.
- Ensure “Delete Cropped Pixels” is Off: In the
Options Bar, make sureDelete Cropped Pixelsis unchecked. This allows you to revert to the original uncropped image later if needed. - Apply Crop: Click the
checkmarkin theOptions Baror pressEnter/Returnto apply the crop. - Return to Image Size for Final Adjustments: Now that your image has the correct aspect ratio, reopen the
Image Sizedialog (Image > Image Size). Follow theResamplesteps described above to set your final printWidth,Height, andResolution(e.g., 8 inches by 10 inches at 300 ppi).
By meticulously following these steps, you ensure that your high-resolution digital photography or intricate digital art pieces are perfectly prepared for print, maintaining their visual integrity and impact.
Resizing Artboards and Layers for Creative Projects
Beyond adjusting the overall canvas of an image, Photoshop also provides robust tools for managing the dimensions of individual design elements. This is particularly vital for graphic design, digital art, and photo manipulation, where multiple components often coexist within a single project. Tophinhanhdep.com understands that creative ideas often require flexible canvas management, and Photoshop excels in this area.
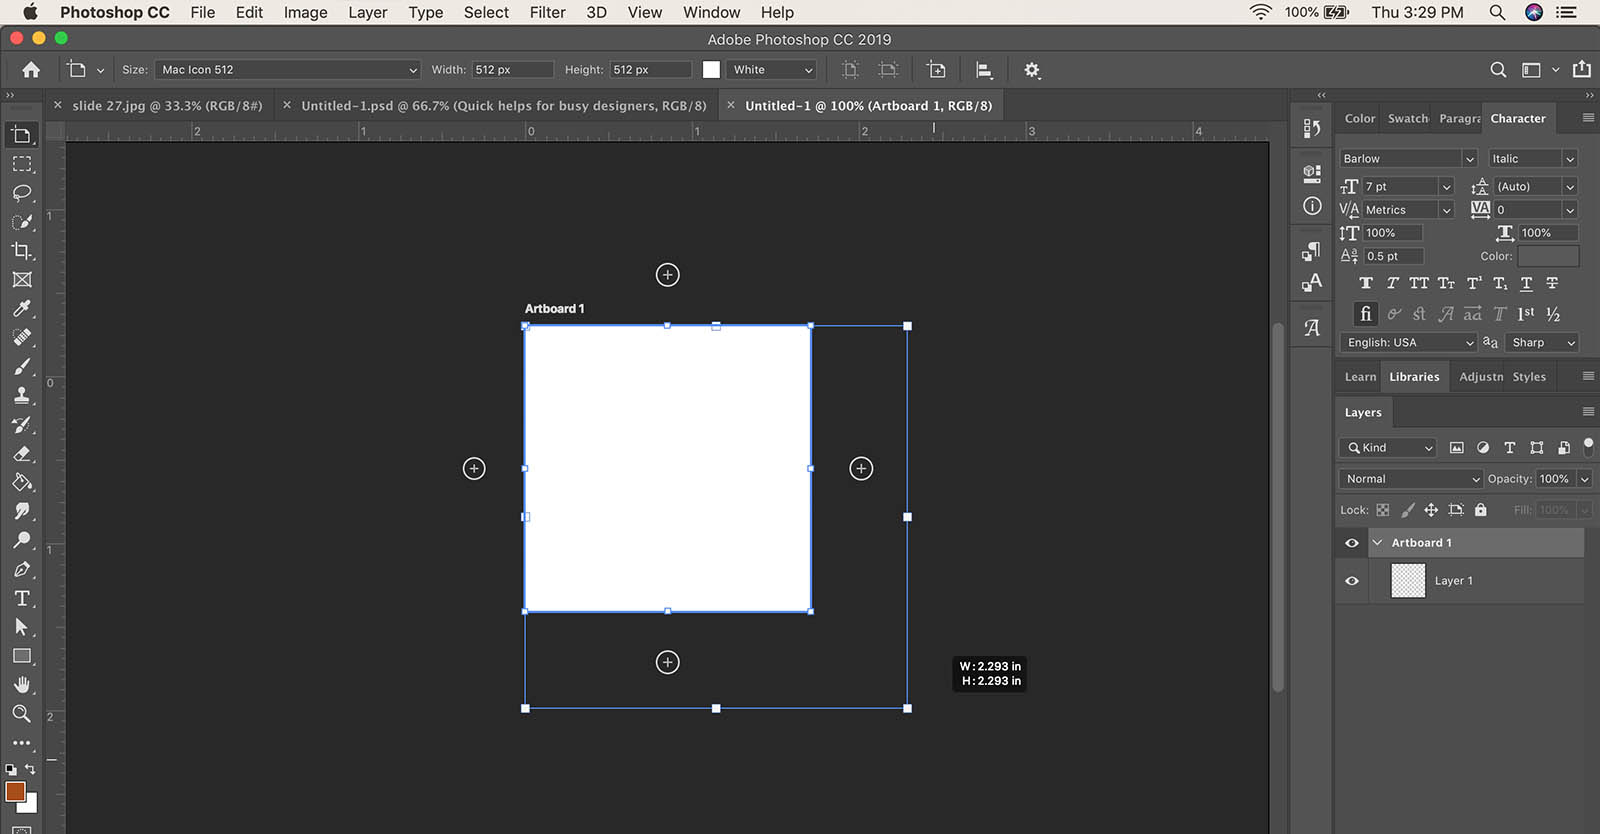
Resizing Artboards for Multi-Design Projects
Artboards in Photoshop are incredibly useful for managing multiple designs or iterations within a single document, such as a series of social media graphics, website mockups, or different versions of a poster. Being able to quickly duplicate and resize these artboards streamlines the visual design process.
Method 1: Using the Image Size Dialog (Best for Precise Numerical Changes)
This method is ideal when you need to set exact dimensions for your artboard.
- Open Your Photoshop Project File: Ensure your project with artboards is open.
- Select the Desired Artboard: In the
Layerspanel, click on the name of the artboard you wish to resize to select it. - Access Image Size: Go to
Image > Image Sizefrom the top menu. - Input New Dimensions: In the
Image Sizedialog box, type in the newWidthandHeightdimensions for your selected artboard. Remember to keepConstrain Proportionschecked unless you specifically want to distort the artboard. - Click OK: Confirm your changes by clicking the
OKbutton. The selected artboard will update to the new size.
Method 2: Using the Move Tool (Best for Visual, Freeform Adjustments)
This method offers a more interactive and visual way to resize artboards.
- Open Your Photoshop Project File: Have your project open in Photoshop.
- Select the Move Tool: From the
Toolbar, select theMove Tool(hotkeyV). You might need to pressShift+Vto cycle through related tools if theMove Toolisn’t immediately visible. - Select Your Artboard Title: Click directly on the title bar of the artboard you want to resize in the document window. This will activate transform controls around the artboard.
- Drag-and-Drop to Resize: Drag any of the eight small squares (handles) located at the corners or sides of the artboard’s bounding box to visually adjust its size to your desired dimensions.
- Confirm Changes: Press
Enter/Returnor click thecheckmarkin theOptions Barto apply the transformation.
Resizing Individual Layers and Elements
Within an artboard or a standard document, you’ll often need to resize individual images, text, or shapes. This falls under the umbrella of “Free Transform.”
- Select the Layer: In the
Layerspanel, click on the layer containing the element you want to resize. - Activate Free Transform: Go to
Edit > Free Transform(hotkeyCtrl+Ton Windows,Cmd+Ton Mac). A bounding box with handles will appear around your selected content. - Resize the Layer:
- Proportional Resizing: Hold down the
Shiftkey while dragging a corner handle. This maintains the aspect ratio, preventing distortion. - Freeform Resizing: Drag any corner or side handle without holding
Shiftto stretch or squash the layer. - From Center: Hold
Alt(Windows) orOption(Mac) while dragging a corner handle to resize from the center point of the layer. - Precise Numerical Input: In the
Options Barat the top, you’ll seeW(Width) andH(Height) percentages. You can manually type in precise percentage values or even pixel dimensions. Ensure the “link” icon between W and H is active for proportional scaling.
- Proportional Resizing: Hold down the
- Confirm Changes: Press
Enter/Returnor click thecheckmarkin theOptions Barto apply the transformation.
Mastering artboard and layer resizing gives you granular control over your creative projects, allowing you to fluidly adapt your graphic design, digital art, and photo manipulations to various visual design requirements.
Beyond Resizing: Optimizing Your Visual Content with Tophinhanhdep.com
While mastering image resizing in Photoshop is an indispensable skill for any digital artist or photographer, it’s often just the first step in preparing your visual content for its final destination. Whether you’re aiming to share breathtaking nature photography, bold abstract designs, or captivating aesthetic backgrounds online, further optimization is typically required. This is where Tophinhanhdep.com extends its value, offering a suite of dedicated image tools that complement your Photoshop workflow, ensuring your images are not only perfectly sized but also perfectly optimized for performance and versatility.
The digital landscape demands visuals that are high-quality yet efficient. A beautifully resized image from Photoshop might still be too large in file size for a fast-loading website or might need to be in a different format for specific applications. Tophinhanhdep.com provides solutions to bridge this gap, enhancing everything from high-resolution stock photos to intricate photo manipulations.
Image Optimization and Compression for Web and Digital Use
After carefully adjusting the dimensions of your images in Photoshop, the next crucial step, especially for online use, is to optimize their file size without compromising visual quality. Large image files can slow down website loading times, consume excessive bandwidth, and negatively impact user experience – factors Tophinhanhdep.com understands are critical for any digital presence.
-
Compressors: Reducing File Size for Efficiency:
- Tophinhanhdep.com offers advanced image compressors that intelligently reduce the file size of your JPEGs, PNGs, and other formats. These tools employ sophisticated algorithms to identify and remove unnecessary data from the image without visibly affecting its quality.
- Why it Matters: For website wallpapers, backgrounds, or galleries of beautiful photography, smaller file sizes mean faster load times, improved SEO, and a smoother browsing experience for your audience. For social media posts or email attachments, they ensure quick uploads and downloads.
- How it Works: You simply upload your Photoshop-resized image to Tophinhanhdep.com’s compressor tool. The tool analyzes the image and applies optimal compression, often allowing you to choose a balance between file size and perceived quality. The result is a web-ready image that retains its visual impact while being significantly lighter.
-
Optimizers: Tailoring Images for Specific Platforms:
- Different platforms (e.g., Instagram, Facebook, specific website CMS) often have their own recommended image dimensions and file size limits. Optimizers help tailor your images to these specifications.
- Tophinhanhdep.com’s optimization tools can assist in preparing images not just for general web use but also for specific channels, ensuring your aesthetic or emotional imagery meets platform-specific criteria, maintaining clarity and avoiding automatic, often destructive, re-compression by the platform itself. This is vital for digital photography where every pixel matters.
Converters and AI Upscalers for Enhanced Visuals
The utility of images extends beyond their initial creation and resizing. Sometimes, you need to transform an image’s format or dramatically increase its resolution, which might be beyond what traditional Photoshop resampling can achieve without significant quality loss. Tophinhanhdep.com provides specialized tools to address these advanced needs.
-
Converters: Changing File Formats for Compatibility and Purpose:
- After resizing an image in Photoshop, you might find that the
.psdor.jpegformat isn’t suitable for all applications. For example, a.pngmight be required for images with transparency, or a.webpfor maximum web efficiency. - Tophinhanhdep.com offers versatile image converters that allow you to seamlessly change your image from one format to another. This ensures compatibility across different devices, software, and web standards.
- Examples: Convert a resized Photoshop image to a
.pngfor graphic design elements with transparent backgrounds, or to a.tifffor high-quality archival purposes. This flexibility is key for managing diverse image collections, from abstract art to nature photography.
- After resizing an image in Photoshop, you might find that the
-
AI Upscalers: Leveraging Artificial Intelligence for Superior Enlargement:
- While Photoshop’s “Preserve Details 2.0” is excellent for moderate upsampling, sometimes you have a smaller image (e.g., an old photograph, a low-resolution stock photo, or an early digital art piece) that needs to be dramatically enlarged for a high-resolution wallpaper, a large print, or even a professional digital photography exhibit. Traditional upsampling can introduce blurriness and artifacts.
- Tophinhanhdep.com’s AI Upscalers utilize advanced artificial intelligence algorithms to intelligently “reconstruct” and add pixels to an image. Unlike conventional methods that simply interpolate existing pixel data, AI upscalers analyze patterns and textures, generating new details that make the enlarged image appear much sharper and more natural.
- Why AI Upscaling is a Game-Changer: For anyone looking to transform a standard image into a stunning high-resolution masterpiece, suitable for intricate visual design or expansive aesthetic backgrounds, Tophinhanhdep.com’s AI Upscaler can breathe new life into your visuals, providing an impressive boost in quality that Photoshop alone cannot match for extreme enlargements. It opens up possibilities for using images that were previously deemed too small for larger applications.
By integrating Tophinhanhdep.com’s comprehensive suite of image tools into your post-Photoshop workflow, you ensure that your visual content is not only expertly crafted and perfectly sized but also optimized, compatible, and enhanced to meet every demand of the modern digital and print world. This holistic approach empowers you to unlock the full potential of your images, from captivating wallpapers to professional photography.
Conclusion
Mastering the art and science of image resizing in Adobe Photoshop is an indispensable skill for anyone engaged with digital visuals. As we’ve explored through this comprehensive guide on Tophinhanhdep.com, accurate resizing is far more than simply changing numbers; it’s about understanding resolution, aspect ratios, resampling techniques, and the ultimate purpose of your image. Whether you’re meticulously preparing a high-resolution photograph for print, adapting a stunning landscape for a website background, designing compelling social media graphics, or precisely adjusting artboards for complex digital art projects, Photoshop provides the tools for unparalleled control.
We’ve walked through the fundamental distinctions between image size, resolution, resizing, and resampling, laying the groundwork for informed decision-making. We’ve provided step-by-step instructions for basic resizing, ensuring your images are perfectly tailored for general digital use, as well as delving into advanced strategies for print, where considerations like native printer resolution and optimal interpolation methods like Preserve Details 2.0 become paramount for maintaining crisp detail and vibrant quality. Furthermore, we’ve covered the crucial techniques for managing artboards and individual layers, offering the flexibility required for dynamic visual design and creative photo manipulation.
However, the journey of optimizing your visual content doesn’t end with Photoshop. Tophinhanhdep.com stands as your comprehensive partner, offering a range of powerful online tools that seamlessly complement your Photoshop workflow. Our image compressors and optimizers ensure your resized images are also lean and fast, perfect for web deployment and enhancing user experience without sacrificing visual integrity. Our converters provide the flexibility to adapt your images to any required file format, guaranteeing compatibility across platforms. And for those ambitious projects requiring significant enlargement from smaller source material, Tophinhanhdep.com’s AI Upscalers leverage cutting-edge artificial intelligence to intelligently generate new pixels and details, breathing new life into images and achieving resolutions previously thought impossible.
In a world where images are currency, the ability to produce and present them with precision and polish is invaluable. By combining the powerful capabilities of Photoshop with the intelligent optimization tools available on Tophinhanhdep.com, you are equipped to elevate your digital images from simple pictures to extraordinary visual experiences, whether they are aesthetic backgrounds, abstract art, or cherished moments of beautiful photography. Continue to explore, create, and refine your visual content, knowing that Tophinhanhdep.com is here to support every step of your creative journey.