How to Change Image Size Without Losing Quality: A Comprehensive Guide from Tophinhanhdep.com

In the digital age, images are the cornerstone of online presence, visual storytelling, and effective communication. From captivating wallpapers and aesthetic backgrounds to stunning nature photography and intricate abstract art, high-quality visuals are paramount. However, a common challenge many digital creators, webmasters, and casual users face is resizing images without compromising their visual integrity. The dreaded pixelation, blurring, or distortion can instantly degrade the impact of an otherwise perfect image.
At Tophinhanhdep.com, we understand the critical role high-resolution photography, effective image tools, and thoughtful visual design play in creating compelling digital experiences. Our extensive collections of stunning images – from serene landscapes to evocative emotional shots – are curated to inspire and elevate. We also provide comprehensive guides on photography techniques, digital photography best practices, and innovative editing styles. This article delves deep into the art and science of resizing images without losing quality, equipping you with the knowledge and tools to maintain pristine visuals for every purpose, whether for your website, social media, or print.
Understanding how to properly manipulate image dimensions is more than just a technical skill; it’s a vital aspect of digital presentation. Poorly optimized images can lead to slow website loading times, an unprofessional appearance, and a diminished user experience. Conversely, expertly resized images enhance aesthetic appeal, improve site performance, and convey a sense of professionalism that resonates with your audience. Join us as we explore the fundamental principles, practical methods, and advanced techniques to ensure your images always look their best.
Understanding Image Resizing: The Core Concepts
Before diving into the “how-to,” it’s crucial to grasp the underlying principles of digital images and how resizing impacts them. Most images we encounter online – from JPEGs to PNGs – are bitmap files. These images are composed of thousands, sometimes millions, of tiny colored squares known as pixels. Each pixel holds specific color information and a defined position within the image grid. When you zoom in closely on a digital image, these individual squares become visible, leading to the “pixelated” effect often associated with low-quality or overly enlarged images.
The challenge of resizing without losing quality stems from this pixel-based structure. When you enlarge a bitmap image, the software has to “guess” what new pixels to add between the existing ones. If done incorrectly, this guesswork leads to blurry or blocky results. Conversely, when reducing an image’s size, pixels must be removed, which can also affect detail if not managed properly.
Pixels, Resolution, and Image Quality
Resolution refers to the density of pixels in an image, typically measured in pixels per inch (PPI) for digital displays or dots per inch (DPI) for print. A higher resolution means more pixels are packed into a given area, resulting in a sharper, more detailed image.
- For online use, resolution often refers to the image’s overall dimensions in pixels (e.g., 1920x1080 pixels). The physical “size” (like inches) is less relevant until the image is displayed on a screen, where the screen’s PPI determines its perceived size.
- For printing, DPI becomes crucial. A common standard for high-quality prints is 300 DPI. If an image has fewer pixels than required for the desired print size at 300 DPI, it will appear pixelated when printed.
The original quality of your image is the foundation. Images captured with high-megapixel cameras or created at large dimensions provide more data to work with, making them more forgiving when resized, especially when enlarging. Starting with a small, low-resolution image and attempting to enlarge it significantly will almost always result in noticeable quality degradation, regardless of the resizing method. This highlights the importance of sourcing high-resolution stock photos and understanding digital photography principles, as championed by Tophinhanhdep.com.
Resizing vs. Resampling: What’s the Difference?
These two terms are often used interchangeably but denote distinct processes in image manipulation:
-
Resizing (Scaling): This method changes the physical dimensions of an image (e.g., from 4x6 inches to 8x10 inches) without altering the total number of pixels. Instead, it changes the pixel density (PPI/DPI). If you enlarge an image by simply resizing, the existing pixels get bigger, leading to a pixelated appearance. If you make it smaller, the pixels get smaller. This is often used for print, where you might want to adjust the print size while maintaining the original pixel count and letting the printer handle the density.
-
Resampling: This is the process that changes the total number of pixels in an image.
- Downsampling: When you make an image smaller through resampling, the software discards pixels. Advanced algorithms intelligently decide which pixels to remove to retain as much detail as possible.
- Upsampling (Enlarging): When you make an image larger through resampling, the software creates new pixels. This is where interpolation algorithms come into play, estimating the color and position of these new pixels based on their neighbors. This is the trickier part, as adding information that wasn’t originally there can easily lead to quality loss.
Interpolation is the mathematical process used during resampling to determine the values of new pixels. Different interpolation methods yield varying results:
- Nearest Neighbor: Simple, fast, but often produces jagged edges and pixelation because it just replicates existing pixels.
- Bilinear: Averages the color of the four nearest pixels. Smoother than Nearest Neighbor but can still lack sharpness.
- Bicubic: Averages the color of the sixteen nearest pixels, resulting in smoother tonal gradations and sharper edges. Often the default and best general-purpose option for both upsampling and downsampling.
- Lanczos (Sinc): A more complex algorithm that often produces very sharp results, particularly effective for downsampling or for modest upsampling where fine detail is important. Some software uses variations like “Lanczos3.”
- Fractal Interpolation: A more advanced technique, used by specialized tools, that attempts to analyze repeating patterns (fractals) in an image to create new pixels more accurately, allowing for significant enlargement with minimal quality loss.
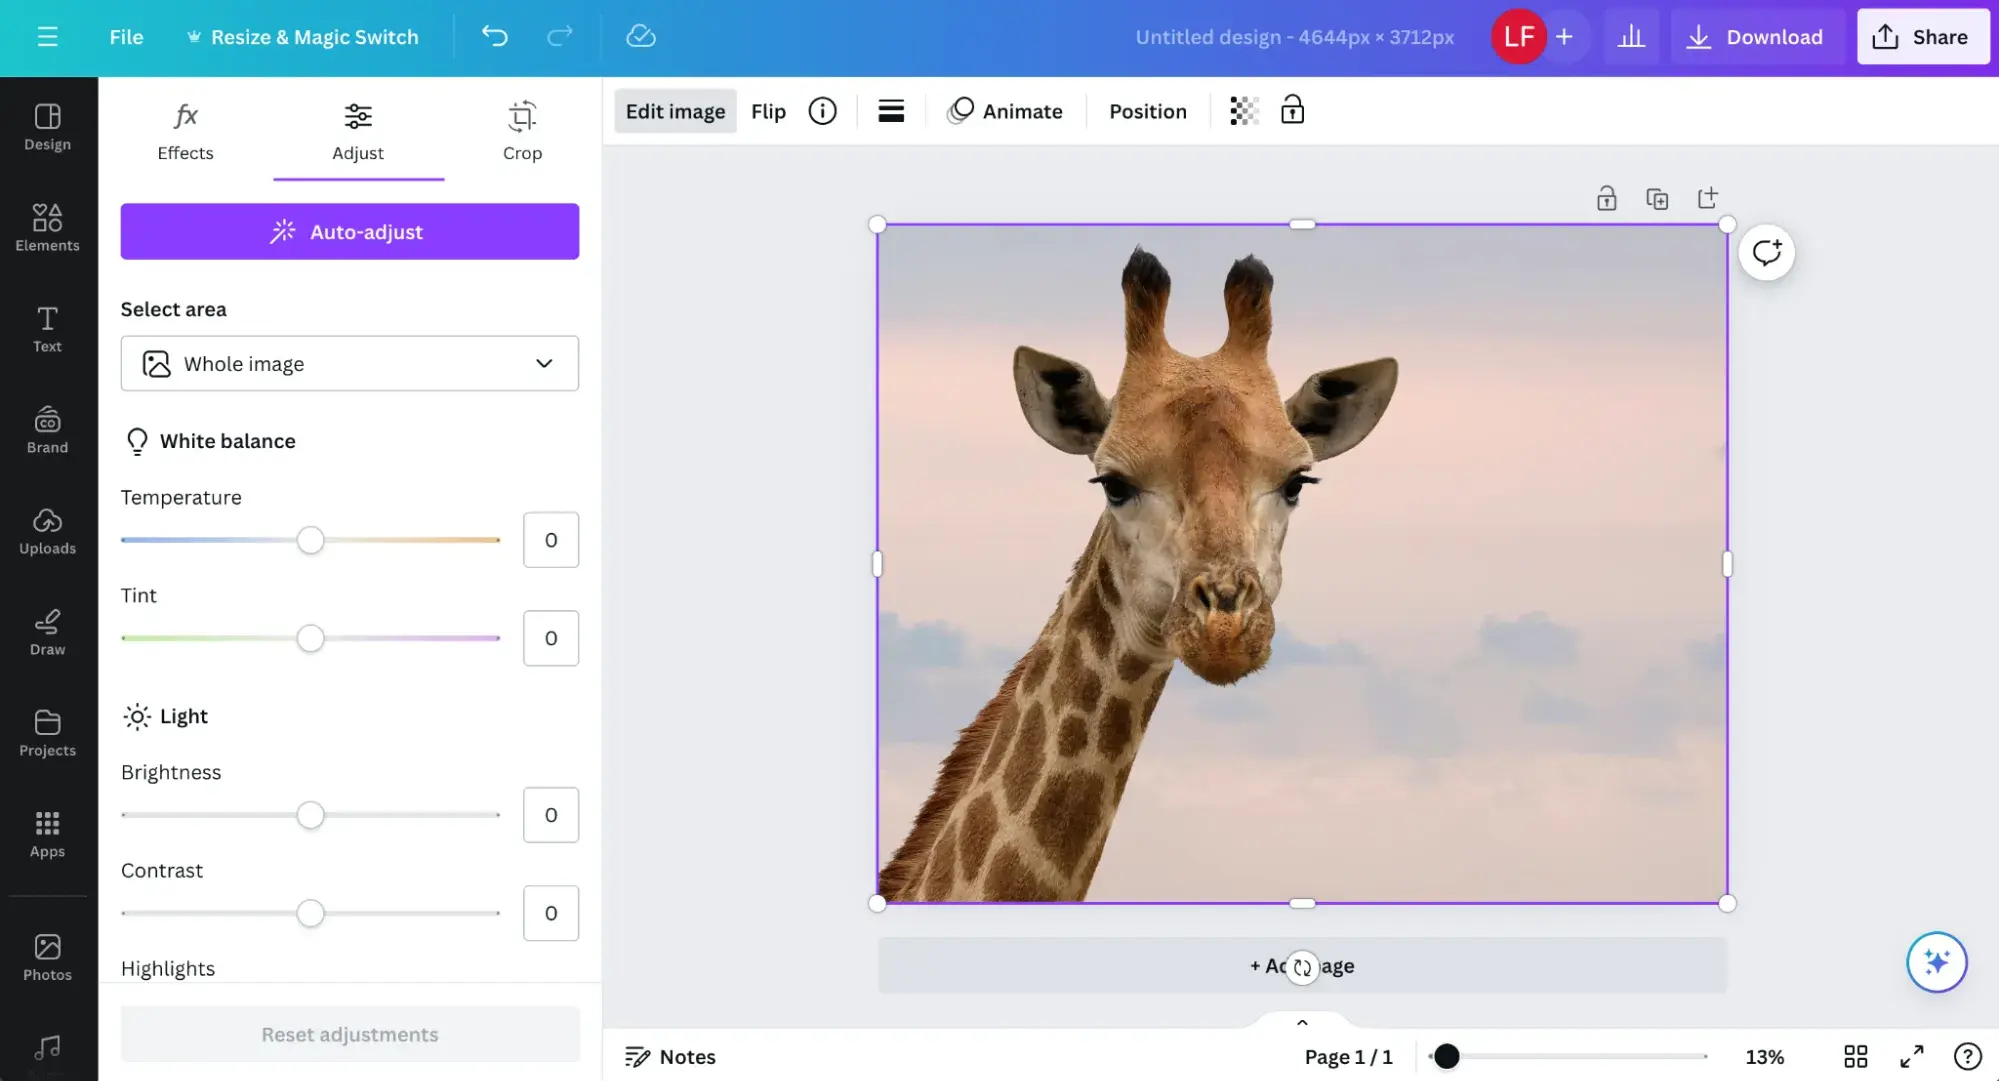
For web optimization and most digital uses, resampling is typically what you want when changing image dimensions. The goal is to choose the right interpolation method to preserve quality. Tophinhanhdep.com’s Image Tools section provides a range of compressors, optimizers, and AI Upscalers designed with these advanced techniques in mind.
Essential Tools for Quality Image Resizing
The digital landscape offers a plethora of tools for image resizing, catering to different needs, skill levels, and budgets. From robust professional software to accessible online utilities, Tophinhanhdep.com recommends exploring options that offer precise control over interpolation and resampling, ensuring your images – be they abstract backgrounds or beautiful photography – retain their high-quality aesthetic.
Adobe Photoshop: The Industry Standard
Adobe Photoshop stands as the unchallenged leader in professional photo editing and graphic design. Its comprehensive feature set and advanced algorithms make it the go-to choice for photographers, visual designers, and content creators worldwide. While it comes with a subscription cost, its capabilities for resizing images without significant quality loss are unparalleled.
Photoshop offers multiple ways to resize, including the “Image Size” dialog box for precise numerical input and the “Free Transform” tool for interactive scaling. It excels in applying sophisticated interpolation methods, particularly “Bicubic Smoother” for enlargement and “Bicubic Sharper” for reduction. Additionally, plugins and advanced features within Photoshop, often discussed in Tophinhanhdep.com’s guides on photo manipulation and editing styles, can further enhance resizing outcomes, such as specialized fractal interpolation tools.
GIMP: A Powerful Open-Source Alternative
For those seeking a free yet highly capable image editing solution, GIMP (GNU Image Manipulation Program) is an excellent choice. As an open-source alternative to Photoshop, GIMP provides a robust set of tools for image manipulation, including effective resizing capabilities. While its interface might initially seem less intuitive to some, GIMP allows for precise control over scaling and interpolation, making it a valuable asset for maintaining image quality on a budget.
GIMP is particularly popular among digital artists and visual design enthusiasts who appreciate its flexibility and the vast array of third-party plugins available. Tophinhanhdep.com recognizes GIMP’s utility for optimizing images, creating graphic design elements, and preparing visuals for various online platforms.
Online Resizers and AI Upscalers
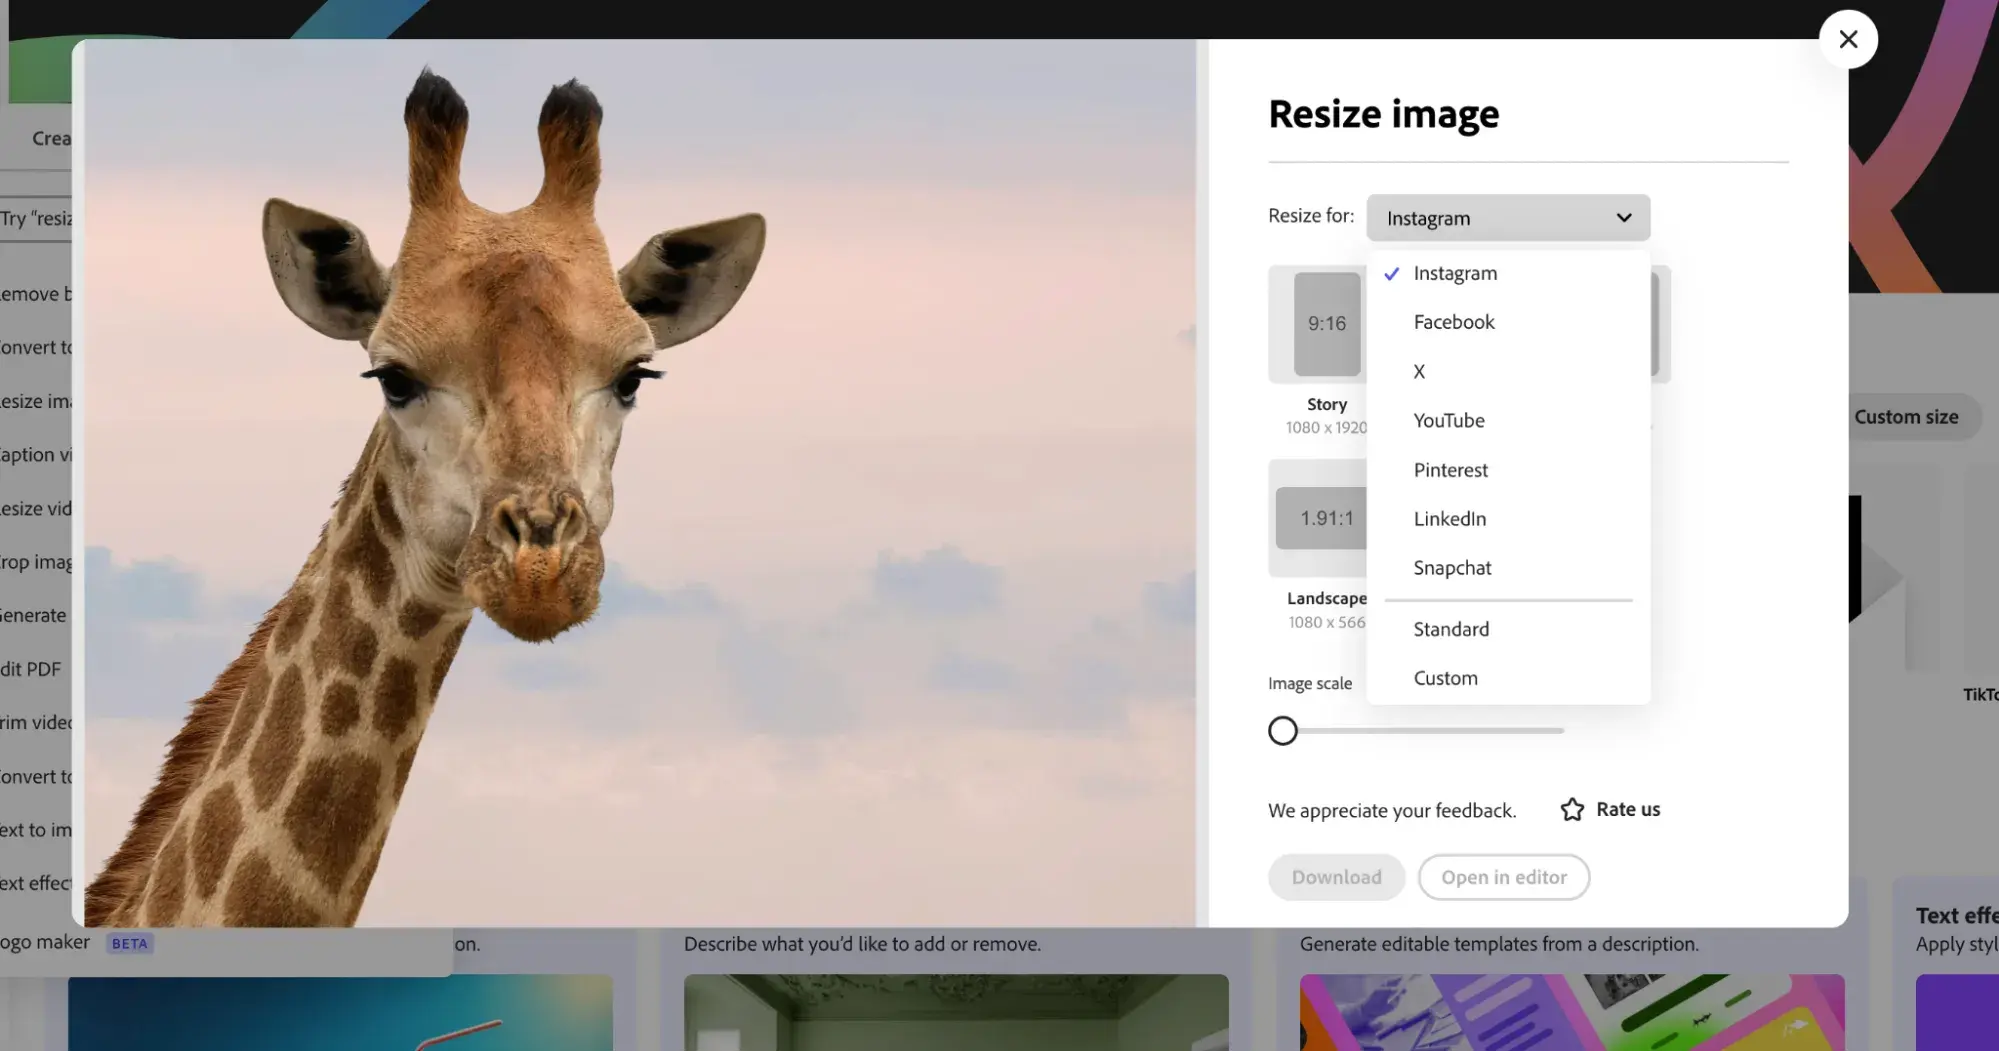
For quick adjustments or for users without dedicated software, online image resizers offer convenience. Many platforms allow you to upload an image, specify new dimensions, and download the resized file. However, the quality of results can vary significantly depending on the algorithms used. Tophinhanhdep.com’s Image Tools section features curated online converters, compressors, and optimizers that prioritize quality.
A revolutionary advancement in quality preservation is AI Upscaling. These tools leverage artificial intelligence and machine learning to “intelligently” add pixels when enlarging an image. Instead of simple interpolation, AI analyzes patterns, textures, and details within the image to generate new information, often leading to remarkably sharp and detailed enlargements from even relatively low-resolution sources. This technology is a game-changer for transforming low-quality images into higher resolution, which is a key focus in Tophinhanhdep.com’s resources on digital photography and high-resolution imaging.
Step-by-Step Guides to Resizing with Popular Software
Mastering image resizing involves understanding the tools and applying the correct techniques. Here, we outline the general steps for two of the most popular image editing software: Adobe Photoshop and GIMP. These methods are applicable whether you’re working on images for a mood board, a collection of aesthetic wallpapers, or high-resolution stock photos from Tophinhanhdep.com.
Resizing in Adobe Photoshop
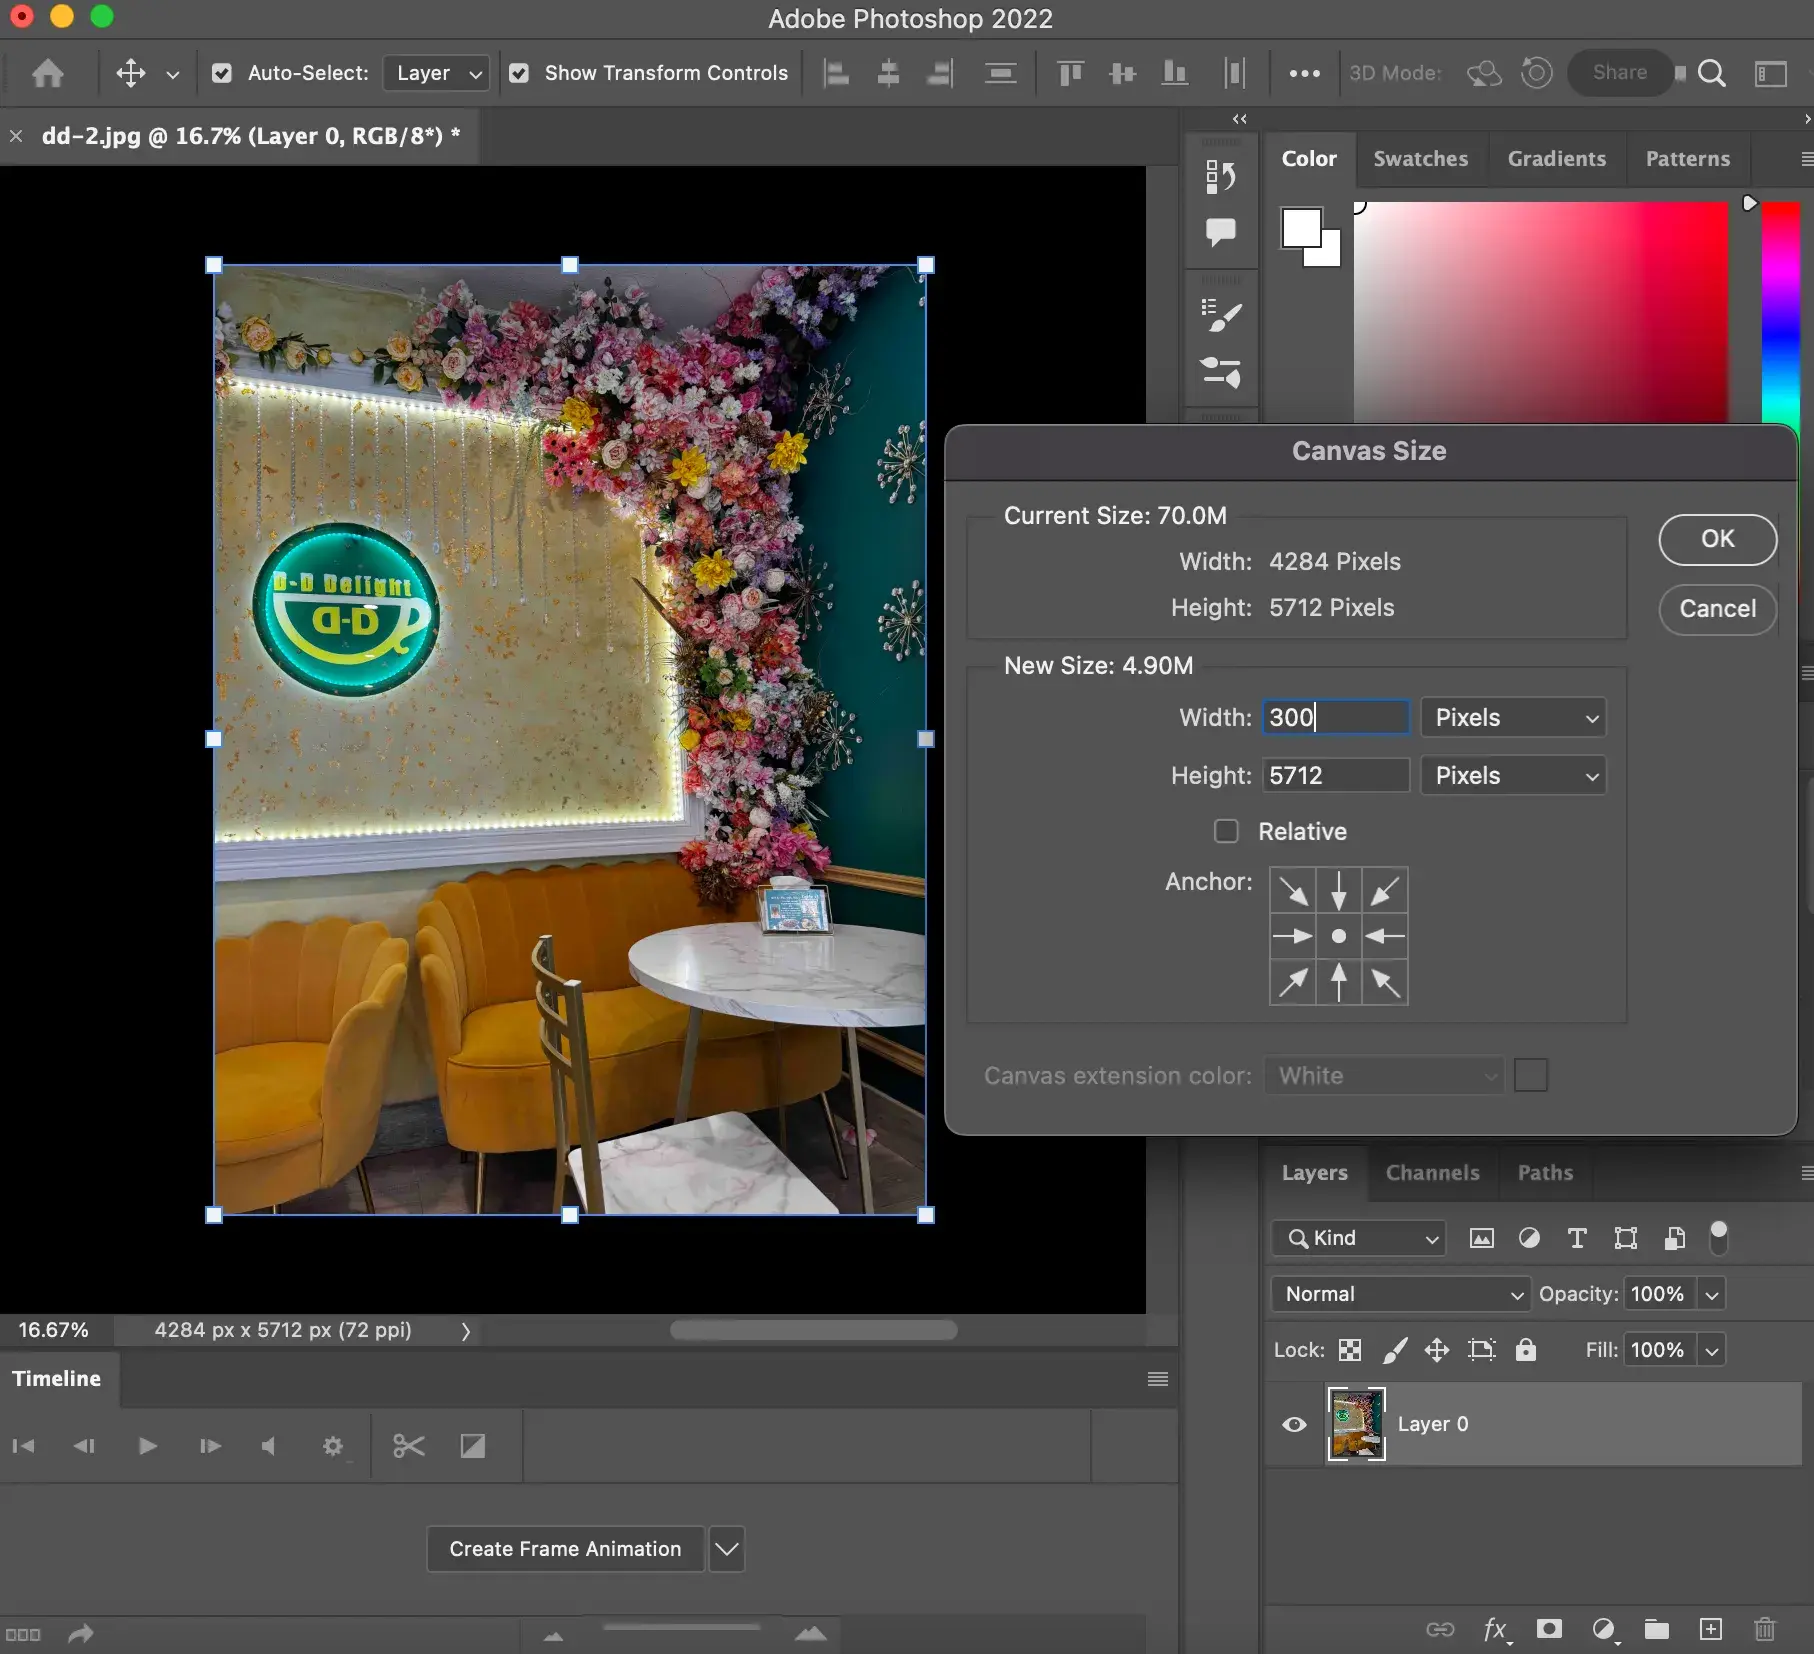
Photoshop offers precise control over image dimensions and resolution. The primary method involves the “Image Size” dialog box, which provides critical options for resampling and interpolation.
- Open Your Image: Launch Adobe Photoshop and open the image you wish to resize (File > Open).
- Access Image Size: Navigate to
Image > Image Size(or use the shortcutCtrl+Alt+Ion Windows /Cmd+Option+Ion Mac). This will open the Image Size dialog box. - Understand the Dialog Box:
- Dimensions: Displays the current width and height of your image.
- Fit To: Offers presets for common sizes.
- Constraint Proportions (Link Icon): Ensure this chain link icon is active. This locks the aspect ratio, so changing the width automatically adjusts the height, preventing distortion.
- Width/Height: Enter your desired new dimensions. You can choose units like pixels, inches, centimeters, etc. For web use, pixels are generally preferred.
- Resolution: This field indicates pixels per inch (PPI). For web, 72 PPI is common, while for print, 300 PPI is standard.
- Resample: This is the most crucial setting for quality.
- To Enlarge: Select “Resample” and choose “Bicubic Smoother (enlargement)” from the dropdown. This algorithm is optimized for adding pixels while maintaining smoothness.
- To Reduce: Select “Resample” and choose “Bicubic Sharper (reduction)” for best results when making images smaller. For general purposes, “Bicubic Automatic” often works well.
- For Print (Changing DPI without changing pixel count): Deselect “Resample.” Then, you can change the Resolution (DPI) and observe how the physical dimensions (inches/cm) change, while the pixel dimensions remain constant.
- Click OK: Once your settings are chosen, click “OK” to apply the changes.
- Save Your Image: Save the resized image (File > Save As…) in your desired format (e.g., JPEG for web, PNG for transparency, TIFF for print). Always keep a copy of your original image!
Using Free Transform for Interactive Resizing:
For visual scaling within Photoshop, select the layer you want to resize in the Layers panel, then go to Edit > Free Transform (or Ctrl+T / Cmd+T). A bounding box will appear. Click and drag a corner handle while holding Shift to constrain proportions and resize the layer. Hit Enter/Return to confirm. This method is excellent for quick adjustments but the “Image Size” dialog offers more precise numerical control and better resampling options for maintaining overall image quality.
Resizing with GIMP
GIMP provides a straightforward process for scaling images, making it accessible for a wide range of users, from those experimenting with photo ideas to aspiring digital artists.
- Open Your Image: Launch GIMP and open your image (File > Open).
- Access Scale Image: Go to
Image > Scale Image. A dialog box will appear. - Set New Dimensions:
- Width/Height: Enter your desired new pixel dimensions. The chain icon should be active to maintain the aspect ratio and prevent distortion.
- Resolution (X/Y resolution): Set the desired resolution (e.g., 72 PPI for web, 300 PPI for print).
- Interpolation: This is GIMP’s equivalent of resampling. For best quality, especially when enlarging, choose “Cubic” or “Sinc (Lanczos3).” “Sinc (Lanczos3)” is often preferred for sharper results.
- Click Scale: Once your settings are applied, click the “Scale” button.
- Save Your Image: Save the resized image (File > Export As…) in the appropriate format. Remember to retain your original file.
GIMP’s simplicity combined with powerful interpolation options makes it a strong contender for quality image resizing, aligning with Tophinhanhdep.com’s emphasis on accessible yet effective visual design tools.
Advanced Techniques and Best Practices
Achieving optimal image quality during resizing often involves more than just selecting the right dimensions. Professionals employ a range of advanced techniques and adhere to best practices to ensure stunning results, whether for high-resolution wallpapers or detailed product photography.
Optimizing for Web vs. Print
The intended use of an image heavily influences the resizing strategy.
-
For Web (Tophinhanhdep.com’s Website Content, Social Media, etc.):
- Dimensions: Aim for the exact pixel dimensions required by the platform. Avoid uploading excessively large images that are then downscaled by the browser, as this wastes bandwidth and can slow down page loading.
- Resolution: 72 PPI is generally sufficient for screens, as monitors have their own pixel density. Higher PPI for web images doesn’t inherently make them look “better” on screen but unnecessarily increases file size.
- File Size: Crucial for website speed. After resizing, always compress your images. Tophinhanhdep.com’s Image Tools include powerful compressors and optimizers to reduce file size without visible quality loss, ensuring fast loading times for your beautiful photography and aesthetic collections.
- Formats: JPEG for photos (offers good compression), PNG for images with transparency or sharp lines (logos, graphics), WEBP for excellent modern compression and quality.
-
For Print (Posters, Banners, Professional Art Prints):
- Dimensions: Convert your desired print size (e.g., 8x10 inches) into pixels based on a target resolution, typically 300 DPI. For an 8x10 print at 300 DPI, you’d need an image of 2400x3000 pixels.
- Resolution: 300 DPI (or PPI in editing software) is the standard for high-quality print. Larger prints (billboards) might use lower DPI as they are viewed from a distance.
- File Type: TIFF or high-quality JPEG are common. Uncompressed formats are often preferred for preserving every detail.
- Color Mode: CMYK is the standard for commercial printing, while RGB is for screens. Convert your images to CMYK before sending them to a printer, or consult your print provider’s specifications.
The Role of AI Upscaling and Sharpening Tools
When faced with the challenge of significantly enlarging a smaller image, or simply wanting to enhance detail post-resizing, specialized tools become invaluable.
-
AI Upscalers: As mentioned, AI-powered tools are transforming image enlargement. They utilize deep learning to analyze and reconstruct image details, effectively “creating” missing information rather than simply interpolating it. This results in much sharper, more natural-looking enlargements compared to traditional methods. Tophinhanhdep.com’s Image Tools section features advanced AI Upscalers to breathe new life into your images, making even older, lower-res photos suitable for high-resolution displays or print.
-
Image Sharpening: After upsampling, images can sometimes appear slightly soft. Applying a subtle sharpening filter can enhance edges and bring back perceived detail. However, over-sharpening can introduce artifacts or a “digital” look.
- Technique: Apply sharpening as a final step after resizing. Use tools like “Unsharp Mask” or “Smart Sharpen” in Photoshop or GIMP, adjusting radius, amount, and threshold carefully. Some advanced resizing tools, like those showcased on Tophinhanhdep.com, integrate sharpening directly into their workflow (e.g., “Apply Sharpen After Resample”).
- Magnification: Always view your image at 100% (actual pixels) when applying sharpening to accurately assess its effect.
Other Valuable Tips and Tricks:
- Work on Copies: Always duplicate your original image before making any resizing changes. This ensures you always have the pristine source file to revert to.
- Gradual Enlargement: If significantly enlarging an image (e.g., by more than 200%), some experts recommend doing it in smaller increments (e.g., 10% or 20% at a time) rather than one large jump. While modern algorithms are sophisticated, this can sometimes yield better results by allowing the software to “learn” more incrementally.
- Batch Processing: For large collections of images (e.g., stock photos, thematic collections), utilize batch processing features available in Photoshop (e.g., Image Processor Pro) or other dedicated tools highlighted on Tophinhanhdep.com. This saves immense time and ensures consistent resizing across multiple files.
- Monitor Quality at 100%: The true quality of an image is best judged when viewed at 100% zoom. This shows you the actual pixel-for-pixel representation.
- Utilize Presets: If you frequently resize images to specific dimensions (e.g., for social media headers, website banners), create and use presets in your editing software or online tools for efficiency and consistency.
Why Quality Images Matter on Tophinhanhdep.com
At Tophinhanhdep.com, our mission is to provide an unparalleled resource for all things visual – from stunning imagery and inspiring photography to robust image tools and innovative visual design ideas. The ability to resize images without losing quality is not just a technical detail; it’s fundamental to achieving the goals we champion:
- Enhancing Visual Appeal: High-quality, well-sized images are crucial for creating aesthetically pleasing wallpapers, captivating backgrounds, and beautiful photography collections. Blurry or pixelated images instantly detract from the visual experience, whereas sharp, clear visuals elevate it. This directly impacts how visitors perceive the quality and professionalism of our curated content and user-generated contributions.
- Optimizing User Experience and Website Performance: In today’s fast-paced digital world, website speed is paramount. Overly large or poorly optimized images significantly slow down page loading, leading to frustrated users and higher bounce rates. By providing guidance on proper resizing and compression, Tophinhanhdep.com empowers users to contribute and display images that load quickly, ensuring a smooth browsing experience across all our image inspiration and thematic collections.
- Professionalism in Digital Art and Graphic Design: Whether you’re a graphic designer showcasing your digital art, a photographer presenting your portfolio, or simply curating mood boards, the fidelity of your images reflects your dedication and skill. Our resources on image manipulation and creative ideas emphasize that technical proficiency in resizing is a cornerstone of professional visual design.
- Maximizing the Impact of Photography: Tophinhanhdep.com features vast resources on high-resolution photography and diverse editing styles. Learning to resize images correctly ensures that the intricate details of nature photography or the nuanced emotions captured in a sad/emotional shot are preserved, maximizing their artistic and communicative impact. Our Image Tools, including AI Upscalers, are specifically designed to help photographers maintain the integrity of their work.
- Supporting Diverse Applications: From images destined for print (requiring high DPI) to web images (optimized for fast loading), understanding quality-preserving resizing techniques is versatile. Tophinhanhdep.com’s comprehensive guides cover these varied applications, ensuring our community can confidently use their images across any medium.
In conclusion, the ability to change image size without losing quality is an indispensable skill in the contemporary digital landscape. By understanding the core concepts of pixels, resolution, and resampling, and by leveraging powerful tools like Adobe Photoshop, GIMP, and the advanced online utilities available on Tophinhanhdep.com, you can ensure your visual content always maintains its pristine quality. Whether you’re optimizing images for web performance, preparing them for print, or simply curating your personal collections of beautiful photography, the principles outlined here will guide you to success. Embrace these techniques, and let your images shine with the clarity and impact they deserve, as inspired by the rich visual resources at Tophinhanhdep.com.