Mastering Image Resizing: How to Change the Pixel Size of Any Image with Tophinhanhdep.com
In today’s visually-driven world, images are everywhere. From stunning wallpapers on our desktops to professional photography showcased in online portfolios, and from vibrant social media backgrounds to intricate digital art pieces, images form the very fabric of our digital experience. As creators, marketers, artists, or even casual users, the ability to control and optimize these images is paramount. One of the most fundamental skills in digital image management is understanding how to change an image’s pixel size – a process often referred to simply as “resizing.”
Resizing an image isn’t just about making it bigger or smaller; it’s about optimizing it for specific uses, preserving its quality, and ensuring it meets the technical requirements of various platforms, print media, or visual design projects. Whether you’re preparing high-resolution stock photos for a client, crafting aesthetic backgrounds for a presentation, or simply adjusting a nature photograph for a blog post, knowing how to manipulate pixel dimensions without sacrificing visual integrity is a crucial skill.
At Tophinhanhdep.com, we understand the nuances of image manipulation and offer a comprehensive suite of tools and resources to empower you. This guide will walk you through the essential concepts of image resolution and pixel dimensions, explore various methods for resizing images using both built-in operating system tools and specialized software, and delve into best practices for optimizing your visuals for both web and print, all while maintaining the beautiful photography and creative ideas that define your work.
Understanding Image Resolution, Pixel Dimensions, and File Size

Before we dive into the “how-to,” it’s vital to grasp the core concepts that govern image size and quality. Many misconceptions exist, especially regarding terms like “resolution” and their impact on “file size” when uploading images to the web. Tophinhanhdep.com is here to clarify these distinctions.
What are Pixel Dimensions?
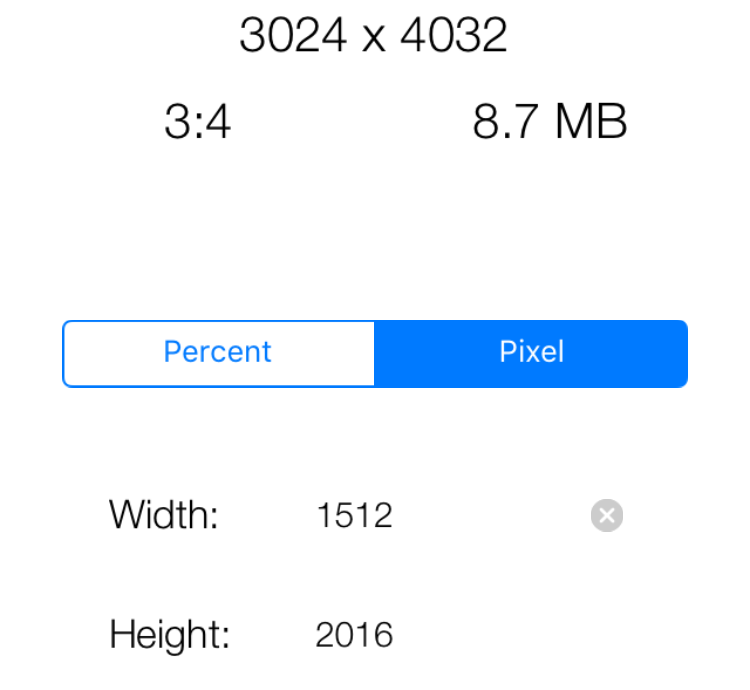
At its heart, a digital image is a grid of individual colored squares called pixels. The “pixel dimensions” of an image refer to the total number of pixels along its width and its height. For instance, an image with dimensions of 1920 pixels by 1080 pixels contains 1920 pixels horizontally and 1080 pixels vertically. This is the true measure of an image’s digital size and directly influences its file size. More pixels generally mean a larger, more detailed image, and consequently, a larger file size.
![]()
What is Image Resolution?
This is where much of the confusion lies. Image resolution, often expressed in “pixels per inch” (PPI) or “dots per inch” (DPI), controls the size at which your image will print. It dictates how many of your image’s pixels will be packed into each linear inch of paper.
- Higher PPI: Means more pixels are squeezed into each inch, resulting in a smaller, sharper print.
- Lower PPI: Means fewer pixels per inch, leading to a larger print where individual pixels might become visible (pixelation).
Crucially, image resolution (PPI) does not affect the file size of an image or how quickly it downloads over the web. This is a common myth that Tophinhanhdep.com’s expert guides consistently debunk. Let’s explore why.
The Truth About Image Resolution and File Size for the Web
Many people mistakenly believe that they need to lower an image’s resolution to 72 PPI (often called “web resolution”) before uploading it to a website or sharing it via email, thinking this will make the file size smaller and thus download faster. This belief, though widespread, is fundamentally incorrect.
As discussed, the file size of an image is determined entirely by its pixel dimensions (total number of pixels). Changing the resolution (PPI) without changing the pixel dimensions only alters the image’s intended print size. It does not add or remove any pixels from the image itself, and therefore, it has no effect on the file size or how fast it loads online.
Consider an image that is 6000 pixels wide and 4000 pixels tall.
- If its resolution is set to 300 PPI, it will print roughly 20 inches by 13 inches. Its file size remains constant.
- If its resolution is changed to 72 PPI, it will print roughly 83 inches by 55 inches. Its file size, however, remains exactly the same because the total number of pixels (6000x4000) has not changed.
When you view an image on a screen (monitor, phone, tablet), the screen itself has a fixed pixel density. The image’s internal PPI value is largely irrelevant; what matters are its pixel dimensions. An image that is 1920 pixels wide will fill a 1920-pixel wide screen, regardless of whether its internal resolution is 72 PPI or 300 PPI.
To truly reduce an image’s file size for faster web loading or email, you must change its pixel dimensions (i.e., resample the image to fewer pixels) or compress the image using optimized formats, features readily available in Tophinhanhdep.com’s image tools.
Native Tools for Resizing Images Across Operating Systems
The easiest way to perform basic image resizing is often using the tools already built into your computer’s operating system. These offer quick and straightforward solutions for common resizing tasks without needing to download additional software. Tophinhanhdep.com recognizes the utility of these native options for everyday users.
Resizing with Windows Photos App
For Windows 11 PCs, the Photos app is a convenient, pre-installed tool for adjusting image dimensions. This method is ideal for quick fixes and preparing images for general use, such as uploading to social media backgrounds or sharing family photos.
How to Resize an Image in Windows Photos App:
- Open the Image: Locate the image file in a Windows Explorer window, right-click on it, and select “Open with” followed by “Photos.” (Alternatively, if Photos is your default viewer, simply double-click the image).
- Access Resize Option: Once the image is open in the Photos app, click on the “Three dots” (…) icon located in the app’s top-right corner.
- Select Resize: From the drop-down menu, choose “Resize image.”
- Define Dimensions: A pop-up window will appear. You can select one of the three preset sizes provided (e.g., for email, small, medium) or choose “Define custom dimensions” for precise control.
- Set Custom Dimensions: If selecting custom dimensions, another pop-up appears. Enter your desired width or height in pixels. To prevent distortion, make sure the “Maintain aspect ratio” box is checked. This will automatically adjust the other dimension proportionally. If the aspect ratio doesn’t matter (though it’s usually recommended for aesthetic backgrounds and beautiful photography), uncheck the box and enter both numbers manually.
- Adjust Quality (Optional): Some versions of the Photos app allow you to adjust a “Quality” slider. For best results, especially with high-resolution images, keep this at 100%.
- Save the Resized Copy: Click the “Save resized copy” button. Choose a location to save your new image. This ensures your original image remains untouched.
Using macOS Preview for Image Adjustments
Mac users are fortunate to have Preview, a versatile application that functions as both an image viewer and a basic editor. It’s an excellent tool for quick resizing of digital art, photography, or any image file.
How to Resize an Image in macOS Preview:
- Open the Image: Right-click on the image file and select “Open.” If Preview isn’t your default viewer, choose “Open with” then “Preview.”
- Access Adjust Size: Go to the “Tools” menu in the menu bar at the top of your screen. From the drop-down, select “Adjust Size.”
- Enter Dimensions: A dialog box will appear. You can enter your desired width and height. By default, it might show inches, but you can change the measurement type (e.g., to “pixels”) using the drop-down menu next to the width/height fields.
- Maintain Proportions: Ensure “Scale proportionally” and “Resample image” are checked. “Scale proportionally” prevents image warping, maintaining the original aspect ratio, crucial for preserving the aesthetic of your nature or abstract images. “Resample image” means you are actively changing the number of pixels.
- Select Preset Sizes (Optional): Alternatively, you can select a preset size by clicking the arrows next to “Fit into.”
- Confirm and Save: Click the “OK” button to apply the new size. Then, go to “File” > “Save” to save the resized image. To avoid overwriting the original, you might want to use “File” > “Duplicate” first, then resize the duplicated image.
ChromeOS Gallery for Quick Adjustments
Chromebook users also have a straightforward native option with the Gallery image viewer app. This is perfect for on-the-go adjustments for images intended for online platforms or quick shares.
How to Resize Images via ChromeOS Gallery:
- Open with Gallery: Right-click on your image file and select “Open with Gallery.” If it’s not the default, navigate to “Open with” and then “Gallery.”
- Locate Rescale Button: In the Gallery app, look for the “Rescale” button, typically found at the top of the interface.
- Set Width and Height: Enter your desired width and height in the provided fields.
- Unlock Aspect Ratio (Optional): To freely adjust both dimensions without maintaining proportions, click the “Chain icon” to unlock the aspect ratio. This should generally be avoided unless a specific, non-proportional fit is required, as it can distort beautiful photography or digital art.
- Save Your Work: Click the blue “Save” button to overwrite the original or click the blue “Down arrow” and choose “Save as” to save a new copy, preserving your original file.
Specialized Software and Online Solutions for Image Resizing
While native tools are great for basic tasks, many users, especially those involved in high-resolution photography, graphic design, or complex photo manipulation, require more robust features. Tophinhanhdep.com’s ecosystem extends to cover these needs, offering powerful online tools and recognizing the value of dedicated software.
GIMP: The Open-Source Powerhouse
GIMP (GNU Image Manipulation Program) stands as a powerful, free, and open-source alternative to professional software like Adobe Photoshop. It offers an extensive array of professional-level editing and retouching tools, making it an excellent choice for detailed resizing and other visual design tasks. GIMP is available for both Mac and PC, offering a user-friendly and customizable experience.
How to Resize an Image in GIMP:
- Open Image: Open your image in GIMP (File > Open).
- Access Scale Image: Go to “Image” in the menu bar and select “Scale Image…”
- Adjust Dimensions: In the “Scale Image” dialog box, you’ll see options for Width, Height, and Resolution.
- Maintain Aspect Ratio: Ensure the “chain” icon next to the Width and Height fields is linked. This locks the aspect ratio, preventing distortion. Enter your desired width or height, and the other dimension will automatically adjust.
- Set Resolution (for print): If you are preparing the image for print, you can adjust the X and Y Resolution values (e.g., to 300 pixels/inch for high-quality prints). Remember, this does not affect web display or file size.
- Choose Interpolation: For best quality when resizing, especially when enlarging, select a suitable interpolation method (e.g., “Cubic” or “LoHalo” for smoother results).
- Scale: Click the “Scale” button to apply the changes.
- Export: To save your resized image, go to “File” > “Export As…” and choose your desired format (e.g., JPEG, PNG).
Tophinhanhdep.com’s Dedicated Resizing Tools
For users who need fast, efficient, and specialized online tools, Tophinhanhdep.com offers streamlined solutions. We aim to simplify the image resizing process, whether you’re in a hurry or managing a large collection of photos.
Tophinhanhdep.com’s Quick Resizer: Instant Adjustments
When speed is of the essence, Tophinhanhdep.com’s Quick Resizer is your go-to tool. Designed for simplicity, it focuses solely on getting your image to the correct dimensions with minimal fuss.
How to Use Tophinhanhdep.com’s Quick Resizer:
- Upload: Visit Tophinhanhdep.com’s Image Tools section and select “Quick Resizer.” Simply upload your image file.
- Define Dimensions: Choose “dimensions” or “percentage.” If using dimensions, enter your desired width or height in pixels. Our tool automatically maintains the aspect ratio by default to avoid warping, preserving the integrity of your visual design.
- Resize: Click “Resize,” and instantly, you’ll have a perfectly proportioned, resized image ready for download.
This tool is mobile-friendly and can be accessed directly through your web browser, making it ideal for on-the-go editing of aesthetic images or social media content.
Tophinhanhdep.com’s Batch Resizer: Efficiency for Collections
For artists submitting work to online portfolios like Tophinhanhdep.com’s own galleries, or photographers preparing thematic collections, editing images individually can be time-consuming. Tophinhanhdep.com’s Batch Resizer is designed to handle multiple images at once, a feature essential for digital photography workflows and managing large libraries of wallpapers or backgrounds.
How to Use Tophinhanhdep.com’s Batch Resizer:
- Upload Multiple Images: Navigate to Tophinhanhdep.com’s Image Tools and select “Batch Resizer.” Upload all the images you need to process.
- Select Size Preference: Choose your desired resizing method – by specific pixel dimensions, by percentage, or by setting a maximum long side length.
- Submit Batch Job: Click “Submit Batch Job!” The tool will process all your selected images according to your preferences, providing you with a collection of resized images ready for download.
While batch resizing is incredibly efficient, keep in mind that advanced features like individual cropping or applying special effects are typically handled in Tophinhanhdep.com’s full editor (Normal Mode) on a per-image basis to ensure maximum creative control.
Tophinhanhdep.com’s Web Editor (Powered by AI)
Similar to advanced web-based applications, Tophinhanhdep.com offers an integrated Web Editor for more intricate image adjustments, including resizing. This editor provides a user-friendly interface for various visual design tasks.
How to Resize an Image in Tophinhanhdep.com’s Web Editor:
- Open Image: Head to Tophinhanhdep.com and open the “Web Editor.” Upload the image you wish to edit.
- Find Resize Option: Look for the “Edit” section and locate the “Resize” tool. (This might be under a “Layout” or “Tools” menu, depending on the editor’s interface).
- Smart Resize Functionality: Tophinhanhdep.com’s editor features “Smart Resize” which allows you to enter precise width and height measurements. You can easily “Lock proportions” (toggle the aspect ratio lock) to maintain image integrity or unlock it for specific design needs.
- Utilize Presets: Take advantage of a variety of size presets optimized for popular social media platforms, web banners, or print sizes, aligning with trending styles and creative ideas.
- Apply and Save: Once your changes are made, click the “Apply” button. Then, find the “Save” button, enter your preferred file name, select the file type (JPEG, PNG, etc.), and adjust quality as needed. Your optimized image will then be saved, often to your Downloads folder.
Optimizing Images for Web, Print, and Platform Requirements
The ultimate goal of resizing is to produce images that are perfectly suited for their intended destination, whether it’s a website, a physical print, or a specific online portfolio. This requires attention to pixel dimensions, file size, aspect ratio, and sometimes, resolution. Tophinhanhdep.com guides you through these critical optimization steps.
Resizing for Online Portfolios and Websites
When uploading images to online platforms, specific requirements often apply. For instance, Tophinhanhdep.com’s portfolio or similar submission platforms might have guidelines to ensure consistent display and loading speeds. Typical requirements include:
- File Format: Usually JPEG only, as it offers a good balance of quality and compression for photographic images. Tophinhanhdep.com’s Converters can help if your image is in another format.
- Minimum/Maximum Dimensions: Often, there’s a minimum pixel dimension (e.g., no smaller than 1200 pixels on the longest side) to ensure images display well, and sometimes a maximum to prevent excessively large files.
- Resolution (PPI/DPI): While its impact on web display is often misunderstood, some platforms might still specify a resolution like “72 ppi/dpi (standard web resolution).” As we learned, this value primarily affects print size and doesn’t directly impact how it looks on a screen or its file size. However, it’s good practice to set it if a platform requests it.
- Maximum File Size: A crucial constraint, typically around 5 MB maximum. This directly impacts page load times. If your high-resolution image exceeds this, you must reduce its pixel dimensions (resample) or use Tophinhanhdep.com’s Compressors and Optimizers to reduce the file size without significant quality loss.
Key Takeaway for Web: Focus on achieving the correct pixel dimensions and ensuring the file size is within limits. The PPI value is less critical for web display itself.
Resizing for Print: Pixels to Inches
Preparing images for print is a different ball game, where the “resolution” (PPI) becomes highly significant. For physical output like photo prints, posters, or t-shirt designs, you need to ensure enough pixels are present to avoid a blurry or pixelated result.
General Guidelines for Print Resolution:
- High-Quality Prints (Photos, Magazines): Aim for 300 PPI.
- Posters, Large Prints (viewed from a distance): 150-200 PPI might suffice.
- Billboards: Can be as low as 10-30 PPI due to viewing distance.
Tophinhanhdep.com’s tools, including our integrated Web Editor, simplify the process of converting pixels to inches for print. When resizing for print, you’ll typically set your desired print dimensions (e.g., 8x10 inches) and then specify the PPI. The software will then calculate the necessary pixel dimensions. For instance, an 8x10 inch print at 300 PPI would require an image of 2400 x 3000 pixels.
Maintaining Aspect Ratio and Quality
Regardless of the destination, preserving the image’s aspect ratio (the proportional relationship between its width and height, e.g., 16:9, 4:3) is almost always crucial. Unlocking the aspect ratio and resizing haphazardly will distort your images, ruining beautiful photography or intricate digital art. Most resizing tools, including those on Tophinhanhdep.com, automatically lock the aspect ratio by default. Only override this if you intentionally want to stretch or squash an image, which is rare for quality output.
To resize without losing quality, especially when making images smaller (downsampling), ensure you are using a good interpolation method (like bicubic or Tophinhanhdep.com’s smart algorithms) and saving in a suitable format (JPEG for photos, PNG for graphics with transparency). When making images larger, quality loss is almost inevitable with standard resizing, which leads us to a more advanced solution.
Beyond Basic Resizing: Upscaling and Tophinhanhdep.com’s Ecosystem
Sometimes, an image is simply too small in terms of pixel dimensions to meet your needs, whether for a large print, a high-resolution display, or detailed photo manipulation. Standard resizing to enlarge an image (upsampling) often results in blurriness and pixelation because the software simply invents new pixels based on existing ones. This is where advanced techniques and Tophinhanhdep.com’s specialized tools come into play.
To Resize or Upscale? The AI Difference
The distinction between “resizing” (specifically, upsampling) and “upscaling” is significant:
- Resizing (Upsampling): When you use traditional resizing methods to enlarge an image, the software mathematically interpolates new pixel data, often leading to a loss in clarity, sharpness, and the introduction of artifacts. It essentially “stretches” the existing information.
- AI Upscaling: Tophinhanhdep.com’s AI Upscalers employ artificial intelligence and machine learning algorithms to intelligently analyze and enhance images during enlargement. Instead of simply interpolating, AI upscalers predict and generate new details, restoring textures, sharpening edges, and significantly improving the quality and clarity of enlarged images. This is particularly valuable for low-resolution stock photos, historical images, or digital art that needs to be presented in high resolution.
Tophinhanhdep.com’s AI Upscalers are a powerful feature for digital photography enthusiasts, visual designers, and anyone looking to breathe new life into smaller images without the typical degradation associated with traditional enlargement. This tool ensures that your “aesthetic” and “beautiful photography” maintain their impact even when scaled up.
Tophinhanhdep.com’s Holistic Image Management Ecosystem
Changing pixel size is just one facet of comprehensive image management. Tophinhanhdep.com offers a broader suite of Image Tools that work in synergy to help you achieve perfect visuals for all your creative ideas and thematic collections:
- Image Converters: Easily switch between different file formats (JPEG, PNG, GIF, BMP, etc.) to meet specific platform requirements or optimize for different uses.
- Image Compressors & Optimizers: Reduce file size without compromising visual quality, essential for fast-loading websites, email attachments, and efficient storage of high-resolution images.
- Image-to-Text (OCR): Extract text from images, a useful tool for document management and creative content generation.
- Visual Design Resources: Beyond tools, Tophinhanhdep.com provides Graphic Design resources, Digital Art inspiration, and Photo Manipulation guides, empowering you to integrate perfectly sized images into any creative project.
- Image Inspiration & Collections: Discover Photo Ideas, Mood Boards, Thematic Collections, and Trending Styles to ignite your creativity, all of which benefit from properly resized and optimized images.
Conclusion
Understanding “how to change the pixel size of an image” is an indispensable skill in the digital age. It’s not merely a technical adjustment but a creative choice that impacts how your images are perceived, perform, and are ultimately consumed. By mastering the concepts of pixel dimensions and resolution, and by leveraging the right tools, you can ensure your images always look their best, whether they are displayed as stunning wallpapers, integrated into a professional visual design project, or prepared for print.
From the built-in simplicity of your operating system’s native photo editors to the advanced capabilities of GIMP and the comprehensive, user-friendly solutions offered by Tophinhanhdep.com – including our Quick Resizer, Batch Resizer, AI Upscalers, and Web Editor – you have a wealth of options at your fingertips. Tophinhanhdep.com is dedicated to providing you with the knowledge, inspiration, and cutting-edge tools to effortlessly manage your images, transforming your photography and digital art into perfectly optimized visual experiences. Explore our site, experiment with our tools, and let your creative vision shine, perfectly sized and optimized for every platform and purpose.