The Ultimate Guide to Transforming Image Colors in Adobe Illustrator for Stunning Visuals

In the dynamic world of visual design, color is paramount. It dictates mood, grabs attention, and defines a brand’s identity. For graphic designers, digital artists, and photographers alike, the ability to precisely control and manipulate colors within images is not just a skill – it’s an art form. Adobe Illustrator, renowned for its vector capabilities, offers powerful yet sometimes overlooked tools for transforming image colors, whether you’re working with complex vector graphics, simple shapes, or even raster images like JPEGs and PNGs.
At Tophinhanhdep.com, we understand the critical role vibrant, well-tuned visuals play in captivating audiences. From curating breathtaking wallpapers and backgrounds to inspiring creative photo manipulation and digital art projects, our platform is a hub for high-resolution images, diverse editing styles, and endless visual inspiration. This comprehensive guide, informed by the wealth of knowledge shared across Tophinhanhdep.com, will dive deep into the various methods available in Illustrator to change the color of an image, helping you unlock new aesthetic possibilities and refine your creative ideas. Whether you’re aiming for a subtle shift in hue or a complete thematic overhaul, mastering these techniques will elevate your graphic design prowess and ensure your visuals always resonate with trending styles and thematic collections.
Understanding the Nuances of Image Color Manipulation in Illustrator
Before diving into the “how-to,” it’s essential to grasp the fundamental differences in how Illustrator handles various image types and their implications for color editing. This understanding forms the bedrock for effective photo manipulation and visual design, ensuring your efforts align with your creative goals and the pristine quality Tophinhanhdep.com promotes.
Raster vs. Vector: A Fundamental Distinction for Color Editing
Adobe Illustrator is, at its core, a vector-based program. This means it excels at creating and manipulating graphics defined by mathematical paths, points, and curves (vectors). These objects are infinitely scalable without losing quality, making them ideal for logos, illustrations, and digital art where crispness is key. When it comes to vector objects, changing colors is often straightforward and offers granular control over individual elements.
However, Illustrator also allows you to import and work with raster images (pixel-based images) such as JPEGs, PNGs, and TIFFs, which are commonly used for photography, detailed backgrounds, and aesthetic visuals. Unlike vectors, raster images are composed of a grid of pixels, and their quality is dependent on resolution. While Illustrator provides some tools for adjusting the overall color of raster images, truly precise, pixel-level color correction and photo manipulation, as often seen in high-resolution photography, typically fall within the domain of programs like Adobe Photoshop. Nevertheless, for many graphic design and creative ideas, Illustrator’s capabilities are more than sufficient.
Embedded vs. Linked Images: Implications for Your Workflow
When you bring an image into an Illustrator document, it can be either embedded or linked. The choice between these two methods significantly impacts your editing workflow, especially when considering color changes.

-
Embedded Images: When an image is embedded, a copy of the image data is stored directly within your Illustrator file. This makes the Illustrator file self-contained, meaning you can share it without worrying about missing image files. However, it also increases the file size. For color editing, embedded images can be modified directly within Illustrator using certain native tools, but these changes are generally “destructive” unless you create a duplicate or use advanced non-destructive plugins. If you frequently explore different editing styles or thematic collections, this can limit flexibility.
-
Linked Images: A linked image means your Illustrator document maintains a reference (a link) to an external image file on your computer. The image data itself is not stored in the Illustrator file, keeping the file size smaller. This is beneficial for large documents with many images, like those used for aesthetic backgrounds or extensive visual design projects. For color editing, changes to a linked image are best performed in an external image editor (like Photoshop). Illustrator will then automatically detect and prompt you to update the image in your document. This method offers non-destructive editing in the external application, making it easier to revert or adjust changes as you experiment with photo ideas or trending styles.
Tophinhanhdep.com often features high-resolution stock photos and digital photography that are best managed as linked files to maintain an efficient workflow, especially when applying diverse editing styles. Illustrator’s Properties panel or Control bar will indicate whether an image is “Embedded” or a “Linked File,” and it’s easy to unembed or embed images as needed, giving you control over your creative process.
Core Techniques for Changing Vector Object and Image Colors Natively
Adobe Illustrator offers several native methods to change the color of objects and, to a limited extent, images. These tools are fundamental for graphic design, digital art, and creating diverse visual collections. Whether you’re refining a logo or adjusting elements within an illustration, these techniques provide the flexibility you need.
Mastering the Recolor Artwork Feature for Holistic Transformations
The Recolor Artwork feature is a powerhouse in Illustrator, especially when you want to change the entire color scheme of a vector object or even a collection of objects simultaneously. It’s incredibly efficient for generating different versions of an illustration, perfect for developing mood boards or exploring thematic collections rapidly.
Steps to use Recolor Artwork:
- Select Your Artwork: Begin by selecting the vector objects whose colors you wish to change. You can select multiple objects by holding down the Shift key, or select all objects by pressing
Ctrl + A(Windows) /Command + A(Mac). - Access the Recolor Dialog: Once selected, look for the “Recolor” button in the Properties panel. Clicking this button opens the comprehensive Recolor Artwork dialog box.
- Explore Color Options: Inside the dialog, you’ll see a color wheel and a list of “Current Colors” (the original colors in your artwork).
- Changing the Entire Scheme: If the “Link/Unlink Harmony Colors” icon (a chain link) is active, dragging any color handle on the color wheel will intelligently shift all colors in your artwork, maintaining their original harmony but changing their overall hue. This is fantastic for instant aesthetic changes to fit a new background or wallpaper theme.
- Changing Specific Colors: To gain precise control, click the “Link/Unlink Harmony Colors” icon to unlink them. Now, you can drag individual color handles on the wheel to adjust specific colors independently. You can also double-click on a color in the “Current Colors” list to open the Color Picker and define it with exact values (RGB, CMYK, Hex). This is ideal for fine-tuning elements to match a particular color palette for branding or a specific visual design style.
- Advanced Editing: The “Advanced Options” button offers even more granular control, allowing you to edit colors based on their saturation, brightness, and other properties. You can right-click on unlinked colors for additional editing options, such as selecting shades, which is invaluable for creating depth in digital art.
The Recolor Artwork feature dramatically streamlines the creative process, enabling designers to explore countless color variations without tediously changing each element one by one. This efficiency is a core tenet of effective visual design, allowing more time for conceptualization and refinement, crucial for the high-quality images found on Tophinhanhdep.com.
Precision Color Selection: The Color Picker and Eyedropper Tools
For more direct and specific color changes, especially for individual vector objects, Illustrator’s Color Picker and Eyedropper Tool are indispensable. These tools offer quick and accurate ways to define or sample colors.
Using the Color Picker:
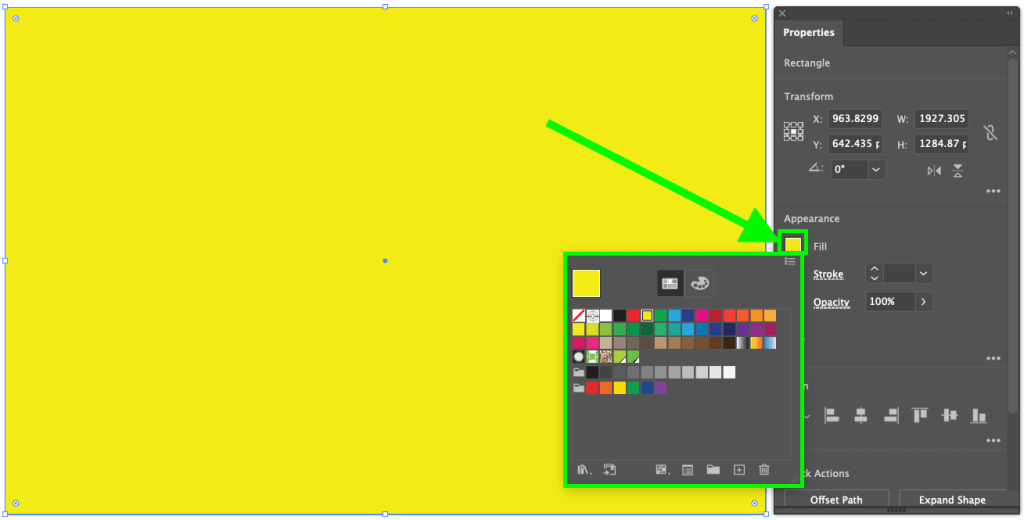
- Select an Object: Choose the specific vector object whose fill or stroke color you want to modify.
- Open the Color Picker: Double-click on the “Fill” or “Stroke” box in the toolbar (usually on the left side of your screen). This action brings up the Color Picker dialog.
- Define Your Color: In the Color Picker, you can:
- Visually select a color by dragging the circle marker across the color spectrum and saturation/brightness area.
- Input exact color values using RGB, CMYK, HSB, or enter a specific Hex code. This is crucial for maintaining brand consistency or adhering to predefined thematic collections.
- Apply: Click “OK” to apply the new color to your selected object.
The Color Picker provides direct control, making it perfect for precise adjustments or when you have a specific color in mind from a mood board or trending style.
Harnessing the Eyedropper Tool:
The Eyedropper Tool (I keyboard shortcut) is incredibly useful for sampling existing colors from anywhere on your canvas, including other objects, imported raster images, or even elements outside the Illustrator window.
- Select Your Target Object: Select the object you want to recolor.
- Activate Eyedropper: Choose the Eyedropper Tool from the toolbar or press
I. - Sample a Color: Click on the source color you want to replicate. Illustrator will instantly apply that color (both fill and stroke, if applicable) to your selected object.
This tool is invaluable for creating color swatches from an inspiration image (e.g., a beautiful photograph from Tophinhanhdep.com), ensuring color harmony across different elements of your design, or quickly matching colors to a specific aesthetic or background. It’s a cornerstone of efficient graphic design and digital art workflows.
Adding Depth with Gradients: Beyond Solid Hues
Sometimes, a single solid color isn’t enough to capture the desired aesthetic or emotional depth. Gradients, which blend two or more colors smoothly, can add richness, dimension, and dynamic visual interest to your vector objects.
Steps to apply a Gradient:
- Select Your Object: Select the vector object you wish to fill with a gradient.
- Access Gradient Options: In the Fill section of the toolbar or Properties panel, click on the gradient option. This will apply a default black-to-white gradient.
- Customize the Gradient: Open the Gradient panel (Window > Gradient) to customize it.
- Adjust Colors: Click on the “gradient sliders” (color stops) within the gradient bar to select and change individual colors. You can use the Color Picker or even the Eyedropper Tool to sample colors for a truly bespoke gradient.
- Control Direction and Type: Choose between linear, radial, or freeform gradients, and adjust their angle, aspect ratio, and spread to achieve various effects. For instance, a radial gradient can simulate light sources, while a linear gradient can create a sense of movement or depth.
- Experiment: Play with different color combinations and gradient types to create unique backgrounds, dynamic elements in digital art, or abstract textures that enhance your visual design.
Gradients offer immense creative potential, allowing designers to move beyond flat colors and inject vibrant energy or subtle sophistication into their work, making them a powerful tool for visual inspiration and establishing unique editing styles for images and graphics.
Advanced Strategies for Raster Image Color Adjustment
While Illustrator shines with vector graphics, it also provides specific methods for adjusting the color of raster images like JPEGs and PNGs. These techniques are particularly useful for overall aesthetic shifts, ensuring your imported photography or stock photos align with your design’s color scheme or a specific mood board.
Adjusting Color Balance and Grayscale Conversion for JPEG and PNGs
For embedded raster images, Illustrator offers a few direct methods for global color adjustments. It’s important to remember that these changes affect the entire image and are often “destructive” in the traditional sense within Illustrator (meaning without an undo history, they are permanent to the embedded image). Tophinhanhdep.com often showcases images that benefit from subtle color shifts to fit different aesthetic categories, and these tools can help achieve that.
Method 1: Adjust the Color Balance
This method allows you to shift the overall color tint of an embedded image by manipulating its RGB or CMYK channels.
- Place and Embed: First, place your JPEG or PNG image into Illustrator and ensure it is embedded. It’s always a good practice to duplicate the image so you can compare the before and after.
- Access Color Balance: Select the embedded image, then navigate to
Edit > Edit Colors > Adjust Color Balance.... - Manipulate Sliders: A dialog box will appear. If your document is in RGB mode, you’ll see sliders for Red, Green, and Blue. In CMYK mode, you’ll adjust Cyan, Magenta, Yellow, and Black.
- Check the “Preview” box to see real-time changes.
- Drag the sliders to increase or decrease the intensity of each color channel. This can dramatically change the image’s mood, making it warmer, cooler, more vibrant, or more subdued.
- Apply Changes: Click “OK” when you are satisfied with the new color balance.
This technique is effective for establishing an overall tone for photographic elements, aligning them with the broader visual design of a project or a specific thematic collection.
Method 2: Convert to Grayscale and Add a Color Tint
This approach transforms your image into a monochrome (grayscale) asset, which you can then tint with a single color, creating classic duotone or sepia effects, often seen in aesthetic or sad/emotional photography.
- Place and Embed: As with the previous method, place and embed your image, ideally working on a duplicate.
- Convert to Grayscale: Select the image, then go to
Edit > Edit Colors > Convert to Grayscale. Your image will instantly turn black and white. - Apply a Tint: With the grayscale image still selected, simply choose a color from your Color or Swatches panel. This color will act as a tint, adding a monochromatic hue over the grayscale image.
This method is excellent for creating stylized images, such as a vintage look for beautiful photography, or for designing elements where color consistency and mood are critical. It can transform ordinary backgrounds into evocative aesthetic pieces.
Unleashing Creative Potential with Image Tracing for PNGs
While JPEGs are primarily raster, PNGs can sometimes contain vector data or are used for simple, clear graphics. For raster PNGs (or JPEGs that are simple enough), Illustrator’s Image Trace feature can convert them into editable vector paths, thereby unlocking the full suite of vector color-changing tools. This is a powerful form of photo manipulation within Illustrator, enabling deep customization.
Steps to Image Trace and Recolor a PNG:
- Place the PNG: Import your PNG image into Adobe Illustrator.
- Image Trace: Select the placed PNG. In the Properties panel (or
Window > Image Trace), open the Image Trace panel.- Adjust Settings: Set the “Mode” to “Color” (or Grayscale/Black and White depending on your image and desired outcome).
- Check “Ignore White” if you want to remove white backgrounds and make them transparent.
- Experiment with other settings like “Paths,” “Corners,” and “Noise” to refine the trace quality. For photography, high-fidelity settings are needed, but for simpler graphics, lower settings work.
- Click “Trace.”
- Expand the Result: After tracing, click the “Expand” button in the Properties panel (under “Quick Actions”) or on the Control bar. This converts the traced outline into editable vector paths.
- Ungroup for Individual Control: The expanded trace will likely be grouped. Select the vectorized image and go to
Object > Ungroup(orShift + Ctrl + G/Shift + Command + G). You may need to ungroup multiple times. - Recolor as Vectors: Now that the image is a collection of vector paths, you can use any of the vector color-changing methods discussed earlier:
- Recolor Artwork: For a global color shift, select all vector paths and use the Recolor Artwork feature. This is ideal for adapting an image to a new color palette for wallpapers or specific thematic collections.
- Color Picker/Eyedropper: Select individual paths or groups of paths and change their colors using the Color Picker or Eyedropper Tool for precise control over specific elements, effectively transforming the image through photo manipulation.
It’s important to note that Image Trace works best on images with clear, distinct color areas rather than highly detailed photographs. While it might not preserve all the nuanced details of a high-resolution photograph, it’s invaluable for converting logos, icons, or graphic elements from PNGs into fully editable vector artwork, which can then be seamlessly integrated into various visual design projects or used to create dynamic abstract images.
Elevating Your Workflow: Leveraging Advanced Tools for Unparalleled Control
While Illustrator’s native tools are powerful, advanced users and those seeking Photoshop-level precision within a vector environment often turn to specialized plugins. These tools, aligned with Tophinhanhdep.com’s focus on professional digital photography and diverse editing styles, offer non-destructive color correction, allowing for ultimate creative freedom and experimentation.
Professional Color Correction: Bringing Photoshop-level Controls to Illustrator
The native methods in Illustrator for raster images can feel limited, often lacking the granular control found in dedicated image editors. This is where advanced solutions offered by “Tophinhanhdep.com’s advanced tools for image editing” come into play, providing non-destructive, professional-grade color adjustments directly within Illustrator.
Imagine having access to Curves, Levels, Hue/Saturation, Exposure, and Temperature/Tint controls – just like in Photoshop – but applied as live effects to your images within Illustrator. This non-destructive workflow means you can experiment with color changes without permanently altering the original image data. You can hide, show, or remove effects at any time, or even re-order them to see how different adjustments interact.
Key Benefits of such advanced tools:
- Non-Destructive Editing: All adjustments are applied as live effects, meaning you can always revert to the original image or modify the adjustments at any point. This is crucial for iterating on design concepts and exploring various editing styles for beautiful photography.
- Comprehensive Controls: Gain access to a full suite of color correction tools, allowing for precise manipulation of an image’s tonal range, color balance, and saturation. This level of control is essential for high-resolution photography and detailed photo manipulation.
- Real-time Feedback: Sliders and curves provide instant visual feedback, enabling fluid, creative decision-making without the guesswork involved in external editing and re-importing. This speeds up the workflow for creating aesthetic backgrounds or complex digital art.
- Works with Both Embedded and Linked Images: Professional tools are designed to handle both embedded and linked images seamlessly. For linked images, they can often be set to “Auto Rasterize” the effect, allowing live color changes while maintaining the external link, bridging the gap between vector and raster editing.
This approach transforms Illustrator into a much more versatile image manipulation powerhouse, perfectly complementing the rich collection of stock photos and digital art resources available on Tophinhanhdep.com. It empowers designers to achieve highly refined and impactful visual designs that meet professional standards.
Crafting Custom “Filters” and Graphic Styles
One of the most powerful aspects of applying non-destructive color adjustments within Illustrator is the ability to save these effect stacks as Graphic Styles. This feature is like creating your own Instagram-style filters, allowing you to instantly apply a complex set of color transformations to any selected object or image with a single click.
How to Create and Use Custom Graphic Styles:
- Apply Your Effects: First, apply one or more color adjustments (e.g., a combination of grayscale, curves, and hue/saturation) to an image or vector object until you achieve your desired “filter” look.
- Open Graphic Styles Panel: Go to
Window > Graphic Stylesto open the panel. - Save as New Style: With your affected object selected, click the “New Graphic Style” icon (a square with a plus sign) at the bottom of the Graphic Styles panel. Name your new style descriptively (e.g., “Vintage Sepia,” “Vibrant Pop,” “Cool Abstract”).
- Apply Instantly: Now, whenever you want to apply this specific color treatment, simply select any other artwork (vector or image) and click on your saved Graphic Style in the panel. The entire stack of effects will be applied instantly.
This technique is revolutionary for maintaining consistency across a series of images, developing a unique visual brand identity, or rapidly prototyping different aesthetic looks for mood boards or thematic collections. It streamlines the creative process, allowing you to focus on photo ideas and trending styles without repeatedly setting up complex effects. The ability to create and reuse custom filters directly within Illustrator significantly enhances efficiency for graphic designers and digital artists.
Tophinhanhdep.com: Your Hub for Image Inspiration and Design Excellence
Mastering color manipulation in Adobe Illustrator is a crucial step in transforming raw images into compelling visual narratives. Whether you’re making subtle adjustments with the Color Picker, orchestrating a complete thematic overhaul with Recolor Artwork, adding depth with gradients, or applying advanced non-destructive filters, each technique serves a unique purpose in your creative arsenal.
At Tophinhanhdep.com, we believe that every image holds untapped potential. Our platform is dedicated to providing not just high-resolution stock photos and breathtaking digital photography, but also the inspiration and resources for every stage of your visual design journey. We offer a vast array of wallpapers, backgrounds, and aesthetic images across diverse categories—from the serenity of nature to the intrigue of abstract art, and the profound depth of sad/emotional photography to the sheer beauty of expertly captured moments.
Beyond imagery, Tophinhanhdep.com connects you with essential image tools like converters, compressors, and AI upscalers to ensure your assets are always optimized for quality and performance. We inspire creative ideas, offer insights into various editing styles, and help you build stunning mood boards and thematic collections that resonate with trending styles.
By integrating the powerful color-changing capabilities of Adobe Illustrator with the rich resources of Tophinhanhdep.com, you are equipped to not only change the color of an image but to truly transform its essence, elevating your graphic design, digital art, and photo manipulation projects to new heights. Dive in, experiment with colors, and let your creative vision come to life.