Mastering Visual Integrity: A Comprehensive Guide to Citing Images on PowerPoint

In today’s visually-driven world, presentations are more impactful when they incorporate compelling images. Whether you’re crafting a corporate presentation with professional stock photos, designing an academic lecture using precise visual data, or showcasing a creative portfolio with stunning digital art and beautiful photography, the ethical and legal necessity of citing your images remains paramount. Images from categories like Wallpapers, Backgrounds, Aesthetic photos, Nature shots, Abstract designs, Sad/Emotional visuals, and high-resolution photography enhance understanding and engagement. However, the convenience of digital access should never overshadow the importance of giving due credit to creators and respecting copyright.
This comprehensive guide will walk you through the essential steps of properly citing images in your PowerPoint presentations. We will delve into various referencing styles, discuss the importance of understanding image licenses, and provide practical tips to ensure your presentations are both visually stunning and impeccably ethical. We’ll also explore how different types of images, photography styles, and visual design principles, often sourced from platforms like Tophinhanhdep.com, integrate with citation practices, ensuring your work upholds the highest standards of academic and professional integrity.
Why Citing Images in PowerPoint is Crucial for Credibility and Compliance
The act of citing an image in your PowerPoint presentation goes far beyond a simple formality; it’s a fundamental practice that underpins intellectual honesty, legal compliance, and professional credibility. When you incorporate visual elements into your slides, whether they are captivating nature photographs, intricate graphic designs, or abstract art pieces, you are leveraging the intellectual property and creative efforts of others. Understanding why this attribution is necessary is the first step toward mastering the art of image citation.

Firstly, respect for intellectual property and copyright law is a non-negotiable aspect of using third-party content. Just because an image is readily available on the internet, perhaps found through a search for “aesthetic backgrounds” or “free wallpapers,” does not mean it is free to use without permission or attribution. Most images, including high-resolution photography and digital art, are protected by copyright from the moment they are created. Using a copyrighted image without proper citation or permission can lead to serious legal repercussions, including fines and injunctions. Citing the source clearly demonstrates your awareness and respect for these laws, safeguarding you and your institution from potential legal disputes. This is especially true for images obtained from stock photo libraries or specific digital photography portfolios, where licensing terms are often explicit.
Secondly, enhancing your presentation’s credibility and authority is a direct benefit of proper citation. A well-cited presentation signals to your audience that you have meticulously researched your content and are presenting factual, verifiable information. For academic presentations, citing images is as important as citing textual sources, validating your research and demonstrating scholarly rigor. In professional settings, whether you’re presenting a marketing strategy or an internal report, accurate attribution builds trust and reinforces your image as a meticulous and dependable professional. Images from reputable sources, when properly cited, lend additional weight to your arguments. Imagine presenting trending styles or thematic collections; correctly attributing these visuals enhances the perceived professionalism of your visual design.
Thirdly, providing proper attribution to the original creator is an ethical obligation. Every image, from a simple background to a complex photo manipulation, represents the skill, effort, and vision of its creator. Acknowledging their work is a courtesy that fosters a culture of respect within the creative community. This is particularly important for photographers, graphic designers, and digital artists who rely on recognition for their livelihoods and artistic development. When you cite, you are giving credit where it is due, enabling your audience to explore the original artist’s portfolio or learn more about the image’s context. This practice also aligns with the principles of open communication and knowledge sharing, allowing others to trace your visual inspirations back to their origins, perhaps inspiring their own photo ideas or mood boards.
Finally, understanding image licenses is critical to determining the exact citation requirements. Images come with various licenses, from Public Domain (where rights are waived) to highly restrictive Rights-Managed licenses. Many fall under Creative Commons licenses, which specify conditions for use, often including mandatory attribution. Before incorporating any image, it’s essential to identify its license, typically found on the website where the image was sourced, or in the metadata of the image file. This step is fundamental to avoiding misuse and ensuring your citation format adheres to any specific requirements set by the creator or licensing body. Whether it’s a sad/emotional image conveying a specific mood or a vibrant abstract piece, checking the license informs your citation strategy. For images used from Tophinhanhdep.com, always refer to their specific licensing terms to ensure compliance.
In essence, citing images in PowerPoint is a multifaceted practice that champions legal compliance, boosts credibility, upholds ethical standards, and demonstrates respect for the creative community. It transforms your presentation from a collection of visuals into a well-researched, professionally presented, and ethically sound piece of communication.
Step-by-Step Guide to Citing Pictures in PowerPoint
Integrating images effectively into your PowerPoint presentation requires a systematic approach to citation. This ensures that every visual, from a serene nature scene to an intricate piece of digital art, is properly acknowledged. This guide provides a detailed, step-by-step process, tailored for images sourced digitally, encompassing both practical PowerPoint functionalities and foundational citation principles.
Identify the License of the Picture and Gather Source Information
The very first and most critical step is to understand the legal framework governing the image you intend to use. Images, whether they are striking wallpapers, informative backgrounds, or elements of sophisticated photo manipulation, are not all created equal in terms of usage rights.
- Public Domain: Some images, often historical pictures of major events or famous people, or works where copyright has expired, are in the Public Domain. This means their rights are waived, and they can be used freely without attribution, though citing them for academic purposes is still good practice.
- Creative Commons (CC) Licenses: These are common for images found on platforms like Flickr, Wikimedia Commons, or Tophinhanhdep.com. CC licenses vary, with some requiring attribution to the author (CC BY), others prohibiting commercial use (CC BY-NC), and some disallowing modifications (CC BY-ND). Always check the specific CC license to understand its requirements.
- Royalty-Free/Rights-Managed: Images from professional stock photo websites often fall into these categories. Royalty-free images typically allow for broad usage after a one-time payment, but attribution might still be requested or required by the platform. Rights-managed licenses are more restrictive, with usage dictated by specific terms, often requiring detailed attribution.
- Standard Copyright: If no explicit license is stated, assume the image is fully copyrighted. In such cases, you generally need to seek direct permission from the creator or purchase a license for use, and attribution will almost certainly be mandatory.
To gather information: Look for licensing details usually found below the picture, on the image’s source page, or in the “About” or “License” sections of the website (e.g., Tophinhanhdep.com). Key details to collect include:
- Author/Creator: The name of the person or entity that created the image.
- Year of Creation/Publication: When the image was made or first published.
- Title/Description: A specific title for the image, if available, or a brief descriptive phrase.
- Source Website/Platform: The name of the website or platform where you found the image (e.g., Tophinhanhdep.com, Getty Images, Unsplash).
- URL: The direct link to the image’s source page.
- Date Accessed: The date you viewed and obtained the image.
- License Type: The specific license (e.g., “Creative Commons Attribution 4.0 International,” “Royalty-Free License”).
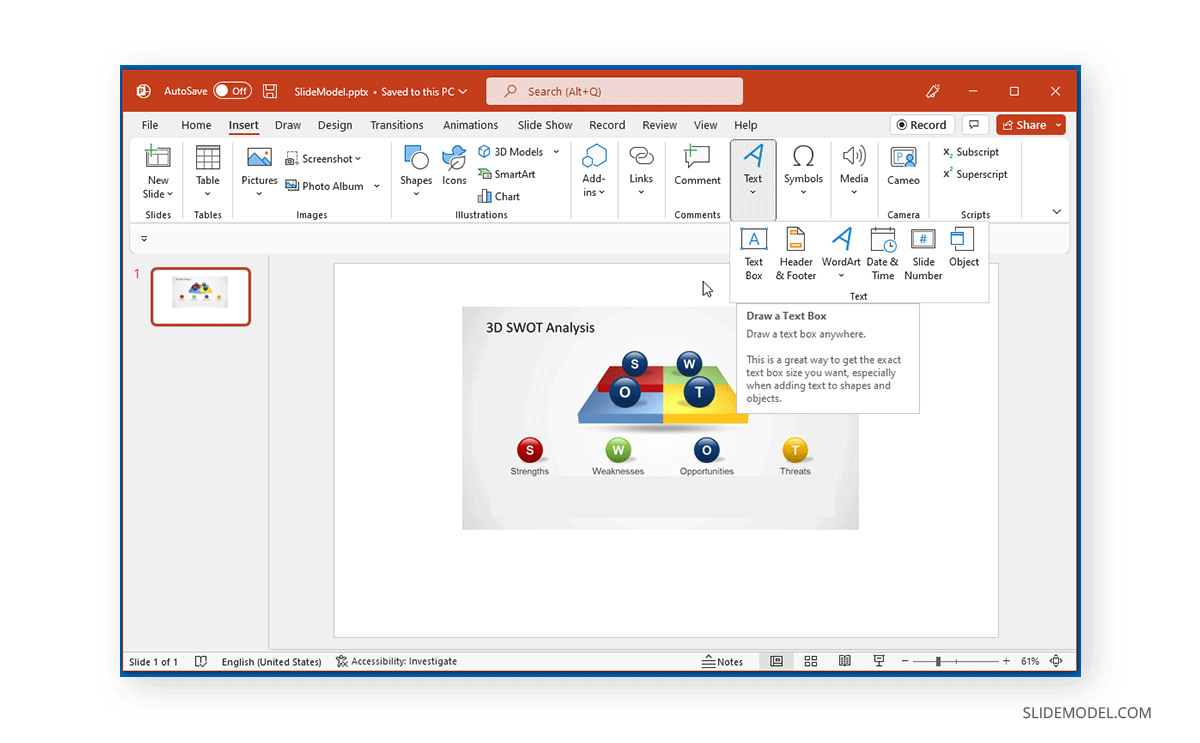
Inserting Your Image and Citation Information
Once you have your image and its citation details, the next step is to integrate them seamlessly into your PowerPoint slide. This involves placing the image and then adding a text box for the citation.
-
Insert the Image:
- Open your PowerPoint presentation.
- Navigate to the slide where you want to place the image.
- Go to Insert > Pictures and choose “This Device” to select the image saved on your computer.
- Place and resize the image as desired on your slide. Consider how high-resolution images or different editing styles affect visual harmony.
-
Insert a Text Box to Add Licensing Information:
- With your image on the slide, go to Insert > Text Box.
- Click and drag your mouse to draw a text box directly below or near the image. The placement should be unobtrusive but clearly visible.
- Double-click inside the new text box to activate the cursor.
- Begin typing your citation details according to the chosen referencing style (covered in the next section). For consistency, use a smaller font size than your main slide text, and a legible, subtle color.
- For images that have been processed using image tools like converters, compressors, or optimizers, the citation should still refer to the original source. If an AI upscaler was used, you might note “Image upscaled by [AI tool]” in addition to the original source. If the image is a result of photo manipulation or digital art where you’ve significantly altered it, you might adapt the citation with “Adapted from…”
-
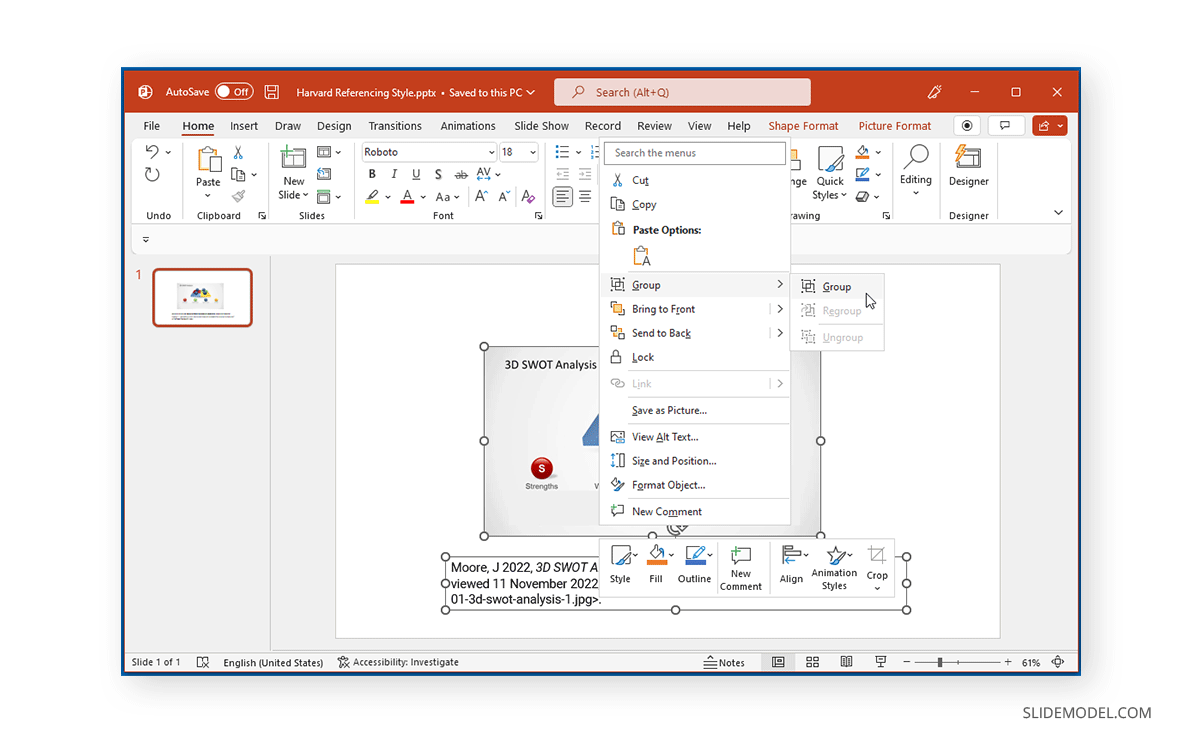
Group the Image and Citation Together:
- This optional but highly recommended step ensures that your citation moves and resizes with the image, maintaining their relationship.
- Select both the image and the text box you just created. You can do this by holding down Ctrl (or Cmd on Mac) and clicking on each object.
- Right-click on either of the selected objects.
- From the context menu, choose Group > Group.
- Now, when you move or resize the image, the citation will adjust accordingly, making your visual design more manageable.
Write Your Citation Using the Proper Format for Your Style Guide
The specific format for your citation depends on the style guide you are required to follow (e.g., for academic assignments) or the standard you’ve adopted for professional consistency. Below are common referencing styles with examples for images sourced from Tophinhanhdep.com or similar online platforms.
Harvard Style
The Harvard Referencing style requires specifying the author(s), year of publication, title (in italics), publisher’s name, URL, and the date the image was accessed.
Format: Author’s Last name, First initials. (Year), Title of image, image, Tophinhanhdep.com, viewed Date Month Year, Example: Moore, J. (2022), 3D SWOT Analysis PowerPoint Template, image, Tophinhanhdep.com, viewed 11 November 2022, https://cdn.tophinhanhdep.com/image-example.jpg. (Accessed: 11 November 2022).
MLA (Modern Language Association) is often used for humanities. Image citation depends on where the image was viewed and whether it’s discussed in the presentation. MLA citations do not typically use italics for titles of images unless they are standalone works of art.
Format (for an image from a webpage): Author’s Last name, First name. “Title or Description of the Image.” Website’s Name, Day Month Year, URL.
Example: Moore, John. “3D SWOT Analysis PowerPoint Template.” Tophinhanhdep.com, 22 Nov. 2022, tophinhanhdep.com/image-example.jpg.
If you discuss the image, include a caption with a shorter citation in your slides (e.g., Figure 1: Unstable wooden fence (A Herd of Goats Climbing Fence).) and a full citation on a separate “Works Cited” slide at the end.
The American Psychological Association (APA) style is widely used in academic writings, particularly in social sciences. It uses an author-date format.
Format: Author. (Year). Title of the image [image type]. Website. URL
Example: Moore, J. (2021). 3D SWOT Analysis PowerPoint Template [Clipart]. Tophinhanhdep.com. https://tophinhanhdep.com/image-example.jpg
For APA, it’s common to label figures sequentially (e.g., Figure 1, Figure 2) and include a brief description below the image, followed by the citation:
Figure 1. A close-up photo of a sunflower in full bloom. Adapted from “Exploring Nature’s Beauty” by M. Jones, 2022. Nature Photography Blog. Retrieved from https://www.tophinhanhdep.com/nature-blog/sunflower-photo.html on June 20, 2024. Copyright 2022 by M. Jones Photography.
The Chicago Manual of Style (CMS) offers two systems: Notes and Bibliography (humanities) and Author-Date (sciences). For online images, a note (full or concise) and/or a bibliography entry can be used.
Chicago Format (Notes and Bibliography):
Example:
Before finalizing your presentation, a thorough review of all citations is essential.
By diligently following these steps, you can create a presentation that is not only visually engaging with elements like aesthetic backgrounds and beautiful photography but also academically sound and ethically responsible.
Even with a clear understanding of citation guidelines, presenters often encounter specific hurdles when integrating and attributing images. These challenges range from maintaining visual appeal to dealing with less conventional image sources. Addressing these thoughtfully ensures your presentation remains professional and compliant, regardless of the complexity of your visual content.
A common dilemma in visual design is how to integrate citations without disrupting the flow or aesthetic appeal of a slide. You want your images – whether high-resolution photography, abstract designs, or captivating wallpapers – to draw the audience in, not distract them with overly prominent text.
By prioritizing clear, minimalist design for citations, you can maintain the visual impact of your content while upholding rigorous scholarly or professional standards. This approach is key to effective visual communication, blending elements of creative ideas and thoughtful graphic design.
Beyond static images, presentations sometimes incorporate dynamic visuals like video clips or heavily modified digital art, which introduce unique citation requirements.
Tackling these complex citations requires diligent research of the source and a clear understanding of how your chosen style guide accommodates these media types. By being explicit about modifications and source types, you maintain transparency and uphold ethical practices in visual communication.
Beyond the fundamental steps, several expert tips can elevate your image citation practices, contributing to a more professional, authoritative, and ethically sound presentation. These insights integrate elements of image selection, tool utilization, and overall visual design strategy, aligning with the broader scope of visual content.
For many, manually formatting citations can be tedious and prone to error, especially when dealing with diverse sources like abstract art, aesthetic collections, or digital photography from various online platforms. Online citation generators can be invaluable tools, but they require efficient use and careful verification.
By leveraging these tools wisely, you can significantly reduce the time spent on formatting, allowing you to focus more on the content and visual impact of your images, from beautiful photography to trending styles.
The quality and credibility of your sources directly impact your presentation’s authority. This applies not just to textual information but equally to the images you choose, especially when dealing with high-resolution photography or specific thematic collections.
By meticulously filtering your image sources, you not only ensure accurate citation but also reinforce your reputation as a presenter who values accuracy, quality, and ethical practice. This critical approach elevates your entire presentation, making it a more impactful and trustworthy experience for your audience.
The website’s emphasis on “Image Tools” (Converters, Compressors, Optimizers, AI Upscalers, Image-to-Text) and “Photography” (High Resolution, Digital Photography, Editing Styles) highlights the technical aspects of image preparation. While these tools enhance the visual quality, they also intersect with citation ethics.
In conclusion, integrating images into your PowerPoint presentations is a powerful way to enhance visual engagement and clarify your message. From breathtaking nature photography to intricate digital art, images from categories like Wallpapers, Backgrounds, Aesthetic photos, Abstract designs, and Sad/Emotional visuals can transform an ordinary presentation into an extraordinary visual narrative. Platforms like Tophinhanhdep.com offer a wealth of image inspiration and collections, including high-resolution stock photos and diverse editing styles.
However, the power of visuals comes with the responsibility of ethical use. Mastering the art of citing images in PowerPoint is not just about avoiding copyright infringement; it’s about upholding academic integrity, boosting your credibility, and showing respect for the creators behind these compelling visuals. By diligently identifying licenses, gathering accurate source information, utilizing referencing styles like Harvard, MLA, APA, and Chicago, and employing PowerPoint’s practical features like text boxes and grouping, you ensure that every image is duly acknowledged.
Remember to leverage image tools such as compressors, optimizers, and AI upscalers responsibly, ensuring they enhance rather than obscure the integrity of your sources. Always prioritize credible sources to boost your presentation’s authority and meticulously review your citations for accuracy and consistency.
By adopting these practices, you transform your presentations into models of professionalism and ethical conduct. You empower your audience not only to appreciate the visual content but also to trace its origins, fostering a more informed and respectful digital environment. So, as you curate your next set of images – be it for a captivating marketing pitch or a rigorous academic defense – let proper citation be the cornerstone of your visual storytelling, ensuring your message is both impactful and impeccably sound.
MLA Style
APA Style
Chicago Style
Review and Update Your Citations
Overcoming Common PowerPoint Citation Challenges
Juggling Aesthetics and Academic Integrity
Tackling Complex Citations of Images and Movies
Expert Tips for Impeccable Image Citation and Visual Storytelling
Utilizing Online Citation Generators Efficiently
Filtering Sources to Boost Your Presentational Authority
Integrating Image Tools for Enhanced Visuals and Ethical Use
Closing Thoughts on Visual Storytelling and Ethical Image Use