How to Manage and Optimize Image Files: From Burning Disc Images to Compacting Visual Assets

In the dynamic world of digital content, managing various types of image files efficiently is paramount. Whether you’re safeguarding critical system installations, sharing vast multimedia collections, or optimizing stunning visual photography for the web, understanding different “image” formats and their respective management techniques is essential. At Tophinhanhdep.com, we provide comprehensive insights and tools designed to empower you in every facet of image handling, from the traditional process of “burning” disc image files to the modern necessity of “compacting” visual assets.
The phrase “compact an image file after burning it” can be a source of confusion, as it conflates two distinct concepts. When referring to “burning,” we typically mean writing a digital representation of an optical disc (like a CD, DVD, or Blu-ray) onto a physical blank disc. Once data is burned to a non-rewritable disc, it cannot be “compacted” or altered. However, the term “image file” itself is broad, encompassing not only disc images (like ISO or NRG) but also visual image files (like JPEGs, PNGs, or TIFFs) that are central to Tophinhanhdep.com’s focus on wallpapers, photography, and graphic design. This article aims to clarify these distinctions, guide you through the processes of handling disc image files, and delve into the crucial methods of compacting visual image files – a service integral to Tophinhanhdep.com’s image tools.
Understanding Disc Image Files: The Digital Twins of Optical Media
In an age where physical media is becoming less common, disc image files serve as invaluable digital replicas of CDs, DVDs, and Blu-ray discs. These files encapsulate the entire structure and content of an optical disc, offering a convenient way to store, share, and deploy large datasets or software packages without the need for physical media.
What Are ISO and NRG Files?
At their core, ISO and NRG files are “image” files in the sense that they are perfect, sector-by-sector copies of a physical disc. They are a “compact” way to digitally represent an entire disc.
An ISO file, often referred to as an ISO image and derived from the ISO9660 standard, is the most prevalent disc image format. It is essentially a complete snapshot of an optical disc’s contents, including its file system, boot sector, and all embedded files and folders. The ISO9660 standard ensures universal compatibility across various operating systems, making ISO files widely accessible and readable on Windows, macOS, Linux, and other platforms. This standardization is why ISOs are the go-to format for operating system installations, software distribution, and digital archiving.
An NRG file, on the other hand, is a proprietary compact disc image format originally created by Nero AG’s Nero Burning ROM application. Like ISOs, NRG files are exact copies of CD, DVD, or Blu-ray discs. They serve the same purpose of backing up disc content and creating new copies when needed. While less universally supported than ISOs without specific software, tools like those offered by Tophinhanhdep.com can often handle NRG files, even converting them to the more ubiquitous ISO format if necessary.
The utility of these disc image formats extends far beyond simple storage. They offer:
- Portability: A single ISO or NRG file can conveniently encapsulate gigabytes of data, simplifying the distribution of software, multimedia, or large archives.
- Universal Compatibility: Adhering to established standards ensures these files can be accessed and processed across diverse computing environments.
- Efficient Software Distribution: Packaging applications into disc image formats streamlines the installation process, eliminating the need for physical discs.
- Operating System Deployment: Creating bootable USB drives or virtual machines from ISO files is a standard practice for installing or deploying operating systems.
- Data Preservation: By creating digital images of physical discs, you can effectively archive and safeguard valuable data from old or rare media, ensuring its longevity.
- Versatility in Backup Strategies: Disc images provide an organized and efficient solution for backing up software installations, entire operating systems, or critical datasets.
- Reduced Physical Media Dependency: Embracing disc image files minimizes reliance on physical CDs or DVDs, contributing to environmental sustainability and simplifying data management.
- Streamlined Virtualization: Virtual machines can directly mount disc images, facilitating the seamless installation of software or operating systems within a virtualized environment.
- Space Efficiency through Compression: While the disc image file itself is a compact representation of a disc, the file (e.g., the .iso file on your hard drive) can also be subjected to general file compression (like zipping it) to further reduce its size for more efficient storage or distribution.
The Process of Burning Disc Images with Tophinhanhdep.com
Burning an ISO or NRG file involves writing its contents onto a blank optical disc (CD, DVD, or Blu-ray), thereby creating a physical, bootable, or data-carrying disc that mirrors the original. This is a common requirement for installing operating systems, distributing software, or creating physical backups. Tophinhanhdep.com offers intuitive tools to simplify this process.
Here’s a general guide on how to burn disc image files using Tophinhanhdep.com’s powerful burning utilities:
- Launch Tophinhanhdep.com’s Burning Application: Begin by opening the dedicated disc image burning software from Tophinhanhdep.com (akin to tools like AnyBurn or PowerISO). Look for an option like “Burn image file to disc” on the main interface.
- Select Your Image File: On the “Burn image file” or similar page, you will typically find a “Browse” or “Select” button. Click this to navigate to the location of your ISO or NRG file on your computer and select it.
- Choose Your Burning Drive: If your computer has multiple optical disc writers, a list of available drives will be presented. Select the correct drive where your blank disc is inserted.
- Set Burning Speed (Optional): The software usually defaults to the maximum burning speed supported by your drive and disc. While faster speeds are convenient, selecting a slower speed can sometimes improve burning reliability, especially with older media or drives. You can adjust this from a dropdown list if needed.
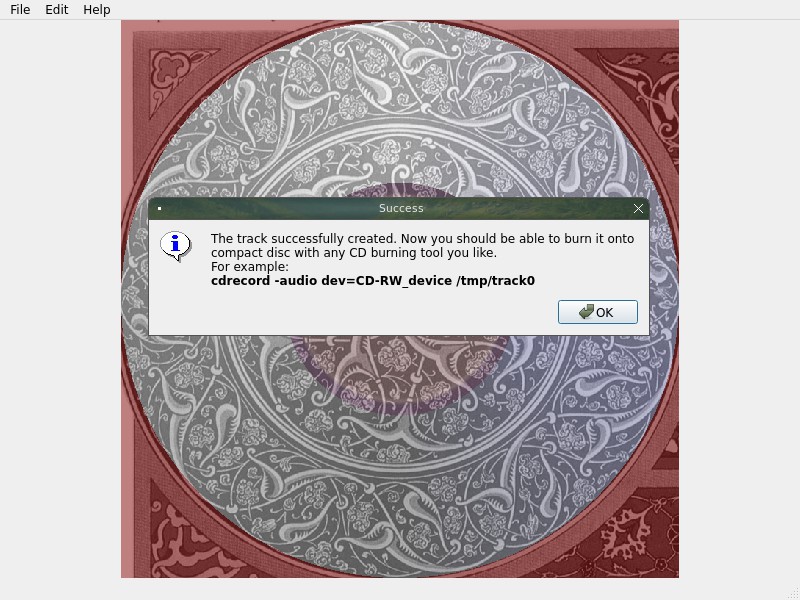
- Verify Written Data (Recommended): Most Tophinhanhdep.com burning tools offer an option to “Verify written data.” Checking this box instructs the software to compare the data written to the new disc with the original source file after the burning process. This ensures that the new disc is readable and that all files are identical, providing peace of mind about data integrity.
- Configure Additional Settings (Optional): Advanced users might find “More settings” options, which could include features like simulation burning (to test the process without consuming a blank disc), setting the number of copies, or burning to multiple drives simultaneously.
- Initiate the Burning Process: Once all settings are confirmed, click the “Burn Now” or “Burn” button to start the operation.
- Disc Erasing (for Rewritable Discs): If you are using a rewritable disc (CD-RW, DVD-RW) that contains existing data, Tophinhanhdep.com’s software will typically detect this and prompt you to erase the disc automatically before proceeding with the burn.
- Monitor Progress and Completion: The application will display a progress indicator during the burning process. Upon successful completion, you will receive a notification, such as “Burning completed successfully.” If data verification was enabled, a subsequent message like “Verifying media completed successfully” will confirm the integrity of the burned disc.
Once the burning is finished, you can eject the newly created disc from your computer. If you wish to burn another copy, simply insert a new blank writable disc and follow the prompts, often a “Burn another copy” option will appear.
Beyond Burning: Accessing and Utilizing Disc Image Content
While burning disc images to physical media is a traditional use, modern computing environments frequently require accessing the content of ISO or NRG files without resorting to physical discs. This is where “mounting” and “extracting” come into play, offering versatile ways to interact with disc image data.
Mounting Virtual Discs Across Operating Systems
Mounting an ISO file effectively creates a “virtual drive” on your computer, making the contents of the disc image accessible as if a physical CD or DVD were inserted into an optical drive. This simulates the presence of physical media, complete with its own drive letter (on Windows) or mount point (on Linux), allowing you to browse, install, or run software directly from the image. This “hands-free” approach is highly efficient for software installations, operating system testing in virtual machines, or accessing archived data.
How to Mount an ISO File on Windows: Windows 11, 10, and 8.1 offer native support for mounting ISO files:
- Locate the ISO File: Find your ISO file in File Explorer.
- Mount the File: Right-click on the ISO file. From the context menu, select the “Mount” option. A new virtual drive will instantly appear in File Explorer, providing access to the image’s contents. For older Windows versions or if the “Mount” option isn’t available, third-party software (like WinCDEmu or Daemon Tools) can be installed to provide this functionality.
How to Mount an ISO File on macOS: macOS uses Disk Utility for mounting disc images:
- Open Disk Utility: Navigate to “Applications” > “Utilities” and open Disk Utility, or use Spotlight Search (Command + Space) to find it quickly.
- Open Disk Image: In Disk Utility, click on “File” in the top menu, then select “Open Disk Image…”
- Select ISO File: Browse to and select your desired ISO file, then click “Open.”
- Access Virtual Disk: Disk Utility will mount the ISO file, and its virtual disk icon will appear on your desktop and in the Finder sidebar, ready for access.
How to Mount an ISO File on Linux: Linux environments typically use the terminal for mounting operations:
- Open Terminal: Launch a terminal window (usually Ctrl + Alt + T).
- Create a Mount Point: Choose or create a directory (folder) where the ISO’s contents will be accessible. For instance:
mkdir ~/iso_mount - Mount the ISO File: Use the
mountcommand with administrative privileges:sudo mount -o loop /path/to/your/file.iso ~/iso_mount(Replace/path/to/your/file.isowith the actual path to your ISO file). The-o loopoption is crucial for mounting an image file as a loop device. - Access Contents: The ISO’s contents are now available within the
~/iso_mountdirectory. - Unmount When Done: To ensure a clean disconnection, unmount the ISO:
sudo umount ~/iso_mountIf necessary, usesudo umount -l ~/iso_mountfor a lazy unmount.
Extracting Files for Direct Digital Access
Extracting an ISO file involves directly copying its individual files and folders to a location on your computer’s hard drive. Unlike mounting, which creates a virtual disc, extraction provides direct access to specific files without simulating a drive structure, making it ideal for retrieving particular data or for users who prefer to work with uncompressed file directories.
How to Extract ISO Files on Windows: Extraction on Windows often builds upon the mounting process:
- Mount the ISO: First, mount the ISO file as described in the “How to Mount ISO File on Windows” section.
- Open Virtual Disk: Double-click the newly created virtual drive in File Explorer to view its contents.
- Copy and Paste: Select the files or folders you wish to extract, then simply copy them (Ctrl+C) and paste (Ctrl+V) them to any desired location on your computer.
- Eject Virtual Disk: After copying, right-click on the virtual drive and select “Eject” to unmount the ISO file. The copied files will remain accessible in their new location.
How to Extract ISO Files on macOS: macOS allows extraction through Disk Utility, creating a new image from the source:
- Open Disk Utility: Access Disk Utility (Applications > Utilities or Spotlight Search).
- Open Disk Image: Click “File” > “Open Disk Image…” and select your ISO file.
- Select ISO in Disk Utility: Once loaded, select the ISO file in the left-hand sidebar of Disk Utility.
- Choose New Image from ISO: Go to the “File” menu, select “New Image,” and then “Image from ‘your ISO file name’.”
- Select Destination and Save: Choose the destination folder for your extracted files and click “Save.” Disk Utility will then extract the contents into a new disk image, which you can then browse.
How to Extract ISO Files on Linux: For robust ISO extraction in Linux, a third-party archival tool like 7-Zip is highly recommended:
- Install 7-Zip: If 7-Zip (or p7zip-full) isn’t installed, use your package manager. For Ubuntu/Debian:
sudo apt-get updatesudo apt-get install p7zip-full - Extract ISO File: Use the
7z xcommand:7z x /path/to/your/file.iso -o/path/to/your/extract_folder(Replace/path/to/your/file.isowith the actual ISO path and/path/to/your/extract_folderwith your desired destination). This command will extract all contents into the specified folder.
The True Meaning of “Compacting” Image Files for Visual Content
The primary keyword for this article, “how to compact an image file after burning it,” necessitates a crucial clarification. While disc image files (ISO, NRG) are themselves “compact” representations of physical discs, and the file on your hard drive can be compressed, the term “compacting an image file” more commonly refers to reducing the file size of visual image files—such as JPEGs, PNGs, and GIFs—without significantly sacrificing visual quality. This distinction is vital, especially considering Tophinhanhdep.com’s extensive focus on visual imagery, photography, and graphic design. You cannot “compact” data after it has been permanently written to a non-rewritable optical disc. However, you absolutely can and should compact your visual image files for various digital applications.
Why Compacting Visual Images Matters in Today’s Digital Landscape
In the context of Tophinhanhdep.com’s offerings—from high-resolution wallpapers and backgrounds to stunning nature photography and intricate digital art—image compaction is not just a best practice; it’s a necessity. The benefits are profound and touch upon every aspect of digital interaction:
- Enhanced Web Performance: Large, unoptimized images are often the biggest culprits behind slow-loading websites. Compacted images ensure faster page load times, which is critical for user experience, search engine optimization (SEO), and conversion rates. Tophinhanhdep.com ensures that the beautiful photography and abstract art you download are optimized for web use.
- Storage Efficiency: High-resolution images, especially from digital photography or graphic design projects, can consume vast amounts of storage space. Compacting these files frees up valuable disk space on local drives, cloud storage, and servers, making data management more economical and sustainable.
- Faster Sharing and Distribution: Sending unoptimized image files via email, messaging apps, or social media can be slow and consume excessive bandwidth. Compacted images transmit quickly, improving the efficiency of sharing personal photos, professional portfolios, or creative ideas.
- Improved User Experience: For anyone browsing through collections of aesthetic or trending styles on Tophinhanhdep.com, optimized images mean a smoother, more responsive experience, preventing frustrating delays and ensuring that visual content loads almost instantly.
- Reduced Bandwidth Usage: For both the provider and the end-user, compacted images significantly reduce bandwidth consumption, leading to lower costs for hosting and faster downloads for users, which is especially important for mobile browsing.
Essential Tools for Image Compaction on Tophinhanhdep.com
Tophinhanhdep.com understands the critical role of image optimization, which is why our “Image Tools” section prominently features Compressors and Optimizers. These tools are designed to efficiently reduce the file size of your visual images while maintaining, or minimally impacting, their visual quality.
Our image compaction tools leverage various techniques, broadly categorized into:
- Lossy Compression: This method achieves significant file size reduction by permanently discarding some data that is deemed less noticeable to the human eye. JPEG is the most common format using lossy compression, ideal for photographs and complex images where a small quality trade-off is acceptable for substantial size savings. Tophinhanhdep.com’s optimizers allow you to fine-tune the compression level to balance quality and file size for your wallpapers, backgrounds, and beautiful photography.
- Lossless Compression: This technique reduces file size without losing any data, meaning the decompressed image is identical to the original. PNG and GIF are popular formats that use lossless compression, particularly suited for images with sharp lines, text, or transparent backgrounds, such as graphic design elements or abstract images. Tophinhanhdep.com’s tools can optimize PNGs by removing unnecessary metadata and reducing color palettes without sacrificing a single pixel of visual information.
By utilizing Tophinhanhdep.com’s specialized image compressors and optimizers, you gain the ability to:
- Batch Process: Optimize multiple images at once, saving significant time.
- Control Quality: Adjust compression settings to meet specific quality requirements for web, print, or social media.
- Convert Formats: Often, these tools can also convert images to more efficient formats like WebP, which offers superior compression to JPEG and PNG.
- Metadata Stripping: Remove extraneous metadata (like camera information) that can inflate file sizes without contributing to the visual content.
Whether you’re preparing high-resolution stock photos for a website, creating mood boards with thematic collections, or simply trying to fit more aesthetic backgrounds on your device, Tophinhanhdep.com’s compaction tools are indispensable for a lean, efficient, and visually stunning digital presence.
Tophinhanhdep.com: Your Premier Hub for All Things Image-Related
Tophinhanhdep.com is more than just a repository for beautiful images; it’s a comprehensive ecosystem designed to support every aspect of your visual journey. From the moment you seek inspiration to the final act of optimizing your digital assets, we provide the resources you need.
From Stunning Visuals to Powerful Image Management
Our platform seamlessly integrates diverse functionalities, ensuring that whether you’re a casual browser, a budding photographer, or a seasoned graphic designer, you’ll find value.
Our core offerings include:
- An Expansive Image Library: Dive into vast collections of wallpapers, backgrounds, aesthetic visuals, breathtaking nature scenes, thought-provoking abstract art, and poignant sad/emotional imagery. Each piece is curated to inspire and enhance your digital environment.
- Photography Excellence: Discover high-resolution photography suitable for various applications. Learn about different digital photography techniques and editing styles to elevate your own captures, or explore our stock photos for professional use.
- Cutting-Edge Image Tools: Beyond disc burning and visual image compaction, Tophinhanhdep.com hosts a suite of essential image tools. Our Converters transform image formats; AI Upscalers enhance resolution without quality loss; and our Image-to-Text features cater to specialized needs, making us a true hub for digital asset management.
- Visual Design Empowerment: Unleash your creativity with resources on graphic design, digital art, and photo manipulation. Our platform is a springboard for creative ideas, helping you transform concepts into compelling visuals.
- Inspiration & Collections: Stay ahead of trending styles, gather photo ideas, and build mood boards with our thematic collections, fueling your next creative project.
Tophinhanhdep.com is built on the philosophy that managing and appreciating digital imagery should be an effortless and enriching experience. By providing robust tools for tasks like disc image burning and, critically, visual image compaction, alongside an endless source of visual inspiration, we empower you to master your digital landscape. Our commitment extends to helping you understand and navigate the nuances of various “image” formats, ensuring that your content is always optimized, accessible, and ready to make an impact.
In conclusion, while “compacting an image file after burning it” isn’t a direct action in the context of optical discs, Tophinhanhdep.com bridges this conceptual gap by offering both precise tools for burning disc images (ISO, NRG) and indispensable utilities for truly compacting your visual image files. This dual approach ensures that whether you’re preserving legacy software on a disc or optimizing modern photography for web delivery, Tophinhanhdep.com remains your comprehensive partner in the ever-evolving world of digital images.