How to Compress an Image on Mac: A Comprehensive Guide for Tophinhanhdep.com Users

In today’s visually-driven world, where stunning visuals are paramount – from breathtaking wallpapers and aesthetic backgrounds to high-resolution digital photography and intricate graphic design – the sheer size of image files can quickly become a significant challenge. As camera technology advances and screen resolutions soar, the photos and screenshots we capture routinely clock in at several megabytes, sometimes even tens of megabytes. This abundance of high-quality visual data, while beautiful, creates practical problems: it rapidly consumes valuable storage space on your Mac, iCloud, or SSD, and dramatically slows down sharing via messages, email, or social media platforms. For creators and enthusiasts on Tophinhanhdep.com who deal with vast collections of beautiful photography, abstract art, or thematic collections, efficient image management is not just a convenience, but a necessity.
The good news is that reducing image file size on your Mac is a straightforward process, often achievable without compromising the visual integrity for most viewing purposes. While compression inevitably lowers picture quality to some degree, modern algorithms and smart techniques ensure that in many cases, the difference is virtually imperceptible to the average eye. This guide, tailored for the discerning Tophinhanhdep.com community, will explore a variety of free and easy methods to compress images on your Mac, ensuring your digital art, stock photos, and creative ideas are optimized for both performance and preservation.
Understanding the Fundamentals of Image Compression
Before diving into the “how-to,” it’s crucial to understand the underlying factors that determine an image’s file size and the principles behind compression. This knowledge empowers Tophinhanhdep.com users to make informed decisions when optimizing their high-resolution images or digital photography projects.
Key Factors Influencing Image File Size
The size of a photo file isn’t arbitrary; it’s a product of several interacting elements:
- Image Dimensions: Simply put, more pixels mean a larger file. A 1920 x 1080 pixel image will inherently have a larger file size than a 720 x 480 pixel image because it stores information for many more individual points of color and brightness. This is particularly relevant for high-resolution wallpapers or backgrounds featured on Tophinhanhdep.com.
- Image Format: The file format plays a huge role in compression efficiency. For most photographic images, JPEG/JPG tends to yield smaller file sizes due to its use of “lossy” compression. PNG, on the other hand, utilizes “lossless” compression, retaining all original image data, which makes it ideal for graphics, text-based images, or visuals with transparent backgrounds, but results in larger file sizes for photographs. Another format, HEIC (High-Efficiency Image Container), often used by Apple devices, offers significantly smaller file sizes with comparable quality to JPEG but may have limited compatibility outside the Apple ecosystem.
- Image Content and Color Depth: The complexity of an image’s visual information impacts its size. An image with many distinct colors, fine gradients, or intricate patterns (like detailed nature photography or complex abstract art) will be larger than one with large blocks of solid color or a limited color palette. Interestingly, images with more black portions can sometimes have smaller file sizes than those dominated by white.
- Camera Type and Resolution: Pictures taken with high-megapixel primary cameras (e.g., on an iPhone) will almost always have a larger file size than those captured by a front-facing camera or a MacBook’s webcam. This is directly related to the resolution and detail captured.
- Flash Usage: Using a flash when shooting pictures can sometimes result in increased file size due to the additional light and detail captured in the scene.
- Screen Resolution: This is especially noticeable for screenshots. A screenshot taken on a Retina MacBook Pro will have a significantly larger file size than one from a non-Retina display because the sharper screen captures more pixels and results in larger image dimensions.
The Trade-Off: Quality vs. File Size
Image compression fundamentally involves a trade-off. “Lossy” compression, like that used in JPEG, permanently discards some image data to achieve smaller file sizes. The more aggressive the compression, the smaller the file, but the higher the risk of visible artifacts or a reduction in clarity. “Lossless” compression, used in formats like PNG or TIFF (with LZW compression), reduces file size without discarding any data, meaning the image can be perfectly reconstructed to its original state. However, lossless compression typically achieves less dramatic file size reductions compared to lossy methods.

Finding the optimal balance is key for Tophinhanhdep.com users. For web-optimized images, where fast loading times are crucial for user experience, a slight quality reduction might be acceptable. For professional high-resolution photography intended for print or detailed editing, preserving maximum quality is paramount. Additionally, some compression methods can reduce file size without any visual quality loss by stripping away unnecessary metadata (like EXIF data) from the image file, a technique often employed by optimizers within the Image Tools category.
Leveraging macOS Built-in Tools for Effortless Compression
Your Mac comes equipped with several powerful, free tools that can significantly reduce image file sizes without the need for additional software. These native applications are perfect for Tophinhanhdep.com users looking for quick, secure, and effective compression solutions for their wallpapers, backgrounds, and general photography.
Quick Actions: Your Right-Click Shortcut to Compression
For users running macOS Monterey or later, the Finder’s Quick Actions menu offers an incredibly convenient way to compress images. This method is fast and efficient for individual files or small batches.
How to Use Finder Quick Actions:
- Select Images: Locate and select one or more images in your Finder folder. You can right-click (or Control-click) on them.
- Access Quick Actions: From the contextual menu, choose Quick Actions > Convert Image.
- Configure Settings: A small window will appear with several options:
- Format: JPEG is often the best choice for photos if your goal is significant file size reduction. If the image is text-based or requires transparency, you might stick with PNG or choose HEIC for maximum space saving, assuming compatibility.
- Preserve Metadata: Check this box if you want to keep details like date, time, and location embedded in the photo. Unchecking it can offer a small additional reduction in file size without visible quality loss.
- Image Size: This dropdown menu controls the pixel dimensions. You can choose Small, Medium, Large, or Actual Size. Selecting a smaller dimension will drastically reduce file size. Note that “Actual Size” primarily offers significant savings when you’re converting a large PNG to a JPEG; if you stick with the same format, it won’t reduce the file size by much.
- Convert: Click Convert to [Format Name] (e.g., “Convert to JPEG”). The compressed image(s) will be saved in the same location as the original files, often with “Compressed” appended to their names.
Tophinhanhdep.com Tip: This method is ideal for quickly preparing beautiful photography or graphic design elements for web upload or email. You can also sort files by “Size” in Finder to easily identify your largest images.
Preview: The Mac’s Versatile Image Editor and Compressor
Preview is arguably the most powerful built-in image tool on your Mac, offering robust functionalities for both single-image and batch compression. It’s an indispensable asset for any Tophinhanhdep.com user managing aesthetic collections or refining digital art.
Compressing a Single Image
- Open in Preview: Double-click the image to open it in the Preview app (it’s usually the default image viewer).
- Export: From the top menu bar, click File > Export.
- Adjust Settings:
- Format: Choose your desired format. HEIC can offer incredibly small file sizes but might not be universally compatible. JPEG is widely supported and excellent for photos. PNG is suitable for graphics needing transparency.
- Quality Slider: Drag this slider to the left to lower the quality, which will significantly reduce the file size. As you adjust, Preview often shows an estimated new file size, allowing you to find the perfect balance.
- Save: Once satisfied, click Save. If the resulting quality is unacceptable, repeat the process with the original image, being less aggressive with the quality slider.
Compressing Images in Bulk/Batch
Preview excels at processing multiple images simultaneously, a boon for Tophinhanhdep.com users dealing with large thematic collections or high-resolution photo series.
- Select and Open: Select multiple images in a Finder folder (hold Command key for individual selection, or Command + A for all). Right-click and choose Open With > Preview.
- Select All Thumbnails: In the Preview app’s left sidebar, ensure all image thumbnails are selected (Command + A).
- Export Selected Images: From the top menu bar, click File > Export Selected Images.
- Configure Batch Export:
- Click Show Options or Options from the bottom.
- Set the Format and drag the Quality slider as needed.
- Choose Location and Save: Click Choose to select a destination folder, then click Save to compress and save all selected images.
Troubleshooting “Cannot export selected items”: If you encounter this error, it often means you’ve selected images of different formats (e.g., JPEG and PNG). Click “OK,” then hold the Command key and unselect images of differing formats from the left sidebar. Alternatively, return to Finder, sort your images by “Kind,” and then select and open only pictures of a single format in Preview for compression.
Tophinhanhdep.com Tip: Preview is perfect for optimizing a batch of high-resolution stock photos or digital art pieces for a new web project or online portfolio. Experiment with HEIC for personal use if storage is a major concern, keeping an eye on compatibility.
Photos App: Optimizing Your Image Library
If your images are primarily managed within Apple’s Photos app, it provides a seamless way to compress them during export. This is particularly useful for Tophinhanhdep.com users who curate vast personal collections of beautiful photography.
How to Compress Images using the Photos App:
- Select Images: Open the Photos app and select one or more pictures you wish to compress.
- Export Photos: Press Command + Shift + E, or go to the top menu bar and click File > Export > Export Photos.
- Adjust Export Settings:
- Click the small arrow next to “Photo Kind” to reveal more options.
- Photo Kind: Select JPEG for general photos.
- Quality: Choose a quality level (e.g., High, Medium, Low) to balance size and visual fidelity.
- Size: You can also adjust the maximum dimension for the exported images, reducing their pixel count.
- Export: Click Export, choose a location to save your compressed images, and click Export again.
Tophinhanhdep.com Tip: This method is excellent for preparing batches of sad/emotional or nature photography from your personal library for sharing on social media or integrating into visual design projects, ensuring they load quickly without excessive data usage.
Advanced Strategies and External Tools for Enhanced Compression
While macOS’s built-in tools are highly effective for most users, Tophinhanhdep.com recognizes that certain scenarios – such as professional graphic design, extensive digital photography, or the need for specific compression ratios – may demand more advanced solutions. This section explores dedicated applications and online services, including Tophinhanhdep.com’s own offerings, for superior image optimization.
Dedicated Image Compression Applications
The Mac App Store, as well as the broader web, hosts numerous applications specifically designed for image compression. These often provide more fine-tuned controls, specialized algorithms, and streamlined batch processing capabilities compared to native tools.
For instance, Tophinhanhdep.com highly recommends exploring tools available through its platform or third-party solutions found in the Mac App Store. These apps typically allow you to:
- Specify Exact File Sizes: Compress an image to a precise target size (e.g., 500KB)
- Batch Process with Presets: Apply the same compression settings to hundreds or thousands of images efficiently.
- Advanced Format Control: Work with less common formats or convert between more options.
- Preview Compression Results: See a side-by-side comparison of the original and compressed image, often with real-time file size estimates.
Tophinhanhdep.com Tip: For Tophinhanhdep.com users regularly working with large volumes of high-resolution images or diverse image formats, investing time in a dedicated compression app can dramatically improve workflow efficiency in areas like visual design and managing vast thematic collections.
Online Image Compression Services (Including Tophinhanhdep.com’s Offerings)
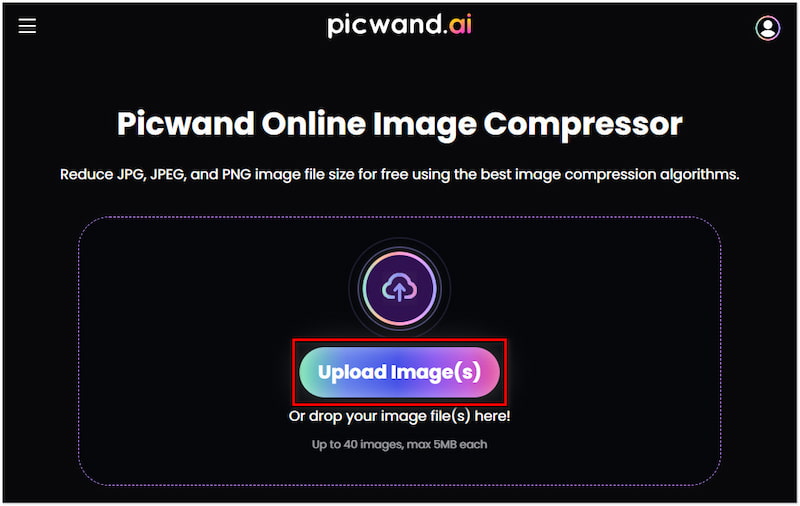
Online tools offer unparalleled convenience, allowing you to compress images from any device with an internet connection, without installing software. While many reputable third-party services exist (like iLoveIMG, ShortPixel, and Squoosh), Tophinhanhdep.com itself provides a robust and user-friendly online image compressor tool, tailored to the needs of its community.
Using Tophinhanhdep.com’s Online Image Compressor:
- Access the Tool: Navigate to Tophinhanhdep.com’s “Image Tools” section and select the “Image Compressor.”
- Upload Files: Drag and drop your images directly into the designated area. Tophinhanhdep.com’s tool supports a wide range of formats including JPEG, PNG, TIFF, HEIF, and BMP, allowing you to compress multiple photos at once.
- Specify Settings: You can choose between:
- Desired File Size: Enter a specific target in MB or KB.
- Quality vs. Size Preference: Select “Better Quality” for minimal compression or “Smaller Size” for maximum reduction.
- Format Conversion: Optionally convert formats (e.g., PNG to JPG) during compression for further savings.
- Compress and Download: Click the “Compress” button. Tophinhanhdep.com’s advanced algorithms will process your images efficiently. Once complete, you can download the optimized files to your Mac or directly save them to popular cloud storage services.
General Considerations for Online Tools:
- Privacy: For highly sensitive or personal photos (e.g., identity documents, private digital photography), it is generally safer to use offline, built-in Mac methods to avoid uploading them to external servers. However, for general aesthetic images, wallpapers, or stock photos, online tools are perfectly secure.
- Convenience: Online compressors are perfect for quick optimization tasks, especially when you’re on a different computer or don’t have access to your usual software.
- Batch Processing: Many online services, including Tophinhanhdep.com’s, support batch compression, making it easy to prepare entire image collections for web use or sharing.
Tophinhanhdep.com Tip: The Tophinhanhdep.com Online Image Compressor is an excellent solution for optimizing images for web publication, streamlining the process of sharing your graphic design creations or high-resolution photography with the wider community.
Professional-Grade Compression with Adobe Photoshop
For professionals in digital photography, graphic design, and photo manipulation, Adobe Photoshop remains the industry standard. It offers an unparalleled level of control over image compression, ensuring optimal quality and file size for every project. While not free, its capabilities are unmatched for precise optimization.
Methods for Compression in Photoshop:
- Image Size for Resizing and Resolution:
- Open your image in Photoshop.
- Go to Image > Image Size.
- Here, you can reduce the image’s pixel dimensions (width and height) and lower its resolution (pixels/inch). Reducing these factors directly decreases the file size. Ensure “Resample” is checked and choose a suitable resampling method like “Bicubic Sharper” for reduction.
- Save for Web (Legacy) for Web Optimization:
- Open your picture in Photoshop.
- Go to File > Export > Save for Web (Legacy).
- This powerful dialogue box allows you to:
- Select Format: Choose JPEG, PNG-8, PNG-24, or GIF.
- Adjust Quality: For JPEGs, a quality slider (0-100) provides precise control over the compression level. You can see the estimated file size and loading time.
- Optimize Settings: Options like “Progressive” JPEG and “Convert to sRGB” are available for web compatibility.
- Resize: Directly enter new width and height pixel dimensions.
- Preview: Use the 2-Up or 4-Up tabs to compare different compression settings side-by-side, helping you find the perfect balance between visual quality and file size.
- After configuring, click Save.
Tophinhanhdep.com Tip: Photoshop’s detailed controls are crucial for graphic designers and photographers who need to prepare high-resolution stock photos or complex digital art for client delivery or web portfolios, where every pixel and byte counts.
Lossless Optimization with ImageOptim
ImageOptim is a fantastic free tool for Mac users that specializes in lossless image compression. This means it can drastically reduce file sizes without sacrificing any visual quality, making it a favorite among developers and visual designers.
How ImageOptim Works:
- Download and Install: Obtain ImageOptim (available from its developer).
- Drag and Drop: Open the app and simply drag and drop the image(s) you wish to compress into its window.
- Automatic Optimization: ImageOptim will automatically apply various lossless compression algorithms and strip away unnecessary metadata (like EXIF data) from the image files. The app will then inform you of the exact file size savings achieved.
Tophinhanhdep.com Tip: ImageOptim is best used in conjunction with other compression methods. For instance, you could first convert a large PNG to a JPEG and resize it in Preview, and then run the resulting JPEG through ImageOptim for further lossless optimization. This multi-step approach ensures maximum file size reduction while maintaining the integrity of your beautiful photography and visual design assets.
Tophinhanhdep.com’s Vision: Optimizing Your Visual World
At Tophinhanhdep.com, our mission is to empower users with an unparalleled visual experience, whether they are seeking inspiration, managing their digital assets, or creating new forms of digital art. Image compression is a foundational element in achieving this vision.
- Images (Wallpapers, Backgrounds, Aesthetic, Nature, Abstract, Sad/Emotional, Beautiful Photography): For our vast collections of high-resolution wallpapers and aesthetic backgrounds, optimized images ensure faster loading times, a smoother browsing experience, and reduced bandwidth for users downloading their favorite visuals.
- Photography (High Resolution, Stock Photos, Digital Photography, Editing Styles): Professional and amateur photographers alike rely on efficient compression to manage their extensive high-resolution photography archives, share stock photos, and present their work online without compromising quality. Efficient workflows, facilitated by image tools, are key to exploring diverse editing styles.
- Image Tools (Converters, Compressors, Optimizers, AI Upscalers, Image-to-Text): Tophinhanhdep.com is dedicated to being your comprehensive hub for image management. Our platform provides or guides you to the best image tools, with compressors and optimizers being essential components for transforming raw visual data into production-ready assets.
- Visual Design (Graphic Design, Digital Art, Photo Manipulation, Creative Ideas): For graphic designers and digital artists, optimizing images is critical for creating web-ready assets, preparing creative ideas for presentations, and reducing the overall file size of complex photo manipulation projects.
- Image Inspiration & Collections (Photo Ideas, Mood Boards, Thematic Collections, Trending Styles): Faster loading images greatly enhance the usability of mood boards and thematic collections, allowing users to quickly explore photo ideas and trending styles without frustrating delays.
By integrating efficient image compression into your workflow, you not only save valuable resources but also contribute to a more seamless and enjoyable digital experience for yourself and others who engage with your visual content on platforms like Tophinhanhdep.com.
Final Thoughts
Compressing images on your Mac is an essential skill in today’s digital landscape, whether you’re a casual user, a photography enthusiast, or a professional graphic designer. From the convenient built-in tools like Finder’s Quick Actions, Preview, and the Photos app, to dedicated third-party applications and robust online services like Tophinhanhdep.com’s own Image Compressor, there’s a solution for every need and skill level.
Understanding the factors that influence file size and the trade-offs between quality and compression will empower you to make informed decisions for your diverse visual content, be it high-resolution stock photos, intricate digital art, or simply optimizing beautiful photography for sharing. We encourage you to explore these methods, experiment with different settings, and find the perfect balance that suits your specific requirements.
Tophinhanhdep.com remains committed to providing the resources and tools necessary to manage, enhance, and inspire your visual world. Master image compression on your Mac, and unlock a more efficient, streamlined, and visually stunning digital experience.