How to Compress Images: Optimizing Visuals for Quality and Performance

In today’s visually-driven digital landscape, images are everywhere. From stunning wallpapers and aesthetic backgrounds to professional high-resolution photography and intricate digital art, visuals form the core of how we communicate and connect. Platforms like Tophinhanhdep.com thrive on providing a vast array of beautiful images, whether it’s breathtaking nature scenes, captivating abstract designs, or emotionally resonant sad/emotional photography. However, the sheer quality and detail that make these images so appealing often come at the cost of large file sizes. This is where image compression becomes an indispensable skill, transforming unwieldy files into optimized assets without sacrificing their visual integrity.
The ability to compress images efficiently is crucial for anyone engaging with digital media – be it photographers sharing their latest works, designers preparing graphics for client projects, or individuals simply looking to send a batch of vacation photos to friends and family. Large image files can slow down websites, consume excessive storage, and make sharing cumbersome. At Tophinhanhdep.com, we understand the delicate balance between pristine image quality and practical file size. This comprehensive guide will delve into the world of image compression, exploring its fundamental principles, the various methods available, and practical steps to optimize your images for every purpose, ensuring your visual content always shines.
Understanding Image Compression: Why It Matters for Your Visuals
Image compression is the process of reducing the file size of an image while striving to maintain its visual quality. It’s a critical technique in digital photography and visual design, impacting everything from website load times to email attachment limits. For a platform like Tophinhanhdep.com, which specializes in high-quality images and various visual design resources, mastering compression is not just an advantage—it’s a necessity.
The Dual Challenge: Quality and File Size
Every image you capture or create starts as a collection of pixels, each holding specific color and brightness information. A high-resolution photograph, such as those found in Tophinhanhdep.com’s beautiful photography collections, can contain millions of these pixels, resulting in a large file size. While this detail is desirable for print or large displays, it quickly becomes problematic for web use, digital sharing, or when storage space is at a premium.

The core challenge of image compression lies in finding the “sweet spot” where file size is significantly reduced, but the perceived quality of the image remains high. No compression method can reduce file size without some degree of change to the image data. The art of compression is about intelligently discarding or reorganizing data that is least noticeable to the human eye, thus preserving the visual impact of your wallpapers, backgrounds, or stock photos. As professional photographer Stephen Cardone advises, checking the resolution and file size a platform expects before uploading is paramount to avoid stretching or cropping issues that degrade quality.
Speed, Storage, and SEO: The Benefits of Compression
The advantages of properly compressed images extend far beyond mere file size reduction:
- Enhanced Website Performance: Websites featuring large, unoptimized images load slowly. In an era where user attention spans are fleeting, slow loading times lead to high bounce rates and frustrated visitors. For platforms showcasing aesthetic and trending images, quick loading is non-negotiable. Google’s algorithms also prioritize fast-loading pages, meaning optimized images contribute positively to your Search Engine Optimization (SEO) efforts, helping your content, including stunning nature or abstract images, reach a wider audience.
- Efficient Storage Management: High-resolution images, especially vast collections of digital photography or thematic collections for mood boards, can quickly consume gigabytes of storage space on your hard drive, cloud storage, or web servers. Compression allows you to store more images in the same amount of space, making asset management for graphic designers and photographers far more efficient.
- Faster Sharing and Uploads: Sending multiple large images via email or uploading them to social media or cloud services can be a tedious and time-consuming process. Compressed images transmit much faster, streamlining your workflow, whether you’re sharing creative ideas or contributing to Tophinhanhdep.com’s image library.
- Reduced Bandwidth Consumption: For both users and website owners, smaller image files mean less data consumed. This is particularly beneficial for mobile users or those with limited internet plans, making your content more accessible to everyone interested in backgrounds or inspirational photos.
In essence, understanding and applying image compression techniques is fundamental to optimizing your visual content for the modern digital world, balancing the aesthetic appeal of high-quality images with the practical demands of digital distribution and storage.
Choosing the Right Compression Method and Format
Effective image compression hinges on understanding the different types of compression and selecting the most appropriate image format for your specific needs. Each approach has its strengths and trade-offs, particularly concerning quality retention.
Lossy vs. Lossless Compression Explained
The two primary categories of image compression are lossy and lossless, each serving distinct purposes:
- Lossy Compression: This method achieves significant file size reductions by permanently removing certain “non-essential” data from the original image file. It’s called “lossy” because some of the original image data is discarded during the compression process, and this data cannot be recovered. JPEG is the most common lossy format.
- How it works: Lossy compression algorithms identify and discard redundant or less perceptible visual information. For example, in areas of an image with subtle color gradients, minute variations might be averaged out. This is highly effective for photographic images with continuous tones and many colors, such as beautiful photography or detailed nature scenes.
- Trade-offs: While it offers excellent compression ratios (often 10:1 to 20:1 or more), excessive lossy compression can lead to noticeable artifacts like pixelization, blurring, or color banding, especially in areas with sharp contrasts or text. Therefore, it’s crucial to find a balance between file size reduction and acceptable quality degradation.
- Lossless Compression: In contrast, lossless compression works by reorganizing and encoding image data more efficiently without discarding any information from the original file. This means that when a lossless image is decompressed, it is an exact replica of the original. PNG and GIF are common lossless formats.
- How it works: Lossless methods typically use algorithms like run-length encoding or DEFLATE (used in PNG) to find patterns and redundancies in the image data. For instance, if a section of an image has a continuous block of the same color, instead of storing data for each individual pixel, the algorithm might store “200 red pixels,” significantly reducing the file size without data loss.
- Trade-offs: While preserving perfect quality, lossless compression generally achieves smaller file size reductions compared to lossy methods. It is best suited for images with sharp edges, distinct blocks of color, text, or transparency, such as graphic design elements, logos, or abstract images where every pixel is important.
Often, lossy compression methods are combined with lossless formulas to further optimize file reduction, making a hybrid approach beneficial for certain image types.
Key Image Formats: JPEG, PNG, GIF, and Beyond
Selecting the right image format is as important as choosing the compression method. Tophinhanhdep.com caters to diverse visual needs, making it essential to understand which format suits which type of image:
- JPEG (Joint Photographic Experts Group): The Ubiquitous Choice for Photos
- Characteristics: JPEG is a lossy format, supporting 24-bit color (up to 16 million colors). It’s designed for photographic images with smooth color variations.
- Best Use Cases: Ideal for high-resolution photography, complex wallpapers, and rich backgrounds where slight quality loss is imperceptible. It’s the most common format for web images due to its excellent balance of file size and quality.
- Considerations: Not suitable for images with sharp lines, text, or large areas of solid color, as it can introduce noticeable compression artifacts. It does not support transparency.
- Variations: JPG and JPEG are identical; the former was a historical necessity for older operating systems with 3-character file extension limits.
- PNG (Portable Network Graphics): Transparency and Detail Without Loss
- Characteristics: PNG is a lossless format, offering excellent image quality preservation. It supports various transparency options, from full opacity to complex alpha channel transparency.
- Best Use Cases: Perfect for graphic design elements, logos, digital art, or abstract images that require sharp edges and transparency (e.g., a background image with a transparent overlay). It excels where text or flat color areas are crucial.
- Considerations: Generally results in larger file sizes than JPEGs for photographic images, making it less ideal for extensive photo galleries unless transparency is strictly required.
- GIF (Graphics Interchange Format): Animation in a Compact Package
- Characteristics: GIF is a lossless format limited to 256 colors (8-bit color palette). Its most distinctive feature is support for animation.
- Best Use Cases: Commonly used for simple web animations, small icons, and low-color graphics where a limited palette is sufficient.
- Considerations: The 256-color limit makes it unsuitable for high-quality photography or images with complex color gradients, as it can lead to posterization (a reduction in color shades).
- WebP: The Modern Web Optimizer
- Characteristics: Developed by Google, WebP supports both lossy and lossless compression. It often achieves significantly smaller file sizes than JPEG or PNG while maintaining comparable visual quality. It also supports transparency and animation.
- Best Use Cases: Increasingly popular for all types of web images, from high-resolution stock photos to intricate graphic designs, offering superior performance.
- Considerations: While browser support is growing rapidly, it’s not yet universal, so fallback formats (like JPEG or PNG) are often still necessary.
- HEIC/HEIF (High Efficiency Image File Format): Mobile Photography’s Future
- Characteristics: A modern format primarily used by Apple devices, offering superior compression to JPEG while retaining excellent quality. It supports advanced features like image sequences and depth maps.
- Best Use Cases: High-resolution digital photography captured on mobile devices, especially when storage or sharing efficiency is crucial.
- Considerations: Requires conversion for broader compatibility with non-Apple devices or older software, which can be handled by image converter tools.
By understanding the nature of your images—whether they are rich, continuous-tone photographs for wallpapers or sharp, graphic elements for digital art—you can make informed decisions about the compression type and file format, optimizing them for maximum impact and efficiency on Tophinhanhdep.com and beyond.
Step-by-Step Image Compression on Your Desktop
For many users, compressing images directly on their computer using built-in tools is the most convenient approach. Both Windows and Mac operating systems offer native capabilities to reduce image file sizes without needing third-party software.
Compressing Images on Windows
Windows provides several built-in options to compress images, from the modern Photos app to the classic Paint program. These tools are straightforward and effective for basic compression needs, such as preparing images for email or quick web uploads.
Using the Photos Application
The Photos app is the default image viewer in Windows and includes basic editing and resizing features.
- Locate Your Image: Navigate to the folder where the photo you wish to compress is stored.
- Open in Photos: Double-click the image. If the Photos app isn’t the default, right-click the image, select “Open with,” and then choose “Photos.”
- Access Resize Options: Once the image is open, click the “…” (ellipsis) icon in the top-right corner of the Photos window. A drop-down menu will appear.
- Select “Resize”: Click on the “Resize” option in the menu. This will open a pop-up window with various size presets. If “Resize” is not available, the image might already be at its minimum size, or this method isn’t suitable for further compression; consider an online tool.
- Choose a Compression Size: Select one of the predefined size letters (e.g., S for “Small,” M for “Medium,” L for “Large”). These options typically offer a balance of resolution and quality, with “Small” providing the most compression. The app will generally only allow you to select sizes smaller than the current image.
- Name and Save: A “Save As” window will appear. Enter a new “File name” for your compressed image to avoid overwriting the original. Choose a “Save location” from the left-hand sidebar.
- Finalize: Click “Save” in the bottom-right corner. Your compressed photo will be saved to the chosen location.
Using the Paint Application
Windows Paint, while primarily a drawing tool, also offers simple resizing capabilities that can effectively compress JPEG images.
- Locate Your Image: Find the JPEG image you want to compress.
- Open in Paint: Right-click the image, select “Open with,” and choose “Paint.”
- Access Resize and Skew: In the Paint window, under the “Home” tab, click the “Resize and Skew” button (often represented by an icon of two overlapping squares).
- Adjust Dimensions: A dialog box will appear.
- You can enter desired percentages in the “Horizontal” and “Vertical” boxes under the “Percentage” option to reduce the image size. For example, entering “50” in both will halve the image dimensions.
- Alternatively, if you know the exact pixel dimensions, select the “Pixels” radio button and enter the new “Horizontal” and “Vertical” values.
- Crucially, ensure the “Maintain aspect ratio” checkbox is ticked to prevent distortion of your image.
- Confirm and Save: Click “OK” to apply the changes. Then, go to “File” > “Save As” to save the resized image. Choose “JPEG Picture” as the format, provide a new file name, and select a save location. Click “Save.”
Compressing Images on Mac
Mac users can leverage the powerful Preview application and the Quick Actions feature for efficient image compression, especially for photography and digital art assets.
Using Preview
Preview is Mac’s versatile default application for viewing and editing images and PDFs, offering robust compression options.
- Locate Your Image: Find the photo you want to compress in Finder.
- Open in Preview: Double-click the image to open it in Preview. If Preview isn’t the default, right-click the image, select “Open With,” and choose “Preview.”
- Access Export Options: Go to “File” in the upper-left menu bar, then click “Export…”. A new window will open.
- Enter a New Name (Optional): In the “Name” text field, type a new title for your compressed image. It’s good practice to rename it to avoid overwriting the original.
- Select Save Location: Click the “Where” drop-down menu and choose the folder where you want to save your compressed image (e.g., “Desktop,” “Documents”).
- Choose JPEG Format: Ensure the format box to the right of “Format” is set to “JPEG.” If not, click the box and select “JPEG” from the drop-down menu.
- Adjust Compression Quality: Drag the “Quality” slider to the left to reduce the image’s quality and, consequently, its file size. You’ll see an estimated file size update as you adjust the slider, allowing you to balance quality and file size.
- Finalize: Click “Save” in the bottom-right corner. Your image will be copied, compressed, and saved to the selected folder.
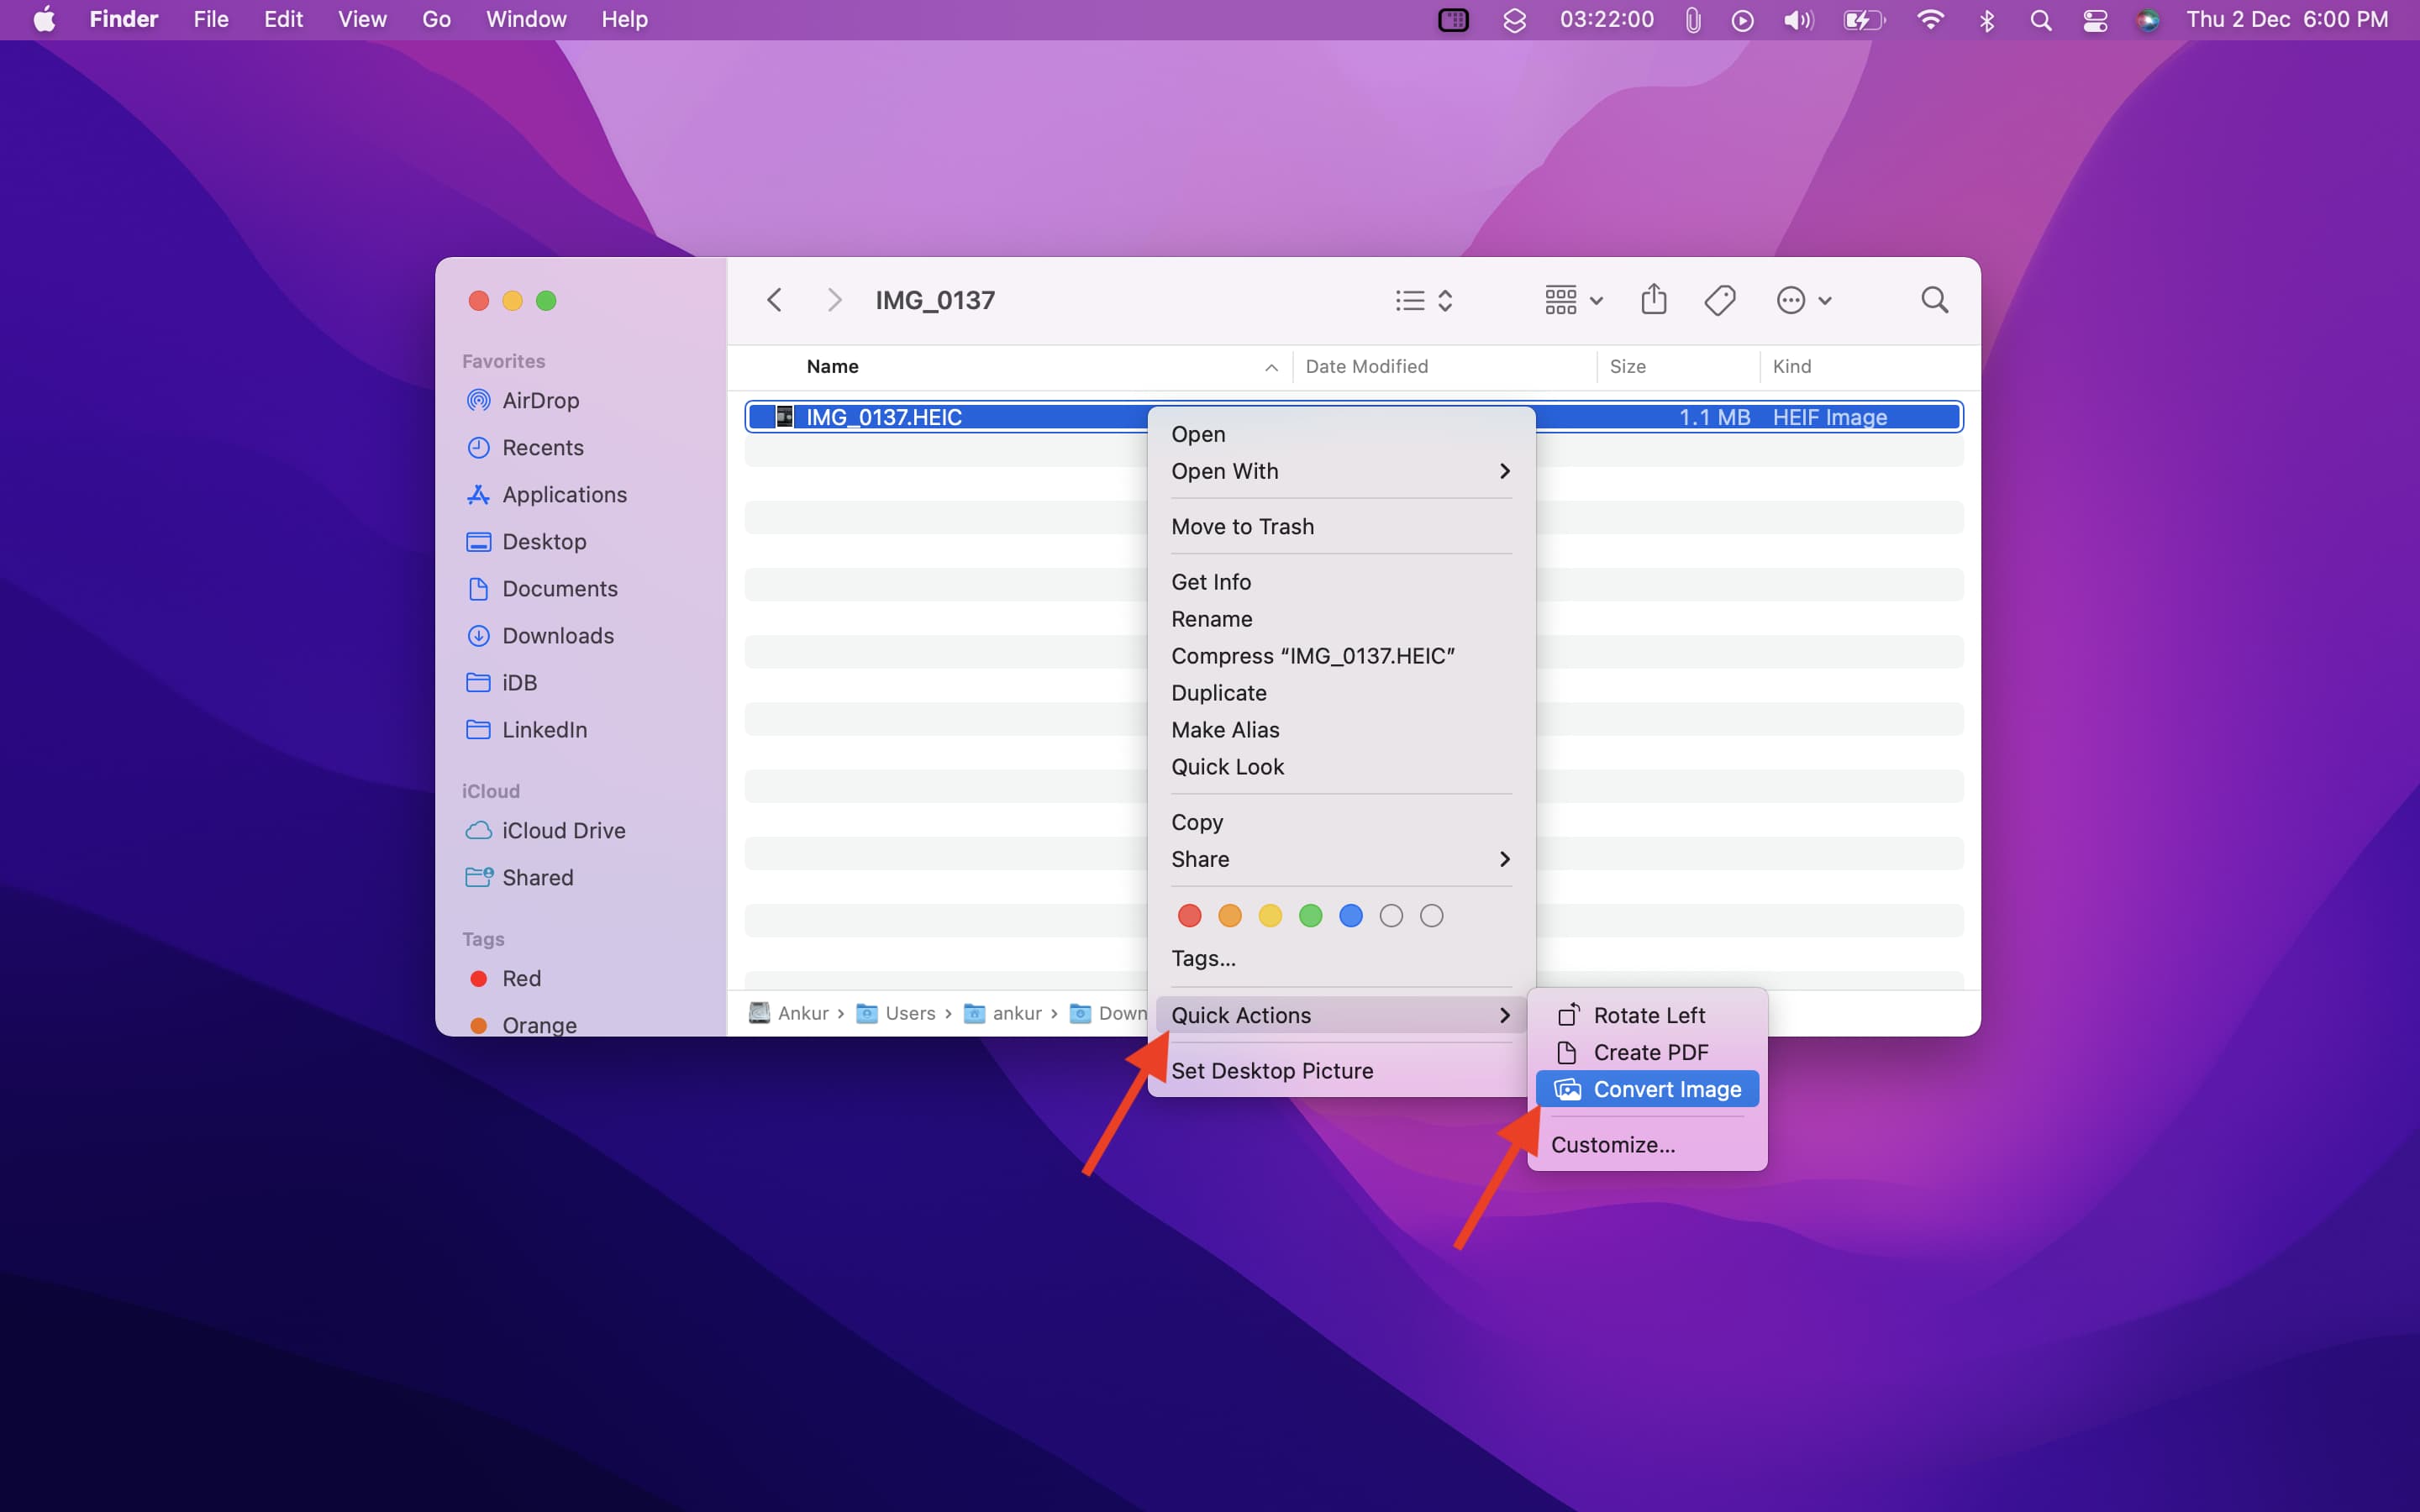
Using Quick Actions (Convert Image)
For even quicker compression, Mac’s Quick Actions feature offers a convenient “Convert Image” tool right from the Finder.
- Select Your Image: In Finder, click the JPEG image you wish to compress.
- Access Quick Actions: Right-click the selected image, or click “File” in the menu bar. Hover over “Quick Actions” in the context menu.
- Choose “Convert Image”: From the Quick Actions sub-menu, select “Convert Image.” A small dialog box will appear.
- Select Image Format: Choose “JPEG” as the target format.
- Adjust Image Size: Click the “Image Size” drop-down menu. You can select “Small,” “Medium,” “Large,” or “Actual Size.” Choosing anything smaller than “Actual Size” will initiate compression.
- Finalize: Click “Convert to JPEG” (or the chosen format). A new, compressed copy of your image will be created in the same folder as the original, with " (Converted)" appended to its name.
These desktop methods are excellent starting points for compressing images. However, for more advanced control, batch processing, or specific web optimization needs, online tools often provide greater flexibility and powerful algorithms.
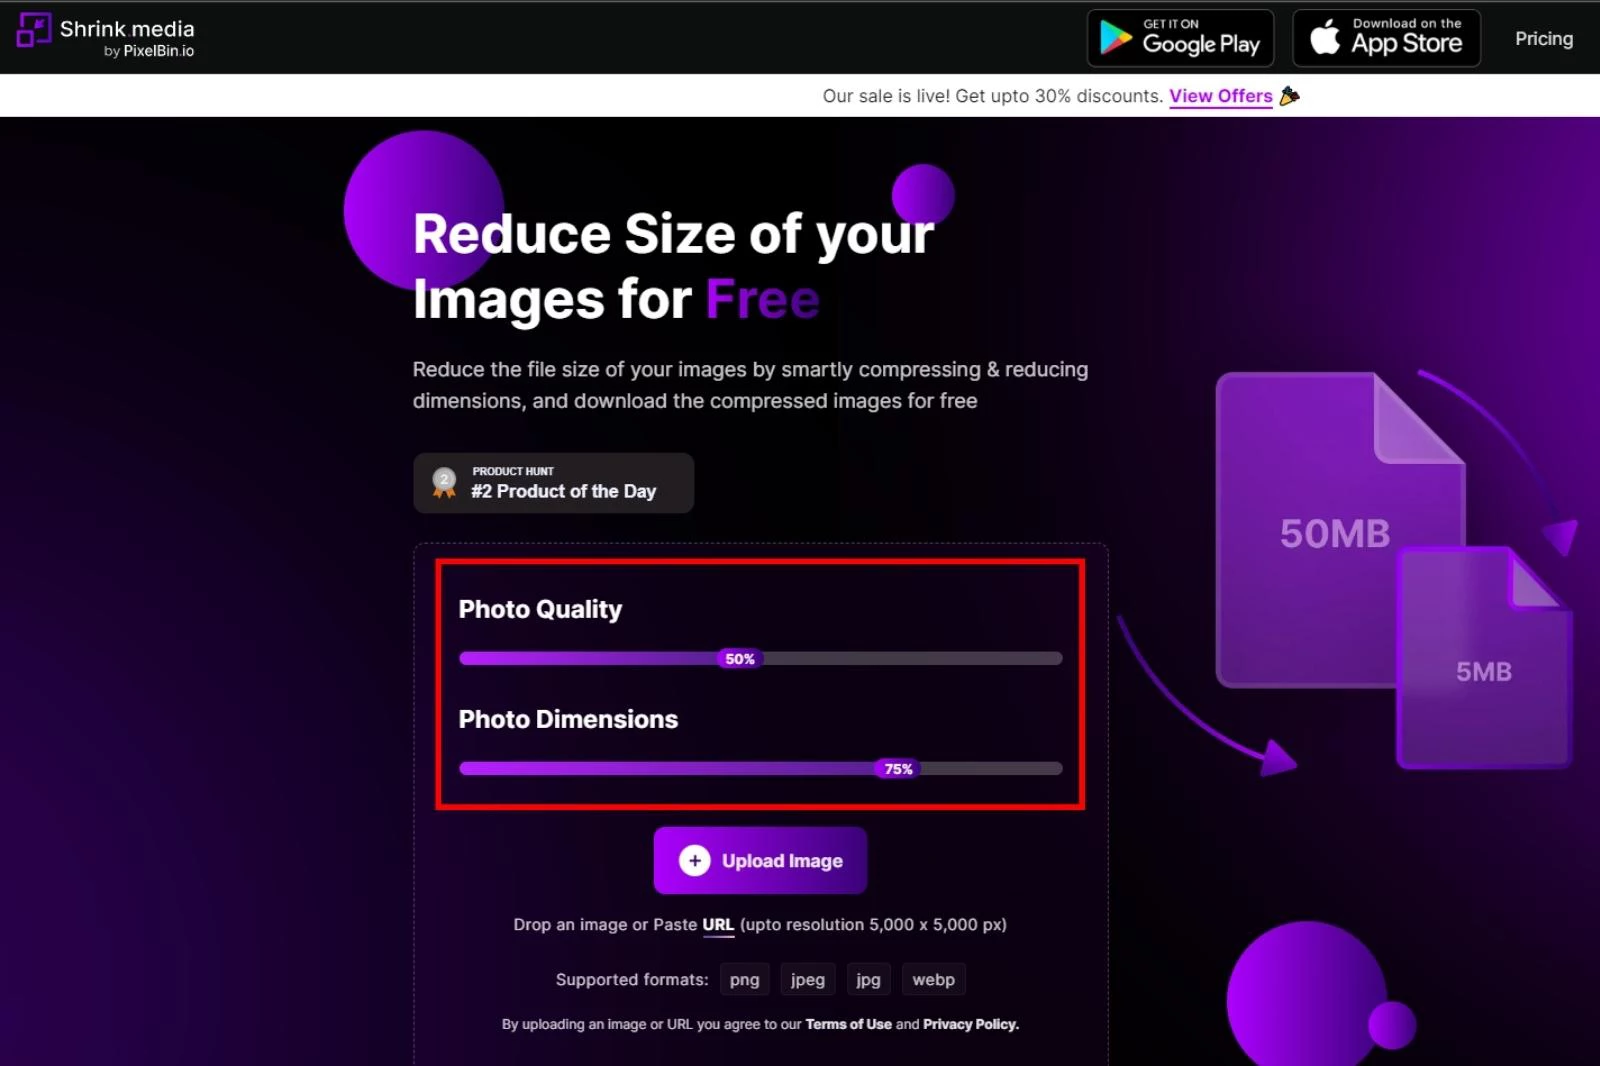
Advanced Compression with Online Tools and Best Practices
While desktop tools offer convenience, online image compression platforms provide robust features, advanced algorithms, and often support for a wider array of formats and scenarios. For users leveraging Tophinhanhdep.com for their diverse image needs—from high-resolution stock photos to intricate digital art—these online solutions, including Tophinhanhdep.com’s own suite of tools, are invaluable.
Tophinhanhdep.com: Your Go-To Online Compression Solution
Tophinhanhdep.com integrates powerful image tools, including converters, compressors, and optimizers, designed to cater to photographers, graphic designers, and anyone managing extensive image collections. Our platform understands that images, whether wallpapers, backgrounds, or artistic creations, need to be high-quality yet optimized for digital use.
How to Compress Images with Tophinhanhdep.com
Tophinhanhdep.com’s online image compression tool provides a user-friendly interface for quick and effective image optimization, supporting popular formats like JPEG, PNG, SVG, and GIF.
- Access the Compressor: Go to the “Image Tools” section of Tophinhanhdep.com and select the “Compress Images” tool.
- Upload Your Files: Click the “Select Images” button (or drag and drop your images directly) to open your computer’s file explorer. You can upload multiple images at once, typically up to 20 images, allowing you to manage your aesthetic photos, nature scenes, or abstract art collections efficiently.
- Automatic Compression and Quality Control: Tophinhanhdep.com’s intelligent algorithms will automatically begin processing your images, aiming for the best quality-to-filesize ratio. For formats like JPEG, you often have the option to manually adjust a “Quality” slider. This allows you to fine-tune the compression level, seeing a live preview of the quality reduction and the resulting file size. This is crucial for high-resolution images where preserving detail is paramount.
- Apply and Download: Once satisfied with the compression settings, click “Apply” (if manual adjustment was made). Then, click “Download All” to receive your compressed images, typically bundled into a convenient ZIP folder.
- Extract Your Images: Navigate to your browser’s download location. On Windows, double-click the ZIP folder, then select “Extract” at the top, “Extract all,” and “Extract.” On Mac, simply double-click the ZIP folder and wait for extraction.
Tophinhanhdep.com’s online compressor is particularly useful for handling various image formats, including more specialized ones like WebP or HEIC through its converter tools. It ensures that your diverse image collections, from trending styles to mood board inspirations, are perfectly optimized for any digital context.
Optimizing for Web and Beyond: Expert Tips
Beyond basic compression, several best practices and advanced techniques can further enhance your image optimization efforts, especially when dealing with specific platform requirements or aiming for peak performance.
- Always Check Platform Requirements: As Stephen Cardone noted, different websites and platforms (e.g., social media, e-commerce, portfolios for digital photography) have specific recommendations or limitations for image dimensions and file sizes. Before uploading your high-resolution images, always check these guidelines to ensure optimal display and avoid automatic, potentially quality-degrading, resizing.
- Backup Your Originals: Compression, especially lossy compression, is irreversible. Always keep a copy of your original, uncompressed images. This safeguards your beautiful photography and digital art assets for future use, larger prints, or different compression requirements.
- Consider AI Upscalers and Image-to-Text Tools: For images that have been over-compressed or need to be enlarged without pixelation, Tophinhanhdep.com offers AI Upscalers. These tools can intelligently enhance image resolution, which is invaluable for working with older, lower-quality images or for creating larger prints from smaller digital art files. Similarly, our Image-to-Text tools can help process visual information, integrating image content with other creative ideas.
- Batch Processing for Efficiency: For designers and photographers dealing with large collections of images (e.g., a series of aesthetic backgrounds or a themed collection of sad/emotional imagery), batch compression tools, available on Tophinhanhdep.com, are a game-changer. They allow you to apply the same compression settings to multiple files simultaneously, saving significant time.
- Leverage Progressive JPEGs: For web optimization, consider using progressive JPEGs. Unlike baseline JPEGs that load top-to-bottom, progressive JPEGs load in a blurry, low-resolution state first, gradually sharpening as more data loads. This improves the perceived loading speed and user experience for those viewing your wallpapers or beautiful photography.
- Use Specific Image Formats for Specific Needs:
- JPEG for most photographs (e.g., nature scenes, portraits).
- PNG for graphics with transparency or sharp lines (e.g., logos, abstract designs, digital art with text overlays).
- WebP for modern web applications seeking maximum performance, using Tophinhanhdep.com’s conversion tools as needed.
- Compress Only What’s Necessary: Don’t compress an image more than required. Over-compression leads to visible quality degradation. Aim for the smallest file size that still retains acceptable visual fidelity for its intended use. Often, a quality setting of 70-80% for JPEGs strikes an excellent balance.
- Regularly Review and Re-optimize: Websites, particularly, can accumulate unoptimized images over time. Periodically reviewing your image assets and re-optimizing them using Tophinhanhdep.com’s tools can significantly improve overall site performance and user experience.
By combining an understanding of compression fundamentals with the practical application of both desktop and sophisticated online tools, you can ensure that all your images—from high-resolution stock photos to trending aesthetic visuals—are perfectly prepared for their digital journey. Tophinhanhdep.com is dedicated to empowering users with the resources to achieve this visual excellence.
Conclusion: Mastering Image Compression for a Visually Rich Digital World
In a digital era defined by visual content, the ability to effectively compress images is an essential skill for anyone who interacts with photography, graphic design, or digital art. From captivating wallpapers and immersive backgrounds to professional stock photos and deeply expressive emotional imagery, high-quality visuals are the cornerstone of engagement. However, the pursuit of visual excellence often comes with the practical challenge of managing large file sizes, which can impede website performance, exhaust storage, and hinder seamless sharing.
This guide has explored the multifaceted world of image compression, illuminating the critical distinctions between lossy and lossless methods, and detailing the strengths of various image formats like JPEG, PNG, GIF, WebP, and HEIC. We’ve provided clear, step-by-step instructions for utilizing both built-in desktop tools on Windows and Mac, as well as leveraging advanced online platforms for more sophisticated optimization.
At Tophinhanhdep.com, we are committed to providing a rich repository of images—from abstract wonders to nature’s breathtaking beauty—alongside the powerful Image Tools necessary to enhance and manage your visual assets. Our compressors, converters, and optimizers are designed to empower photographers, designers, and enthusiasts alike to strike the perfect balance between uncompromised quality and optimal file size.
By embracing these compression techniques, you not only improve the technical performance of your digital creations but also ensure that the inherent beauty and message of your images are delivered with maximum impact and efficiency. Whether you’re curating a mood board, uploading your latest photography project, or simply sharing cherished memories, mastering image compression transforms a potential bottleneck into a powerful enabler, allowing your visuals to truly shine in every digital context. Continue to explore, create, and share with the confidence that your images are always perfectly optimized, thanks to the insights and tools provided by Tophinhanhdep.com.